Table of Contents
Advertisement
Quick Links
FPC 6000 • Setup Guide
Overview
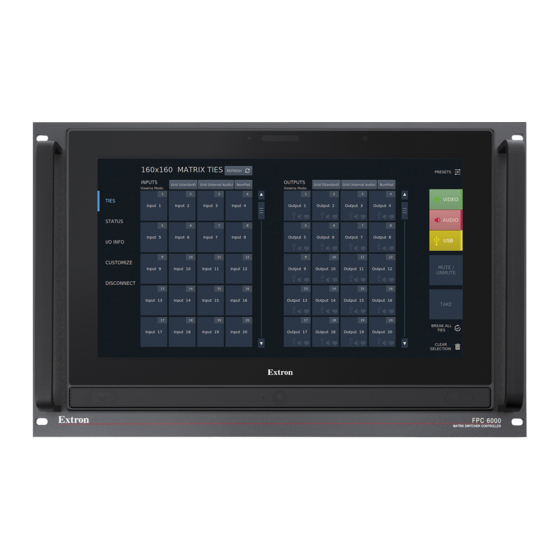
The Extron FPC 6000 uses an Extron TLP Pro 1520M TouchLink
intuitive 15-inch front panel controller for Extron FOX
stand-alone device that does not require an external controller. This guide provides instructions
for experienced installers to mount and install the touchpanel.
Setup Checklist
The FPC 6000 touchpanel ships with a Power over Ethernet (PoE) power injector and a 7U high, 19-inch wide, rack-mountable
metal panel.
Get Ready
…
Obtain the following network information from your network administrator:
…
DHCP status — on or off. If DHCP is off, you must also obtain the following:
…
IP address — by default, this is 192.168.254.251
…
Subnet mask — by default, this is 255.255.255.0
…
Gateway — by default, this is 0.0.0.0
…
User name — by default, this is admin
…
Password — the factory configured passwords for all accounts on this device have been set to the device serial num-
ber. Passwords are case sensitive.
NOTES:
•
If the device is reset to default settings, the password is the default password configuration. The default
password, extron.
•
To change the password, use the Extron Toolbelt utility (see the Toolbelt Help File). Contact your Extron
representative about obtaining a license for Toolbelt.
•
The password can also be changed via the device's webpage.
…
IP address for the matrix switcher
…
Username is for the matrix switcher
…
Password is for the matrix switcher (see the user guide for your matrix switcher for information about the password).
Mount and Cable All Devices
NOTE:
The FPC 6000 ships with a PoE power injector. You can use a 12 VDC 3.0 A power supply instead, but that power
supply must be purchased separately.
ATTENTION:
•
Do not power on the touchpanels or control processors until you have read the Attention in the "Rear Panel Features"
section of the FPC 6000 User Guide.
•
Ne branchez pas les écrans tactiles ou les contrôleurs avant d'avoir lu la mise en garde dans la section « Rear Panel
Features » du FPC 6000 User Guide.
…
Choose a suitable location and mount the units. When the FPC 6000 ships it is already mounted in a 7U high, 19-inch
wide, rack-mountable metal panel. Secure the panel to any standard instrument rack or console (see
next page).
…
A Power over Ethernet power injector is provided with the FPC 6000. Connect the power injector to the FPC 6000 (see
figure 4
on page 4).
…
Connect the power injector to the LAN and power it on (see
®
touchscreen to provide an
matrix switchers. The FPC 6000 is a
®
figure
4).
0 0
5 5
C
ER
F P
LL
NT
RO
CO
ER
IT CH
X SW
M AT
RI
Mounting
on the
1
Advertisement
Table of Contents

Subscribe to Our Youtube Channel
Related Manuals for Extron electronics FPC 6000


Summary of Contents for Extron electronics FPC 6000
- Page 1 Password is for the matrix switcher (see the user guide for your matrix switcher for information about the password). Mount and Cable All Devices NOTE: The FPC 6000 ships with a PoE power injector. You can use a 12 VDC 3.0 A power supply instead, but that power supply must be purchased separately. ATTENTION: •...
-
Page 2: Set Up The Fpc 6000 For Network Communication
Wall Mounting the FPC 6000 The FPC 6000 can also be wall-mounted, either using the Extron BB 700M wall box or directly into drywall. To use the BB 700M, see the TLP Pro 1220MG, TLP Pro 1520MG, and TLP Pro 1720MG Setup Guides, at www.extron.com. -
Page 3: Wall Mounting Installation
5.70 inches (145 mm) high. mounting plate. The FPC 6000 ships, already mounted, in a rackmountable metal panel. Remove the FPC 6000, and unscrew the mounting plate from the panel. Secure the mounting plate to the mounting surface with four #10 screws ( ). -
Page 4: Rear Panel Features
XTP input — Do not connect the FPC 6000 directly to an XTP source. • LAN input — If you use the provided 12 VDC power supply, connect the FPC 6000 directly to the network using a twisted pair cable, terminated with an RJ-45 connector. -
Page 5: Fpc 6000 Web Page
NOTE: See the FPC 6000 User Guide for the matrix switcher for information about device passwords. Press Connect. The FPC 6000 attempts to connect to the matrix switcher. If the connection is successful, the FPC 6000 opens to the Ties screen. - Page 6 — Clear Selection Use this button to clear potential ties. For complete instructions about creating and breaking ties, or saving and recalling presets, see the FPC 6000 User Guide. Create Ties NOTE: One input can be tied to multiple outputs but each output can be tied to only one input.
-
Page 7: Select All
NOTE: To save rooms or room presets, use Simple Instruction Set™ commands (see the user guide for your matrix switcher). The FPC 6000 can save global presets and recall global and room presets. Press Presets to open the presets menu. -
Page 8: Reset Modes: A Brief Summary
You can also access the settings of the panel by clicking on the settings. Reset Modes: a Brief Summary The FPC 6000 offers the following reset modes (see the FPC 6000 User Guide for complete information): • Use Factory Firmware — With the unit powered off, press and hold the Reset button (see...
Need help?
Do you have a question about the FPC 6000 and is the answer not in the manual?
Questions and answers