Table of Contents
Advertisement
Quick Links
Advertisement
Table of Contents

Related Manuals for SPECTRO SPECTROCUBE C XEP06C


Summary of Contents for SPECTRO SPECTROCUBE C XEP06C
- Page 1 Das v erk nüpfte Bild k ann nicht angezeigt werden. Möglicherweise wurde die Datei v erschoben, umbenannt oder gelöscht. Stellen Sie sicher, dass die Verk nüpfung auf die k orrek te Datei und den k orrek ten Speicherort zeigt. SPECTROCUBE C Benchtop XRF Spectrometer Original operating instructions...
-
Page 3: Table Of Contents
Table of Contents Description of instrument ..................5 Description .......................... 5 Function ..........................5 Overview ..........................6 1.3.1 Sample chamber with single sample holder or single sample rotation ....7 1.3.2 Sample chamber with sample tray ................ - Page 4 Insert the film for the "liquid protect" sample cup .............. 34 Troubleshooting ....................36 Spare parts and consumables ................38 De-commissioning .................... 38 Manufacturer address ..................38 EC Declaration of Conformity ................39 ...
-
Page 5: Description Of Instrument
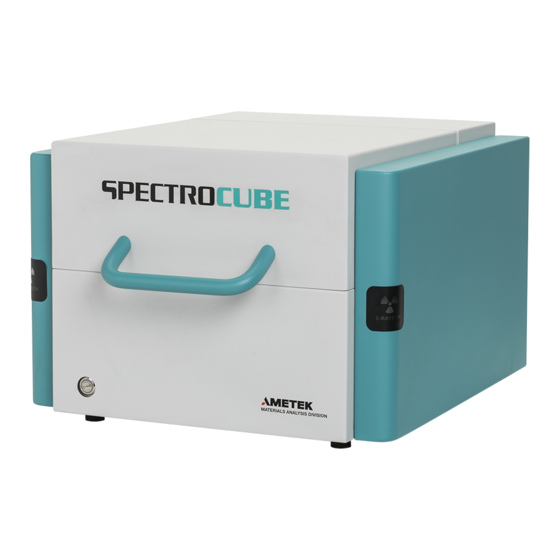
Description of instrument Description of instrument Description Designation: SPECTROCUBE C Model: XEP06C Type: 76004856 Function X-rays excite the atoms of the sample, causing them to emit radiation. This radiation is measured by a semiconductor detector. To achieve a higher sensitivity, the exciting radiation can be optimized by using filters. -
Page 6: Overview
Description of instrument Overview The sample to be measured is placed onto the measurement position (single sample holder) and it is subsequently measured. The following options are available: Single sample rotation Sample tray Sample tray with sample rotation ... -
Page 7: Sample Chamber With Single Sample Holder Or Single Sample Rotation
Description of instrument 1.3.1 Sample chamber with single sample holder or single sample rotation Fig. 2 Component Single sample holder or single sample rotation Measurement position (position of the sample during the measurement) SPECTROCUBE C — 28.08.2019 — 7... -
Page 8: Sample Chamber With Sample Tray
Description of instrument 1.3.2 Sample chamber with sample tray Fig. 3 Component Sample tray (different models available) Tray handle Tray screw Sample tray locking device Measurement position (covered by sample tray for protection) — 8 SPECTROCUBE C — 28.08.2019... -
Page 9: Sample Chamber - Additional Components
Description of instrument 1.3.3 Sample chamber - additional components Fig. 4 Component Discharge reservoir (if liquid samples are leaking, the liquid is collected here) Sample tray holder (optional if the instrument is equipped with a sample tray) Sample rotation drive (option), (only visible if sample tray or single sample holder/rotation is removed) Measurement position, (only visible if sample tray or single sample holder/rotation is removed) -
Page 10: Safety
Safety Safety Every user of the instrument must have read and understood these operating instructions. This applies in particular to the safety instructions. Symbols used The following symbols are used in these abbreviated operating instructions and/or on the instrument. If required, additional important information is available in connection with these symbols. -
Page 11: User Information
Safety User information Compliance with all safety instructions is mandatory. For your own safety. Only an expert organization or accordingly trained personnel are permitted to transport the instrument in its transport packaging. Only service personnel authorized by the manufacturer are permitted to ... -
Page 12: Intended Use
Safety Intended use This instrument can be used for analyzing solids weighing up to 20 kg. Liquid or powdery samples have to be placed into special containers (e.g. cuvettes, sample cups) for analysis. The instrument is designed as a table-top device and intended solely for operation in enclosed rooms. - Page 13 Safety Warning of toxic substances! The ray exit window of the X-ray tube and the detector window contain beryllium. Vapors or dust of beryllium and its compounds are toxic and hazardous to your health when inhaled. Therefore never touch these windows. ...
-
Page 14: Radiation Protection Advice
Safety Radiation protection advice 2.6.1 Germany The operation of the device requires the approval in accordance with §12 of the law for the protection against the harmful effect of ionizing radiation (Strahlenschutzgesetz - StrlSchG (German Radiation Protection Ordinance)). The approval procedure according to Radiation Protection Ordinance is only applicable in Germany. -
Page 15: Technical Data
Technical data Technical data Description Value Instrument height 380 mm (15’) Instrument width 520 mm (20.5’’) Instrument depth 540 mm (21.3’’) Instrument weight approx. 56 kg (~124 lbs) Place of installation Inside of dry, dust-free rooms up to an altitude of 2000 m above sea level, vibration-free (not subject to impact or vibration load conditions) Operating voltage range... -
Page 16: Transportation/Setting-Up
Transportation/Setting-up Transportation/Setting-up Only instructed personnel are permitted to transport, unpack, install, and start up the instrument. Information: Measurement errors! Shocks to the instrument during the measuring process can result in measurement errors. Shocks to the instrument while taking measurements should therefore ... -
Page 17: Storage
UPS. Please do not connect the laser printer to the UPS. Information The first installation of the UPS must be performed by a technician authorized by SPECTRO. If you would like to retrofit the instrument at a later date, please order the retrofitting set. - Page 18 Transportation/Setting-up Fig. 5 Component Component Acknowledgement (deactivation) of PC communication port alarm signal UPS ON/OFF Automatic circuit breaker, 6 A Power connection points for UPS power supply connection point instruments When changing or reconnecting the UPS, proceed as follows: Connect all components with the UPS (instrument, PC, monitor, etc.) Connect the UPS with the power supply.
-
Page 19: Operation
Operation Operation Overview of controls Fig. 6 Control element Function Pushbutton Used to start a measurement Measurement position: Single sample holder / single sample rotation Positioning of sample to be measured Sample tray Sample chamber lid Used to open and close the sample chamber Key switch with removable key Horizontal position: ON setting (rear of instrument) -
Page 20: Displays
Operation Displays Fig. 7 Display Function X-ray radiation Lit orange when X-ray tube is in operation. — 20 SPECTROCUBE C — 28.08.2019... -
Page 21: Switching On The Instrument
Operation Switching on the instrument Information Ensure that the ambient conditions specified in Chapter 3 are maintained. Please note the points below, whenever you switch the spectrometer back on (or the X-ray tube) after an extended “off” period: You should follow the warm-up procedure that is suggested on activation of ... -
Page 22: Safety Circuits Are Automatically Checked After One Month
Operation Log in to the software program when prompted to do so. Username: admin Password: admin Further passwords for various groups can be found in the “XRF-Analyzer Pro User Guide” document by pressing the F1 key. Select the green button: Start instrument For the purpose of checking the safety circuits you will be prompted to open and close the sample chamber lid. -
Page 23: Switching Off The Instrument
Operation Switching off the instrument If the instrument is switched on and off very frequently, its service life will be reduced (the X-ray tube being particularly affected). Always leave the instrument switched on if possible. Information If you are not using the system for an extended period, the specified warm-up procedure for the X-ray tube must be carried out once a month. -
Page 24: Measuring Procedure
Operation Measuring procedure Warning! Risk of injury due to crushing! Risk of crushing when closing the sample chamber lid. When closing the sample chamber lid keep your fingers out of the sample chamber. Information Please note the following information should you be working with liquid samples: Measurement of liquid samples should always be performed with “double film ... - Page 25 Operation Observe the following instructions when inserting the samples: Leave the filled cuvettes outside of the sample chamber for approx. 3 minutes and then check them for tightness and ensure the film is undamaged. If the film is crinkled, the sample with this film must not be measured. In ...
-
Page 26: Preparing The Measuring Procedure
Operation 5.5.1 Preparing the measuring procedure Before starting the measurement, proceed as follows: Check the sample chamber and, if available, in the sample tray for contaminations. If necessary, remove the contamination (see Chapter 6.3 and 6.4). Ensure that the proper sample tray - if available - is selected or another sample holder unit is chosen. -
Page 27: Start The Measurement Via The Xrf Analyzer Pro Software Program
Operation 5.5.2 Start the measurement via the XRF Analyzer Pro software program Place the sample (single sample holder/rotation) or the loaded sample tray into the sample chamber. Close the sample chamber. Enter a sample name. Start the measurement using the green “START” button. The pushbutton at the bottom left-hand side of the instrument housing starts to flash. -
Page 28: How To Change / Remove The Sample Tray
Operation How to change / remove the sample tray To change or remove the sample tray, proceed as follows: Loosen the locking device of the sample tray (1) by turning it clockwise. Fig. 8 Carefully remove the sample tray. Fig. 9 Install the new sample tray. -
Page 29: Maintenance By The Operator
In order to ensure the availability and operational safety of the equipment, we recommend having the system checked for correct operation and performance at least once per year by specialized technicians. To find contact addresses of service organizations authorized by SPECTRO go to www.spectro.com Operator maintenance plan Warning! Ionizing radiation! An X-ray tube is located inside the instrument. - Page 30 Then, carry out an energy channel recalibration procedure (MCA) (see Chapter 6.2.1). Further operator maintenance work Backup of data (complete registry = Directory C:\Spectro Smart Studio\XRF program and data). Analyzer Pro Energy channel recalibration (MCA), Place the recalibration aid at the...
-
Page 31: Mca / Global) Recalibration Sample
Maintenance by the operator (MCA / Global) recalibration sample The same supplied recalibration sample is used for both the MCA recalibration and the global recalibration. Correctly place the recalibration sample on the measurement position and carry out the energy channel recalibration (MCA) procedure (see Chapter 6.2.1) and/or the global recalibration procedure (see Chapter 6.2.2). -
Page 32: Global Recalibration
Maintenance by the operator 6.2.2 Global recalibration Information An energy channel recalibration procedure (MCA) should always be performed before carrying out a global recalibration procedure. Following this, the control sample should be measured again. A global recalibration procedure only has to be carried out if the values still lie outside the tolerance range. -
Page 33: Clean The Sample Tray
Maintenance by the operator Clean the sample tray To clean the sample tray, proceed as follows: Remove the sample tree from the sample chamber, see page 28 and place the sample tray on the level, clean surface. Use a small brush to carefully clean the sample tray. Do not apply any pressure to the sample support surface. -
Page 34: Insert The Film For The "Liquid Protect" Sample Cup
Maintenance by the operator Insert the film for the "liquid protect" sample cup Parts required for inserting the film: XRF film (2) Sample cup holder (4) Clamping ring (3) Tool for removing the clamping ring (1) Fig. - Page 35 Maintenance by the operator In order to replace the film, push the tool into the gap between the sample cup holder and the clamping ring and push off the clamping ring. The film is now inserted. Fig. 14 SPECTROCUBE C — 28.08.2019 —...
-
Page 36: Troubleshooting
Troubleshooting Troubleshooting Notice! Damage to instrument! Improperly performed repairs may damage the instrument. Do not repair the instrument yourself. Always notify your immediate supervisor or contact your Service Center. Malfunction Cause Remedy The instrument cannot be The power plug is not Insert the power plug correctly. - Page 37 Troubleshooting Malfunction Cause Remedy The sample chamber lid Measurement procedure is Wait a few seconds for the lid to will not open. not finished yet. be unlocked after the measurement is finished. Defective sample chamber Please contact your Service lid locking mechanism. Center.
-
Page 38: Spare Parts And Consumables
Spare parts and consumables You can find the spare parts and consumables for this instrument under "Support - Parts Catalogue" (Service – Parts Catalogue) on our website at www.spectro.com. Use only genuine spare parts for repairing the instrument. The use of non-genuine spare parts will make the CE Declaration of Conformity null and void. -
Page 39: Ec Declaration Of Conformity
EC Declaration of Conformity EC Declaration of Conformity SPECTROCUBE C — 28.08.2019 — 39...
Need help?
Do you have a question about the SPECTROCUBE C XEP06C and is the answer not in the manual?
Questions and answers