Siemens SIMATIC HMI Unified Comfort MTP700 Operating Instructions Manual
Hide thumbs
Also See for SIMATIC HMI Unified Comfort MTP700:
- Quick install manual (2 pages) ,
- Compact operating instructions (67 pages)
Table of Contents
Advertisement
Quick Links
Unified Comfort Panels
SIMATIC HMI
HMI devices
Unified Comfort Panels
Operating Instructions
03/2020
A5E46641217-AA
Preface
Overview
Safety instructions
Mounting and connecting the
device
Operating the device
Operating the Control Panel
Transferring data
Device maintenance and
repair
Technical information
Technical Support
Markings and symbols
Abbreviations
1
2
3
4
5
6
7
8
A
B
C
Advertisement
Table of Contents

Related Manuals for Siemens SIMATIC HMI Unified Comfort MTP700


Summary of Contents for Siemens SIMATIC HMI Unified Comfort MTP700
- Page 1 Unified Comfort Panels Preface Overview SIMATIC HMI Safety instructions Mounting and connecting the device HMI devices Unified Comfort Panels Operating the device Operating the Control Panel Operating Instructions Transferring data Device maintenance and repair Technical information Technical Support Markings and symbols Abbreviations 03/2020 A5E46641217-AA...
- Page 2 Note the following: WARNING Siemens products may only be used for the applications described in the catalog and in the relevant technical documentation. If products and components from other manufacturers are used, these must be recommended or approved by Siemens. Proper transport, storage, installation, assembly, commissioning, operation and maintenance are required to ensure that the products operate safely and without any problems.
-
Page 3: Preface
The operating instructions apply to the following HMI devices in conjunction with the SIMATIC WinCC Unified software: Name Type Article number, device with Article number, device with- Siemens logo out Siemens logo MTP700 Unified Comfort 7" device 6AV2128-3GB06-0AX0 6AV2128-3GB36-0AX0 MTP1000 Unified Comfort 10" device... - Page 4 HMI device. Provide all stored documents to subsequent owners of the HMI device. Trademarks The following designations marked with the symbol ® are registered trademarks of Siemens AG: ● HMI ® ● SIMATIC ®...
- Page 5 Preface Naming conventions This document uses the following naming conventions. Term Applies to Plant System • Machining center • One or more machines • Comfort HMI device, MTP700 Unified Comfort • HMI device, MTP1000 Unified Comfort • Device MTP1200 Unified Comfort •...
- Page 6 Preface Unified Comfort Panels Operating Instructions, 03/2020, A5E46641217-AA...
-
Page 7: Table Of Contents
Table of contents Preface ..............................3 Overview............................... 11 Product description ......................... 11 Scope of delivery ........................13 Design of the devices......................14 Interfaces ..........................15 Accessories ..........................16 The HMI device in the operating process ................18 Apps and software options ..................... 19 Safety instructions .......................... - Page 8 Table of contents Operating the device ..........................57 Operator input options ......................57 Important notes on touch screen ................... 57 Supported gestures ........................ 60 4.3.1 Supported gestures in the Control Panel ................60 4.3.2 Supported gestures in the runtime project ................60 Using the screen keyboard ....................
- Page 9 Table of contents Service and Commissioning ....................103 5.9.1 Transfer ..........................103 5.9.2 Update OS ..........................104 5.9.3 Backup ..........................106 5.9.4 Automatic backup ......................... 108 5.9.5 Restore ..........................112 5.9.6 Trace forwarder ........................114 5.10 Apps ............................114 5.10.1 SIMATIC Edge ........................
- Page 10 Table of contents Dimension drawings ......................150 8.7.1 Dimension drawings of the MTP700 Unified Comfort ............150 8.7.2 Dimension drawings of the MTP1000 Unified Comfort ............151 8.7.3 Dimension drawings of the MTP1200 Unified Comfort ............152 8.7.4 Dimension drawings of the MTP1500 Unified Comfort ............153 8.7.5 Dimension drawings of the MTP1900 Unified Comfort ............
-
Page 11: Overview
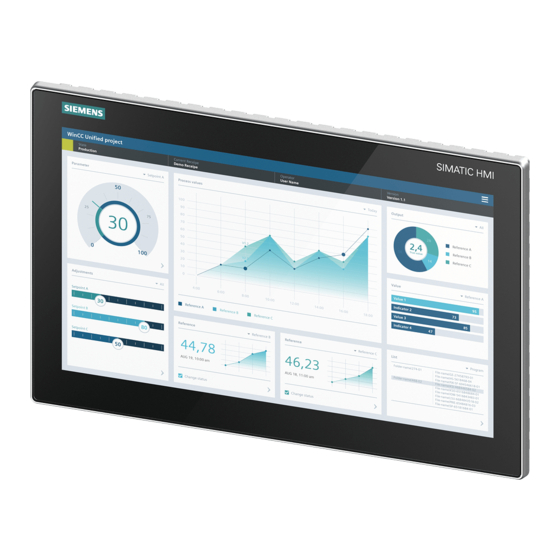
● Visualization based on SIMATIC WinCC Unified, the new web-based visualization system in the TIA Portal for scalable solutions from machine-level applications to distributed SCADA solutions. ● All devices are available in standard design with Siemens logo and in neutral design without Siemens logo. Unified Comfort Panels... - Page 12 Overview 1.1 Product description Features of the Unified Comfort Panels Enclosure Rugged aluminum die-cast housing Mounting format Mounting and operation in landscape and portrait format The respective format must be selected during the configuration of the user interface. The display orientation must also be changed in the Control Panel of the HMI device.
-
Page 13: Scope Of Delivery
Overview 1.2 Scope of delivery Scope of delivery The scope of delivery of the HMI device includes the following components: Name Figure Quantity HMI device Installation instructions (Quick Install Guide) Power supply connector Mounting clips steel, MTP700 captive MTP1000, MTP1200 MTP1500, MTP1900 MTP2200 Strain relief element... -
Page 14: Design Of The Devices
This section describes the design of the Unified Comfort Panels, using the MTP1900 Unified Comfort with Siemens logo as an example. The remaining Unified Comfort Panels differ in the size of the front, the interfaces are identical for all Unified Comfort Panels. -
Page 15: Interfaces
Overview 1.4 Interfaces Rear view ① Position of rating plate ② Safety lock for the SD memory card slot cover X51: Slot for the data memory card, left • X50: Slot for the system memory card, right • For a detailed description, see section "Memory concept and memory cards (Page 69)" Interfaces The figure below shows the interfaces of the Unified Comfort Panels using the interface plate of the devices with display diagonal ≥15"... -
Page 16: Accessories
Industry Mall on the Internet (https://mall.industry.siemens.com/mall/en/WW/Catalog/Products/10144445). Details such as the delivery quantity and technical specifications of accessories can be found in the Industry Mall under the respective article numbers. - Page 17 ".." stands for the variant key of the article number. Additional USB accessories Additional USB accessories can be found on the Internet in the following entry: FAQ 19188460 (https://support.industry.siemens.com/cs/ww/en/view/19188460) Other accessories You can find additional accessories for SIMATIC HMI devices on the Internet at the following link: Accessories (https://mall.industry.siemens.com/mall/en/WW/Catalog/Products/10144445)
-
Page 18: The Hmi Device In The Operating Process
Overview 1.6 The HMI device in the operating process The HMI device in the operating process The HMI device is part a technical process. The following two phases are key to the way the HMI device is integrated in the process: ●... -
Page 19: Apps And Software Options
Via "SIMATIC Edge" you start the local edge management web page on the HMI device. Add-ons Under "Add-ons" you can find apps that were not developed by Siemens. The following apps are pre-installed license-free on the HMI device: Description Doc Viewer With the "Doc Viewer"... - Page 20 Overview 1.7 Apps and software options Unified Comfort Panels Operating Instructions, 03/2020, A5E46641217-AA...
-
Page 21: Safety Instructions
Safety instructions General safety instructions The device is designed for operation in industrial areas for operating and monitoring of plant processes. Open equipment and the Machinery Directive WARNING The device constitutes open equipment on the back side The device constitutes open equipment on the back side. This means that you must integrate the device in an enclosure or cabinet where the device is operated via its front side. - Page 22 Siemens’ products and solutions undergo continuous development to make them more secure. Siemens strongly recommends that product updates are applied as soon as they are available and that the latest product versions are used. Use of product versions that are no longer supported, and failure to apply latest updates may increase customer’s exposure to...
-
Page 23: Security Management For Hmi Devices
2.2 Security management for HMI devices Disclaimer for third-party software updates This product includes third-party software. Siemens AG only provides a warranty for updates/patches of the third-party software, if these have been distributed as part of a Siemens software update service contract or officially released by Siemens AG. Otherwise, updates/patches are undertaken at your own risk. -
Page 24: Data Protection
Panel Security Guidelines (https://support.industry.siemens.com/cs/de/en/view/109481300) Data protection Siemens observes the data protection guidelines, especially the requirements regarding data minimization (privacy by design). This means the following for this SIMATIC product: The product does not process / save any personal information, but only technical functional data (e.g. - Page 25 Safety instructions 2.4 Notes about usage Industrial applications The HMI device is designed for industrial applications. It conforms to the following standards: ● Requirements for emissions EN 61000-6-4: 2007 ● Requirements for interference immunity EN 61000-6-2: 2005 Use in mixed-use zone Under certain circumstances you can use the HMI device in a mixed-use zone.
- Page 26 Safety instructions 2.4 Notes about usage TFT displays NOTICE Burn-in effect A permanently displayed two-color or multi-color picture can cause a burn-in effect, i.e. the picture remains dimly visible for a certain period of time. The longer the image is burned in, the longer the image will last.
-
Page 27: Use In Hazardous Areas
Safety instructions 2.5 Use in hazardous areas Use in hazardous areas The following warnings apply to operating a device with Ex approval in hazardous areas. WARNING Explosion Hazard Do not disconnect while circuit is live unless area is known to be non-hazardous. Substitution of components may impair suitability for Class I, Division 2 or Zone 2. - Page 28 Safety instructions 2.5 Use in hazardous areas Unified Comfort Panels Operating Instructions, 03/2020, A5E46641217-AA...
-
Page 29: Mounting And Connecting The Device
A damaged part will cause the HMI device to malfunction. Do not install parts damaged during shipment. In the case of damaged parts, contact your Siemens representative. Check the scope of delivery of the HMI device, see section "Scope of delivery (Page 13)". -
Page 30: Permitted Mounting Positions
Mounting and connecting the device 3.1 Preparing for installation 3.1.3 Permitted mounting positions The HMI device is suitable for installation in: ● Mounting cabinets ● Control cabinets ● Switchboards ● Consoles In the following, all of these mounting options are referred to by the general term "cabinet". The device is self-ventilated and approved for inclined mounting at angles up to +/-35°... - Page 31 Mounting and connecting the device 3.1 Preparing for installation Mounting in landscape format All Unified Comfort HMI devices are suitable for installation in landscape format. Mounting in portrait format All Unified Comfort HMI devices are suitable for installation in portrait format. Select the appropriate screen format during configuration.
-
Page 32: Checking Clearances
Mounting and connecting the device 3.1 Preparing for installation 3.1.4 Checking clearances The following clearances are required around the HMI device to ensure sufficient self- ventilation: ● At least 15 mm to both the right and left of the mounting cutout (in x direction) to allow for insertion of the mounting clips during installation ●... -
Page 33: Preparing The Mounting Cutout
Mounting and connecting the device 3.1 Preparing for installation 3.1.5 Preparing the mounting cutout Note Stability of the mounting cutout The material in the area of the mounting cutout must provide sufficient strength to guarantee lasting and safe mounting of the HMI device. To achieve the degrees of protection described below, it must be ensured that deformation of the material cannot occur due to the force of the mounting clips or operation of the device. -
Page 34: Mounting The Device
Mounting and connecting the device 3.2 Mounting the device Dimensions of the mounting cutout Width and height should be reversed accordingly when mounting in portrait format. Mounting the device 3.2.1 Notes on installation Before installing the device, please ensure that the installation location complies with the following: NOTICE Use according to IEC 61010-2-201 requires an appropriate enclosure... -
Page 35: Positions Of The Mounting Clips
Mounting and connecting the device 3.2 Mounting the device 3.2.2 Positions of the mounting clips You fasten the built-in devices with the mounting clips from the accessory pack, which are also available as accessories (Page 16). For the 7" device MTP700 Unified Comfort you need 7 mounting clips, for all other devices 12 mounting clips. - Page 36 Mounting and connecting the device 3.2 Mounting the device Device Positions of the mounting clips 15" devices 19" devices 22" devices Unified Comfort Panels Operating Instructions, 03/2020, A5E46641217-AA...
-
Page 37: Fastening The Built-In Device With Mounting Clips
Mounting and connecting the device 3.2 Mounting the device 3.2.3 Fastening the built-in device with mounting clips Requirement ● All packaging components and protective films have been removed from the device. ● The following material and tools are available: – The mounting clips from the accessory kit –... -
Page 38: Installing A Strain Relief
Mounting and connecting the device 3.3 Installing a strain relief 3. Insert a mounting clip into the cutout provided on the device. Make sure it is in the correct position; see the section "Positions of the mounting clips (Page 35)". 4. - Page 39 Mounting and connecting the device 3.3 Installing a strain relief HMI devices with display diagonal ≤ 12" Fasten the strain relief plate to the device with a torque of 0.8 Nm using the two screws supplied. The figure below shows the installation using the MTP700 Unified Comfort HMI device as an example.
-
Page 40: Connecting The Device
Use copper (Cu) cables for all supply lines that are connected to the device with terminals, e.g. 24 V DC power supply cables on the 24 V DC power supply connector. Use only shielded standard cables as data connecting cables, order information is available in the Industry Mall (https://mall.industry.siemens.com). Connection sequence NOTICE Damage to the HMI device If you do not keep to the connection sequence you could damage the HMI device. -
Page 41: Connecting The Equipotential Bonding Circuit
Mounting and connecting the device 3.4 Connecting the device Connecting the cables NOTICE Observe local installation regulations Observe the local installation regulations and the local installation conditions, such as protective wiring for power supply lines, when connecting the cables. Short-circuit and overload protection Different measures for short-circuit and overload protection are required when setting up an entire plant. - Page 42 Mounting and connecting the device 3.4 Connecting the device General requirements for equipotential bonding Differences in potential must be reduced by means of equipotential bonding in order to ensure trouble-free operation of the relevant components of the electronic system. The following must therefore be observed when installing the equipotential bonding circuit: ●...
- Page 43 Mounting and connecting the device 3.4 Connecting the device Wiring diagram The following figure shows the connection of the equipotential bonding using the MTP1900 Unified Comfort as an example and similarly applies to the other Unified Comfort HMI devices. ① Control cabinet ②...
-
Page 44: Connecting The Power Supply
An external protective circuit is required for operation with 24 V DC, see section 7 "Lightning protection and overvoltage protection" in function manual "Designing interference-free controllers (https://support.industry.siemens.com/cs/ww/en/view/59193566)". Wiring diagram The following figure shows the connection between the power supply and the HMI device with the Unified Comfort Panel with display diagonal ≥15"... - Page 45 Mounting and connecting the device 3.4 Connecting the device Note when connecting The power supply connector is contained in the accessory kit. The power supply connector is designed for cables with a maximum cross-section of 1.5 mm². Connecting the power supply connector NOTICE Do not damage the socket Do not tighten the screws of the power supply connector when it is plugged into the HMI...
-
Page 46: Connecting The Configuration Pc
Mounting and connecting the device 3.4 Connecting the device 3.4.4 Connecting the configuration PC Wiring diagram The following figure shows how to connect the HMI device to a configuration PC with a Unified Comfort Panel with display diagonal ≥15" as an example. Procedure Proceed as follows: 1. -
Page 47: Connecting The Controller
Mounting and connecting the device 3.4 Connecting the device Result The configuration PC and HMI device are connected. In the connection, assign an IP address to the HMI device. Note Updating the operating system If there is no serviceable HMI device image on the HMI device, you can only update the operating system by restoring the factory settings via one of the two PROFINET (LAN) interfaces. - Page 48 Use only straight cables whenever possible to connect a controller. Bent connectors can cover adjacent interfaces. Standard cables are available for the connection. You can find order information in the Industry Mall (https://mall.industry.siemens.com). PROFINET Note Observe the instructions regarding the installation of PROFINET networks, in the "PROFINET System Description...
-
Page 49: Connecting A Usb Device
Mounting and connecting the device 3.4 Connecting the device 3.4.6 Connecting a USB device Below are examples of industrial grade devices you can connect to the USB type A interfaces of the HMI device: ● External mouse ● External keyboard ●... - Page 50 Mounting and connecting the device 3.4 Connecting the device Formatting of USB sticks The following file systems are supported for USB sticks: ● NTFS ● FAT32 We recommend using the "NTFS" formatting method which offers greater data consistency and flexibility regarding the size of the saved files. Connection diagram The following figure shows the example of a Unified Comfort Panel with a screen diagonal ≥15"...
-
Page 51: Connecting A Printer
Mounting and connecting the device 3.4 Connecting the device 3.4.7 Connecting a printer Wiring diagram The following figure shows how to connect the HMI device to a printer with a Unified Comfort Panel with display diagonal ≥15" as an example. Note when connecting Note Cables for data exchange... - Page 52 Mounting and connecting the device 3.4 Connecting the device Managing printers The printer settings of the HMI device are managed via the local web page "CUPS" (Common Unix Printing System) under "localhost:631". To open the printer administration, proceed as follows: 1.
-
Page 53: Switching On, Testing And Switching Off The Device
Mounting and connecting the device 3.4 Connecting the device 3.4.8 Switching on, testing and switching off the device Switch on the HMI device 1. Switch on the power supply. The display lights up. If the HMI device fails to start after a longer period, you may have crossed the cables on the power supply connector. -
Page 54: Securing The Cables
Mounting and connecting the device 3.4 Connecting the device 3.4.9 Securing the cables After the power-up test, secure the connected cables with a strain relief. Requirement The strain relief plate is mounted, see section "Installing a strain relief (Page 38)". HMI devices with display diagonal ≤... -
Page 55: Securing Cables For Use In Hazardous Areas
Mounting and connecting the device 3.4 Connecting the device HMI devices with display diagonal ≥ 15" For devices with display diagonal ≥ 15", secure the cables to the marked fixing elements of the strain relief plate. The figure below shows the fastening components using the MTP1900 Unified Comfort as an example. -
Page 56: Removing The Device
Mounting and connecting the device 3.5 Removing the device The following figure shows an example of how to secure a connector in a captive manner. Removing the device The HMI device is generally removed in the reverse order used for installing and connecting. Procedure Proceed as follows: 1. -
Page 57: Operating The Device
Operating the device Operator input options Depending on the connected peripheral devices, the following operator input options are available: ● Capacitive multi-touch screen ● Screen keyboard ● External keyboard, connected via USB ● External mouse, connected via USB If you need an external keyboard or mouse during operation, then use industrial grade devices. - Page 58 Operating the device 4.2 Important notes on touch screen You can find additional information on connecting the earth conductor in the section "Connecting the equipotential bonding circuit (Page 41)". WARNING Personal injury or property damage due to maloperation Incorrect operation of touch devices cannot be ruled out. This can result in personal injury or property damage.
- Page 59 Operating the device 4.2 Important notes on touch screen Notes on operation Note Do not touch the capacitive multi-touch screen during startup The HMI device automatically calibrates the capacitive multi-touch screen during startup. The touch screen is locked during calibration. Do not touch the touch screen during startup.
-
Page 60: Supported Gestures
Operating the device 4.3 Supported gestures Supported gestures 4.3.1 Supported gestures in the Control Panel The following touch gestures are available in the Control Panel. Icon Gesture Behavior To activate an input object (such as input box, option button, selection list), tap on the input object. Vertical dragging To scroll vertically in the window pane or in lists, drag vertically in with one finger... - Page 61 Operating the device 4.3 Supported gestures Supported touch gestures in process pictures Icon Gesture Function To select an object, tip on the corresponding position in the process screen. Drag with one To scroll horizontally or vertically, drag the process screen or finger the object with one finger in the desired direction.
- Page 62 Operating the device 4.3 Supported gestures Icon Gesture Behavior Supported WinCC controls Drag with one To shift the X axis or Y axis. Trend control • finger To navigate within a list or Process control • table. Ruler window • To select multiple rows, tap a Alarm control row and drag your finger up...
-
Page 63: Using The Screen Keyboard
Operating the device 4.4 Using the screen keyboard Using the screen keyboard 4.4.1 The screen keyboards When you touch an operating element in Runtime or in the Control Panel on the touch screen of the HMI device that requires input, the screen keyboard is displayed. If the screen keyboard is not displayed automatically during data input, use the floating screen keyboard described at the end of this section. - Page 64 Operating the device 4.4 Using the screen keyboard Special character level 1 Use the <1/2> button to switch to special character level 2. Use the <ABC> button to switch to the last used letter level. Special character level 2 Use the <2/2> button to switch to special character level 1. Use the <ABC>...
- Page 65 Operating the device 4.4 Using the screen keyboard Numerical screen keyboard If a numeric value is to be entered in a input box, the numerical screen keyboard is displayed. Checking numerical value limits Tags can be assigned limit values. Any entry of a value outside this limit is rejected. If an alarm view is configured, a system alarm is triggered and the original value is displayed again.
-
Page 66: Control Keys On The Screen Keyboard
Operating the device 4.4 Using the screen keyboard The levels and keys of the floating keyboard correspond to the levels and keys of the alphanumeric keyboard. To move the floating screen keyboard, drag the floating keyboard by its left bar to the desired position. -
Page 67: Using The Taskbar
Operating the device 4.5 Using the taskbar Using the taskbar A taskbar is available for fast access to functions or apps. You open the taskbar with a wiping gesture from bottom to top at the bottom edge of the display. If there is no operation in the taskbar for more than two seconds, the taskbar is hidden again. -
Page 68: Commissioning The Hmi Device
Operating the device 4.6 Commissioning the HMI device Commissioning the HMI device Requirement The HMI device is mounted and connected according to these operating instructions. Procedure The following procedure describes how to typically include the HMI device during operation. 1. If you want to use the service concept with automatic backup, then insert a SIMATIC SD memory card ≥... -
Page 69: Memory Concept And Memory Cards
Operating the device 4.7 Memory concept and memory cards Memory concept and memory cards 4.7.1 Memory concept The HMI devices use the following memory types: ● Internal memory ● Data memory card for user data and logs ● System memory card for "automatic backup" ●... - Page 70 You can use commercially available memory cards with "SD(IO/HC)" format as data memory card. For reasons of data consistency, Siemens recommends the use of the SIMATIC SD memory card ≥ 32 GB as data memory card, see section "Accessories (Page 16)".
- Page 71 Operating the device 4.7 Memory concept and memory cards Slots for data and system memory cards The slots for data memory card and system memory card are on the back of the HMI device. The memory cards are protected by a safety catch. The figure below shows the slots with safety catch.
-
Page 72: Changing The Memory Card
Operating the device 4.7 Memory concept and memory cards 4.7.2 Changing the memory card The memory cards are protected by a safety catch. WARNING Do not plug or pull a memory card in a hazardous area If you plug or pull a memory card during operation, you run the risk of a flashover. A flashover can cause an explosion in a hazardous area, resulting in death or severe injuries. - Page 73 Operating the device 4.7 Memory concept and memory cards Procedure Note Only use SIMATIC SD memory card ≥ 32 GB as system memory card Only the SIMATIC SD memory card ≥ 32 GB is permitted for use as a system memory card. All other memory cards are not recognized as system memory card by the HMI device.
- Page 74 Operating the device 4.7 Memory concept and memory cards Unified Comfort Panels Operating Instructions, 03/2020, A5E46641217-AA...
-
Page 75: Operating The Control Panel
Operating the Control Panel Opening the settings The Control Panel can be opened as follows: ● After switching on the device, if there is no project on the HMI device. ● Via an appropriately configured operating element in your project. ●... - Page 76 Operating the Control Panel 5.1 Opening the settings Logging on in the Control Panel The "Login" button is located on the right of Control Panel title bar. If user administration has been configured for the HMI device and transferred to the HMI device, you can log in using the "Login"...
-
Page 77: Overview Of Functions
Operating the Control Panel 5.2 Overview of functions Overview of functions The table below shows the icons of the Control Panel and provides links to the corresponding function descriptions in the appropriate sections. Icon Assigned functions Open the main window of the Control Panel Start project on the HMI device Start Runtime Panel information (Page 78) -
Page 78: System Properties
Panel information Under "Panel information" you will find information specific to your HMI device, which you will need, for example, if you contact Technical Support (https://support.industry.siemens.com/cs/ww/en/). Properties The following figure shows an example. Variable display values are shown with the wildcard character "#"... -
Page 79: Display
Operating the Control Panel 5.3 System Properties 5.3.2 Display Under "Display" you define the display orientation and the display brightness via the intensity of the backlight. NOTICE Backlight reduction The brightness of the backlight decreases with increasing service life. To avoid shortening the service life of the backlight unnecessarily, reduce the backlight. Orientation ●... -
Page 80: Screensaver
Operating the Control Panel 5.3 System Properties 5.3.3 Screensaver Under "Screensaver" you define the time until the automatic activation of the screensaver and the brightness of the backlight when the screensaver is active. NOTICE Activating the screensaver If an image is displayed on the screen for long time, its outline may remain dimly visible on the display. -
Page 81: Update Os
Use a SIMATIC SD memory card with 32 GB or more or an industrial USB flash drive to load the firmware. Firmware files for the HMI devices can be downloaded from the Internet (https://support.industry.siemens.com/cs/ww/en/view/109746530). Observe the documentation included with the download. Note... - Page 82 Operating the Control Panel 5.3 System Properties Panel Information ● "Device type": HMI device type designation. ● "Image version": Version of the firmware and operating system. Select storage media for OS update Use the selection list to select the storage medium on which the firmware file is located. Firmware files on external storage ●...
-
Page 83: Reboot
Operating the Control Panel 5.3 System Properties 5.3.5 Reboot You can restart the HMI device manually under "Reboot". The restart can be carried out normally or in maintenance mode. In the following cases the HMI device is automatically restarted after confirmation: ●... -
Page 84: Performance
Operating the Control Panel 5.3 System Properties 5.3.6 Performance Under "Performance" you can activate the monitoring of the internal flash memory. Flash Memory Monitoring Section "Show Alarm if life of flash memory is reducing fast": Option to activate flash memory monitoring. -
Page 85: Runtime Properties
Operating the Control Panel 5.4 Runtime Properties Runtime Properties 5.4.1 Automatic runtime start Under "Automatic runtime start" you define whether the project on the HMI device starts automatically or not after a defined delay time. Automatic runtime start "Waiting time(s)": Selection list for determining whether the project on the HMI device starts automatically after a specified delay time or not. -
Page 86: Alarm Buffer
Operating the Control Panel 5.4 Runtime Properties 5.4.2 Alarm buffer Under "Alarm buffer" you can activate or deactivate the retentive alarm buffer. The default setting is "deactivated". Note Back up data before deactivating the retentivity When you deactivate the retentivity of the alarm buffer and still need the data in the alarm buffer, back up this data before deactivating the retentivity in a log. -
Page 87: Network And Internet
Operating the Control Panel 5.5 Network and Internet Network and Internet 5.5.1 Network settings 5.5.1.1 Overview Under "Network settings", you change settings for the network and for the network interfaces X1 and X2. The following buttons take you to the corresponding settings. ●... - Page 88 Operating the Control Panel 5.5 Network and Internet IP address ● "Obtain an IP address via DHCP" (default setting): Option to automatically assign the IP address via the DHCP server. ● "Specify an IP address": Option to manually assign the IP address. ●...
-
Page 89: Pn-X2
Operating the Control Panel 5.5 Network and Internet Ethernet parameters Port 1, Ethernet Parameters Port 2 ● "Activate this port for use": Option to activate or deactivate the X1P1 or X1P2 ports. The default setting is "Activated". ● "Mode and speed": List for selecting the transmission type and transmission rate for the interface;... - Page 90 Operating the Control Panel 5.5 Network and Internet IP address ● "Obtain an IP address via DHCP" (default setting): Option to automatically assign the IP address via the DHCP server. ● "Specify an IP address": Option to manually assign the IP address. ●...
-
Page 91: General
Operating the Control Panel 5.5 Network and Internet Name servers ● "Primary DNS": Address of the DNS server. ● "Secondary DNS": Address of the secondary DNS server. If you have activated the "Obtain an IP address via DHCP" option under "IP adress", the specifications under "Name servers"are optional. - Page 92 Operating the Control Panel 5.5 Network and Internet Sm@rtServer "Enable Sm@rtServer": Option to enable or disable the Sm@rtServer on the HMI device. The default setting is "deactivated". If the Sm@rtServer is started on an HMI device, you can access the HMI device via a suitable client.
-
Page 93: Security
Operating the Control Panel 5.6 Security Communication ● "Secure communication via self-signed certificate": Option to enable secure communications via SSL encryption. Default setting: "activated". Client access is only possible if the client application supports SSL encryption and if passwords have been set for both users. For access via the Sm@rtClient application, this option must be cleared. - Page 94 Operating the Control Panel 5.6 Security Current user ● "Logged in user": Displays the login name of the user currently logged in. If no user is currently logged in, this field is empty. ● "change password": Button to change the password for the user currently logged in. After pressing the button, the "Change password"...
- Page 95 Operating the Control Panel 5.6 Security Users ● The following buttons with the following functions are located above the user list: Creating a new user. Edit data of the user currently selected in the list. Delete the user currently selected in the list. Import complete user administration from a file in ".json"...
- Page 96 Operating the Control Panel 5.6 Security After pressing one of the two buttons, the dialog "Add user" or the dialog "Edit user" is displayed. Both dialogs boxes are identical in content. The following figure shows an example of the "Edit user" dialog box. ●...
-
Page 97: Certificates
Operating the Control Panel 5.6 Security ● "Comment": Note on changing the user. ● "Edit user" or "Add user" Button for saving the user. ● "Cancel": Button for discarding the changes. See also Transferring a project with WinCC (Page 125) 5.6.2 Certificates You can use this function to import, display and delete certificates. - Page 98 Operating the Control Panel 5.6 Security The "Import certificate" dialog box is displayed after the "Import" button is pressed. Select the storage medium and certificate file and import the certificate file using the "Import" button. If you import an encrypted certificate with the ".enc" file extension, enter the encryption password under "Password"...
-
Page 99: Control Panel Access
Operating the Control Panel 5.6 Security 5.6.3 Control panel access Under "Control panel access" you can protect access with a password on the Control Panel. Only users who have been assigned the "Control Panel access" function right in the configuration can change the password protection. General network settings ●... -
Page 100: External Devices And Input
Operating the Control Panel 5.7 External Devices and Input If you are not logged in or do not have the "Control Panel access" function right, the "Access to control panel is restricted" dialog is displayed when accessing the Control Panel. Access to the Control Panel can be triggered directly in the Control Panel or via a system function of the Runtime software. -
Page 101: Language, Region And Formats
Operating the Control Panel 5.8 Language, Region and Formats Language, Region and Formats 5.8.1 Date and time Under "Date and time", set the date, time, and time zone for the HMI device manually or via a time server on the network. NOTICE Time synchronization required for time-dependent reactions A malfunction may occur in the plant if the date and time are not synchronized and time-... - Page 102 Operating the Control Panel 5.8 Language, Region and Formats ● "Set date and time manually" (default setting): Option for manual time setting on the HMI device. If you select this option, the following list is displayed below the options: Set the day, month, year and time by scrolling the respective list column so that the desired date and time are displayed in the framed line in the middle of the list.
-
Page 103: Service And Commissioning
Operating the Control Panel 5.9 Service and Commissioning Service and Commissioning 5.9.1 Transfer Under "Transfer" you define whether and how data is transferred from a configuration PC to the HMI device. Transfer mode ● "Enable transfer": Option to enable or disable data transfer to the HMI device. If you disable the transfer, you protect the HMI device against unintended update of the operating system and overwriting the project data. -
Page 104: Update Os
Use a SIMATIC SD memory card with 32 GB or more or an industrial USB flash drive to load the firmware. Firmware files for the HMI devices can be downloaded from the Internet (https://support.industry.siemens.com/cs/ww/en/view/109746530). Observe the documentation included with the download. Note... - Page 105 Operating the Control Panel 5.9 Service and Commissioning Panel Information ● "Device type": HMI device type designation. ● "Image version": Version of the firmware and operating system. Select storage media for OS update Use the selection list to select the storage medium on which the firmware file is located. Firmware files on external storage ●...
-
Page 106: Backup
Operating the Control Panel 5.9 Service and Commissioning 5.9.3 Backup Under "Backup" you can back up the operating system, applications and data from the flash memory of the HMI device to an external storage medium. Use a SIMATIC SD memory card ≥ 32 GB or an industrial grade USB stick as storage medium. - Page 107 Operating the Control Panel 5.9 Service and Commissioning Backup file ● "File Name": Name of the backup. Select a name that best identifies the backup. A backup includes multiple files. The master file has the extension ".brf". The number of additional files varies;...
-
Page 108: Automatic Backup
Operating the Control Panel 5.9 Service and Commissioning 5.9.4 Automatic backup Under "Automatic backup" you can activate or deactivate the "Automatic backup" function. If the "Automatic backup" function is activated the data of the HMI device is automatically backed up to the system memory card during operation in form of a backup including firmware. - Page 109 Operating the Control Panel 5.9 Service and Commissioning Automatic Backup ● "Show notification if system card is plugged": Option to enable or disable the automatic message "System memory card plugged". ● "Status": Status information on the system memory card in slot X50. –...
- Page 110 Operating the Control Panel 5.9 Service and Commissioning 2. Press "OK". The window "Service and Commissioning" > "Automatic Backup" opens in the Control Panel. "Ready for automatic backup" is displayed in the "Status" field. 3. Press the "Start" button. The "Start automatic backup" dialog box is displayed. 4.
- Page 111 Operating the Control Panel 5.9 Service and Commissioning Using automatic backup of a system memory card If a system memory card already contains automatically backed-up data, the corresponding backup must first be loaded. Automatic backup can then be continued. 1. Insert the SIMATIC SD memory card with automatically backed-up data in slot X50. The "System memory card plugged"...
-
Page 112: Restore
Operating the Control Panel 5.9 Service and Commissioning 4. Start the restore process via the "OK" button or cancel the process via the "Cancel" button. The HMI device restarts after the "OK" button is pressed. The restore process then begins. During the restore process, the "Automatic backup restore"... - Page 113 Operating the Control Panel 5.9 Service and Commissioning Backup files ● The list shows all backups that can be loaded to the HMI device. Select the desired backup from the list. ● "Restore": Button to start the restore process. The HMI device restarts after the "Restore" button is pressed. The restore process then begins.
-
Page 114: Trace Forwarder
If you start the HMI device in maintenance mode, the "Tracing" function is automatically enabled. See also FAQ on configuring Trace Viewer (https://support.industry.siemens.com/cs/ww/en/view/109777593) 5.10 Apps The following options are available for managing apps on the HMI device under "Apps": ●... - Page 115 Operating the Control Panel 5.10 Apps The following figure shows an example of the delivery state of an HMI device. To make the settings for an app or to manage the apps, select an entry under "SIMATIC Apps", "Add-ons" or "Settings". The following entries are available in the above example for the delivery condition: "SIMATIC Apps"...
-
Page 116: Simatic Edge
Log in as a user who has been assigned the "Control Panel access" function right in the configuration. Siemens Industrial Edge You can find detailed information on Siemens Industrial Edge and Edge Management on the Edge Management website in the programming and operating manual "Siemens Industrial Edge (https://support.industry.siemens.com/cs/ww/en/view/109773259)". -
Page 117: Add-Ons
Operating the Control Panel 5.10 Apps 5.10.2 Add-ons Under "Add-ons" you will find pre-installed apps such as "Doc Viewer", "E-Mail Client", "File Browser", "Media Player", "PDF Viewer", "Printer Configuration" and "Web Browser". The following figure shows the symbol of the "Doc Viewer" as an example. All pre-installed apps under "Add-ons"... - Page 118 However, you can also start the pre-installed apps via an operating element in the project. To do this, use the "StartProgram" system function in your configuration. <Name Enter the following command under "Program name": "/opt/siemens/App_Restriction/ of start script> " <Name of start script>...
-
Page 119: App Management
Operating the Control Panel 5.10 Apps 5.10.3 App Management You can uninstall pre-installed apps or change their settings under "App Management". Manage apps ● The list shows all apps installed under "Add-ons". ● "Uninstall": Button to uninstall the selected app. Recommendation: Uninstall apps that you do not need. - Page 120 Operating the Control Panel 5.10 Apps Unified Comfort Panels Operating Instructions, 03/2020, A5E46641217-AA...
-
Page 121: Transferring Data
Transferring data Overview Configuration phase In the configuration phase, the automation process is visualized with the configuration software in the form of a project. The plant screens of the project contain operating elements and display controls for values and alarms which provide information about process statuses. - Page 122 Transferring data 6.1 Overview Updating the operating system of the HMI device The firmware and operating system version of the HMI device must be compatible with the firmware and operating system version of the installed WinCC software. If this is not the case, an error message is output before the transfer.
-
Page 123: Operating Modes
Transferring data 6.2 Operating modes Operating modes Operating modes The HMI device can be in the following operating modes: ● Offline ● Online ● Transfer Changing the operating mode The configuration engineer must have configured appropriate operating elements to allow a change of the operating mode on the HMI device during ongoing operation. -
Page 124: Data Transmission Options
Transferring data 6.3 Data transmission options Data transmission options The following table shows the options for data transmission between an HMI device and the configuration PC. Interface PROFINET (LAN) Transfer function Protocol X61 ... X64 Backup and Restore PN/IE * Ethernet Update operating system PN/IE... -
Page 125: Transferring A Project With Wincc
Transferring data 6.5 Transferring a project with WinCC Transferring a project with WinCC This section describes how to transfer a project to the HMI device via the configuration software WinCC . Before the transfer, the software checks whether the project can be loaded onto the HMI device. - Page 126 Transferring data 6.5 Transferring a project with WinCC The "Load preview" dialog box contains alarms of type "Information" and "Warning". Information The setting is compatible, the project can be loaded. Warning The setting on the HMI device differs from the settings in the configuration software.
- Page 127 Transferring data 6.5 Transferring a project with WinCC 11. In the "Load preview" dialog box, specify the options for the loading process. – "Load Runtime": Selection list for overwriting or keeping the runtime software on the HMI device. – "Fit": In this area you define whether the version of individual components should be adjusted if the version of the component in the configuration differs from the version of the component on the HMI device.
-
Page 128: Backup And Restore
Transferring data 6.6 Backup and restore Backup and restore During data backup, the contents of the internal memory are saved in a backup on a configuration PC or on an external storage medium. Alarm logs and process value archives are not included in the backup. These archives are stored separately on an external storage medium. - Page 129 Transferring data 6.6 Backup and restore 10. Click on the "Backup" button. The "SIMATIC ProSave [ Backup ]" dialog box is displayed. 11. Under "Data type", select which data of the HMI device should be saved. 12. Enter the file name of the backup in the "Save as" field. 13.
- Page 130 Transferring data 6.6 Backup and restore 7. In the project tree, select the HMI device whose data you want to restore. 8. Select the "Restore" command in the menu "Online > HMI Device maintenance" . 9. If there is no connection to the HMI device, the connection dialog box is displayed. In this case, select the "Ethernet"...
-
Page 131: Updating The Operating System
".fwf". The number of additional files varies; these files have the file name of the master file and a sequential number (".0", ".1", ".2", etc.) as an extension. Firmware files for the HMI devices can be downloaded from the Internet (https://support.industry.siemens.com/cs/ww/en/view/109746530). Observe the documentation included with the download. Note... -
Page 132: Updating The Operating System Via Wincc
Transferring data 6.7 Updating the operating system You have the following options for updating the operating system or restoring the factory settings of the HMI device, provided that access to the Control Panel of the HMI device is working: ● Updating the operating system via WinCC (Page 132) ●... -
Page 133: Resetting An Hmi Device To Factory Settings Via Prosave
Transferring data 6.7 Updating the operating system 9. If there is no connection to the HMI device, the connection dialog box is displayed. In this case, select the "Ethernet" interface protocol, enter the IP address or name of the target device and click the "Connect"... - Page 134 Transferring data 6.7 Updating the operating system 3. In the Control Panel of the HMI device, select "Network and Internet". Ensure that the port selected for data transmission is activated for the interface used ("Activate this port for use"). 4. In the Control Panel of the HMI device, select "System Properties" > "Reboot". 5.
-
Page 135: Device Maintenance And Repair
Clean the glass front of the HMI device. The HMI device is designed for low-maintenance operation. However, you should clean the glass front regularly. Observe the information on chemical resistance (https://support.industry.siemens.com/cs/ww/en/view/39718396). Important notes Note Avoid unintentional responses during cleaning If you clean the glass front when it is switched on, you may cause inadvertent operations via the touch screen. -
Page 136: Using The Maintenance Mode
Device maintenance and repair 7.3 Using the maintenance mode Requirement ● Damp cleaning cloth ● Dishwashing liquid or foaming screen cleaning agent Procedure Proceed as follows: 1. If a project is running on the HMI device, close the project. 2. Switch off the HMI device. 3. - Page 137 Device maintenance and repair 7.3 Using the maintenance mode NOTICE Operating system must be updated after startup with the "Maintenance" button If you start the HMI device while pressing the "Maintenance" button, the HMI device is in maintenance mode. The "Waiting for Operation" and then "Waiting for Connection" dialogs are displayed in maintenance mode.
-
Page 138: Spare Parts And Repairs
Depending on the work necessary to repair the device, the Center may decide to give you a credit. A credit is only granted when the sender ordered a new HMI device. The address is: Siemens AG Digital Industries Retouren-Center c/o Geis Service GmbH, Tor 1-4 Kraftwerkstraße 25a... -
Page 139: Technical Information
Technical information Software license agreements Open Source Software Observe the software license agreements for Open Source Software on the supplied "Open Source Software License Conditions" data medium. Labels, certificates and approvals Note Approvals on the rating plate The following overview shows possible approvals. Only the approvals specified on the rating plate apply to the device. - Page 140 Technical information 8.2 Labels, certificates and approvals EU Declarations of Conformity The EU Declarations of Conformity are available to the relevant authorities at the following address: Siemens AG Digital Industries Factory Automation DI FA AS SYS Postfach 1963 D-92209 Amberg You can download information on the EC Declaration of Conformity, here under the keyword "Declaration of Conformity":...
- Page 141 Notes on use in hazardous areas Observe the following FAQ regarding the use of an HMI device in hazardous areas: ATEX- FAQ (https://support.industry.siemens.com/cs/ww/en/view/291285) When using the device in hazardous areas, ensure that all plugs connected to the device are secured in a captive manner, see section "Securing cables for use in hazardous areas (Page 55)".
- Page 142 Technical information 8.2 Labels, certificates and approvals ATEX approval For an HMI device with "Ex" marking, the following approvals apply according to the following standards ● Standards: – EN 60079-0:2018 – EN 60079-7:2015 +A1:2018 – EN 60079-31:2014 ● Approvals: II 3 G Ex ec IIC T4 Gc II 3 D Ex tc IIIC T 70 °C Dc...
- Page 143 ● Class NK (Nippon Kaiji Kyokai) ● KR (Korean Register of Shipping) ● CCS (China Classification Society) ● RINA (Registro Italiano Navale) After acceptance you will find the certificates on the Internet (https://support.industry.siemens.com/cs/ww/en/ps/26033/cert). Unified Comfort Panels Operating Instructions, 03/2020, A5E46641217-AA...
-
Page 144: Electromagnetic Compatibility
1 kV signal line, > 30 m, • External protective circuit required, see Function Manual "Designing Interference-free Controllers", section 7 "Lightning and overvoltage protection" You can find the Function Manual "Designing interference-free controllers" for download on the Internet (https://support.industry.siemens.com/cs/ww/en/view/59193566). Unified Comfort Panels Operating Instructions, 03/2020, A5E46641217-AA... - Page 145 Technical information 8.3 Electromagnetic compatibility Sinusoidal interference The following table shows the EMC behavior of the modules with respect to sinusoidal interference. This requires the device to meet the specifications and directives for electrical installation. Sinusoidal interference Test values HF radiation (electromagnetic fields) 80% amplitude modulation at 1 kHz according to IEC 61000-4-3 to 10 V/m from 80 MHz to 1 GHz...
-
Page 146: Mechanical Ambient Conditions
Technical information 8.4 Mechanical ambient conditions Mechanical ambient conditions 8.4.1 Storage conditions The following information is valid for a device that is transported and stored in its original packaging. The device was tested according to IEC 60721-3-2 Class 2M4 with the following additions and restrictions: Type of condition Permitted range... -
Page 147: Climatic Ambient Conditions
Technical information 8.5 Climatic ambient conditions Climatic ambient conditions 8.5.1 Long-term storage The following information applies to a device that is stored in its original packaging for longer than two weeks. The device meets the requirements according to IEC 60721-3-1 Class 1K21. 8.5.2 Transport and short-term storage The following information applies to a device that is transported in the original packaging and... -
Page 148: Operating Conditions
Technical information 8.5 Climatic ambient conditions 8.5.3 Operating conditions The following information applies to a device installed according to the specifications in these operating instructions. The HMI device is designed for weatherproof and stationary operation according to IEC 60721-3-3. The device meets the requirements according to IEC 60721-3-3 Class 3K3 with the following additions and restrictions: Type of condition Mounting position... -
Page 149: Climate Diagram
Technical information 8.6 Information on insulation tests, protection class and degree of protection 8.5.4 Climate diagram The diagram below shows the extended range for temperature and humidity during continuous operation based on IEC 60721-3-3 Class 3K3. The information applies to a device installed in landscape format without inclination. Information on insulation tests, protection class and degree of protection Insulation test... -
Page 150: Dimension Drawings
Technical information 8.7 Dimension drawings Protection class Protection class III according to IEC 61010-2-201 und IEC 61131-2. Protection against foreign objects and water The device meets the requirements according to IEC 60529 and UL50. Device side Degree of protection Front When mounted: IP65 according to IEC 60529 •... -
Page 151: Dimension Drawings Of The Mtp1000 Unified Comfort
Technical information 8.7 Dimension drawings 8.7.2 Dimension drawings of the MTP1000 Unified Comfort Unified Comfort Panels Operating Instructions, 03/2020, A5E46641217-AA... -
Page 152: Dimension Drawings Of The Mtp1200 Unified Comfort
Technical information 8.7 Dimension drawings 8.7.3 Dimension drawings of the MTP1200 Unified Comfort Unified Comfort Panels Operating Instructions, 03/2020, A5E46641217-AA... -
Page 153: Dimension Drawings Of The Mtp1500 Unified Comfort
Technical information 8.7 Dimension drawings 8.7.4 Dimension drawings of the MTP1500 Unified Comfort Unified Comfort Panels Operating Instructions, 03/2020, A5E46641217-AA... -
Page 154: Dimension Drawings Of The Mtp1900 Unified Comfort
Technical information 8.7 Dimension drawings 8.7.5 Dimension drawings of the MTP1900 Unified Comfort Unified Comfort Panels Operating Instructions, 03/2020, A5E46641217-AA... -
Page 155: Dimension Drawings Of The Mtp2200 Unified Comfort
Technical information 8.7 Dimension drawings 8.7.6 Dimension drawings of the MTP2200 Unified Comfort Unified Comfort Panels Operating Instructions, 03/2020, A5E46641217-AA... -
Page 156: Technical Specifications
Technical information 8.8 Technical specifications Technical specifications 8.8.1 MTP700, MTP1000, MTP1200 Unified Comfort Weight Unified Comfort HMI device MTP700 MTP1000 MTP1200 Weight without packaging 1.4 kg 2.1 kg 2.8 kg Display Unified Comfort HMI device MTP700 MTP1000 MTP1200 Type LCD TFT Display diagonal 7.0"... - Page 157 Technical information 8.8 Technical specifications Interfaces Unified Comfort HMI device MTP700 MTP1000 MTP1200 RS 422/485 1 x SUB-D PROFINET (LAN) 2 x RJ45 10/100 Mbps 1 x RJ45 10/100/1000 Mbps USB 3.1 4 x Host With integrated switch (one IP address only) USB Type A;...
-
Page 158: Mtp1500, Mtp1900, Mtp2200 Unified Comfort
Technical information 8.8 Technical specifications 8.8.2 MTP1500, MTP1900, MTP2200 Unified Comfort Weight Unified Comfort HMI device MTP1500 MTP1900 MTP2200 Weight without packaging 4.3 kg 5.5 kg 6.9 kg Display Unified Comfort HMI device MTP1500 MTP1900 MTP2200 Type LCD TFT Display diagonal 15.6"... - Page 159 Technical information 8.8 Technical specifications Interfaces Unified Comfort HMI device MTP1500 MTP1900 MTP2200 RS 422/485 1 x SUB-D PROFINET (LAN) 2 x RJ45 10/100 Mbps 1 x RJ45 10/100/1000 Mbps USB 3.1 4 x Host With integrated switch (one IP address only) USB Type A;...
-
Page 160: Description Of The Interfaces
Technical information 8.9 Description of the interfaces Description of the interfaces 8.9.1 DC24V X80 Power supply 24 V DC 2-pin Meaning +24 V DC Ground 8.9.2 RS422/485 X20 Serial interface, 9-pin sub-D socket, female Assignment for the RS422 Assignment for the RS485 TxD+ Data signal B (+) RxD+... -
Page 161: Profinet (Lan) X1
Technical information 8.9 Description of the interfaces 8.9.3 PROFINET (LAN) X1 PROFINET (LAN) 10/100 Mbps, RJ45 socket Name Meaning Data output + Tx– Data output - Data input + Not assigned Not assigned Rx– Data input - Not assigned Not assigned 8.9.4 PROFINET (LAN) X2 PROFINET (LAN) 10/100/1000 Mbps, RJ45 socket... -
Page 162: Usb X61/X62/X63/X64
● SIMOTION ● SIMATIC HTTP protocol Additional controllers and communication drivers are supported via CSP. You can find the CSPs for download on the Internet (https://support.industry.siemens.com/cs/ww/en/view/109739698). Observe the documentation in the respective download. Unified Comfort Panels Operating Instructions, 03/2020, A5E46641217-AA... -
Page 163: Scope Of Functions With Wincc
Technical information 8.11 Scope of functions with WinCC 8.11 Scope of functions with WinCC Performance features The following tables of performance features help you to assess whether your project conforms to the system limits of an HMI device. The specified maximum values are not additive. It cannot be guaranteed that configurations running on the devices at the full system limits will be functional. - Page 164 Technical information 8.11 Scope of functions with WinCC Screens Unified Comfort HMI device Display diagonal ≤ 12" Display diagonal ≥ 15" Number of screens 1200 Number of lower-level screen windows Number of objects per screen 1200 Number of objects from the "Controls" area per screen Number of tags per screen Parameter sets...
- Page 165 Technical information 8.11 Scope of functions with WinCC Text lists and graphics lists Unified Comfort HMI device Display diagonal ≤ 12" Display diagonal ≥ 15" Number of graphics lists Number of text lists Number of entries per text or graphics list Number of graphic objects 6000 Number of text elements...
- Page 166 Technical information 8.11 Scope of functions with WinCC User administration Unified Comfort HMI device Display diagonal ≤ 12" Display diagonal ≥ 15" Number of roles Number of predefined function rights Number of users Project Unified Comfort HMI device Display diagonal ≤ 12" Display diagonal ≥...
-
Page 167: Technical Support
You can find additional information and support for the products described on the Internet at the following addresses: ● Technical support (https://support.industry.siemens.com/cs/ww/en/) ● Support request form (http://www.siemens.com/automation/support-request) ● After Sales Information System SIMATIC IPC/PG (http://www.siemens.com/asis) ● SIMATIC Documentation Collection (http://www.siemens.com/simatic-tech-doku-portal) ● Your local representative (http://www.automation.siemens.com/mcms/aspa-db/en/Pages/default.aspx) ●... -
Page 168: Troubleshooting
Application examples You can find application examples on the Internet at the following address: Application Examples Unified Comfort Panels (https://support.industry.siemens.com/cs/ww/en/ps/26032/ae). FAQs Frequently asked questions on Unified Comfort Panels are available on the Internet at the following address: FAQs Unified Comfort Panels (https://support.industry.siemens.com/cs/ww/en/ps/26032/faq) -
Page 169: System Alarms
You can find a list of system events for your HMI device in the TIA Portal information system. Information about the manufacturer Siemens AG is the manufacturer of the HMI devices described in this document. The manufacturer address is: Siemens AG... - Page 170 Technical Support A.5 Information about the manufacturer Unified Comfort Panels Operating Instructions, 03/2020, A5E46641217-AA...
-
Page 171: Markings And Symbols
Markings and symbols Safety-relevant symbols The following table describes symbols that can be added to your SIMATIC device, to its packaging or to an enclosed document in addition to the symbols described in the manuals. Symbol Meaning Reference General danger sign Caution / Attention ISO 7000 No. - Page 172 Markings and symbols B.1 Safety-relevant symbols Symbol Meaning Reference Only for industrial applications and indoor areas (control cabinet) Device is to be integrated into a control cabinet Install devices approved for Ex Zone 2 in a control cabinet with at least IP54 Install devices approved for Ex Zone 22 in a control cabinet with at least IP6x...
-
Page 173: Abbreviations
Abbreviations ANSI American National Standards Institution Central Processing Unit Communication Service Package Comma Separated Values Clear To Send CUPS Common Unix Printing System Direct Current Data Carrier Detect DHCP Dynamic Host Configuration Protocol Dual-in-Line (electronic chip housing design) Domain Name System Distributed I/O Data Source Name Data Set Ready... - Page 174 Abbreviations Programming device Point-to-Point Interface (SIMATIC S7) Random Access Memory PELV Protective Extra Low Voltage RJ45 Registered Jack Type 45 Request to send Receive Data SD Memory Card Abbreviation for Secure Digital Memory Card SELV Safety Extra Low Voltage Service Pack SUB-D Subminiature D (plug) Tabulator...
-
Page 175: Glossary
Glossary Alarm An alarm may be a system alarm or a user-defined alarm. A user-defined alarm typically indicates a particular operating state of the plant, a system alarm typically contains information about the state of the HMI device. Boot loader The bootloader is used to start the operating system and is started automatically after the power on of the HMI device power. - Page 176 Glossary Electromagnetic compatibility (EMC) refers to a usually desirable state, in which technical equipment does not disturb one another with unwanted electrical or electromagnetic effects. Electromagnetic compatibility deals with technical and regulatory questions of undesired, mutual influence in electrical engineering. Event Functions are triggered by defined incoming events.
- Page 177 Glossary Object An object is a project element such as a screen or an alarm. Objects are used to view or enter texts and values on the HMI device. Operating element An operating element is a component of a project used to enter values and trigger functions. A button, for example, is an operating element.
- Page 178 Trade goods are qualified in a brief power-up test but do not undergo a system test by Siemens AG. The technical properties of trade goods can deviate from the properties guaranteed by comparable products of the Siemens AG.
Need help?
Do you have a question about the SIMATIC HMI Unified Comfort MTP700 and is the answer not in the manual?
Questions and answers