Champion 64 PRO Operation, Cleaning, And Maintenance Manual
Two tank rack conveyor
Hide thumbs
Also See for 64 PRO:
- Operation, cleaning and maintenance manual (44 pages) ,
- Installation manual (32 pages)
Table of Contents
Advertisement
Quick Links
Operation, Cleaning, and Maintenance Guide
LISTED
www.championindustries.com
3765 Champion Boulevard
Winston-Salem, NC 27105
(336) 661-1556 Fax: (336) 661-1660
Toll-free: 1 (800) 858-4477
64 PRO
64 PRO
2674 N. Service Road, Jordan Station
Ontario, Canada L0R 1S0
(905) 562-4195 Fax: (905) 562-4618
Toll-free: 1 (800) 263-5798
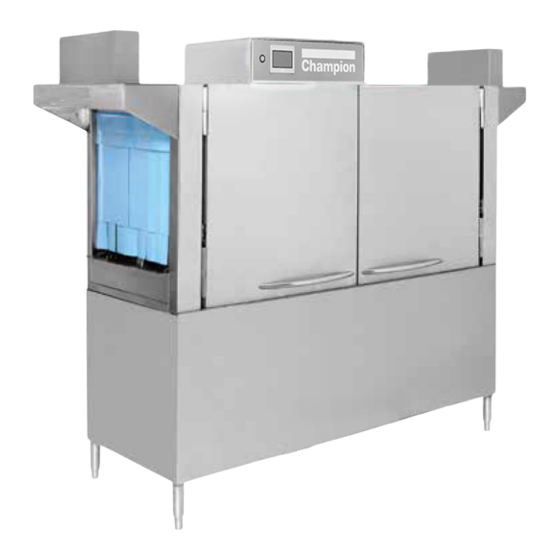
64 PRO Series
Two Tank Rack Conveyor
Dishwasher
Models
64 PRO
90FF PRO
100HD PRO
Issue Date: 9.25.19
Manual P/N
116085 rev. - B
For machines beginning with S/N
86 PRO
and above
RP19038937
Printed in the USA
Advertisement
Table of Contents

Related Manuals for Champion 64 PRO


Summary of Contents for Champion 64 PRO
- Page 1 Operation, Cleaning, and Maintenance Guide 64 PRO Series Two Tank Rack Conveyor Dishwasher Models 86 PRO 64 PRO 90FF PRO 100HD PRO 64 PRO 64 PRO LISTED Issue Date: 9.25.19 www.championindustries.com Manual P/N 116085 rev. - B For machines beginning with S/N...
- Page 2 National Service Department In Canada: In the USA: Toll-free: (800) 263-5798 Toll-free: (800) 858-4477 Tel: (905) 562-4195 Tel: (336) 661-1556 Fax: (905) 562-4618 Fax: (336) 661-1660 email: service@moyerdiebellimited.com email: service@championindustries.com ATTENTION The model no., serial no., voltage, Hz and phase are needed to identify your machine and to answer questions.
- Page 3 Product Registration Two ways to REGISTER YOUR PRODUCT and ACTIVATE YOUR WARRANTY. 4:34 PM • Use your mobile or computer to go to our website at http://www.championindustries.com/warranty-registration and register your product there. • Use the fax form on the next page.
- Page 4 Product Registration PRODUCT REGISTRATION BY FAX COMPLETE THIS FORM AND FAX TO: (336) 661-1660 in the USA 1-(800) 204-0109 in Canada PRODUCT REGISTRATION CARD Model Serial # Date of Installation: Company Name: Address: (Street) State/Province Zip/Postal Code Telephone #: ( Contact: Installation Company: Address:...
- Page 5 Revision History Revision History Specifications are subject to change based on continual product improvement. Dishwasher owners may a request a manual by calling 1(800) 858-4477 in the USA and 1(800) 263-5798 in Canada. Revision Revised Serial Number Description Date Pages Effectivity 8.2.19 RP19038937...
-
Page 6: Limited Warranty
(b) 90 days after installation, whichever occurs first. In the event that The Company elects to repair, the labor and work to be performed in connection with the warranty shall be done during regular working hours by a Champion authorized service technician. -
Page 7: Table Of Contents
Table of Contents Table of Contents Revision History ..........................i Limited Warranty ......................... ii Model Descriptions ........................iv Operation ....................1 Set-up ...................... 1 Sequence of Operation ................9 Control Panel Description ..............10 Built-in Manuals ..................11 Sequence of Operation ................. 11 .... -
Page 8: Model Descriptions
Model Descriptions Model Size 64 PRO 64" Two Tank Rack Conveyor 86 PRO 64" Two Tank Rack Conveyor with 22" Prewash 90FF PRO 64" Two Tank Rack Conveyor with 26" Front Feed Prewash 100HD PRO 64" Two Tank Rack Conveyor with 36" Prewash... -
Page 9: Operation
AUTOMATIC ELECTRIC DRAIN VALVE(S) CLOSE WHEN POWER IS ON. RED LINE INDICATOR ON VALVE INDICATES OPEN OR CLOSED. OPEN Fig. 2 • 64 PRO Dishwasher features electrically operated drain valves that automatically open and close. Drain Valve Operation: • Valve closes when dishwasher power switch is turned on. - Page 10 Operation INSTALL SCRAP SCREENS AND BASKETS INSTALL THE SCRAP SCREENS. INSTALL THE SCRAP BASKET. Fig. 2 Fig. 3 Install the Prewash Scrap Screens INSTALL THE SCRAP SCREEN. INSTALL THE SCRAP BASKET. Fig. 4 Fig. 5...
- Page 11 Operation INSTALL WASH ARMS SLIDE UPPER WASH ARM INTO TRACKS MAKING SURE IT ENGAGES THE WASH MANIFOLD. PUSH WASH ARM UP UNTIL THE LATCHES LOCK IT IN PLACE. LATCH LATCH MANIFOLD Fig. 6 SLIDE LOWER WASH ARM INTO TRACKS MAKING SURE IT ENGAGES THE WASH MANIFOLD.
- Page 12 Operation INSTALL PREWASH ARMS SLIDE UPPER WASH ARM INTO TRACKS MAKING SURE IT ENGAGES THE WASH MANIFOLD. PUSH WASH ARM UP UNTIL THE LATCHES LOCK IT IN PLACE. Fig. 9 - 36" Prewash Tank Fig. 8 - 22" Prewash Tank...
- Page 13 Operation MAKE SURE THE SIDE WASH ARM CLEAN-OUT PLUGS AND O-RINGS ARE INSTALLED BEFORE INSTALLING THE ARMS. Fig. 10 INSTALL THE SIDE WASH ARM PIPE(S). TURN TO LOCK IN PLACE. 22" Prewash Tank 36" Prewash Tank Fig. 11...
- Page 14 Operation CURTAIN LOCATIONS Curtain Size LONG CURTAIN, 24" x 20-1/4" P/N 113720 ROD, 5/16" x 24-5/8" P/N 108250 MEDIUM CURTAIN, 24" x 13-1/4" P/N 108043 ROD, 5/16" x 23-1/2" P/N 114012 Medium Long Curtain Curtain Long Curtain Wash Rinse L-R Direction Fig.
- Page 15 Operation CURTAIN INSTALLATION CAUTION: Failure to properly install a curtain may prevent proper heating of the machine. LABELS ON THE FRONT OF THE MACHINE INDICATE THE CURTAIN LOCATIONS. HANG THE CURTAINS ON THE HOOKS LOCATED ON EACH SIDE OF THE HOOD. MAKE SURE THE CURTAIN SHORT FLAPS FACE THE LOAD END OF THE MACHINE.
- Page 16 Operation Operation - Loading Dish Racks REMOVE FOOD REMNANTS FROM THE WARES BEFORE LOADING THEM INTO DISH RACKS. LOAD PLATES IN A PEG RACK, BOWLS AND GLASSES IN A FLAT-BOTTOM RACK. LOAD SILVERWARE IN A SINGLE LAYER IN A FLAT-BOTTOM RACK. LOAD POTS, PANS AND UTENSILS UPSIDE DOWN IN A FLAT-BOTTOM RACK.
-
Page 17: Sequence Of Operation
Operation Sequence of Operation Power up Procedure: 1. Touch the Green Power button. The drain valves will close and the dishwasher will begin the automatic fill. The display screen will illuminate; a flashing faucet appears and FILLING displays in the status bar. The incoming wash temperature displays in the Wash °F box. -
Page 18: Control Panel Description
Operation Operation - Control Panel Description Touch Control Power On Panel and Pushbutton Display Fig. 15 Maintenance Fill Symbol Menu Tools Status Bar FILLING Start Stop The Start/Stop button Displays in °F or °C changes from Green to Red when if selected. -
Page 19: Built-In Manuals
Operation Built-in Manuals Operation and Cleaning manuals are built-in to the display. To access the manuals: 1. Press the "TOOLS" button. 2. Press the "MANUALS" button". 3. Press the Operation or Clean button to access the instructions. Sequence of Operation INITIAL FILL—... -
Page 20: Wash/Final Rinse
Operation Sequence of Operation (continued) WASH/FINAL RINSE— Machine washes and performs a final rinse. TOUCH THE GREEN BUTTON WHEN READY APPEARS. THE BUTTON CHANGES TO RED. INSERT A DISH RACK. DWELL APPEARS ON THE SCREEN AND THE PUMPS AND CONVEYOR START. THE MINIMUM WASH TEMPERATURE IS 150°F, THE POWER RINSE TEMPERATURE IS 160°F. -
Page 21: Dwell
Operation DWELL— Dwell pauses the dish rack in the wash zone to clean heavily soiled wares. INSERT A DISH RACK OF HEAVILY SOILED DISHES INTO THE MACHINE. 'DWELL' APPEARS ON THE DISPLAY. Immediately touch the 'DWELL' button when it appears. It will turn red when touched indicating dwell is activated. -
Page 22: Check Drain
Operation ALARM SCREENS CHECK DRAIN— The machine will stop filling if there is a problem with the drain. IF THE MACHINE DOES NOT FILL WITHIN 10 MINUTES, THE FILL STOPS AND 'CHECK DRAIN' APPEARS IN THE STATUS BAR. MAKE SURE THE DRAIN VALVES ARE CLOSED. -
Page 23: Alarm Screens
Operation ALARM SCREENS DOOR OPEN— The machine stops if a dishwasher door is opened. To clear the 'DOOR OPEN' alarm: Close the door. 'READY' will appear in the status bar. Insert a dish rack to restart the machine. Fig. 22 TABLE FULL —... -
Page 24: Below Temp
Operation ALARM SCREENS BELOW TEMP— The below temp alarm indicates the wash temperature is below the minimum 150°F. The operator should determine why the temp is low and take corrective action. THE DISPLAY INDICATES 'BELOW TEMP' WHEN THE TANK IS FULL OF WATER BUT HAS NOT REACHED THE PRESET TEMPERATURE. -
Page 25: Conveyor Jam
Cleaning ALARM SCREENS CONVEYOR JAM — The machine stops and 'Conveyor Jam' is displayed if the conveyor is overloaded or an object interferes with the conveyor's movement. To rest the 'Conveyor Jam' alarm: 1. Open the doors and remove any dish racks. 2. -
Page 26: Check Thermistors
Operation ALARM SCREENS CHECK THERMISTORS— Indicates an error in a thermistor circuit. THE DISPLAY INDICATES 'CHECK THERMISTORS' IN A WASH, POWER RINSE, OR BOOSTER TANK. CONTACT A SERVICE AGENT TO RESOLVE THE ERROR. Fig. 26... -
Page 27: Check Float
Operation CHECK FLOAT— Float may be jammed or defective. THE DISPLAY INDICATES 'CHECK FLOAT' IN A PREWASH, WASH, POWER RINSE, OR BOOSTER TANK. INSPECT THE FLOAT TO ENSURE IT IS MOVING FREELY. Fig. 27... -
Page 28: Electric Drain Valve Operation
Operation ELECTRIC DRAIN VALVE OPERATION The electric drain valves can be opened using the "TOOLS" button and options screens. 1. Press the "TOOLS" button. 2. Press the "DRAIN" button. 2. Press the desired button to open the valve. The valve will remain open until the button is pressed again. - Page 29 Blank Page This Page Intentionally Left Blank...
-
Page 30: Wash Arms
Cleaning CLEANING WASH ARMS — The upper and lower wash arms should be removed to clean. The upper wash arms have five pipes, the lower wash arms have four pipes. THE UPPER WASH ARM ASSEMBLY HAS FIVE ARMS, THE LOWER HAS FOUR. THEY ARE NOT INTERCHANGEABLE. -
Page 31: Prewash Arms
Cleaning PREWASH ARMS — The side and upper wash arms should be removed to clean. TURN SIDE ARM 1/4 TURN AND PULL DOWN TO REMOVE. INSPECT O-RING FOR WEAR AND REPLACE AS NECESSARY (Fig. 30). CLEAN THE SPRAY NOZZLES WITH A PAPER CLIP (Fig. 31). REMOVE THE ARM END PLUGS AND FLUSH WITH CLEAN WATER. - Page 32 Cleaning CLEANING (continued) PREWASH ARMS (continued) REMOVE PREWASH UPPER SPRAY ARMS AND CLEAN (Fig. 33-34). REMOVE THE ARM END PLUGS AND FLUSH WITH CLEAN WATER. CHECK THE O-RING AND REPLACE AS REQUIRED (FIG. 33-34). Fig. 34 - 36" Prewash Tank Fig.
-
Page 33: Rinse Arms
Cleaning RINSE ARMS — The upper and lower rinse arm nozzles should be cleaned regularly to prevent scale build-up. ROTATE RINSE ARM 1/4 TURN AND PULL TO REMOVE (FIG. 35). USE SCREWDRIVER TO REMOVE END PLUG AND FLUSH ARM WITH CLEAN WATER. -
Page 34: Cleaning
Cleaning SCRAP SCREENS AND SCRAP BASKETS CAUTION: Spray and wipe down the interior of the machine to remove debris before removing scrap screens and baskets. DO NOT CLEAN INTERIOR WITH METAL PADS. REMOVE THE SCRAP BASKET. REMOVE THE SCRAP SCREENS. Fig. -
Page 35: Pump Suction Strainer And Drain
Cleaning PUMP SUCTION STRAINER AND DRAIN CAUTION: Failure to clean the pump suction strainer significantly reduces wash results. TURN THE MACHINE POWER SWITCH OFF AND ON TO OPEN THE ELECTRIC DRAIN VALVES FOR 10 MINUTES. FLUSH TANK WITH FRESH WATER. CLEAN DRAIN SCREEN (FIG. 42). PULL THE PUMP STRAINER HANDLE UP TO REMOVE (FIG. -
Page 36: Cleaning Intervals
Cleaning CLEANING Cleaning - Intervals Cleaning your dishwasher is the best maintenance you can do. The cleaning intervals below are the minimum requirements for most dishwashers. You may need to clean your dishwasher more often when washing heavily soiled wares or during long periods of continuous operation. Daily or every 4 hours of operation 1. -
Page 37: Deliming
Deliming Deliming DELIME WARNING: Consult the chemical representative's recommendations for the use of deliming chemicals. Wear protective clothing, goggles and face shield when handling chemicals. Deliming intervals are determined by the amount of lime build-up in the dishwasher. A pass- word protected delime time interval is adjustable by a management. - Page 38 Deliming Step 3: The display returns to the main screen and displays "DELIME REQUIRED". Pressing "TOUCH TO RESET" will bypass the delime function but the prompt will return until a deliming operation is performed Fig. 46 Step 4: Press "YES" to begin the deliming process. Step 5: "CLEAN SCREENS"...
- Page 39 Deliming Step 6: "CLOSE DOOR TO FILL" is displayed. Step 7: Close doors and machine fills. • "FILLING" displayed. Step 8: "ADD DELIME CHEMICAL" displayed. • Open the doors and add the delime chemical according to the chemical representative's instructions. •...
- Page 40 Deliming Step 9: "CLOSE DOOR TO START" is displayed. Step 10: "PUMPS ON" is displayed. Pumps will run. Step 11: "DRAINING" is displayed. Machine drains. Step 12: " FILLING" is displayed. Machine fills.
- Page 41 Deliming Step 13: "DELIME RINSE" displayed. • Final rinse water valve opens for the pre-programmed time. • Time remaining displayed on screen. • Valve closes. Step 14: "DRAINING" is displayed. Machine drains. Step 15: "DELIME COMPLETE" is displayed when deliming is complete. •...
- Page 42 Deliming POWER GREEN POWER BUTTON OFF: The deliming process can not be stopped by pushing the main power button off. • Push green power button off. The green light will go out and the screen will go blank. Deliming continues. •...
- Page 43 Deliming Step 3: Press "DELIME START". NOTE: "The"DELIME START" button disappears and can not be pressed when the machine is filling or washing. Delime Start is only available when the machine is idle and "READY" is displayed on the main screen. Step 4: Press "YES"...
-
Page 44: Maintenance
Maintenance MAINTENANCE Schedules Weekly 1. Inspect all water lines for leaks and tighten at joints if required. 2. Clean any detergent residue from the exterior of the machine. 3. Clean any accumulated scale from the heating element. 4. Inspect the spray arms for damage or missing parts. 5. -
Page 45: Troubleshooting Chart
Troubleshooting Before calling for service check the following conditions. 1. Dishwasher main power and water supply is on. 2. Machine has been assembled correctly. 3. Conveyor is clear of any obstructions. 4. Screens and pump intake screens are clear. 5. Doors are closed and secure. Condition Cause Solution... - Page 46 Blank Page This Page Intentionally Left Blank...
Need help?
Do you have a question about the 64 PRO and is the answer not in the manual?
Questions and answers