
Related Manuals for Aastra Ascotel Office 45


Summary of Contents for Aastra Ascotel Office 45
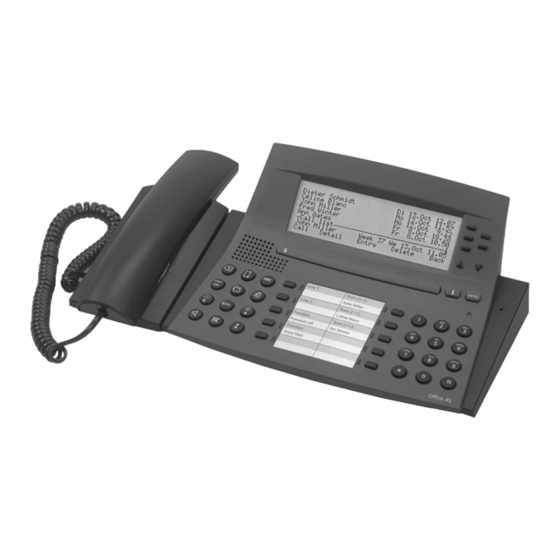
- Page 1 Ascotel Office 45 / 45pro System Assistant Operating Instructions for the End User Ascotel IntelliGate Telecommunication Systems...
-
Page 2: Operating And Display Elements
Operating and Display Elements Operating and Display Elements " Some systems or system versions do not support all the features. The corresponding text sections are identified by a letter inside square brackets. The section "System and Software Dependency" indicates which system versions support the relevant features. - Page 3 Operating and Display Elements Display Entry-Selection key • 1. - 5. line: Selection menus Selecting list entries: • 6. line: Action prompt • Press 1x: left-hand column • 7. line: Active menu • Press 2x: right-hand column • 8. line: Foxkey functions Scroll keys Foxkey Changes data record...
-
Page 4: Table Of Contents
Contents Contents Operating and Display Elements ........... 2 Menu tree . -
Page 5: Menu Tree
Menu tree Menu tree The purpose of the menu tree The menu tree illustrates the structure of the System Assistant, giving you quick access to the setting options. In the menu, you can go from the System Assistant's root to the individual branches. From there you can reach the sub-branches, at the end of which you can adjust the settings you want. - Page 6 Menu tree 4: LICENCING 8:HOTEL 1/3 EID 1: ROOM CONFIGURATION 1/21:NUMBER 2: ROOM STATE 2/31:LICENCES 3: NAME 4: ALARM CALL 5: DATE/TIME 5: COUNTER STATE 1: SHOW 2/21:EXCH. ACCESS 2: SYSTEM TIME 2: ROOM TO ROOM 3: SYSTEM DATE 3: SURCHARGE 4: HOTLINE 6: REMOTE CONTROL 1: ALLOW...
-
Page 7: What Is This Document About
What is this document about? What is this document about? The System Assistant The purpose of these Instructions is to show you what settings you can carry out on the (telephone) system. Your main tool for such settings is the "System Assistant" menu. Use your 45 or 45pro phone to enter your settings. - Page 8 What is this document about? External access (remote maintenance) There are three authorization types for external access using the AIMS configuration software: • no access • one-off access • permanent access Authorization for external access to the system is granted within the System Assistant. Access to the system by other users is barred while you are in the System Assistant menu, and only you can make changes to the system settings.
-
Page 9: Using The Display And Operating Elements
Using the Display and Operating Elements Using the Display and Operating Elements The settings in the System Assistant are generally the same as those for the 45 and 45pro phones. Beyond the settings on the phone, the System Assistant offers additional basic operating features and some settings are made differently. -
Page 10: Menu-Guided Navigation
Using the Display and Operating Elements Exiting the System Assistant Any changes you may have made are only accepted if you confirmed the last input with the "OK" Foxkey or if you carried out a switch (e.g. "YES / NO"). You can exit the "System Assistant" menu any time by pressing the "Exit"... -
Page 11: Processing Settings
Using the Display and Operating Elements Exiting a Menu Level Pressing the "Back" Foxkey takes you up one menu level. You are then at a higher level in the menu tree. To ensure you remain in the System Assistant, you always go back only as far as the start page of the System Assistant. - Page 12 Using the Display and Operating Elements Displays You want the settings to be displayed. Example You want to know whether a subscriber has locked his phone. Calling up the "Subscriber Settings" menu. The display shows "1: DISPLAY", "2: CHANGE" and "3: PRINT". Press digit key 1.
- Page 13 Using the Display and Operating Elements Using the Arrow Keys to Navigate through Pages A submenu or menu item can contain a list with many of entries. If all the data records cannot be shown at one time, the entries are displayed on several pages. The page number and the number of pages are shown in the bottom right-hand corner of the display, for example, "1/3"...
- Page 14 Using the Display and Operating Elements Using the Scroll Keys to Navigate through Records A data record can contain one or more entries. If all the data records cannot be shown at one time, the entries are displayed on several pages. You can go to other data records by pressing the "...
- Page 15 Using the Display and Operating Elements Modify You want to edit certain settings. The settings can be names, numbers, or switches, for example "YES / NO" or "ON / OFF". Names and numbers are simply overwritten. When you are finished, you must confirm the changes with the "OK"...
- Page 16 Using the Display and Operating Elements Entering Letters and Special Characters You can also use the digit keys to enter letters and special characters. A number of letters and special characters are assigned to each key. To enter letters and special characters using the digit keys, you need to be in text mode. The display shows the "...
-
Page 17: Settings With The System Assistant
Settings with the System Assistant Settings with the System Assistant The description below generally refers to the procedure required to "CHANGE" system settings using the System Assistant. Other options for editing the settings, such as "DISPLAY", "PRINT", and "DELETE", are described under Menu Guided Navigation. They will only be referred to here if further information is required. -
Page 18: Destinations
Settings with the System Assistant Destinations Lets you determine where calls are to be routed in certain situations. Destinations can be internal or external phone numbers. Changing the call distribution Menu path: 2-Destinations/1-CDE setting. Lets you change the name of an existing call distribution. The DDI number and the switch positions are displayed. - Page 19 Settings with the System Assistant Specifying a Destination for the Substitution Menu path: 2-Destinations/5-Substitution. Lets you forward calls intended for your Operator Console to a substitute (another phone or the general bell). The setting automatically applies to all the other Operator Consoles belonging to the same system.
-
Page 20: Subscriber List
Settings with the System Assistant Capolinea Menu path: 2-Destinations/9-Capolinea (Italy only). Lets you specify destinations for the Capolinea function. You have a choice of three Capolinea destinations. */# procedures on a phone are used to specify in each case which switch position is currently valid. The Capolinea feature is available only in Italy. -
Page 21: Subscriber Settings
Settings with the System Assistant Subscriber Settings Lets you change the following settings for any given phone number: • Name • Busy lamp field • Hotline allocation • Call Forwarding Unconditional • Call Forwarding on No Reply • Pager number •... - Page 22 Settings with the System Assistant Changing a Hotline Menu path: 4-Subscriber settings/2-Modify/Phone number/3-Hotline Lets you allocate a hotline to a phone number. This means you will immediately be connected with the hotline as soon as you pick up the handset. The hotline is in turn allocated a specific destination. You have a choice of five hotlines.
- Page 23 Settings with the System Assistant Changing the Pager Number Menu path: 4-Subscriber settings/2-Modify/Phone number/Foxkey "->"/ 4-Pager-Subscriber-Number Lets you allocate a pager's number to a phone number. Calls made to the phone will be forwarded to the pager. The pager (also referred to as a beeper) is a mobile receiver that guarantees that you can be reached at all times.
- Page 24 Settings with the System Assistant Deactivating the Phone Lock Menu path: 4-Subscriber settings/2-Modify/Phone number/2x Foxkey "->"/ 4-Phone lock Lets you overwrite the PIN for a phone lock. You cannot deactivate or set up a phone lock. The phone lock must be deactivated on the phone using the new PIN.
-
Page 25: Busy Lamp Field
Settings with the System Assistant Busy lamp field When the 45 / 45pro phone is used as a key phone or Operator Console, it is possible to use the display to indicate whether or not specific phones are busy. Busy Lamp Field Menu path: 5-Busy lamp field/2-Modify Lets you change the phone numbers displayed on your busy lamp field. - Page 26 Settings with the System Assistant System Status and Event Messages Menu path: 6-Maintenance settings/3-Maintenance The information can be processed with any of the following commands: "VIEW", "PRINT", "DELETE", or "BOTH" (Print, followed by Delete). You must specify the function you want before selecting the data. You can choose the following items: •...
- Page 27 Settings with the System Assistant Enabling External Remote Control Menu path: 6-Maintenance settings/6-External remote control/1-Enable Also lets you prohibit external remote control. An external subscriber can remote control a number of features through the public network using */# procedures. All he requires is a DDI number specially set up for remote control and a valid password (for example: change call forwarding, send text messages, actuate door opener).
-
Page 28: Connection With Data Acquisition
Settings with the System Assistant Connection with Data Acquisition Lets you retrieve , print and/or delete individual counter readings, and print a report of those readings. The information obtained is separated according to: • Subscriber • Cost centre • Network interface •... - Page 29 Settings with the System Assistant Printing a Subscriber's Report Menu path: 7-Connection with data acquisition/2-Report/1-Subscriber Lets you print reports / receipts on the counter reading of one or all subscribers. The data can then be automatically deleted. To select a subscriber, press digit key "1" a second time and enter the phone number. Next use digit key "2"...
-
Page 30: Hotel
Settings with the System Assistant Hotel Listed here are special features for hotel applications. For best results the room number and the phone number of the room's phone should be identical. Inputs are always made using the phone number. In this menu you can: •... - Page 31 Settings with the System Assistant Printing / Clearing the Counter Reading for Hotel Rooms Menu path: 8-Hotel/1-Room settings/Phone number/5-Counter Lets you print or clear the counter reading (individual charge counting - ICC) of a particular room. Changing the Hotel Room Exchange Access Menu path: 8-Hotel/1-Room settings/Phone number/Foxkey "->"/1-Exchange access Lets you enable or bar external calls for individual room phones.
- Page 32 Settings with the System Assistant Occupying a Room Menu path: 8-Hotel/2-Room status/2-Modify/2-Occupied Lets you allocate a room and assign it a guest name and one or more phone numbers. A name can consist of up to 17 characters and must start with a letter. Set up wake-up calls Menu path: 8-Hotel/3-Wake-up call/1-Edit You must first enter the wake-up time and then the phone number of the room phone.
-
Page 33: Password
Settings with the System Assistant Password Changing the System Assistant Password Menu path: 9-Password Lets you change the password for using the System Assistant. Before making the change, you must enter the old password. The new password must have a minimum of 8 and a maximum of 10 characters. - Page 34 Settings with the System Assistant Changing the Handset Message Destination Menu path: 0-Other settings/2-DECT message destination You can set up a phone as a message destination so that the phone's display can be used to indicate the logoff procedure for handsets (or DECTs) logged on with a time limit. The phone number of the message destination does not appear on the display during input.
- Page 35 Settings with the System Assistant Deleting Unread Messages Menu path: 0-Other settings/4-Message/Announcement/3-Delete all messages. Lets you delete both read and unread messages. Enter "Y" for "YES" to confirm the deletion. Reducing Messages Menu path: 0-Other settings/4-Message/Announcement/4-Reduce messages Lets you delete both read and unread messages that are more than 3 days old. Enter "Y"...
-
Page 36: Index
Index Index Abbreviated dialling ...........................17 Action prompt .............................3 Activate Call Forwarding on No Reply (4/2/Phone number/Foxkey ->/3) ..........22 Activate System Assistant ........................9 Activating First-Ring Call Forwarding(4/2/Phone number/Foxkey ->/1) ..........22 Active menu ............................3 Allocating Ringing Pattern for the General Bell (2/3) ................18 Announcement ..........................34 Authorising a handset for a limited period of time(4/2/Phone number/2x Foxkey "->"/5 (cordless phone only) ..............................24... - Page 37 Index Connection with data acquisition ...................... 28 Cost centre ............................29 Counter reading ..........................29 Creating a password for external remote control (6/6/1) ..............27 Data backup ............................7 DDI number ............................24 Deactivating the phone lock (4/2/Phone number/2x Foxkey ->/4) ............24 Deleting a name automatically during checkout (8/4/2/2) ..............
- Page 38 Index Input character ..........................16 Language Setting ..........................35 Logging a handset off (0/1/Phone number/2) ..................33 Logging a handset on (0/1/Phone number/1) ..................33 Mains power failures .........................26 Maintenance Settings ........................25 Menu-Guided Navigation ........................10 Message ............................34 Message destination ..........................34 Modify ...............................15 Network interface ..........................29 Occupying a room (8/2/2/2) .......................32 Operating elements ..........................2 Password .............................9...
- Page 39 Index Selection menu ........................... 3 Set up wake-up calls (8/3/1) ......................32 Setting a hotline for a room (8/1/Phone number/Foxkey ->/4) ............31 Setting up a surcharge curve (8/1/Phone number/Foxkey ->/3) ............31 Settings on the system ........................9 Specifying a forwarding destination for "Do not disturb (2/4) ............18 Specifying a substitution (2/5) ......................
- Page 40 Declaration of Conformity Konformitätserklärung We, Aastra Telecom Schweiz AG, declare with full responsibility that the product complies with the provisions of Directive 1999/5/EC of the Council of the European Union. You will find the complete text of the declaration of conformity and other documents under: www1.aastra.com/docfinder...
Need help?
Do you have a question about the Ascotel Office 45 and is the answer not in the manual?
Questions and answers