Aastra 470 Installation Manual
Applications card cpu2 as of r2.1
Hide thumbs
Also See for 470:
- System manual (304 pages) ,
- User manual (28 pages) ,
- Getting started (10 pages)
Table of Contents
Advertisement
Quick Links
Aastra Business
Communication Solution
Applications Card CPU2 as of R2.1
Installation Guide
Platforms supported:
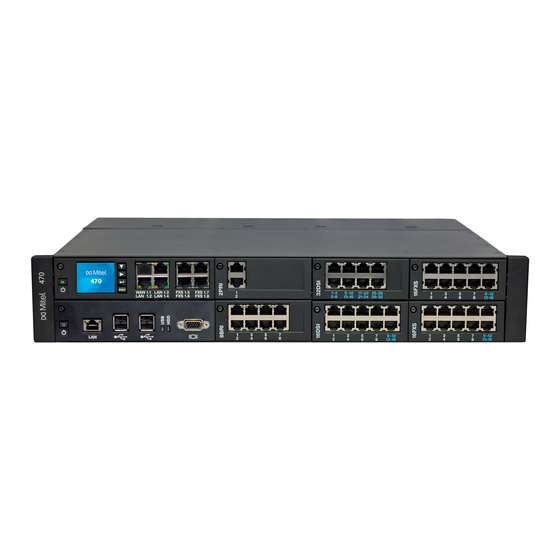
Aastra 470
These intructions take you through the installation and
initial configuration of the Aastra 470 communication
server applications card.
Innovations with R2.1: Setting up the Aastra 400 Fax
Service
syd-0421_en / 1.2 – R2.1 – © 07.2012
Advertisement
Table of Contents

Subscribe to Our Youtube Channel
Related Manuals for Aastra 470


Summary of Contents for Aastra 470
- Page 1 Platforms supported: Aastra 470 These intructions take you through the installation and initial configuration of the Aastra 470 communication server applications card. Innovations with R2.1: Setting up the Aastra 400 Fax Service syd-0421_en / 1.2 – R2.1 – © 07.2012...
-
Page 2: Table Of Contents
About Aastra ........ -
Page 3: Installation Guide
Product information Purpose and function Aastra 400 is an open, modular and comprehensive communication solution for the business sector with several communication servers of different performance and expansion capacity, an extensive telephone portfolio and a multitude of expansions. - Page 4 Product information Conformity Aastra Telecom Schweiz AG hereby declares that • the Aastra 400 products conform to the basic requirements and other relevant stipulations of Directive 1999/5/EC. • all our products are manufactured in conformity with RoHS and WEEE (2002/95/EC and 2002/96/EC).
-
Page 5: Safety Information
Hazard warnings are affixed whenever there is a risk that improper handling may put people at risk or cause damage to the Aastra 400 product. Please take note of these warnings and follow them at all times. Please also take note in particular of hazard warnings contained in the user information. -
Page 6: Limited Warranty (Australia Only)
(1) year period from the date of original purchase ("Warranty Period"). If there is a defect or malfunction, Aastra shall, at its option, and as the exclusive remedy under this limited warranty, either repair or replace the product at no charge, if returned within the warranty period. - Page 7 2010 (the ACL), the exercise of a right conferred by such a provision or any liability of Aastra in relation to a failure to comply with a guarantee that applies under Division 1 of Part 3-2 of the ACL to a supply of goods or services.
- Page 8 Limited Warranty (Australia only) Limitation of liability To the extent permitted by law and subject to clause 1.2 below, the liability of Aastra to you for any non-compliance with a statutory guarantee or loss or damage arising out of or...
-
Page 9: About Aastra
North America, Europe and Africa as well as Internet Service Providers and distributors of renown. Aastra Technologies Limited, (TSX: “AAH”), is a leading company at the forefront of the enterprise communication market. Headquartered in Concord, Ontario, Canada, Aastra develops and delivers innovative communication products and applications for businesses. -
Page 10: Installing The Application Card
Preparing the application card installation Before installing the application card, first make the following preparations: 1. First put the communication server Aastra 470 into operation and configure your system for operation without application card. 2. Configure the Windows user name and the users e-mail addresses. - Page 11 Installing the application card Putting the application card into operation To put the application card into operation, proceed as follows: 1. Switch on the communication server. Switching on the communication server also powers up the application card. You can see this on the the LED's On/Off key which now turns steady orange. 2.
- Page 12 Installing the application card 2. Define the administrator password and enter it under New password Password confirmation. 3. Click Apply, to confirm the IP address and new password. The setup assistant sets the IP address of the communication server and applies the passwort to Windows, OIP and TWP.
-
Page 13: Configuring The Application Card
Configuring the application card Configuring the application card Configure the applications card by executing the configuration processes in the following order: Basic configuration, IP Network and Licenses. Then configure the OIP and TWP applications. To secure the configuration data, create a backup in the end. Settings under Basic configuration The general settings are described below. - Page 14 Configuring the application card Settings under IP Network You will find the IP network settings here. IP network adapter settings Parameter Explanation Device Name of the network adapter integrated into the application card (read only access). MAC address MAC address of the network adapter integrated into the application card (read only access).
- Page 15 Configuring the application card Configuring applications Configure the mandatory applications. The hyperlinks at the bottom of the Configuration screen take you to the OIP and TWP configuration platforms. Log on using the username cpu2-emmc and the application card password. Saving the configuration (menu Maintenance) You can create a configuration data backup under Maintenance.
-
Page 16: Configuring The Fax Server
PCs. However, if necessary, you must adapt the registry as follows on each PC: Start the fax client setup, with the following parameter request, whereby you Aastra-Fax- must replace fax.local with the new domain name: Client-Setup32.exe... - Page 17 Configuring the fax server Parameter Explanation Exchange access prefix Lets you specify by selecting a prefix how an external outgoing fax message should access the exchange: • Enter the usual exchange access prefix according to the numbering plan (country-specific default value): The prefix is added to the destination number and the routing takes place via the transit route (in the default setting...
- Page 18 Configuring the fax server Placeholders for fax cover sheets Placeholder Information @@SENDERNAME@@ Name of the sender @@FAXORIGINATOR@@ Fax DDI @@SMTPORIGINATOR@@ E-mail address of the sender @@RECEIVER@@ Fax number @@SUBJECT@@ e-mail subject @@BODY@@ e-mail content @@DATE@@ Date of the fax transmission @@TIME@@ Time of the fax transmission Instructions on how to set up the fax service on the communication...
- Page 19 Configuring the fax server 8. Set up the SMTP server (Configuration IP network Routing view) and ask your IT manager to set up an SMTP connector for the Exchange Server and to enter the fax domain in the Exchange Server. 9.
-
Page 20: Updating System Software
Updating system software Updating system software With the aid of the Microsoft update service and depending on your configu- ration in the Security view you can keep the operating system up-to-date. On the other hand, you can update the entire software of the applications card including all applications by running an update package provided from your reseller. -
Page 21: Replacing An Application Card
Replacing an application card Replacing an application card To replace an application card without complications, follow the instructions below. Removing the application card To remove an application card, proceed as follows: 1. Switch off the application card, by pressing the On/Off pushbutton on the front side of the card. - Page 22 Index Access if DHCP is deactivated ....12 Safety information ......5 Security on the IP network .
Need help?
Do you have a question about the 470 and is the answer not in the manual?
Questions and answers