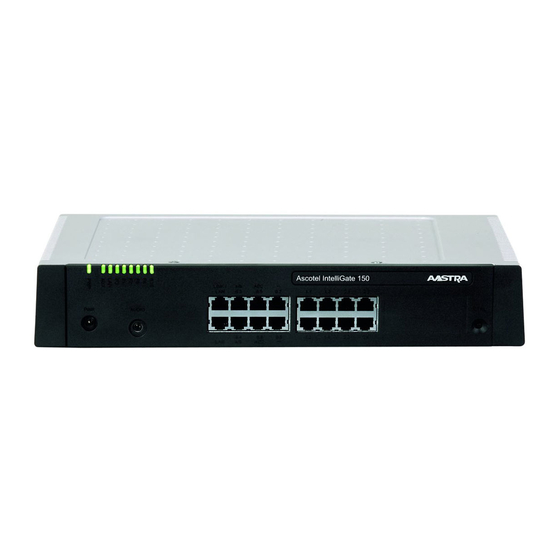
Aastra Ascotel IntelliGate A150 System Manual
Dect system
Hide thumbs
Also See for Ascotel IntelliGate A150:
- System manual (524 pages) ,
- User manual (97 pages) ,
- System manual (111 pages)

Related Manuals for Aastra Ascotel IntelliGate A150


Summary of Contents for Aastra Ascotel IntelliGate A150
- Page 1 A150 A300 Ascotel® IntelliGate® Communications Systems 2025 2045 2065 Ascotel® DECT System System Manual...
-
Page 2: Table Of Contents
Ascotel® DECT System Content Safety Information ......... .4 About the products. - Page 3 Ascotel® DECT System Installation ..........62 Location .
-
Page 4: Safety Information
Ascotel® DECT System Safety Information About the products Purpose and function Ascotel® IntelliGate® is an open, modular and comprehensive communication system that comprises the IP PBX, a multitude of expansion cards and modules, and a complete series of system terminals including IP system terminals. The system and all its parts were designed to cover the full spectrum of communication requirements of businesses and organizations using a single convenient solution. - Page 5 The document is available in the following languages: German, English, French and Italian. You can download this document as well as related documents and help systems with further information (see http://www.aastra.com/docfinder. More information on the system can be found at http://www.aastra.com or in your dealer’s...
-
Page 6: Considerations
Ascotel® DECT System Considerations Safety Considerations Special hazard alert messages with pictograms are used to signal areas of particular risk to people or equipment. Hazard Failure to observe information identified in this way can put people and hardware at risk through electrical shock or short-circuits respectively. Warning Failure to observe information identified in this way can cause a defect to the product or to a module. -
Page 7: Ascotel® Dect System
Ascotel® DECT System Ascotel® DECT System One or more radio units are required to be able to operate DECT handsets on the Ascotel® IntelliGate® system. They are connected to one or two AD2 interfaces. They are powered either via the AD2 or locally using separate plug-in power supply units. Office handsets as well as GAP-mode DECT handsets by outside manufacturers can be logged on to a radio unit. -
Page 8: Planning Dect Systems
Ascotel® DECT System Planning DECT systems The following sections take you through the planning procedure for an Ascotel DECT system (DECT: Digital Enhanced Cordless Telecommunications). It contains recommendations on the project sequence and on handling the measuring equipment. Unless otherwise specified, these considerations apply to DECT radio units operated with the integrated antenna. -
Page 9: Ascotel Dect And Pbx
Ascotel® DECT System System installation Once determined, the locations must be observed precisely in order to obtain reproducible results. There are always surprising effects in practice, due for example to cells being set up with several radio units (rather than the one cell originally planned and surveyed). -
Page 10: Coverage Area
Ascotel® DECT System Coverage area The supply range of an Ascotel DECT system can include many different types of geographic geometry. In most cases the bulk of the supply range is inside buildings. A DECT system always relates to a PINX (Private Integrated Exchange) in a PISN (Private Integrated Services Network). - Page 11 Ascotel® DECT System Topology A radio system supplies a specific area. This area is known as the supply range. In practice home users are able to receive a variety of autonomous DECT systems (e. g. Ascotel DECT, cordless DECT phones, etc.). An Office handset can be logged on in up to four autonomous DECT systems.
- Page 12 Ascotel® DECT System Location areas Location areas are used to divide the radio area into as many as four locally subdivided supply ranges. The system knows the location area in which a handset is located and only needs to send messages to the handset within that location area. Location area partitioning helps to reduce the system load caused by the signalling of incoming calls.
-
Page 13: System Characteristics
Ascotel® DECT System System characteristics 3.3.1 Radio characteristic of a radio unit The coverage range of a radio unit depends among other things on the antenna through which the radio signal is transmitted. The radio units transmit through two integrated antennas inside the housing. The radio characteristic of internal antennas is virtually spherical (with only transmission to the rear slightly diminished), in other words registered handsets are able to move away from the radio unit the same distance in every direction without the radio signal breaking up. -
Page 14: High-Frequency Propagation Conditions
Ascotel® DECT System Fig. 6: Radio characteristic through obstacles to radio propagation 3.3.2 High-frequency propagation conditions For a better understanding of the explanations on physical conditions given in the following sections, we first need to take a look at the basic principles of high- frequency propagation. - Page 15 Ascotel® DECT System • Interference due to other radio signals, leading to transmission errors The receive power of DECT signals can fluctuate a great deal, locally, within only a few centimetres (see Fig. 7). This means that signal interference can be reduced or eliminated simply by altering the position.
- Page 16 Ascotel® DECT System Obstacles may include: • Moving metal objects such as lifts, cranes, carriages, escalators, blinds, especially ones that are actuated automatically (the influence of such obstacles varies and is therefore difficult to assess) • Metal-panelled rooms and large metal-clad objects such as air conditioners, computer rooms, metallized glassed areas (mirrored), fire protection walls, storage tank installations, refrigerating units, boilers •...
-
Page 17: Using External Antennas
Ascotel® DECT System Reception conditions Optimising range is a fundamental challenge of radio technology. The reception of information in marginal zones is patchy at best. Practical measurements are carried out on the premises to determine the range. When instructing users, the following instructions can help to achieve optimum results: •... - Page 18 Ascotel® DECT System Radiation pattern in relative field strength Horizontal Vertical Fig. 10: Example 1: Omni-directional gain antenna The second example of an antenna, which radiates directionally both horizontally and vertically, is called a corner reflector antenna. It is ideally suited for covering distant remote buildings or areas.
- Page 19 That is why the radio units themselves are always equipped with two internal antennas. For recommendations regarding manufacturers and antenna type please contact Support ( https://pbxweb.aastra.com) Note: If two individual antennas are used instead of a dual antenna, the installation clearance between the antennas must not be chosen at random but adapted to the wavelength of the radio signals.
-
Page 20: Using Repeaters (Relays)
Ascotel® DECT System 3.3.4 Using repeaters (relays) Repeaters are autonomous devices which increase the range of the DECT system. When positioning a repeater you need to make sure not only that the coverage ranges overlap but also that the repeater is mounted in the coverage range of one radio unit and vice versa. - Page 21 Most repeaters do not support voice data encryption. For this reason the "Encryption" parameter should normally be configured to "No" in the DECT System Configuration. For recommendations regarding manufacturers and a suitable repeater type please contact Support (https://pbxweb.aastra.com). Planning DECT systems...
-
Page 22: Planning
Ascotel® DECT System Planning In practice a regulated procedure for planning has proved sensible and, above all, efficient. A considerable increase in efficiency can be achieved through the consistent use of the aids available. In the following, the planning procedure is described in the form of a "checklist": 1. -
Page 23: Initial Rough Determination Of The Radio Unit Locations
Ascotel® DECT System 3.4.2 Initial rough determination of the radio unit locations Radio circumstances are difficult to estimate. For this reason, situations regarded as particularly critical need to be determined on site through measurements. This will provide a reliable idea of the equipment required and the locations for the radio units. -
Page 24: On-Site Measuring
Ascotel® DECT System 3.4.3 On-site measuring As soon as the concrete locations for the radio units have been planned, it is recommended to confirm the circumstances in keeping with the plan using on-site measurements. A detailed description on how to use the test equipment can be found in "DECT Measuring Device ME-8", page Remarks:... - Page 25 Ascotel® DECT System DECT radio unit with outdoor supply The following principles are to be observed when installing DECT radio units on outdoor premises: • Choose a central position and avoid flat penetration angles • Ensure the chosen location is protected from the weather •...
- Page 26 Ascotel® DECT System DECT radio unit with indoor supply Fig. 15: Optimum positioning of the DECT radio unit indoors The following principles are to be observed when installing DECT radio units indoors: • In indoor supply install the radio units on inner walls rather than outdoor walls. •...
-
Page 27: Preparing The Measurements
Ascotel® DECT System 3.4.3.1 Preparing the measurements Drawing up a situation plan: • The situation plan records approximately the number and size of the coverage ranges required. • The measurements provide the ideal locations for the radio units. Radio supply and zone formation: •... - Page 28 Ascotel® DECT System Global coverage in the supply range First, ensure that the surface area of the planned supply range is satisfactorily covered. The ideal locations for the radio units are determined using practical measurements. Fig. 16: Global coverage in the supply range Planning DECT systems...
- Page 29 Ascotel® DECT System Handover overlap areas • To guarantee a clean handover, the radio units should be fitted in such a way that the 35–40 dBµV limits are at least in contact. • When conducting survey measurements in unfinished buildings, the limits should be increased by 10 dBµV.
- Page 30 Ascotel® DECT System Location areas Up to 4 location areas can be configured in an Ascotel® DECT system. With incoming calls each handset is called by the system simultaneously via all the radio units of a location area in which the handset is logged on. As the capacity of the signalling channel is limited, splitting the radio units into several location areas needs to be considered in the following cases: •...
- Page 31 Ascotel® DECT System Traffic density Once the supply range has been located and covered, the locations for the radio units are known. The second phase now looks at other requirements: The traffic volume, determined by the number of handsets and the frequency and duration of connections in an area defined by the customer.
- Page 32 Ascotel® DECT System Hotspots A hotspot is an area with an above-average number of handsets. Such an area can be covered with several radio units as the resources in the coverage range of neighbouring radio units are cumulated. It is recommended to cover hotspots with several SB-8 (or SB-4+) radio units as they operate in ”Zero-Blind-Slot mode”...
- Page 33 For manufacturer recommendations and information about antennas and attenuations, please contact Support (https://pbxweb.aastra.com). Note: It is advisable to use not more than 6 SB-8 or SB-8ANT radio units in one hotspot.
-
Page 34: Measuring
Ascotel® DECT System 3.4.3.2 Measuring We are assuming that the project planner is familiar with the information contained in the previous sections of this document. The locations entered on the situation plan are definitively fixed using on-site measurements. The ME-8 DECT measuring equipment (see "DECT Measuring Device ME-8", page 37) described below provides... - Page 35 Ascotel® DECT System Measuring procedure The following sequence is an example of a possible measuring procedure: Depending on the situation and aim of the measurement, a different procedure may be used. We shall be looking here at a measurement procedure using 2 test radio units.
-
Page 36: Installing The Definitive System
Ascotel® DECT System 3.4.4 Installing the definitive System "Installation", page 62 3.4.5 Re-measuring As soon as the definitive system is installed, test measurements should be carried out in handover overlap border areas and compared with the results of the planning (see "On-site measuring", page 24). -
Page 37: Dect Measuring Device Me-8
Ascotel® DECT System DECT Measuring Device ME-8 New as well as already installed DECT systems can be measured out and optimised with the DECT measuring device ME-8. For easier handling during the measuring procedure, the radio units can be powered with battery packs. The headsets are connected to the test equipment and enable simultaneous visual and acoustic checking of the connection quality as well as the communication among those conducting the measurement during the measuring procedure. -
Page 38: Test Handsets
Ascotel® DECT System 3.5.1 Test Handsets The 4 test handsets (test HAs) of the ME-8 DECT measuring device contain special test software which extends the functionality of a standard HA for test purposes. For example: • Loop connections via a test RU •... -
Page 39: Test Radio Units
Ascotel® DECT System 3.5.2 Test radio units The test software for the test radio unit (test RU) is integrated in the standard software. A rotary switch is on the bottom of the test radio units so that the test HAs can identify the test RUs (position 1..8). - Page 40 Ascotel® DECT System Operating State Display with LEDs A test RU, like a normal RU, is fitted with 3 LEDs. The operating state is indicated by different colours and flashing sequences in cycles of 1 second. Each character (G=green, R=red, O=orange, - =off) corresponds to 1/8 of a second. Tab.
-
Page 41: Operating Modes Of The Handsets For Test Purposes
Ascotel® DECT System 3.5.3 Operating modes of the handsets for test purposes All Office 135/135pro handsets are able to perform various measurements for test purposes. Three different modes of operation are available: • "Look Around Mode" Up to 32 RUs can be logged and their parameters displayed. •... - Page 42 Ascotel® DECT System Activating "Look Around Mode" when the HA is in Another State: 1. Long-click the ”M” key to access the configuration menu 2. Press the ”M” key repeatedly until "Test" appears 3. Press Foxkey "Test" 4. Press the “Look” Foxkey Exiting "Look Around Mode": Long-click 4 or long-click C Displays in "Look Around Mode"...
- Page 43 Ascotel® DECT System The Standard display is active after entering "Look Around Mode". The following example shows the standard display during a scanning procedure in test system T: 1. line: Icons 2. line: Field strength and call quality 3. line: Status and supplementary information 4.
- Page 44 Ascotel® DECT System 2. line: Field strength and call quality Call quality display 4 bars: (>54): "perfect": very good speech quality 3 bars: (45-54): "good": good speech quality 2 bars (35-44): "fair": Call interruptions may occur 1 bars (25-34): "bad": Frequent call interruptions 0 bars (<25): "lousy": No stable connection possible.
- Page 45 Ascotel® DECT System 4. line: Fox menu and supplementary information Right Foxkey: > " ": Select next RU from the list < " ": Select previous RU from the list > < (long-click ” ” switches to " ” and vice versa) Number of found RUs during the scan procedure (information) Dialled RU (information) Left Foxkey:...
- Page 46 Ascotel® DECT System Detail Display ”Bearer Information” Pressing the ”i” key again takes you to the ”Bearer information” detail display. Lines 3 and 4 in this display show the current values for "Traffic Bearer" and "Synchronisation Bearer". The values of the "Traffic-Bearer" are not visible until a call connection has been set up.
- Page 47 Ascotel® DECT System Settings in "Look Around Mode" Selecting a DECT System 1. In ”Look Around Mode” press the ”M” key repeatedly until "System" appears 2. Press Foxkey "System" 3. Use the Foxkey ”>” to select the system designation 4. Confirm with Foxkey "OK" Tip: Long-click 1 to change the system.
- Page 48 Ascotel® DECT System Scan Procedure: After selecting the DECT system, the scan procedure is started by pressing Foxkey "OK" or Foxkey "scan". This generates a list of all visible RUs of the selected system: • The list may have a maximum of 32 entries •...
- Page 49 Ascotel® DECT System Selecting an RU: The first found RU is automatically displayed after starting the scan procedure. If more than one RU is found, another RU can be selected with Foxkey ”>” or ”<”. Alternately, pressing digit keys 1..8 (for system T) or 1..9 or 0 for 10 (for all other systems) directly selects a specific RU from the list.
- Page 50 Ascotel® DECT System Display Backlighting During the measuring procedure it may be practical to have the display on the handset continually backlit. The backlighting mode can be set on the test HA via the menu. 1. Press ”M” in ”Look Around Mode” until "Light" appears 2.
- Page 51 Ascotel® DECT System Voice Connections via the test RU If the selected system is a test system (T), voice connections can be set up as an acoustic check of the test RU. This is only possible with the test HAs, since it requires special HA software.
- Page 52 Ascotel® DECT System Switching Microphone On/Off In a call connection with another test HA or in a loopback connection of a test HA, the microphone can be switched off and on: 1. Press ”M” repeatedly until "Micro" appears 2. Press Foxkey "Micro": Microphone is switched off and the symbol ”n”...
- Page 53 Ascotel® DECT System Antenna Selection and Diversity The test RU (like a SB-8ANT) has 2 internal antennas and 2 external antenna connections (see Fig. 19). Special coverage requirements can be satisfied with external antennas. Dual antennas, which support antenna diversity, are normally used.
- Page 54 Ascotel® DECT System Switching Antenna Diversity On/Off and Selecting the Antenna If a test HA is in a call connection (loopback connection or connection to another test HA), antenna diversity can be deactivated and switched permanently to one of the two internal or external antennas. The current connection then uses only this antenna: 1.
- Page 55 Ascotel® DECT System Overview of the Menu Items in ”Look around mode” Tab. 4: Menu items in ”Look around mode” Menu Description Parameter Remarks System Select the DECT systems (see A, B, C, D, E, T, X page Store->E Saving a system ID (see page •...
- Page 56 Ascotel® DECT System Keyboard assignment in "Look Around Mode" The keyboard assignment (short or long key press) in ”Look Around Mode” is partially identical to normal HA operation and partially different. Tab. 5: Short key press (”short-click”) in ”Look Around Mode” Meaning Note Foxkey left/...
- Page 57 Ascotel® DECT System Meaning Note 5 + 4 Request ”Bearer handover” 5 + 5 Displays the internal SW version Tab. 7 Go directly to menu for display backlighting Available only with test HA not available not available not available Reset field strength minimum and CRC errors Also possible with short-click ”#”...
-
Page 58: Show Measurement Mode
Ascotel® DECT System 3.5.3.2 Show Measurement Mode" This mode is available without restriction with a standard HA as well as with a test HA. A prerequisite, however, is that the handset is registered on system A, B, C or D and is connected to a radio unit (locked). -
Page 59: Show Handover Mode
Ascotel® DECT System 3.5.3.3 Show Handover Mode" A handover (HO) is a change from one radio unit (RU) to another (”Connection Handover”) or from one channel to another on the same RU ("Bearer Handover"). It is always performed when the field strength is too weak and at the same time a stronger signal is present. - Page 60 Ascotel® DECT System Display on the Handset If the setting "Disp" or "Both" is selected, the following display is visible for 7 seconds for every handover: 1. line: icons (see Fig. 2. line: Field strength and call quality (see Fig. 3.
-
Page 61: Handset Keyboard Assignment (Long-Clicks)
Ascotel® DECT System Handset keyboard assignment (long-clicks) In normal handset operation, long-clicking the following keys accesses additional functions directly. These indications apply to Office 135/135pro and Office 155pro/ 155ATEX. Deviations are indicated by footnotes. Tab. 7: Long-clicks on handsets in normal operation Meaning >... -
Page 62: Installation
Ascotel® DECT System Installation Location The locations determined for the handsets, charging bays and radio units during the planning phase need to be checked against the following criteria: • Influence on radio operation • Ambient conditions Influences on radio operation Radio operation is affected by the following influences: •... -
Page 63: Installing The Radio Units
Ascotel® DECT System Ambient conditions • When installing: Ensure convection (space for ventilation). • Avoid excessive dust. • Avoid exposure to chemicals. • Avoid direct sunlight. • See also Tab. 18 Note: If these requirements cannot be met (e.g. outdoor installation), use the appropriate protective housing. - Page 64 Ascotel® DECT System Fig. 30: Dimensional drawing for wall-mounting the mounting bracket [1] X = 200: Minimum distance if the radio units are connected to the same PBX (synchronous) X = 2000:Minimum distance if the radio units are not connected to the same PBX (not synchronous) Make sure the minimum distances are observed Fig.
- Page 65 Ascotel® DECT System Connecting the radio unit 230 VAC (optional) AD2 interface Socket 1 Socket 2 Sockets, external antennas (SB-8ANT only) Fig. 32: Underside of the radio units with connection points Tab. 8: Connections on the Ascotel DECT radio units RJ12 sockets Pin Socket 1: AD2 interface Socket 2: Power supply...
- Page 66 Ascotel® DECT System Tip: If an SB-8 radio unit is operated with two AD2 interfaces, the rack-version connection module S/T can be used for the wiring. Socket 1 of the radio unit is then automatically correctly wired with the neighbouring ports of the AD2 interface card.
-
Page 67: Configuration
Ascotel® DECT System Configuration Once the DECT radio units have been installed, complement the system configuration. If the system is being configured for the first time, steps 1 and 2 are already covered by the preceding section. 1. Complement the numbering plan with the Ascotel DECT subscriber numbers. Note: After the system initialization the radio unit starts in status "AD2 OK". -
Page 68: Configuring Ascotel Dect System Parameters
Ascotel® DECT System Configuring Ascotel DECT system parameters. Tab. 10: DECT parameters valid throughout the system Parameter Parameter value Remarks Search duration [10...30 s] Recall is signalled on a handset for this amount of time if the DECT call connection was previously briefly interrupted. Message <Subscriber>... - Page 69 Ascotel® DECT System Port configuration If an SB-8 / SB-8ANT is opkerated on two AD2 interfaces, it is recommended always to use two neighbouring ports. Note: If the ports of a radio unit are to be changed or if a radio unit is no longer used, it is important to remove the radio unit in the system configuration.
-
Page 70: Logging A Handset Onto The System
Ascotel® DECT System Logging a handset onto the system Tab. 12: Procedure for logging a handset on to the PBX Procedure Input in AIMS Input on Input on handset handset – not logged on – already logged on anywhere elsewhere 1. -
Page 71: Logging A Handset Off The System
Ascotel® DECT System Logging a handset off the system In the System Configuration under "Mobile: DECT” in the system configuration. "Select "Log Ascotel DECT subscriber off"; log-off procedure is initiated. Tip: The handset identification is deleted if the handset is located within the coverage range of a radio unit;... -
Page 72: Operation And Maintenance
Ascotel® DECT System Operation and Maintenance LED on the radio unit Ascotel DECT Each radio unit is equipped with 3 LEDs. The radio unit operating state is indicated by different LED colours and flashing sequences in cycles of 1 second, specifically by the middle LED on the SB-4, by one of the two outer LEDs on the SB-4+ and by the two outer LEDs on the SB-8 / SB-8ANT (separately for each AD2 bus). -
Page 73: Self-Test
Ascotel® DECT System An orange pilot LED indicates that the DECT signalling is active, i.e. DECT sequences are currently being transmitted between the handset and the radio unit. Examples: • With each keystroke on the handset the LED briefly lights up orange. •... -
Page 74: Malfunctions Of The Dect Radio Unit
Ascotel® DECT System Malfunctions of the DECT radio unit Tab. 14: Malfunctions of the DECT radio unit Error description Error cause / error handling No radio connection in a coverage area. Check LED on radio unit. Red LED flashing: • Check power supply / line length of AD2 bus cable (LED flashes briefly at regular intervals) •... -
Page 75: Overload Code Displays
Ascotel® DECT System Overload code displays The overload code displays on the DECT handsets can be activated and deactivated using the following key combination (toggle function): Long-click key 5 and then long-click key 3 (long-click = > 2 seconds). The overload code display is always deactivated after system initialization. Tab. -
Page 76: Dect Compatibility
Ascotel® DECT System DECT Compatibility GAP functionality The following table contains the network features as defined in the GAP standard. For each feature it indicates in a separate column whether it is supported by Ascotel® IntelliGate® or the Office DECT handsets. Tab. -
Page 77: Radio Units, Handsets
Ascotel® DECT System Feature In Office DECT In Ascotel® handset IntelliGate® Encryption deactivation PP initiated — — ✓ ✓ Calling Line Identification Presentation (CLIP) ✓ Internal Call — Service Call — — PP: Portable Part FP: Fixed Part M: Mandatory (this feature must be supported by GAP compliant equipment) O: Optional —: The Office DECT handsets or Ascotel®... -
Page 78: Technical Data
Ascotel® DECT System Technical Data Tab. 18: Ascotel DECT Radio units Duplex method Time-division multiplex, 10 ms frame length Frequency range 1880 MHz to 1900 MHz Frequency bands (carrier) Channel spacing (carrier distance) 1,728 MHz Transmission rate 1152 kbit/s Duplex channels per carrier SB-4 / SB-8 6 / 12 Number of channels (duplex channels) SB-4 / SB-8 60 / 120... -
Page 79: Index
Ascotel® DECT System ..... . 55 Index - Overview ..... . . 47 - Settings - Short-click .
Need help?
Do you have a question about the Ascotel IntelliGate A150 and is the answer not in the manual?
Questions and answers