Solid State Logic C100 HDS Installation Manual
Digital broadcast console
Hide thumbs
Also See for C100 HDS:
- Installation manual (64 pages) ,
- Software update manual (31 pages) ,
- Specification (7 pages)
Table of Contents
Advertisement
Quick Links
Advertisement
Chapters
Table of Contents

Related Manuals for Solid State Logic C100 HDS


Summary of Contents for Solid State Logic C100 HDS
- Page 1 Installation Manual...
- Page 3 Solid State Logic O U N D V I S I DIGITAL BROADCAST CONSOLE Installation Manual Part Number: 82BCBG01E Version 1.0...
- Page 4 © Solid State Logic All Rights reserved under International and Pan-American Copyright Conventions C10 HD, C100 HD, C100 HDS, C200 HD, C300 HD, Blackrock, RIO, NetBridge, Solid State Logic and SSL are trademarks of Solid State Logic All other product names and trademarks are the property of their respective owners...
-
Page 5: Table Of Contents
About This Manual Safety Information Regualtory Information 2 – P eCtIon reParatIon Services Available From SSL Physical Requirements Technical Requirements Installation Cabling C100 HDS System Components 2-13 System Options 2-34 3 – I eCtIon nStallatIon Power Supply Connections Sync Connections Network Connections... -
Page 6: Safety Information
Mains Supply and Phases Mains Isolation and Over-Current Protection Electrical Safety Warning Physical Safety eGulatory nforMatIon CE Certification FCC Certification Instructions for Disposal of WEEE by Users in the European Union Page ii Section 1: Introduction C100 HDS Installation Manual... -
Page 7: Bout T Hism M Anual
The information provided by this manual is relevant to the all versions of the C100 HDS. Any aspects of the C100HDS system which may be subject to specific customisation – Master Channel layout and meter panel as examples – will be documented separately and supplied with the console. -
Page 8: Definitions
IEC 60320 C13 LL MAINS CORDS SUPPLIED ARE FITTED WITH AN TyPE SOCkET HEN CONNECTING TO SUPPLy OUTLETS ENSURE THAT APPROPRIATE SIzED CONDUCTORS AND PLUGS ARE USED TO SUIT LOCAL ELECTRICAL REqUIREMENTS Page 1-2 Section 1: Introduction C100 HDS Installation Manual... -
Page 9: Mains Supply And Phases
Take particular care if removing a fully populated RIO chassis from an equipment rack. If the console trim is removed for any reason then there may be sharp edges exposed on the frame metalwork. C100 HDS Installation Manual Section 1: Introduction... -
Page 10: R Egulatory I Nformation
Ce C ertIfICatIon The C100 HDS system is CE compliant. Note that cables supplied with SSL equipment may be fitted with ferrite rings at each end. This is to comply with the current regulations and these ferrites should not be removed. -
Page 11: Section 2 Preparation
Analogue Cables Digital Cables Serial cables System Wiring Overview Fibre cables Fibre Standards I/O Fibre Connection Arrangements 2-10 Channel Capacity 2-11 Blacklight Interface for RIO Stageboxes 2-11 Fibre Cabling Examples (See Opposite) 2-11 C100 HDS Installation Manual Section 2 Page 2-i... - Page 12 Contents … ection ontentS c100 HDS System components 2-13 C100 HDS Console 2-13 Frame Layout 2-13 Connector Panels 2-13 Console Connectors 2-15 The Blackrock Processor 2-17 Audio Processor (DSP) 2-17 Single Board Computer (SBC) 2-17 Console Networks 2-17 Fibre I/O Ports...
-
Page 13: Services Available From Ssl
• Signal sources available raining Three days of standard operator training are available for each C100 HDS system. This is normally scheduled to take place immediately after installation and, if commissioning is included, is usually carried out by the commissioning engineer. A further day of advanced operator training is available at additional cost. -
Page 14: Factory Warranty
The standard warranty period may optionally be extended up to a maximum of 5 years. Three levels of extended cover can be specified: ‘Out-of-hours Pager Support’, ‘Parts supply’ and ‘Parts and Labour’. In each case the travel and subsistence costs are not included. Page 2-2 Section 2: Preparation C100 HDS Installation Manual... -
Page 15: Physical Requirements
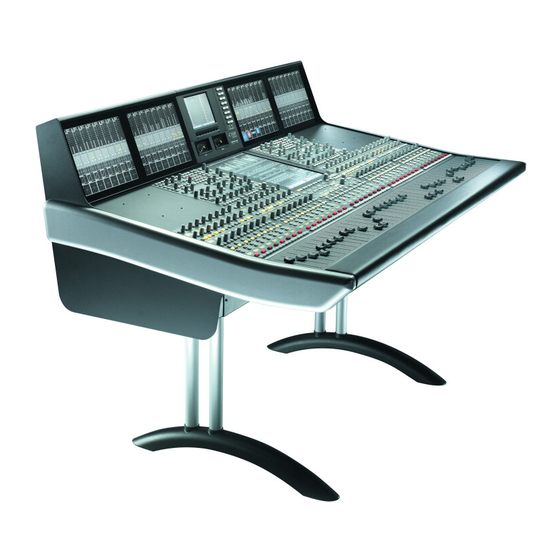
Each C100 HDS control surface consists of a single 8-fader master section (usually referred to as the centre section) plus additional eight-fader channel bays. Integrated racking sections, producer’s tables or corner sections are not available. • The control surface is available in sizes of 16 to 64 channel faders – plus the centre section. -
Page 16: Acoustic Isolation
Clearance for service access will also be required in front of and behind the rack into which the Blackrock processor and RIO units are installed so that cards can easily be removed. See the drawing on pages 2-10 and 2-14 for minimum clearances. Page 2-4 Section 2: Preparation C100 HDS Installation Manual... -
Page 17: Technical Requirements
– the ground wire must always be connected. C100 HDS systems feature dual-redundant power supplies as standard and are therefore fitted with two separate IEC mains input connectors. (See note on UPS provision below). -
Page 18: Computer For File Management
Ethernet hub. A hub may also be required to create the ipMIDI network. Hubs or switched provided must be at 100mb capable. For additional network connection detail see pages 2-8, 3-5 and 3-29. Page 2-6 Section 2: Preparation C100 HDS Installation Manual... -
Page 19: Network Cables
C100 HDS systems are supplied with mains leads, sync termination and short cables to allow the system to be connected for initial testing. Systems are not supplied with the longer runs of network, fibre, sync or other cabling necessary to connect remote I/O boxes or to integrate with associated studio systems. -
Page 20: System Wiring Overview
– Duplex optical fibre SSL Network – Ethernet TCP/IP Network – Ethernet Sync Distribution – 75R Coax Analogue Audio – Balanced Digital Audio – 110R Balanced Router / Control – RS422 Serial Page 2-8 Section 2: Preparation C100 HDS Installation Manual... -
Page 21: Fibre Cables
Default fitment “ Multimode 62.5/125um <300m No longer available “ Singlemode 9/125um 2,000m Option Blacklight Multimode 50/125um 300m Default fitment “ Multimode 62.5/125um 150m No longer available “ Singlemode 9/125um 2,000m Option C100 HDS Installation Manual Section 2: Preparation Page 2-9... - Page 22 Optional upgrade MADI MADI MADI MADI Remote I/O MADI Alpha-Link Live-R, 2, 3 & 4 MORSE stagebox or RIO MADI 1 44.1k 38.2k MADI POWER INPUT OUTPUT SAMPLE CLOCK METERS RATE Page 2-10 Section 2: Preparation C100 HDS Installation Manual...
-
Page 23: Fibre Cabling Examples (See Opposite)
The number of fibre connections that will need to be run between the processor and each remote i/o locations will depend on the type of connection chosen. All I/O units are equipped with two fibre connectors to allow backup audio cables to be installed C100 HDS Installation Manual Section 2: Preparation Page 2-11... - Page 24 Touch Screen VU Meters Phase Scope (Option) Channel TFT Screen Top Trim Master Tile Channel Control Tile Fader Tile Side Arm Trim Front Buffer (Optional) Centre Control Tile Power Supplies Connector Panels Page 2-12 Section 2: Preparation C100 HDS Installation Manual...
-
Page 25: C100 Hds System Components
The I/O connector panel (see diagram opposite) is located beneath the centre section of the console. The mains input panel is located beneath the bay to the left of the centre section. The mounting pillars for the D-sub connectors fitted to the connector panel use the UNC-440 thread. C100 HDS Installation Manual Section 2: Preparation Page 2-13... - Page 26 SSL Network SSL Network Touchscreen/Keyboard (Backup) Used (Main) Used IR Receiver Used 3 x User Option (VGA In) Talkback Microphone *Phasescope *Phasescope VU Inputs Output Diagnostics Inputs (Analogue) (Digital) Page 2-14 Section 2: Preparation C100 HDS Installation Manual...
-
Page 27: Console Connectors
Automatic control backup will be included on systems that are equipped with processor redundancy. Allocation of function is setup in system software. Page 3-27. DDitionaL onnector aneL RS422 RS422 Touchscreen # 5 x blank for user option Serial 2 Serial 1 VGA Out C100 HDS Installation Manual Section 2: Preparation Page 2-15... - Page 28 Dual Power Supplies DSP Processor SSL-Network Hub NET 1 NET 1 NET 1 NET 2 NET 2 NET 2 SYNC SYNC SYNC SSL TCP/IP SSL TCP/IP SSL TCP/IP SBC Processor Page 2-16 Section 2: Preparation C100 HDS Installation Manual...
-
Page 29: The Blackrock Processor
Blacklight links provide 256 audio channels per fibre and operate as two main-plus-redundant pairs. A 4- port I/O card will therefore provide two Blacklight audio links. Note that Blacklight links can only be used with the RIO stageboxes. Refer to page 2-9 for fibre cable specifications. C100 HDS Installation Manual Section 2: Preparation Page 2-17... - Page 30 Fibre Ports 1–4 Fibre Ports 5–8 SSL Network Standard Option NET 1 NET 2 SYNC SSL TCP/IP SSL Net ipMIDI Sync RS422 SSL Net TCP/IP (DSP) Serial Used (SBC) Network Kbd/mouse Page 2-18 Section 2: Preparation C100 HDS Installation Manual...
- Page 31 I/O capacity. The standard MADI ports support 64 audio channels, either individually or as two redundant pairs. Blacklight links (RIO only) support 256 audio channels – configured as two redundant pairs. C100 HDS Installation Manual Section 2: Preparation Page 2-19...
- Page 32 RMP - 2 AES / EBU – A AES / EBU – B AES / EBU – C MADI OUT MADI IN IN WORD CLOCK OUT EXPANSION PORT RMP - 3 VIDEO IN Page 2-20 Section 2: Preparation C100 HDS Installation Manual...
-
Page 33: Alpha-Link Live-R
• The ‘RMP 1, 2 & 3’ control connectors have a different pinout. Standard Ethernet cables CANNOT be used. Refer to Appendix page 4-12. • The USB connector is not fitted. The additional ‘Expansion Port’ connector is not used and does not require a connection. C100 HDS Installation Manual Section 2: Preparation Page 2-21... -
Page 34: Alpha-Link Live
PORT NUMBER MIC/LINE IN 1 MIC/LINE IN 2 MIC/LINE IN 3 MIC/LINE IN 4 MIC/LINE IN 5 MIC/LINE IN 6 MIC/LINE IN 7 MIC/LINE IN 8 LINE OUT 1 – 8 Page 2-22 Section 2: Preparation C100 HDS Installation Manual... -
Page 35: Connector Summary
Control data connection to Alpha-Link LIVE-R.* *Standard Ethernet cables can be used to connect to Alpha-Link LIVE-R. Custom pinout is required to connect to Alpha-Link Live. See Section 4-12 for the connector pinouts. C100 HDS Installation Manual Section 2: Preparation Page 2-23... - Page 36 System Components rio L ayout 344mm rio r LearanceS 280mm min. 100mm (For airflow) Page 2-24 Section 2: Preparation C100 HDS Installation Manual...
-
Page 37: Remote I/O Rack (Rio)
– refer to the table on page 2-9. Singlemode and multimode interfaces and connectors are almost identical in appearance but are operationally incompatible – the standards must NOT be mixed within a system. C100 HDS Installation Manual Section 2: Preparation Page 2-25... - Page 38 IN 6 AES/EBU OUT IN 5 ANALOGUE OUT 1 - 24 IN 4 9 - 16 1 - 8 IN 3 IN 2 IN 1 25 - 32 17 - 24 Page 2-26 Section 2: Preparation C100 HDS Installation Manual...
-
Page 39: Rio - Micamp Card
1m or 3m interconnecting leads. Do not attempt to extend the panel interface leads beyond the 3m maximum as doing so could increase the risk of data corruption. Connector pinouts are listed on page 4-10. bNC b REAkOuT PANEL C100 HDS Installation Manual Section 2: Preparation Page 2-27... - Page 40 POWER B POWER A NETWORK 37 - 48 25 - 36 37 - 48 25 - 36 13 - 24 1 - 12 13 - 24 1 - 12 CONSOLE ADDRESS Page 2-28 Section 2: Preparation C100 HDS Installation Manual...
-
Page 41: Remote Gp Io Interface
If used for discrete track arming with associated tally, the tally must return to the same number input as the arming output signal, (ie. The tally for GP Out 1 will be on GP In 1). C100 HDS Installation Manual Section 2: Preparation... - Page 42 S tagebox Line Output AES/EBU Line Input Embedder/ Tx Isolated In/Out De-embed’ AES/EBU Mic/Line In Line In & Line Output In/Out TX Isolated Line Out Input SRC morSe 3u r outer Page 2-30 Section 2: Preparation C100 HDS Installation Manual...
-
Page 43: Morse System (Option)
The fibre links between the Blackrock and the MORSE router are available as multimode or as singlemode to special order. Blackrock to MORSE fibre leads are LC – SC duplex. The MORSE system is more fully described in a separate SSL document ‘Morse Specification Guide’ part number: 82S6SMO10A. C100 HDS Installation Manual Section 2: Preparation Page 2-31... - Page 44 AES OUT SDI-1 SDI-2 SDI-3 SDI-4 AES OUTPUTS (UNBALANCED) MADI ETHERNET eDunDant ibre onnection Sing MADI Opti-Coax Media Converter SC – LC fibre BNC – BNC MADI ST – LC fibre Page 2-32 Section 2: Preparation C100 HDS Installation Manual...
-
Page 45: Sdi-Madi Interface
This signal is a duplicate of the primary MADI but will need to be converted to fibre media – this can be achieved by using the SSL copper-to-fibre media converter ‘Opti-Coax’. The diagram opposite shows the redundant connection. C100 HDS Installation Manual Section 2: Preparation Page 2-33... -
Page 46: System Options
Space is available in the console centre section into which a multichannel LCD meter can be fitted. Two types available to order: RTW Touchmonitor TM-7 (8ch analogue plus 8ch digital) or the MSD600M (8ch digital as standard but modular and customisable). Both phase-scopes feature loudness metering as standard. Page 2-34 Section 2: Preparation C100 HDS Installation Manual... -
Page 47: Section 3: Installation
3-21 metering and talkback 3-23 VU Meters 3-23 Phasescope 3-23 Talkback 3-23 oscillator 3-25 user option macro Switches 3-25 rS422 Serial Ports – automation/router Data 3-27 touchscreen video output 3-27 ipmiDi 3-29 C100 HDS Installation Manual Section 3 Page 3-1... - Page 48 BNC ‘T’ Adapter and 75R termination Blackrock SYNC Sync Source Redundant SYNC Blackrock Option Sync Distribution Amplifier POWER Alpha-Link LIVE-R WORD CLOCK VIDEO IN Optional 2nd sync feed for ‘Mirrored’ configuration MORSE Router Option Page 3-2 Section 3: Installation C100 HDS Installation Manual...
-
Page 49: Power Supply Connections
MADI stream. Refer to Appendix page 4-16 for the full list of supported sync frame rates C100 HDS Installation Manual Section 3: Installation Page 3-3... - Page 50 37 - 48 25 - 36 13 - 24 1 - 12 13 - 24 1 - 12 CONSOLE ADDRESS MORSE routes Option MORSE Router Optional 2nd network links for ‘Mirrored’ configuration Page 3-4 Section 3: Installation C100 HDS Installation Manual...
-
Page 51: Network Connections
The file management PC can also be used to control a MORSE router providing it is equipped with two independent network cards. This configuration will also allow additional suitably licensed PCs access the router. C100 HDS Installation Manual Section 3: Installation... -
Page 52: Network Configuration
‘Terminal’ application that is included with the OSX operating system. For PC users it will be necessary to install a 3rd-party terminal emulator application. (Most terminal applications support ssh connection; the free, downloadable application ‘PuTTY’ is a suitable example). This program will be used to communicate with the C100 HDS administration programmes. - Page 53 Because the ‘root’ login has full access permissions it is recommended that after running either setup program the connection to the server is closed: • At the server prompt type: ‘exit’ <CR> This action will prevent unintentional alteration of critical files. C100 HDS Installation Manual Section 3: Installation Page 3-7...
-
Page 54: Time Zone Selection
If the console is fitted with a backup processor it is important to input the correct time zone to both the main and the backup servers – the servers will not synchronise correctly if set to different time-zones. It can take 10–15 minutes for dual Blackrock systems to become synchronised. Page 3-8 Section 3: Installation C100 HDS Installation Manual... -
Page 55: Server Configuration Options
• Save and exit the setup program using the ‘(s)’ option. (You may receive a network restart message). • Then, at the server prompt, type: ‘reboot’ <CR> The core will then immediately restart and you will be logged out. C100 HDS Installation Manual Section 3: Installation Page 3-9... -
Page 56: Alpha-Link Live-R
OUT 2 IN 2 AES/EBU - A MADI OUT 1 – 8 IN 1 – 8 ANALOGUE 1 – 8 OUT 1 IN 1 OUT 2 IN 2 AES/EBU - A MADI Page 3-10 Section 3: Installation C100 HDS Installation Manual... -
Page 57: Fibre Cables
Panels can be ordered with either 1m or 3m connection cables. Note that 3m is the maximum distance at which the panel can be located. 8-rmP r emote For remote control connection to separate Alpha-Link 8-RMP microphone amplifier units. See following pages. C100 HDS Installation Manual Section 3: Installation Page 3-11... -
Page 58: Alpha-Link 8-Rmp 1
Alpha-Link 8-RMP 2 LINE OUT 1 – 8 D25M – D25M 8 channel balanced audio Remote Control Link (See notes) emote onFiguration 1 2 3 +48v -15dB ACTIVE POWER INPUT TYPE GAIN Page 3-12 Section 3: Installation C100 HDS Installation Manual... -
Page 59: Alpha-Link 8-Rmp
NB. It is possible to set channel numbers above ID3. Settings ID4 and above are invalid and will result in a loss of control of the unit. f. Press the ‘TYPE’ and ‘GAIN switches down together for about 1 second. This will exit the configuration mode. Remember to reconnect the control lead. C100 HDS Installation Manual Section 3: Installation Page 3-13... - Page 60 Port B MADI – Main Port A MADI – Backup Port B – L ibre onnectionS ink PLuS roceSSor eDunDancy Backup Blackrock Main Blackrock Port A Port B Port A Port B Page 3-14 Section 3: Installation C100 HDS Installation Manual...
-
Page 61: Morse Stageboxes
• It is recommended that spare cables are installed to remotely located units to allow for possible damage or future expansion. Suitable ready made fibre cables are available from networking and computer supply outlets. C100 HDS Installation Manual Section 3: Installation Page 3-15... - Page 62 Lackrock NET 1 NET 2 SYNC USB 1 NET 1 NET 2 SYNC USB 1 SSL TCP/IP SSL TCP/IP RUNNING LOCKED POWER DATA SYNC ETHERNET Main Redundant Link Backup Page 3-16 Section 3: Installation C100 HDS Installation Manual...
-
Page 63: Rio Connection
The ‘Sync’ connector fitted to the front of the RIO interface card provides an output of Wordclock at the system’s clock rate. tHernet The Ethernet connector on the RIO interface card is non functional so must not be connected. C100 HDS Installation Manual Section 3: Installation Page 3-17... - Page 64 IN 5 ANALOGUE OUT 1 - 24 IN 4 DL96 Female D25 Female 9 - 16 1 - 8 IN 3 IN 2 IN 1 25 - 32 17 - 24 Page 3-18 Section 3: Installation C100 HDS Installation Manual...
-
Page 65: Rio I/O Cards
Do not attempt to extend the panel interface leads beyond the 3m maximum; the signals are unbalanced and doing so could increase the risk of data corruption. Connector pinouts are listed on page 4-10. C100 HDS Installation Manual Section 3: Installation Page 3-19... - Page 66 25-way D-type Female 25-way D-type Male Point Input Circuit The input is triggered by applying an AC or DC voltage of between 4V and 30V. The current drawn is approximately 10mA. Page 3-20 Section 3: Installation C100 HDS Installation Manual...
-
Page 67: Remote Gp Io Box
1. It is not possible for two consoles to share control of the same IO unit. nDicatorS StatuS LeD PoWer LeD State Indication State Indication Flashing quickly Ethernet activity Steady illumination Both PSUs powered Flashing slowly Network not connected Flashing slowly One PSU powered C100 HDS Installation Manual Section 3: Installation Page 3-21... - Page 68 ANALOGUE 9 – 16 ANALOGUE 17 – 24 AES/EBU - A AES/EBU - B AES/EBU - C Balanced Analogue Cable 110R Digital Cable * Connectors fitted only when a phasescope has been specified Page 3-22 Section 3: Installation C100 HDS Installation Manual...
-
Page 69: Metering And Talkback
The C100 HDS console contains an in-built talkback microphone and amplifier. The microphone is located next to the main monitor level pot on the centre-control tile. The output is balanced and at line level (approximately 0dB) and the circuit features an inbuilt compressor. - Page 70 User Meter Panel User / Hardwire (Latching) PSU 1 PSU 2 Solid State Logic S O U N D V I S I O N LEFT RIGHT Console Meters and Switch Panel Page 3-24 Section 3: Installation C100 HDS Installation Manual...
-
Page 71: Oscillator
VR2. SciLLator The C100 HDS provides an inbuilt software oscillator. The oscillator signal can be assigned to any console output without the need for external cabling. Alternatively, external hardware oscillators (either analogue or digital, mono, stereo or 5.1) may be supplied. In this configuration one or more circuits should be allocated on the appropriate analogue or digital input connector;... - Page 72 System Components Console Serial Port Serial Port Touchscreen XGA out Blackrock NET 1 NET 2 SYNC SSL TCP/IP Serial Port Page 3-26 Section 2: Preparation C100 HDS Installation Manual...
-
Page 73: Rs422 Serial Ports - Automation/Router Data
Two serial control services are available on C100 HDS systems: 1. Router name transfer using the Probel PB08 protocol. 2. Remote control automation using the Sony ELC or Ross Overdrive protocols. An license upgrade is required to activate the Automation feature. - Page 74 Blackrock Rear Panel NET 1 NET 2 SYNC NET 1 NET 2 SYNC ipMIDI Network Router Workstation Computer Network lead RJ45 – RJ45 Page 3-28 Section 3: Installation C100 HDS Installation Manual...
-
Page 75: Ipmidi
To use the interface a third party ipMIDI software driver will need to be installed on the DAW computer. Using this method of communication allows the C100 HDS to be used with a wide variety of DAW applications on a number of different platforms. - Page 76 Page 3-30 Section 3: Installation C100 HDS Installation Manual...
-
Page 77: Section 4 - Appendices
Blackrock Processor RIO – Analogue and Digital I/O 4-10 Alpha-Link Live 4-11 Alpha-Link 8-RMP 4-12 GP IO 4-13 Audio interfacing 4-14 environmental Specification 4-15 Supported Sync Rates 4-16 SnMp 4-17 ndex C100 HDS Installation Manual Section 4 – Appendices Page 4-1... -
Page 78: C100 Hds Console
IEC 3-pin male 10A Network TCP/IP RJ45 100 baseT USB (touchscreen) USB A Meter input Analogue 25-way D-type male Meter input Digital 25-way D-type female T/B audio output XLR 3-way male Page 4-2 Section 4 – Appendices C100 HDS Installation Manual... -
Page 79: Rio
Duplex LC fibre multimode GPI Input 25-way D-type male GPI Output 25-way D-type female † RIO units must be supported on rack shelves. Do not rely on the rack ears alone. C100 HDS Installation Manual Section 4 – Appendices Page 4-3... -
Page 80: Alpha-Link 8-Rmp
XLR 3-pin female Line level Output 25-way D-type female Remote control RJ45 socket † Alpha-Link units must be supported on rack shelves. Do not rely on the rack ears alone. Page 4-4 Section 4 – Appendices C100 HDS Installation Manual... -
Page 81: Console Footprint Drawing - 32 Channels
Specifications – 32 c onSoLe ootpRint RAwing HAnneLS C100 HDS Installation Manual Section 4 – Appendices Page 4-5... -
Page 82: Connector Details
Hood Plug Socket 1 2 3 4 5 6 7 8 8 7 6 5 4 3 2 1 Connectors Viewed From Wiring Side Dimensions: 29mm x 69mm Page 4-6 Section 4 – Appendices C100 HDS Installation Manual... -
Page 83: Connector Pinouts
Circuit 5 input Input 5 Circuit 5 input Circuit 6 input Input 6 Circuit 6 input Circuit 7 input Input 7 Circuit 7 input Circuit 8 input Input 8 Circuit 8 input C100 HDS Installation Manual Section 4 – Appendices Page 4-7... - Page 84 Switch common Mode Rx Data Select Memo Tx Data Gain Reset Shift * The Digital Input and Diagnostics connectors will only be fitted if an LCD meter has been specified. Page 4-8 Section 4 – Appendices C100 HDS Installation Manual...
-
Page 85: Rs422 Serial
Connector Type: 9-way D-type Male Description Notes Chassis TX– No connection RX– Chassis LAckRock RoceSSoR RS422 Serial Location: Blackrock Rear Panel Connector Type: 9-way D-type Male Description Notes ‘Controller’ Pinout … C100 HDS Installation Manual Section 4 – Appendices Page 4-9... -
Page 86: Rio - Analogue And Digital I/O
Connector Type: 25-way D-type female 25 - 32 17 - 24 Cold Screen Notes Pin 13 unused AES/EBU OUT 9 - 16 1 - 8 25 - 32 17 - 24 Page 4-10 Section 4 – Appendices C100 HDS Installation Manual... - Page 87 Ground In channels 7/8 Inputs In channels 7/8 Ground In channels 5/6 In channels 5/6 Ground In channels 3/4 In channels 3/4 Ground In channels 1/2 In channels 1/2 Ground C100 HDS Installation Manual Section 4 – Appendices Page 4-11...
-
Page 88: Alpha-Link 8-Rmp
Notes Pin 13 unused 8-RMp c LpHA iVe to LpHA ontRoL ABLe inoUt RJ45 Plug RJ45 Plug *Applicable to Alpha-Link Live only. Alpha-Link Live-R can use pin-pin Ethernet compatible cables Page 4-12 Section 4 – Appendices C100 HDS Installation Manual... -
Page 89: Gp Io
Output 9A Input 22 Output 9B Input Output 10A Input 23 Output 10B Input Output 11A Input 24 Output 11B Input Output 12A Input 25 Output 12B +12V 450mA maximum C100 HDS Installation Manual Section 4 – Appendices Page 4-13... -
Page 90: Audio Interfacing
0V which will give rise to audible hum and buzz. The recommendation for connection of balanced to unbalanced equipment is to isolate unbalanced connections by using a balancing transformer. Balanced – Unbalanced One screen connected to chassis (Recommended) Chassis Page 4-14 Section 4 – Appendices C100 HDS Installation Manual... -
Page 91: Environmental Specification
It is recommended that air conditioning systems are designed such that the relative humidity does not fall below 30% during periods of operation. C100 HDS Installation Manual Section 4 – Appendices Page 4-15... -
Page 92: Supported Sync Rates
1080PsF 24Hz(1080i 48Hz) 1080PsF 23.976Hz(1080i 47.95Hz) 23.967 23.967 720p 60Hz 720p 59.94Hz 59.94 59.94 720p 50Hz nSUppoRted RAteS PAL 23.976 720p 30Hz 720p 29.97Hz 720p 25Hz 720p 24Hz 720p 23.976Hz Page 4-16 Section 4 – Appendices C100 HDS Installation Manual... -
Page 93: Snmp
Ethernet network in some way. In the case of the C100 HDS system, the Blackrock DSP card, the console control surface and the RIO I/O unit are all systems which can be managed –... - Page 94 This string is used for read/write SNMP ‘set’ requests. By default this SNMP private community string string will be set to ‘private’ (although at present C100 HDS has no writable SNMP objects). The trap community string defines the community that ‘trap’ events –...
- Page 95 System info, computer name. Finally, use files, Load MiBs to read in the C100 HDS MIB files. These files will be found on the SBC in the /usr/share/snmp/mibs folder. They will be called SOLID-STATE-LOGIC-C110-MIB.txt for the Blackrock DSP card and SOLID-STATE-LOGIC-RIO-MIB.txt for the B-RIO.
- Page 96 Any traps received can be viewed by selecting tools, trap Receiver. Clicking on an individual trap will display its details in the bottom half of the window. c100 HdS SnMp o BjectS The individual SNMP objects for the C100 HDS (Blackrock) system that are exported from V1.1/5 software are as follows: object type description...
- Page 97 SNMP c100 HdS SnMp t RApS The standard ‘trap’ objects that are available for the C100 HDS system in V1.1/5 software are shown in the following table. object from description System System restarting SSLC110Restarting System Blackrock DSP card memory low...
- Page 98 A great deal of information regarding SNMP is of course available from the internet whilst a highly recommended book is ‘Essential SNMP, 2nd edition’, published by O’Reilly Media (ISBN10: 0-596-00840-6, ISBN13: 9780596008406). Page 4-22 Section 4 – Appendices C100 HDS Installation Manual...
- Page 99 C100 HDS Installation Manual Section 4 – Appendices Page 4-23...
- Page 100 Page 4-24 C100 HDS Installation Manual...
- Page 101 2-17 Metering 3-23 MORSE 2-31 MORSE Stagebox 2-30 MORSE Stageboxes 3-15 Multichannel User Meter 2-34, 3-23 Earth Environmental Specification 4-15 Extended Warranty Network 2-17, 3-5, 3-21 Network Cables Network Configuration Fibre cables C100 HDS Installation Manual Main Index Page X-1...
- Page 102 2-34 SNMP 4-17 Specifications ssl_setup SSL Network Static 4-15 Sync 2-7, 3-3 Sync Source Talkback 2-15, 3-23 Talkback Level 3-25 TCP/IP TFT External Input 2-34 Time Zone Touchscreen 3-27 Training Trim 2-13 Page X-2 Main index C100 HDS Installation Manual...
- Page 103 Solid State Logic Solid State Logic O U N D V I S I O U N D V I S I Digital Broadcast Console Digital Broadcast Console 71mm 71mm Installation Installation Manual Manual 82BCBG01E 82BCBG01E 3 mm 3 mm...
Need help?
Do you have a question about the C100 HDS and is the answer not in the manual?
Questions and answers