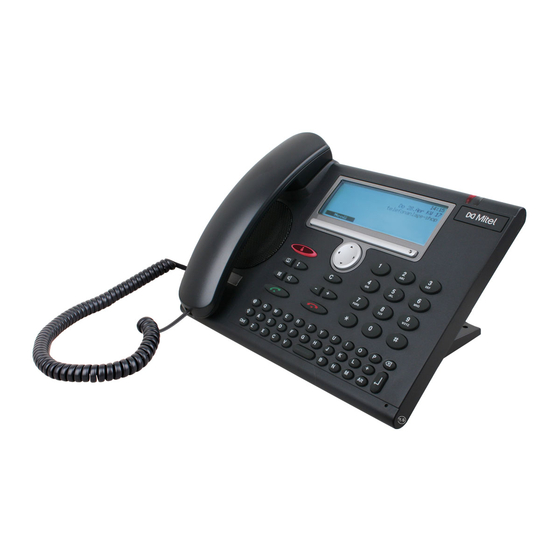
Aastra 5380 User Manual
Communications systems
Hide thumbs
Also See for 5380:
- User manual (166 pages) ,
- Quick user manual (24 pages) ,
- User manual (131 pages)

Subscribe to Our Youtube Channel
Related Manuals for Aastra 5380


Summary of Contents for Aastra 5380
- Page 1 A150 A300 2025 Aastra Communications Systems 2045 2065 Aastra 5380 / Aastra 5380ip User's Guide...
-
Page 2: Operating And Display Elements
Operating and Display Elements Operating and Display Elements ■ Operating elements Display • In the upper area: status display with symbols. • In the middle area: current displays on the telephone traffic. • In the lower area: display of the available Foxkey functions. Indicator LED •... - Page 3 If preconfigured as a line key: Set up or answer call via line. Configure key: press and hold down. Write-on labels on Aastra M530 expansion key module (optional) Write-on labels for the configurable keys can be found on the internet at www.aastra.com/docfinder...
-
Page 4: Display Symbols
Call parked Retrieve parked call (Foxkey) Activate discreet ringing Telephone locked Loudspeaker/hands-free mode Microphone deactivated activated Headset mode activated Bluetooth® activated (Aastra 5380 Bluetooth® device connected only) (Aastra 5380 only) ■ Display symbols Aastra M535 Business number Private number Mobile number... -
Page 5: Safety Information
Security Security ■ Safety Information Failure to observe this information can be hazardous and infringe existing laws. Connections Always plug the phone cable connectors into the appropriate sockets. Do not modify the connections in any way. Mains connection Use the original power supply only. Connect the power supply only to power sources that conform to the indications on the device. -
Page 6: User Information
• Changing Terminal Names Please note that with implementing the I7.7 system, the Office KBM and Office DKBM are renamed in Aastra M530 / Aastra M535. • Your system administrator can set up several terminals for you that hold all the same phone number. -
Page 7: Document Information
Security ■ System and software-related functions Some systems or system versions do not support all the features. The corresponding text sec- tions are identified by a letter inside square brackets. The Chapter "System and Software-Related Functions", page indicates which system versions support the relevant features. ■... -
Page 8: Table Of Contents
Expansion key module Aastra M530⁄M535 (optional) ........ -
Page 9: Dialling And Phoning
Dialling and Phoning The following sections explain how to make phone calls simply and the functions your phone offers you whenever you receive a call. Answering Calls ........... . .10 Making calls . -
Page 10: Answering Calls
Dialling and Phoning Answering Calls This section explains the procedure for answering a call. ■ Answering a Call Your phone is ringing and the indicator LED is flashing. To answer the call, proceed as follows. Pick up the handset. Note: If the caller's phone number is received, it is shown on the display. -
Page 11: Making Calls
Dialling and Phoning Making calls This section explains the different ways you can make a call with your phone. ■ Dialling with the Phone Number You want to call someone and key in that person's phone number. With call preparation you can enter a phone number without it being dialled automatically, so you have time to check the number and, if necessary, correct it. - Page 12 Dialling and Phoning ■ Using Your Phone in Open Listening Mode You want other people in the room to be able to listen in to the call. The open listening function lets you activate the loudspeaker in addition to the handset. During a call: Press the Loudspeaker key.
-
Page 13: Muting The Microphone
• To find out how to connect a Bluetooth® headset, refer to chapter "Activate Bluetooth® operation and Bluetooth® device (Aastra 5380 only)", page 60. • To call a user, dial the user’s phone number and press the Call key or Loud- speaker key. -
Page 14: Using The Display And Operating Elements
Using the Display and Operating Elements The following sections explain how to operate your phone quickly and simply. Display ............. 15 Keys . -
Page 15: Display
Using the Display and Operating Elements Display ■ Display symbols and display text New events such as a call in your absence, a new message or activated functions (e.g. Forward- ing) are signalled on the display in the idle state by a symbol or a display text. You can then use the relevant Foxkey to call up the information. -
Page 16: Keys
The configurable keys of the expansion key module Aastra M535 can be operated as the other configurable keys. In addition, there are the following extensions: • If you remove an Aastra M535 or if you modify the order of the connected expansion key modules, the keys configuration does not change. -
Page 17: Input
Using the Display and Operating Elements Input ■ Digit keys You can use the digit keys for entering digits and passwords and for Quickdial. The characters are assigned to the keys as follows: A B C 2 a b c 2 D E F 3 G H I 4 d e f 3... -
Page 18: Correcting Your Input
Using the Display and Operating Elements <key> Shift + <Key> Ctrl + <Key> Ctrl + Shift + <Key> ñ Ñ ö ó ò ô õ ø Ö ó ò ô Õ Ø ß ü ú ù û Ü ú ù û ÿ... -
Page 19: Menu-Guided Navigation
Using the Display and Operating Elements ■ Moving the Cursor You want to go to a certain character for an input or correction. With the navigation key you can move the cursor to the left or right. Move the cursor with the horizontal navigation key. Menu-Guided Navigation ■... -
Page 20: Signals
Using the Display and Operating Elements ■ Other navigation possibilities Scrolling back through the menu: Press the correction key. ■ Resetting activated features You can deactivate again all the activated functions (e.g. Forwarding, Barring). Menu Press the Menu Foxkey. Activated features Scroll to Activated features and press the... -
Page 21: Supplementary Features
Supplementary features The following sections explain the supplementary features provided by your phone for more efficient use. Making and answering calls ........22 Using functions while in a call . -
Page 22: Making And Answering Calls
Supplementary features Making and answering calls This section explains some convenient features provided by your phone for making a call. ■ Dialling by Name You want to make a call by entering a name. Requirement: The name and the corresponding call number are stored in one of the system’s phone book or in an external phone directory connected to the system. -
Page 23: Dialling From The Phone Book
Supplementary features ■ Dialling from the phone book You want to search directly in one of the connected phone books. The surname and first name have to be separated by a space, for example "no s" for Noble Stephen. Ask your system administrator whether you should start with the surname or the first name. -
Page 24: Dialling From The Call List Of Unanswered Calls
Supplementary features Scroll through the list until the user you want is displayed. Pick up the handset. ➯ The phone number displayed is dialled. Notes: • The search function is not affected by upper/lower case and special charac- ters. • When searching in external phone books you must always enter portions of the first and last name and possibly of the town name. -
Page 25: Dialling From The Call List Of Answered Calls
Supplementary features ■ Dialling from the Call List of Answered Calls You want to call back someone whose call you answered. Your phone automatically stored the person's phone number on the list of answered calls. You can now call the person back using this call list. The list of answered calls contains a maximum of 10 entries. - Page 26 Pick up the handset. ➯ The phone number displayed is dialled. ■ Selecting with a configurable key on the Aastra M530⁄M535 expansion key module (optional) You want to call someone whose phone number is stored under a configurable key of the Aastra M530 or Aastra M535 expansion key module.
-
Page 27: Requesting A Callback
Supplementary features ■ Requesting a Callback You want to talk to a certain person. The person is busy or does not answer. You can make call- back requests to both internal and external users. Not all providers support this function. If the called party is busy, you can activate an automatic callback. -
Page 28: To Answer The Callback Request
Supplementary features ■ To answer the callback request Someone has asked you to call back. You can tell this from the lit attention LED in the idle state. The display reads Call back requested. Call To answer the callback request: Press Foxmenu >... -
Page 29: Answering Call Waiting
Supplementary features ■ Answering Call Waiting You are in a call and hear the call waiting tone. Someone is urgently trying to reach you. You can either answer, deflect or reject the call. Answer Answering the call: Press Foxmenu > Foxkey Answer. ➯... -
Page 30: Starting An Announcement
Supplementary features ■ Starting an Announcement You want to address internal users directly via their loudspeaker – where available – , without waiting for a reply (similar principle to that of an intercom system). Requirement: It is essential that the internal user has not barred his phone against announce- ment (for configuration see the Chapter "Do not disturb/Call waiting/Intrusion/Announcement/ Forward", page 66). -
Page 31: Private Call With Pin
Supplementary features ■ Private call with PIN You want to make a private call on your phone or on a third-party phone. With the aid of your PIN you can use any phone to make an external call with your own personal settings, even if that phone is locked for external calls. -
Page 32: Using Functions While In A Call
Supplementary features Using functions while in a call This section explains the different options provided by your phone while you are in a call. ■ Enquiry Call During a Call You want to call someone else briefly without losing your current call partner. Then you want to resume your conversation with your original call partner. -
Page 33: Making A Conference Call
Supplementary features ■ Making a Conference Call You are in a call and have a call party on hold at the same time. You want to include the party on hold in the conversation and hold a conference call. With the conference function you can include a call party on hold in the current conversation. From the conference call you can initiate an enquiry call to someone else. -
Page 34: Parking A Call Partner
Supplementary features Connecting without notification: Wait for the first ringing tone, then hang up. ➯ The other party is then called directly by your first call partner. Note: Recall: If the other party does not answer, the call comes back to your phone. ■... -
Page 35: Organising Absences From The Desk
Supplementary features Organising absences from the desk This section explains the different options provided by your phone when you want to leave your desk. Note: A forwarding applies to all connected terminals . ■ Organising absences using the Absence Key You want to leave your desk and set up your phone for your absence. -
Page 36: Forwarding Calls (Call Forwarding)
Supplementary features ■ Forwarding Calls (Call forwarding) You want to leave your desk. Calls for you are to be forwarded to a different destination (e.g. phone, Voice Mail, pager). With Call Forwarding you can forward incoming calls directly to a different destination. Menu Press Foxmenu >... - Page 37 Supplementary features ■ Forwarding a Call on No Reply (CFNR) You want calls that you receive on your phone to be forwarded to another destination. Both your own phone and the other destination will then start ringing. The system configura- tion determines whether or not there is a ringing delay at the other destination.
-
Page 38: Forward To Voice Mail
Supplementary features ■ Forward to Voice Mail You cannot momentarily be reached on your phone. If you forward to your Voice Mail, a user can leave you a voice message. You can use the global greeting or your own greeting (see Chapter "Configuring Voice Mail", page 69). -
Page 39: Locking Your Phone
Supplementary features ■ Forwarding to a message You cannot be reached on your phone. You want any internal user who calls you to get a text message. The subscriber hears the busy tone and obtains a text message on his display. Requirement: The internal user must have a phone capable of receiving text messages. -
Page 40: Unlocking Your Phone
Supplementary features General Scroll to General and press the Select Foxkey. Barring Scroll to Barring and press the Modify Foxkey. ➯ You are prompted to enter your PIN. <PIN> Enter the PIN and confirm with the Foxkey. <Setting value> Select the required type of barring and confirm with the Foxkey. -
Page 41: Functions For Special Situations
Supplementary features Functions for special situations This section explains the different options provided by your phone to deal with special situations. ■ Deflect a call during the ringing phase You do not want to answer a call yourself but deflect it to another user. With the function Deflect you can deflect calls to an internal or external user or to the Voice Mail... -
Page 42: Send Text Messages
Supplementary features ■ Send text messages You want to send a written message to an internal user. You can send a text message to an internal user. The text message will appear on the person's display. Requirement: The internal user must have a phone capable of receiving text messages. You can use one of the text messages stored in the system directly, modify it or create a new message. -
Page 43: Picking Up A Call
Supplementary features ■ Read Text Messages Your display shows New message and the envelope symbol. The right-hand indicator LED is lit. Show Press Foxmenu > Foxkey Show. ➯ The display shows the sender and the date/time of the text message. Read Read Message: Select the message you want and press Foxmenu >Foxkey Read. - Page 44 Supplementary features ■ Using the DTMF Mode. Activating/deactivating DTMF You want to be able to use your phone to control other equipment or to access certain services, such as remote polling of an answering machine or telebanking. For these services you need the DTMF mode.
-
Page 45: Making A Call On A Third-Party Phone
Supplementary features ■ Making a call on a third-party phone You want to make a call on a third-party phone using your personal settings, for example on a colleague’s phone or in a meeting room. You can activate a third-party phone to make an internal or external call using your personal settings, even if the phone is locked for external calls. -
Page 46: Answer The Pager
Supplementary features ■ Paging an Internal User You are unable to reach an internal user and thus want to page them. If the system is equipped with a paging system (PS), the person can be paged. The paged per- son can answer from any phone. Menu Press Foxmenu >... -
Page 47: Answering A General Bell
Supplementary features ■ Answering a General Bell Via the general bell, you hear either your personal ringing pattern or the general ringing signal. Calls with the general bell as the destination can be signalled visually or acoustically via an external piece of supplementary equipment. The call can be answered on any terminal. Ask your system administrator whether a general bell is set up. -
Page 48: Tracking A Malicious Call
Supplementary features ■ Suppressing your call number from your called party's terminal display You do not want your call number to appear on the terminal display of a called party in the pub- lic network. You have two possibilities: • If you never want the phone number to be displayed, set CLIR permanently. -
Page 49: Ring Alone
Supplementary features You can activate a call routing for all terminals. If you have not configured a call routing, the fac- tory setting (all terminals are ringing) is used as standard. This function must be stored under a Foxkey or a function key (see Chapter "Configuring Keys", page 70). -
Page 50: Setting Functions By Remote Control
Supplementary features Setting functions by remote control This section explains how you can alter your phone’s settings even if you are not directly at your phone. You are not at your desk and want to set various functions on your phone from a different phone. -
Page 51: Organisation Within The Team
This section explains the different options provided by your phone to communicate in a team. To be able to set up a Team key, you need to make sure an Aastra M530 or Aastra M535 expansion key module is connected. Contact your system administrator for more information. -
Page 52: Substituting For A Team Partner
Supplementary features ■ Substituting for a Team Partner Your team partner is called. The Team key flashes. You know that your team partner is not at his desk at present and therefore decide to answer the call. You can answer the call using the Team key. As soon as you have answered the call, your team partner is free again. -
Page 53: Line Keys
Line keys. Line keys turn your phone into a key phone. To be able to set up line keys, you need to make sure an Aastra M530 or an Aastra M535 expansion key module is connected. -
Page 54: Switching Active Lines
Supplementary features ■ Making Calls using the line key You want to make a call via a Line key. You can make a call via any free Line key. Each Line key has its own phone number; in other words when you make a phone call you transfer the phone number belonging to the active Line key. -
Page 55: Personalizing Your Phone
Personalizing Your Phone These sections explain how to adapt the phone’s basic settings to suit your personal requirements. Display ............. 56 Setting the Ringing Properties (Audio) . -
Page 56: Display
You can set the display contrast, the backlight and the backlight intensity. Note: Please note that the backlight intensity may become less if Aastra 5380 is not connected to the power supply. Menu Press the Menu Foxkey. Settings Scroll to... -
Page 57: Setting The Ringing Properties (Audio)
Personalizing Your Phone Setting the Ringing Properties (Audio) This section explains how to set your phone's ringing tone properties. ■ Setting the ringing volume during ringing You want to adjust the ringing volume. You can adjust the ringing volume while the phone is ringing. Quieter: Press the –-key. -
Page 58: Setting The Ringing Properties
Note: Please note that the ringing volume may be reduced if Aastra 5380 is not connected to the power supply. Menu Press the Menu Foxkey. Settings Scroll to Settings... -
Page 59: Hands-Free And Headset Settings
Personalizing Your Phone Hands-free and headset settings This section explains other ways in which you can make calls with your phone. ■ Automatic Hands-Free Mode You want to answer a call without picking up the handset or pressing a key. You can choose whether your phone should immediately and automatically activate hands-free operation after one ring, for internal calls or announcements. -
Page 60: To Activate Headset Operation
The microphone is now deactivated, is displayed. ■ Activate Bluetooth® operation and Bluetooth® device (Aastra 5380 only) You want to make a call using a Bluetooth®-supported headset or to set up a conference using a Bluetooth®-supported conference unit. Contact your system administrator to install a Blue- tooth®... - Page 61 Personalizing Your Phone The terminal automatically discovers a Bluetooth® device and activates the Bluetooth® oper- ation. You can activate or deactivate the Bluetooth® manually. The following Bluetooth® applications are supported: • Headsets • Conference units Only one Bluetooth® connection at a time is possible. Note: To find out how to make phone calls with the headset, refer to the Chapter "Using a...
-
Page 62: General Settings
Personalizing Your Phone General settings This section explains other settings you can make on your phone. ■ Selecting the language The display text is not in the language you want. You can select a different language. The menu item under which you select your language is marked by an "*"... -
Page 63: Changing The Pin
Personalizing Your Phone ■ Changing the PIN You want to change the PIN used to lock/unlock your phone (see Chapter "Locking Your Phone", page "Unlocking Your Phone", page 40). The factory setting is digit combination "0000"; you can select any 2 to 10-digit combination for your new PIN. -
Page 64: Entering The Display Text For The Idle State
Note: You can use the Correction key to delete any incorrect character. ■ Identifying the communication system This terminal can be connected to different Aastra communication systems. You can verify to which system your terminal is connected to. Menu Press the Menu Foxkey. - Page 65 Personalizing Your Phone ■ Local IP settings (Aastra 5380ip) The IP-relevant data for your phone is stored in this menu. The input of this data is pass- word-protected; it can therefore only be carried out by your system administrator. You can how- ever call up the data.
-
Page 66: Protection
Personalizing Your Phone Protection This section explains how you can protect yourself against certain types of call. ■ Do not disturb/Call waiting/Intrusion/Announcement/Forward You want to protect yourself against certain types of calls. You can set your phone so that these functions are not permitted on it. Ask your system admin- istrator whether these functions are enabled on the system. -
Page 67: Phone Book Management
Personalizing Your Phone Phone Book Management This section explains how to create a new entry in the phone book and how to edit or delete an entry. ■ Creating a New Phone Book Entry You want to store your own phone numbers. You can store your own phone numbers in the pri- vate phone book. - Page 68 Personalizing Your Phone ■ Editing or deleting a phone book entry You want to modify a phone number stored on your private phone book. Note: You cannot modify entries in other phone books. Press the phone book key. Private contacts Scroll to Private contacts and press the...
-
Page 69: Configuring Voice Mail
Personalizing Your Phone Configuring Voice Mail This section explains how to set your Voice Mail. ■ Personal greeting You have the possibility of recording up to three different greetings. If no personal greeting is activated or if none is available, the global greeting is activated automatically, provided it has been recorded. -
Page 70: Configuring Keys
Foxkey itself – retrievable only in the idle state To be able to use a configurable key, you need to make sure an Aastra M530 or Aastra M535 expansion key module is connected. Contact your system administrator for more information. - Page 71 You want to retrieve a frequently used phone number with a single keystroke rather than enter it digit by digit. On each Foxkey and configurable key of the Aastra M535 expansion key module you can store one call number and name, and on each configurable key of the Aastra M530 expansion key module you can store two call numbers and the associated names.
- Page 72 • activate the function with the first keystroke – key-LED lit, • and deactivate the command again with a second keystroke - key-LED off. If you have connected an Aastra M530 or Aastra M535 expansion key module, the LED indi- cates the key status: •...
- Page 73 Personalizing Your Phone ■ Storing a Team Partner under a Key– team key Together with other members you wish to organise yourself into a team so that on the one hand you can always be reached as a team and, on the other, to ensure mutual substitution. You can configure a configurable key as a Team key and then assign it to a team partner.
-
Page 74: Configuring Line Keys
Personalizing Your Phone ■ Clearing a Key You want to clear the assignment made to a configurable key. No function function is provided specifically for this purpose. <long> To clear the Foxkey: Press the Foxkey with a long keystroke. ➯ The display shows the key type. - Page 75 Personalizing Your Phone <long> Press the Line key you want and hold it down for a moment. ➯ The display shows the line key and the properties with which you can con- figure the line key. Note: The Personal key is also treated as a line key. Line key Scroll to Line key...
-
Page 76: Formulating Functions
• The availability of certain */# procedures may be restricted depending on the system and software version. ■ */# Procedures A list with all the */# procedures can be found at http://www.aastra.com/docfinder ("User’s Guide */# Procedures"). -
Page 77: Operator Console
Operator Console This section explains the options provided by your Aastra 5380 / 5380ip with Aastra M535 when it is registered on the system as an Operator Console . Information on Operator Console ........78 Setting the operator console . -
Page 78: Information On Operator Console
■ Aastra M535 The Aastra M535 contains all information of your operator console. A line key is stored on level 1 but all 3 levels are used as information display. Use the shift key to scroll through the levels to display all call information. -
Page 79: Personal Key
Operator Console ■ Personal Key Once your system administrator has configured your phone as operator console, your Personal Key is also configured. The Personal key allows the Operator Console to act as an ordinary user. In other words, you can use this key to make personal calls. - Page 80 Operator Console External call (Company A) Red-flashing External call forwarded to operator console (Com- Red-flashing pany A) External call (Company B) Red-flashing External call forwarded to operator console (Com- Red-flashing pany B) • Red (external) Connected • Green (internal) • Red-flashing (external) Parked •...
-
Page 81: Setting The Operator Console
Operator Console Setting the operator console You can configure up to 10 line keys on level 1 of an Aastra M535. ■ Adding and setting operator lines You can make a number of settings that affect the telephone's response when someone calls on a Line key. -
Page 82: Deleting A Line Key
Operator Console <long> Setting the operator console using a function key: Press and hold down the operator line key. ➯ Display shows choice of key types. Operator Scroll to Operator and press the Select Foxkey. ➯ The setting is stored. ■... -
Page 83: Using An Operator Console
Operator Console Using an Operator Console ■ Answering a Call on Your Personal Key You receive a call on your personal phone number on your Operator Console. The LED on your personal key begins to flash. To answer the call, proceed as follows: You can take the call without having to press your Personal key. - Page 84 Operator Console ■ Making calls using the Personal Key You want to make calls on your operator console without seizing a Line key. You can make a call via your Personal key using the Operator Console. Your Operator Console then acts as an ordinary user; in other words, when making a call you will be transmitting your personal phone number.
- Page 85 Operator Console ■ Park call on line key You are connected with your call partner via a Line key and decide to park the party. You can park your call partner on the current Line key. Park Press the Park Foxkey.
-
Page 86: Transferring An Exchange Line
Operator Console ■ Transferring an Exchange Line You want to transfer an exchange line to an internal subscriber who does not have exchange access. Not only can you hand over an exchange line, you can also dial the call partner's phone number and announce him to the call destination required. - Page 87 Operator Console ■ Activating a Substitution for the Operator Console You want to forward calls to your Operator Console to a different destination. The substitution function is used to forward calls intended for Operator Consoles. The substitu- tion is automatically activated for all the other Operator Consoles as well. Calls to your Personal key are not affected by the forwarding.
- Page 88 Operator Console Properties of a two-company system: • Each individual Line key allows you to appear as Company A or B. • Call lists are not kept separately according to company. • The call charges are recorded separately for each company. •...
-
Page 89: Further Information
Troubleshooting ........... . .90 Declaration Open Source Software (Aastra 5380ip)....91... -
Page 90: Troubleshooting
The key for a reconfiguration may be locked in the system. Contact your system administrator for more information. The expansion key module Aastra M530⁄M535 possibly has not sufficient power supply. Contact your system administrator for more information. Insufficient display contrast The setting for the display contrast is inadequate. -
Page 91: Declaration Open Source Software (Aastra 5380Ip)
Further information Declaration Open Source Software (Aastra 5380ip). ■ About Open Source Software This product contains Open Source Software from third-party suppliers subject to the GNU licence provisions GPL (GNU General Public License) and LGPL (GNU Library/Lesser General Public License). -
Page 92: Installation And First-Time Operation
Connecting Aastra 5380ip ........ -
Page 93: Equipment Provided
Installation and First-Time Operation Equipment provided Handset connection Telephone connection Telephone and handset cable cable Aastra 5380 Stand rest; can also be used as a Quick User's Guide and mounting frame for wall mounting safety information... -
Page 94: Options
Plug-in power adapter (if the power supply is not supplied via the LAN, only Aastra 5380ip). Aastra M530 expansion key module with write-on labels (incl. stand rest and connection cable) Aastra M535 expansion key module with display (incl. stand rest and connection cable) -
Page 95: Setting Up And Mounting The Phone
To relieve the strain on the cable feed the cable through one of the cable guides on the stand rest. • Connect the phone as indicated in chapter "Connecting Aastra 5380", page "Con- necting Aastra 5380ip", page 98. -
Page 96: Wall Mounting
(only Aastra 5380ip). • You can only connect one Aastra M530 resp. one Aastra M535 (option) if the phone is wall-mounted. • Fit the screws for securing the stand rest and mount the stand rest (Figure A). -
Page 97: Connecting Aastra 5380
Connecting the handset Connecting the headset Connecting the Aastra M530⁄M535 expansion key module or power supply ■ Connecting your phone to the system • Plug the connector on the phone cord on the underside of the phone into the socket with the phone symbol. -
Page 98: Connecting Aastra 5380Ip
Connecting the handset Connecting the headset Connecting the power supply Connecting the Aastra M530⁄M535 expansion key module Note: Your system administration will take care of the IP addressing and the commis- sioning of the phone. The IP addresses and other information about your phone is available in the setting mode. -
Page 99: Connecting The Power Supply
Installation and First-Time Operation ■ Connecting your PC to the LAN If required, you can connect your PC or another LAN device to the phone, for example a printer. • Connecting the LAN cord (not included in the scope of delivery) to the PC’s network socket. •... -
Page 100: Expansion Key Module Aastra M530⁄M535 (Optional)
You can connect up to 3 Aastra M530 expansion key modules with 20 configurable keys each and up to 3 Aastra M535 expansion key modules with 3 x 15 configurable keys to your phone. You can freely combine Aastra M530 and Aastra M535. Each key has an LED for visual signalling. - Page 101 • Unplug the phone cord from the socket on the underside of the phone. • Attach Aastra M530⁄M535 expansion key module to the right of the phone until you feel and hear it snap into place, as indicated in the following figure.
-
Page 102: Labelling The Aastra M530 Expansion Key Module
Installation and First-Time Operation Labelling the Aastra M530 expansion key module Write-on labels for the configurable keys can be found on the internet at http://www.aastra.com/ docfinder as an electronic document. You can fill out the fields directly on your PC and then print out the labels. - Page 103 Configuring Keys ......70 Aastra M535 (Operator Console) ....78 Configuring Line keys .
- Page 104 M535 display contrast ......56 Expansion key module Aastra M530 ... 94 Maintenance .
- Page 105 Index To answer the callback request ....28 Tracking a Malicious Call ..... . 48 Queue (Operator Console) .
-
Page 106: Declaration Of Conformity
Ascotel® and Asco- tel® IntelliGate® under: www.aastra.com/docfinder Ascotel® and IntelliGate® are registered trademarks of Aastra. Technical modifications and product availability subject to change without notice. Copyright © Aastra Technologies Limited...
Need help?
Do you have a question about the 5380 and is the answer not in the manual?
Questions and answers