Raven CR Series Installation Manual
Hide thumbs
Also See for CR Series:
- Operation manual (71 pages) ,
- Operation manual (73 pages) ,
- Manual (9 pages)

Subscribe to Our Youtube Channel
Related Manuals for Raven CR Series


Summary of Contents for Raven CR Series
- Page 1 CRX + SC1 RAVEN EUROPE GENERIC 016-8000-014EN REV. A1 Installation manual (English) (Original)
- Page 2 Raven Industries Inc. PAGE 2/36 | Installation manual | 016-8000-014EN | Rev. A1...
-
Page 3: Preface
Any comments or questions can be sent to service- should take note of. eu@ravenind.com. Caution!: Raven Europe or any of its suppliers will accept no Indicates that the machine can be damaged. liability for physical or material damage caused whilst using the CRx . Warning!: Indicates a risk of injury. -
Page 4: Disclaimer
DISCLAIMER | CRX + SC1 | RAVEN EUROPE GENERIC DISCLAIMER WARNING! The safety instructions contained in the manuals of the tractor or implements must be complied with at all times. Always switch off the tractor before installing or repairing hydraulic and electrical components of the ... -
Page 5: Table Of Contents
CONTENTS | CRX + SC1 | RAVEN EUROPE GENERIC CONTENTS PREFACE ..........................................3 DISCLAIMER ........................................4 CONTENTS .........................................5 RAVEN EUROPE GENERIC KITS CR7 .................................6 RAVEN EUROPE GENERIC KITS CR12...............................9 STEERING SYSTEM INSTALLATION ..............................12 MOUNTING HARNESSES ................................12 SC1 ........................................14 HYDRAULIC ..................................... 15 1.3.1 HYDRAULIC VALVE................................ -
Page 6: Raven Europe Generic Kits Cr7
RAVEN EUROPE GENERIC KITS CR7 | CRX + SC1 | RAVEN EUROPE GENERIC RAVEN EUROPE GENERIC KITS CR7 Raven Industries Inc. PAGE 6/36 | Installation manual | 016-8000-014EN | Rev. A1... - Page 7 RAVEN EUROPE GENERIC KITS CR7 | CRX + SC1 | RAVEN EUROPE GENERIC PAGE 7/36 | Installation manual | 016-8000-014EN | Rev. A1...
- Page 8 RAVEN EUROPE GENERIC KITS CR7 | CRX + SC1 | RAVEN EUROPE GENERIC Raven Industries Inc. PAGE 8/36 | Installation manual | 016-8000-014EN | Rev. A1...
-
Page 9: Raven Europe Generic Kits Cr12
RAVEN EUROPE GENERIC KITS CR12 | CRX + SC1 | RAVEN EUROPE GENERIC RAVEN EUROPE GENERIC KITS CR12 PAGE 9/36 | Installation manual | 016-8000-014EN | Rev. A1... - Page 10 RAVEN EUROPE GENERIC KITS CR12 | CRX + SC1 | RAVEN EUROPE GENERIC Raven Industries Inc. PAGE 10/36 | Installation manual | 016-8000-014EN | Rev. A1...
- Page 11 RAVEN EUROPE GENERIC KITS CR12 | CRX + SC1 | RAVEN EUROPE GENERIC RAVEN EUROPE GENERIC KITS CR12 PAGE 11/36 | Installation manual | 016-8000-014EN | Rev. A1...
-
Page 12: Steering System Installation
STEERING SYSTEM INSTALLATION | CRX + SC1 | RAVEN EUROPE GENERIC 1 STEERING SYSTEM INSTALLATION This chapter describes the installation of all the different steering systems, hydraulic, SmarTrax MD and steer ready tractors. Look carefully at the system overviews to know which parts of the installation are applicable. - Page 13 STEERING SYSTEM INSTALLATION | CRX + SC1 | RAVEN EUROPE GENERIC If necessary the positive and negative wires, in between the battery and the fuses, can be shortened. Be sure to use cable sockets with the correct size for proper connection.
-
Page 14: Sc1
STEERING SYSTEM INSTALLATION | CRX + SC1 | RAVEN EUROPE GENERIC The following guidelines have been established for mounting the SC1: Preferably, place the SC1 (Figure 3) next to and to the right of the seat. Use the standard SC1 mounting bracket. -
Page 15: Hydraulic
STEERING SYSTEM INSTALLATION | CRX + SC1 | RAVEN EUROPE GENERIC HYDRAULIC In this chapter a short overview of the hydraulic system that needs te be installed on a tractor will be given. 1.3.1 HYDRAULIC VALVE Figure 4 shows a manifold mounted onto a manifold bracket with four M8 bolts. -
Page 16: Hydraulic Installation Load Sense
STEERING SYSTEM INSTALLATION | CRX + SC1 | RAVEN EUROPE GENERIC 1.3.2 HYDRAULIC INSTALLATION LOAD SENSE The manifold should be connected between the hoses leading from the steering orbitrol to the steering cylinder(s). To do so, the hoses must be disconnected, preferably on an existing connection between a pipe line and a hose. -
Page 17: Hydraulic Installation Open Center
STEERING SYSTEM INSTALLATION | CRX + SC1 | RAVEN EUROPE GENERIC Hint! : In case the wheels of the tractor are steering, when the hydraulics of the tractor are operated; a non-return valve should be mounted in the load sense line from the manifold. The non-... -
Page 18: Pressure Relief Valve
STEERING SYSTEM INSTALLATION | CRX + SC1 | RAVEN EUROPE GENERIC 1.3.5 PRESSURE RELIEF VALVE A pressure relief valve is mounted to the add-on part of the open center manifold (Figure 12). This pressure relief valve must be set to the maximum allowable control pressure of the steering system. -
Page 19: Hydraulic System On Tractors With Gear Pump And Load Sense Orbitrol Connection
STEERING SYSTEM INSTALLATION | CRX + SC1 | RAVEN EUROPE GENERIC 1.3.6 HYDRAULIC SYSTEM ON TRACTORS WITH GEAR PUMP AND LOAD SENSE ORBITROL CONNECTION Tractors with a gear-type pump and equipped with an orbitrol with load sense connection fitted with a load sense priority valve. -
Page 20: Mounting And Connecting The Hydraulic Drive Unit
STEERING SYSTEM INSTALLATION | CRX + SC1 | RAVEN EUROPE GENERIC 1.3.7 MOUNTING AND CONNECTING THE HYDRAULIC DRIVE UNIT The Hydraulic Drive Unit bracket can be mounted to the manifold. The Hydraulic Drive Unit can then be fitted to the manifold bracket (Figure 14). -
Page 21: Wheel Angle Sensor
STEERING SYSTEM INSTALLATION | CRX + SC1 | RAVEN EUROPE GENERIC 1.3.8 WHEEL ANGLE SENSOR For a correct operation of the Raven system a wheel angle sensor is necessary. In various types of tractors a factory fitted wheel angle sensor is already mounted in the front axle. -
Page 22: Mounting The Wheel Angle Sensor
STEERING SYSTEM INSTALLATION | CRX + SC1 | RAVEN EUROPE GENERIC 1.3.10 MOUNTING THE WHEEL ANGLE SENSOR Figure 16 and Figure 17 show a detailed view of the structure of a wheel angle sensor assembly. Table 1 also lists the components shown in Figure 16. - Page 23 STEERING SYSTEM INSTALLATION | CRX + SC1 | RAVEN EUROPE GENERIC 1. If there is a grease nipple at the bottom of the stub axle (stub axle with triangle), then a special U-shaped bracket is to be used for the wheel angle sensor housing (Figure 19 and Figure 20).
-
Page 24: Mounting The Sensor Disc
STEERING SYSTEM INSTALLATION | CRX + SC1 | RAVEN EUROPE GENERIC 1.3.11 MOUNTING THE SENSOR DISC Mount the sensor disc without spacers on the provided 20x3 strip (Figure 21). Mount the sensor disc in the sensor housing and mark where the first bend should be made (about 10 cm from the beginning). - Page 25 STEERING SYSTEM INSTALLATION | CRX + SC1 | RAVEN EUROPE GENERIC Tap the first thread in the hole drilled into the front axle using a M6 screw-thread tapping attachment. Now fasten the strip with one M6 bolt (Figure 23). Drill the second hole in the front axle with a 5 mm drill bit.
- Page 26 STEERING SYSTEM INSTALLATION | CRX + SC1 | RAVEN EUROPE GENERIC 14. Remove the strip again from the front axle. Then mount the strip again to the front axle with the aid of M5 X 30 bolts, raised with two nuts and two washers on each side.
- Page 27 STEERING SYSTEM INSTALLATION | CRX + SC1 | RAVEN EUROPE GENERIC Hint!: It is often useful to drill bigger holes (slots) in the wheel angle sensor strip for the sensor disc. Allow the nuts to be loose-fit when mounting the strip. The disc then centers itself automatically.
-
Page 28: Heavy-Duty Carraro Front Axle With Independent Suspension
STEERING SYSTEM INSTALLATION | CRX + SC1 | RAVEN EUROPE GENERIC 1.3.12 HEAVY-DUTY CARRARO FRONT AXLE WITH INDEPENDENT SUSPENSION Tractors with the heaviest type of Carraro front axle with independent suspension must be fitted with a special wheel angle sensor bracket (Figure 32). This type of assembly requires a wheel angle sensor with a much wider range (180°) in connection with the larger... -
Page 29: Steer Ready Tractors
STEERING SYSTEM INSTALLATION | CRX + SC1 | RAVEN EUROPE GENERIC STEER READY TRACTORS Most of the tractor brands which are already equipped with a factory fitted GPS ready system can be contolled with a steering system of Raven in combination with a CRx. -
Page 30: Smartrax Md
STEERING SYSTEM INSTALLATION | CRX + SC1 | RAVEN EUROPE GENERIC SMARTRAX MD For mounting the mechanical drive unit (Figure 33), some specific manuals are available. These manuals are specific for the type of tractor. Go to portal.ravenprecision.com to download the correct manual. - Page 31 STEERING SYSTEM INSTALLATION | CRX + SC1 | RAVEN EUROPE GENERIC Intentionally left blank. PAGE 31/36 | Installation manual | 016-8000-014EN | Rev. A1...
-
Page 32: Gps Receiver Installation
GPS RECEIVER INSTALLATION | CRX + SC1 | RAVEN EUROPE GENERIC 2 GPS RECEIVER INSTALLATION When the combination of CRx with SC1 is chosen 2 GPS receivers can be used. The 500S and 600S INSTALLATION 500S & 600S For connecting a 500S antenna use this adapter cable: 1-115-8000-342. -
Page 33: Slingshot Installation
GPS RECEIVER INSTALLATION | CRX + SC1 | RAVEN EUROPE GENERIC SLINGSHOT INSTALLATION If a SlingShot modem is used, in addition to the GPS- antenna, two GPRS / UMTS antennas and a GPS patch should be mounted. FIGURE 40 GPS ANTENNA BRACKET WITH A LAIRD The GPRS / UMTS-antennas should be mounted at UMTS ANTENNA. -
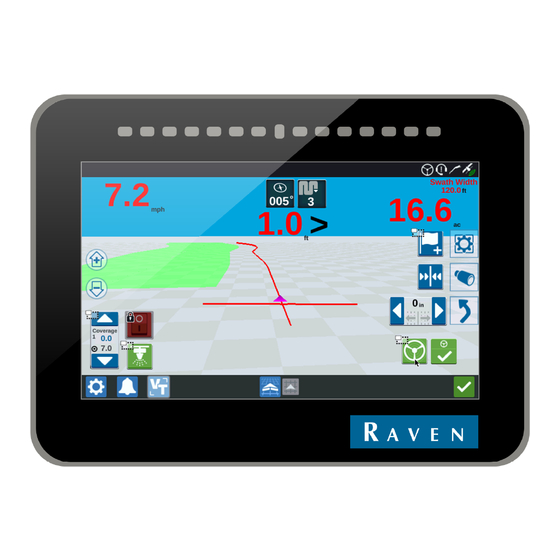
Page 34: Crx Installation
CRX INSTALLATION | CRX + SC1 | RAVEN EUROPE GENERIC 3 CRX INSTALLATION MOUNTING THE CR7 The following guidelines have been established for mounting the terminal (Figure 44): Always contact the customer about the terminal position in the cabin. -
Page 35: Mounting The Cr12
CRX INSTALLATION | CRX + SC1 | RAVEN EUROPE GENERIC MOUNTING THE CR12 The following guidelines have been established for mounting the terminal. Always contact the customer about the terminal position in the cabin. Always use a RAM-C or RAM-B ball ... - Page 36 Hoornseweg 22 1775 RB, Middenmeer The Netherlands Phone: +31 227 54 93 00 Web: www.raveneurope.com Email: service-eu@ravenind.com...
Need help?
Do you have a question about the CR Series and is the answer not in the manual?
Questions and answers