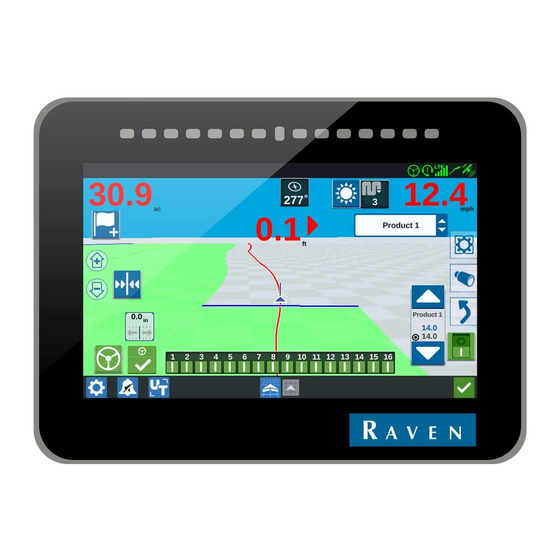
Raven CR7 User Manual
Hide thumbs
Also See for CR7:
- Operation manual (71 pages) ,
- Quick start manual (35 pages) ,
- Calibration manual (24 pages)

Related Manuals for Raven CR7


Summary of Contents for Raven CR7
- Page 1 QUICKSTART STEERING MANUAL 016-8000-017EN REV. B User manual (English) (Original)
- Page 2 Raven Industries Inc. PAGE 2/34 | User manual | 016-8000-017EN | Rev. B...
-
Page 3: Preface
Any comments or questions can be sent to service- should take note of. eu@ravenind.com. Caution!: Raven Europe or any of its suppliers will accept no Indicates that the machine can be damaged. liability for physical or material damage caused whilst using the CR7. Warning!: Indicates a risk of injury. -
Page 4: Disclaimer
It is strictly prohibited to use the CR7 system on public roads. It is strictly prohibited to leave a driving vehicle unattended when the CR7 system is switched on. The driver is always responsible for the direction and course of the vehicle. -
Page 5: Table Of Contents
CONTENTS | CR7 | QUICKSTART STEERING MANUAL CONTENTS PREFACE ..........................................3 DISCLAIMER ........................................4 CONTENTS .........................................5 SETUP WORKING WIDTH ..................................6 CREATE NEW (MOUNTED) EQUIPMENT ..........................6 CHOOSE (MOUNTED) EQUIPMENT FOR THE JOB ......................10 CREATE GROWER, FARM, FIELD STRUCTURE..........................13 START FIELD AND JOB ..................................14 QUICK START NEW FIELD AND NEW JOB .......................... -
Page 6: Setup Working Width
SETUP WORKING WIDTH | CR7 | QUICKSTART STEERING MANUAL 1 SETUP WORKING WIDTH CREATE NEW (MOUNTED) EQUIPMENT Figure Description Go to the settings and press ‘Machine’. This will open the Machine Garage. In case of a mounted implement, press on the already configured tractor. - Page 7 SETUP WORKING WIDTH | CR7 | QUICKSTART STEERING MANUAL Press on <enter name> to give the implement a name. A keyboard pops up. Enter the name and press on the checkmark. The name is now changed. Press in the boxt next to ‘Total Width’...
- Page 8 SETUP WORKING WIDTH | CR7 | QUICKSTART STEERING MANUAL In case there are more sections, configure the sections. In case of just one section, the section is always the same as the Total Width (generated automatically). Press next step. Enter the value from the rear axle to the reference point of the implement (for example where the seed hits the ground).
- Page 9 SETUP WORKING WIDTH | CR7 | QUICKSTART STEERING MANUAL In this example is a Fertilizer which has 7 sections. Total width is the same as Guidance width so there is no overlap. Enter the # of sections. Press next step.
-
Page 10: Choose (Mounted) Equipment For The Job
SETUP WORKING WIDTH | CR7 | QUICKSTART STEERING MANUAL CHOOSE (MOUNTED) EQUIPMENT FOR THE JOB Description Figure Enter the machine garage. Select the tractor. Delete all the created implements in the ‘Mounted Equipment’ list. When deleting, the implements are just removed from the tractor. - Page 11 SETUP WORKING WIDTH | CR7 | QUICKSTART STEERING MANUAL When the list is empty, press ‘Mount Equipment’. Select (only) the implement that is mounted. Press the green checkmark. Now the list with Mounted Equipment contains only the chosen implement. Press the green checkmark.
- Page 12 SETUP WORKING WIDTH | CR7 | QUICKSTART STEERING MANUAL Check if the Guidance Width corresponds to the Guidance width expected. Press the green checkmark. The correct implement is now mounted. Raven Industries Inc. PAGE 12/34 | User manual | 016-8000-017EN | Rev. B...
-
Page 13: Create Grower, Farm, Field Structure
CREATE GROWER, FARM, FIELD STRUCTURE | CR7 | QUICKSTART STEERING MANUAL 2 CREATE GROWER, FARM, FIELD STRUCTURE Description Figure Press on GFF in the settings menu. Create (new), rename or delete Grower, Farm and Fields (also possible in the next steps). -
Page 14: Start Field And Job
START FIELD AND JOB | CR7 | QUICKSTART STEERING MANUAL 3 START FIELD AND JOB QUICK START NEW FIELD AND NEW JOB Description Figure Press the green checkmark. Press the blue arrow on the bottom of the screen. Select the Grower and Farm as created in the GFF settings (step 26) and enter a Field Name. -
Page 15: Load Field And Create New Job In The Field
START FIELD AND JOB | CR7 | QUICKSTART STEERING MANUAL LOAD FIELD AND CREATE NEW JOB IN THE FIELD Description Figure Press the blue arrow on the side of the screen in Maps. Select the Field. Press New Job if a New Job is started. Select one of the existing Job’s underneath to open... -
Page 16: Create And Shift-Nudge Ab Line
CREATE AND SHIFT-NUDGE AB LINE | CR7 | QUICKSTART STEERING MANUAL 4 CREATE AND SHIFT-NUDGE AB LINE CREATE AB-LINE Figure Description Press on the button with the arrow on the right side of the screen. Press on the type of line that needs to be created (for this example we use the Straight AB). - Page 17 CREATE AND SHIFT-NUDGE AB LINE | CR7 | QUICKSTART STEERING MANUAL Once the distance is big enough (after 10m) the line will be created and Autosteer can be activated. It is more accurate to enter ‘Set B’ on the other side of the field.
- Page 18 CREATE AND SHIFT-NUDGE AB LINE | CR7 | QUICKSTART STEERING MANUAL Enter a name and press the green checkmark. Press the green checkmark. Close the ‘Guidance Line’ widget by pressing on the button with the arrow again. Raven Industries Inc.
-
Page 19: Shift - Nudge Ab Line
CREATE AND SHIFT-NUDGE AB LINE | CR7 | QUICKSTART STEERING MANUAL SHIFT – NUDGE AB LINE Description Figure Press on the ‘Shift Line’ widget (see figure). If the widget is not in the screen, proceed to step #59 and add the widget before continuing. - Page 20 CREATE AND SHIFT-NUDGE AB LINE | CR7 | QUICKSTART STEERING MANUAL Press on the arrow to nudge the line with the preset distances per arrow. Press the ‘Center Line’ widget to shift the closest Guidance Line underneath the machine. The closest line is now on the current position.
-
Page 21: Driving Direction
DRIVING DIRECTION | CR7 | QUICKSTART STEERING MANUAL 5 DRIVING DIRECTION Description Figure When driving forward the, the arrow must be shown as in the next screen (just a blue arrow without a red arrow in front of it). When the big red arrow is in front of the blue arrow, the system thinks the machine is driving backwards. -
Page 22: Create And Load A Boundary (Scout Feature)
CREATE AND LOAD A BOUNDARY (SCOUT FEATURE) | CR7 | QUICKSTART STEERING MANUAL 6 CREATE AND LOAD A BOUNDARY (SCOUT FEATURE) Description Figure When in a job, press on the button with the telescope (on the right side of the screen). - Page 23 CREATE AND LOAD A BOUNDARY (SCOUT FEATURE) | CR7 | QUICKSTART STEERING MANUAL When the boundary is finished, press on the stop button and save the boundary. Give the boundary a clear name. PAGE 23/34 | User manual | 016-8000-017EN | Rev. B...
-
Page 24: In-Job Screen Setup
IN-JOB SCREEN SETUP | CR7 | QUICKSTART STEERING MANUAL 7 IN-JOB SCREEN SETUP Description Figure Press on the button with the gear in it on the right side of the screen. Select the widget which needs to be added to the Job layout. - Page 25 IN-JOB SCREEN SETUP | CR7 | QUICKSTART STEERING MANUAL Press on the button with the arrows to change the position of the widget. Press on the button with the trash can to delete the widget from the screen. Press on the button with the ‘open arrow’ (if available) to go to the settings of the widget.
- Page 26 IN-JOB SCREEN SETUP | CR7 | QUICKSTART STEERING MANUAL Press on the widget again to remove the bar with options and see just the widget. Raven Industries Inc. PAGE 26/34 | User manual | 016-8000-017EN | Rev. B...
-
Page 27: Day / Night Mode
DAY / NIGHT MODE | CR7 | QUICKSTART STEERING MANUAL 8 DAY / NIGHT MODE Description Figure Add the widget day/night switch. (see chapter 6 how to add the widget). Press on the widget to change between day and night mode... -
Page 28: Master Switch Coverage Configuration
MASTER SWITCH COVERAGE CONFIGURATION | CR7 | QUICKSTART STEERING MANUAL 9 MASTER SWITCH COVERAGE CONFIGURATION Description Figure Go to the settings page and select ‘Master Switch’ Select how to start the coverage: 1. Require all on: All selected inputs needs to be on before coverage starts. -
Page 29: Import Fields, Lines And/Or Jobs
IMPORT FIELDS, LINES AND/OR JOBS | CR7 | QUICKSTART STEERING MANUAL 10 IMPORT FIELDS, LINES AND/OR JOBS Description Figure Insert USB or use a Slingshot Field Hub for over the air File Transfer. Go to the settings page and press on File Manager. - Page 30 IMPORT FIELDS, LINES AND/OR JOBS | CR7 | QUICKSTART STEERING MANUAL For this example we use USB. The fields are shown on the screen. This must be files of the format; .SHP .KML Select the fields that must be imported.
- Page 31 IMPORT FIELDS, LINES AND/OR JOBS | CR7 | QUICKSTART STEERING MANUAL The files are now imported on the CR7. PAGE 31/34 | User manual | 016-8000-017EN | Rev. B...
-
Page 32: Export Fields, Lines And/Or Jobs
EXPORT FIELDS, LINES AND/OR JOBS | CR7 | QUICKSTART STEERING MANUAL 11 EXPORT FIELDS, LINES AND/OR JOBS Description Figure Insert USB or use a Slingshot Field Hub for over the air File Transfer. Go to the settings page and press on File Manager. - Page 33 EXPORT FIELDS, LINES AND/OR JOBS | CR7 | QUICKSTART STEERING MANUAL Select if the file needs to be exported to Slingshot (if mounted) or USB. Press the green checkmark to start the export. The files are exported. PAGE 33/34 | User manual | 016-8000-017EN | Rev. B...
- Page 34 Hoornseweg 22 1775 RB, Middenmeer The Netherlands Phone: +31 227 54 93 00 Web: www.raveneurope.com Email: service-eu@ravenind.com...
Need help?
Do you have a question about the CR7 and is the answer not in the manual?
Questions and answers