ZyXEL Communications NBG410W3G User Manual
3g wireless router
Hide thumbs
Also See for NBG410W3G:
- Quick start manual (88 pages) ,
- Specifications (2 pages) ,
- User manual (200 pages)

Related Manuals for ZyXEL Communications NBG410W3G


Summary of Contents for ZyXEL Communications NBG410W3G
- Page 1 NBG410W3G Series 3G Wireless Router User’s Guide Version 4.03 2/2009 Edition 2 www.zyxel.com...
-
Page 3: About This User's Guide
Help us help you. Send all User Guide-related comments, questions or suggestions for improvement to the following address, or use e-mail instead. Thank you! The Technical Writing Team, ZyXEL Communications Corp., 6 Innovation Road II, Science-Based Industrial Park, Hsinchu, 300, Taiwan. E-mail: techwriters@zyxel.com.tw NBG410W3G Series User’s Guide About This User's Guide... -
Page 4: Warnings And Notes
Syntax Conventions • The NBG410W3G and NBG412W3G may be referred to as the “ZyXEL Device”, the “device”, the “system”, or the “NBG410W3G Series” in this User’s Guide. • Product labels, screen names, field labels and field choices are all in bold font. - Page 5 Icons Used in Figures Figures in this User’s Guide may use the following generic icons. The ZyXEL Device icon is not an exact representation of your device. ZyXEL Device Server Telephone NBG410W3G Series User’s Guide Computer Notebook computer DSLAM Firewall Switch...
-
Page 6: Safety Warnings
Only use the included antenna(s). • If you wall mount your device, make sure that no electrical lines, gas or water pipes will be damaged. This product is recyclable. Dispose of it properly. Safety Warnings NBG410W3G Series User’s Guide... - Page 7 Safety Warnings NBG410W3G Series User’s Guide...
- Page 8 Safety Warnings NBG410W3G Series User’s Guide...
-
Page 9: Table Of Contents
ALG Screen ... 293 Logs and Maintenance ... 299 Logs Screens ... 301 Maintenance ... 325 Troubleshooting and Specifications ... 337 Troubleshooting ... 339 Product Specifications ... 345 Appendices and Index ... 351 NBG410W3G Series User’s Guide Contents Overview Contents Overview... - Page 10 Contents Overview NBG410W3G Series User’s Guide...
-
Page 11: Table Of Contents
2.2 Accessing the ZyXEL Device Web Configurator ... 43 2.3 Resetting the ZyXEL Device ... 45 2.3.1 Procedure To Use The Reset Button ... 45 2.3.2 Uploading a Configuration File Via Console Port ... 45 NBG410W3G Series User’s Guide Table of Contents Table of Contents... - Page 12 Chapter 5 LAN Screens... 101 5.1 LAN, WAN and the ZyXEL Device ... 101 5.2 IP Address and Subnet Mask ... 101 5.2.1 Private IP Addresses ... 102 5.3 DHCP ... 102 ... 54 ... 56 NBG410W3G Series User’s Guide...
- Page 13 7.5 DMZ Public IP Address Example ... 141 7.6 DMZ Private and Public IP Address Example ... 141 7.7 DMZ Port Roles ... 142 Part III: Wireless ... 145 Chapter 8 Wi-Fi ... 147 8.1 Wi-Fi Introduction ... 147 NBG410W3G Series User’s Guide Table of Contents...
- Page 14 9.10.1 Threshold Values ... 182 9.11 Threshold Screen ... 182 9.12 Service ... 184 9.12.1 Firewall Edit Custom Service ... 185 9.13 My Service Firewall Rule Example ... 186 Chapter 10 Authentication Server... 191 ... 177 ... 181 NBG410W3G Series User’s Guide...
- Page 15 12.1.3 How NAT Works ... 226 12.1.4 NAT Application ... 227 12.1.5 Port Restricted Cone NAT ... 228 12.1.6 NAT Mapping Types ... 229 12.2 Using NAT ... 230 12.2.1 SUA (Single User Account) Versus NAT ... 230 NBG410W3G Series User’s Guide Table of Contents...
- Page 16 14.10 Dynamic DNS ... 255 14.10.1 DYNDNS Wildcard ... 255 14.10.2 High Availability ... 256 14.11 Configuring Dynamic DNS ... 256 Chapter 15 Remote Management... 259 15.1 Remote Management Overview ... 259 15.1.1 Remote Management Limitations ... 260 NBG410W3G Series User’s Guide...
- Page 17 16.4.1 Installing UPnP in Windows Me ... 285 16.4.2 Installing UPnP in Windows XP ... 286 16.5 Using UPnP in Windows XP Example ... 286 16.5.1 Auto-discover Your UPnP-enabled Network Device ... 287 NBG410W3G Series User’s Guide ... 283 Table of Contents...
- Page 18 19.4.1 Viewing Web Site Hits ... 309 19.4.2 Viewing Host IP Address ... 309 19.4.3 Viewing Protocol/Port ... 310 19.4.4 System Reports Specifications ... 312 19.5 Log Descriptions ... 312 19.6 Syslog Logs ... 323 Chapter 20 Maintenance ... 325 NBG410W3G Series User’s Guide...
- Page 19 Appendix A Pop-up Windows, JavaScripts and Java Permissions ... 353 Appendix B Setting up Your Computer’s IP Address... 361 Appendix C IP Addresses and Subnetting ... 377 Appendix D Common Services ... 385 Appendix E Wireless LANs ... 389 NBG410W3G Series User’s Guide Table of Contents...
- Page 20 Table of Contents Appendix F Importing Certificates ... 403 Appendix G Legal Information... 415 Appendix H Customer Support... 419 Index... 425 NBG410W3G Series User’s Guide...
-
Page 21: List Of Figures
Figure 35 Tutorial Example: Using NAT with Static Public IP Addresses ... 78 Figure 36 Tutorial Example: WAN Connection with a Static Public IP Address ... 79 Figure 37 Tutorial Example: WAN 1 Screen ... 79 Figure 38 Tutorial Example: DNS > System ... 80 NBG410W3G Series User’s Guide... - Page 22 Figure 78 NETWORK > WAN > Traffic Redirect ... 133 Figure 79 NETWORK > DMZ ... 136 Figure 80 NETWORK > DMZ > Static DHCP ... 138 Figure 81 NETWORK > DMZ > IP Alias ... 140 NBG410W3G Series User’s Guide...
- Page 23 Figure 122 SECURITY > CERTIFICATES > My Certificates > Details ... 200 Figure 123 SECURITY > CERTIFICATES > My Certificates > Export ... 202 Figure 124 SECURITY > CERTIFICATES > My Certificates > Import ... 204 NBG410W3G Series User’s Guide...
- Page 24 Figure 163 Replace Certificate ... 266 Figure 164 Device-specific Certificate ... 266 Figure 165 Common ZyXEL Device Certificate ... 267 Figure 166 SSH Communication Over the WAN Example ... 267 Figure 167 How SSH Works ... 268 NBG410W3G Series User’s Guide...
- Page 25 Figure 205 Configuration Upload Successful ... 335 Figure 206 Network Temporarily Disconnected ... 335 Figure 207 Configuration Upload Error ... 335 Figure 208 Reset Warning Message ... 336 Figure 209 MAINTENANCE > Restart ... 336 Figure 210 Wall-mounting Example ... 348 NBG410W3G Series User’s Guide...
- Page 26 Figure 248 Peer-to-Peer Communication in an Ad-hoc Network ... 389 Figure 249 Basic Service Set ... 390 Figure 250 Infrastructure WLAN ... 391 Figure 251 RTS/CTS ... 392 Figure 252 WPA(2) with RADIUS Application Example ... 399 Figure 253 WPA(2)-PSK Authentication ... 400 NBG410W3G Series User’s Guide...
- Page 27 Figure 268 Personal Certificate Import Wizard 5 ...411 Figure 269 Personal Certificate Import Wizard 6 ...411 Figure 270 Access the ZyXEL Device Via HTTPS ... 412 Figure 271 SSL Client Authentication ... 412 Figure 272 ZyXEL Device Secure Login Screen ... 412 NBG410W3G Series User’s Guide...
- Page 28 List of Figures NBG410W3G Series User’s Guide...
-
Page 29: List Of Tables
List of Tables List of Tables Table 1 NBG410W3G Front Panel Lights ... 39 Table 2 NBG412W3G Front Panel Lights ... 40 Table 3 Title Bar: Web Configurator Icons ... 47 Table 4 Web Configurator HOME Screen ... 47 Table 5 Screens Summary ... 52 Table 6 HOME >... - Page 30 Table 78 ADVANCED > REMOTE MGMT > Telnet ... 273 Table 79 ADVANCED > REMOTE MGMT > FTP ... 274 Table 80 SNMP Traps ... 276 Table 81 ADVANCED > REMOTE MGMT > SNMP ... 277 NBG410W3G Series User’s Guide...
- Page 31 Table 120 Firmware Specifications ... 346 Table 121 Feature Specifications ... 347 Table 122 IP Address Network Number and Host ID Example ... 378 Table 123 Subnet Masks ... 379 Table 124 Maximum Host Numbers ... 379 NBG410W3G Series User’s Guide...
- Page 32 Table 133 Commonly Used Services ... 385 Table 134 IEEE 802.11g ... 393 Table 135 Wireless Security Levels ... 394 Table 136 Comparison of EAP Authentication Types ... 397 Table 137 Wireless Security Relational Matrix ... 400 NBG410W3G Series User’s Guide...
-
Page 33: Introduction
Introduction Getting to Know Your ZyXEL Device (35) Introducing the Web Configurator (43) Wizard Setup (59) Tutorials (65) -
Page 35: Getting To Know Your Zyxel Device
LAN or wireless network to the DMZ. The ZyXEL Device also provides NAT, port forwarding, DHCP server and many other powerful features. The NBG410W3G and NBG412W3G offer similar features. However, the NBG410W3G also supports an internal 3G interface. Chapter 22 on page 345 1.2 Applications for the ZyXEL Device... -
Page 36: Secure Broadband Internet Access Via Cable Or Dsl Modem
• Web Configurator. This is recommended for everyday management of the ZyXEL Device using a (supported) web browser. • Command Line Interface. Line commands are mostly used for troubleshooting by service engineers. • FTP for firmware upgrades and configuration backup/restore. NBG410W3G Series User’s Guide... -
Page 37: Configuring Your Zyxel Device's Security Features
Section 9.1 on page 167 • Ensure the firewall is turned on. Traffic initiated from your WAN is blocked by default. NBG410W3G Series User’s Guide Chapter 1 Getting to Know Your ZyXEL Device for instructions on changing your password and setting the for more information. -
Page 38: Nat
If you backed up an earlier configuration file, you would not have to totally re-configure the ZyXEL Device. You could simply restore your last configuration. for instructions on these measures. for instructions on this measure. NBG410W3G Series User’s Guide... -
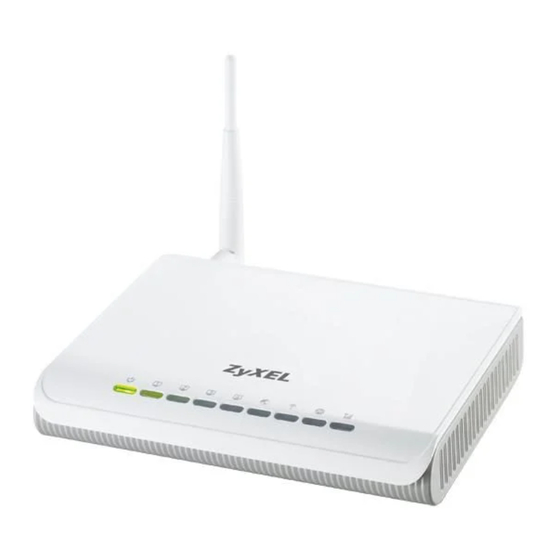
Page 39: Front Panel Lights
1.5.1 Front Panel Lights Figure 3 Front Panel The following tables describe the lights. Table 1 describes the light features in NBG410W3G, and Table 2 describes the light features in NBG412W3G. Table 1 NBG410W3G Front Panel Lights ICONS COLOR POWER... -
Page 40: Table 2 Nbg412W3G Front Panel Lights
Chapter 1 Getting to Know Your ZyXEL Device Table 1 NBG410W3G Front Panel Lights (continued) ICONS COLOR Green OPERATION Blue Orange 3G SIGNAL Blue STRENGTH Green Orange Table 2 NBG412W3G Front Panel Lights ICONS COLOR POWER Green LAN/DMZ 10/ Green... - Page 41 ICONS COLOR 3G MODE Green 3G LINK Green NBG410W3G Series User’s Guide Chapter 1 Getting to Know Your ZyXEL Device STATUS DESCRIPTION The 3G function is activated. The 3G function is not activated. The ZyXEL Device has a successful 3G connection.
- Page 42 Chapter 1 Getting to Know Your ZyXEL Device NBG410W3G Series User’s Guide...
-
Page 43: Introducing The Web Configurator
3 Type "192.168.1.1" as the URL. 4 Type "1234" (default) as the password and click Login. In some versions, the default password appears automatically - if this is the case, click Login. NBG410W3G Series User’s Guide Introducing the Web Configurator... -
Page 44: Figure 4 Login Screen
If you do not replace the default certificate here or in the CERTIFICATES screen, this screen displays every time you access the web configurator. Figure 6 Replace Certificate Screen 7 You should now see the HOME screen (see Figure 9 on page 47). NBG410W3G Series User’s Guide... -
Page 45: Resetting The Zyxel Device
4 Enter "atlc" after "Enter Debug Mode" message. 5 Wait for "Starting XMODEM upload" message before activating Xmodem upload on your terminal. This is an example Xmodem configuration upload using HyperTerminal. NBG410W3G Series User’s Guide Chapter 2 Introducing the Web Configurator... -
Page 46: Navigating The Zyxel Device Web Configurator
• D - status bar 2.4.1 Title Bar The title bar provides some icons in the upper right corner. Type the configuration file’s location, or click Browse to search for it. Choose the Xmodem protocol. Then click Send. NBG410W3G Series User’s Guide... -
Page 47: Main Window
Refresh Click this button to update the status screen statistics immediately. NBG410W3G Series User’s Guide Chapter 2 Introducing the Web Configurator Chapter 3 on page... - Page 48 Click "+" to expand or "-" to collapse the IP alias drop-down lists. Hold your cursor over an interface’s label to display the interface’s MAC address. Click an interface’s label to go to the screen where you can configure settings for that interface. Section 2.3 on page 45). NBG410W3G Series User’s Guide...
- Page 49 1xRTT, EVDO Rev.0 or EVDO Rev.A when you insert a CDMA 3G card. Service Provider This displays the name of your network service provider or Limited Service when the signal strength is too low or the ISP is limiting your access. NBG410W3G Series User’s Guide Chapter 2 Introducing the Web Configurator...
- Page 50 Enter the PUK code to enable the SIM card. If an incorrect PUK code is entered 10 times, the SIM card will be disabled permanently. You then need to contact your ISP for a new SIM card. NBG410W3G Series User’s Guide...
- Page 51 Click this button to reset the time and data budgets. The count starts over with the 3G connection’s full configured monthly time and data budgets. This does not affect the normal monthly budget restart. NBG410W3G Series User’s Guide Chapter 2 Introducing the Web Configurator factory defaults. The budget counters are saved to the flash every hour or when the 3G connection is dropped.
-
Page 52: Navigation Panel
Use this screen to assign fixed IP addresses on the DMZ. Use this screen to partition your DMZ interface into subnets. Use this screen to change the LAN/DMZ port roles on the ZyXEL Device. Use this screen to configure the WAN2 connection for Internet access. NBG410W3G Series User’s Guide... - Page 53 IP Static Route Use this screen to configure IP static routes. System Cache DHCP DDNS NBG410W3G Series User’s Guide Chapter 2 Introducing the Web Configurator FUNCTION Use this screen to configure the wireless LAN settings. Use this screen to configure the Wi-Fi security settings.
-
Page 54: Port Statistics
Use this screen to backup and restore the configuration or reset the factory defaults to your ZyXEL Device. This screen allows you to reboot the ZyXEL Device without turning the power off. Click this label to exit the web configurator. NBG410W3G Series User’s Guide... -
Page 55: Show Statistics: Line Chart
Click this button to update the screen’s statistics immediately. 2.4.6 Show Statistics: Line Chart Click the icon in the Show Statistics screen. This screen shows you a line chart of each port’s throughput statistics. NBG410W3G Series User’s Guide Chapter 2 Introducing the Web Configurator... -
Page 56: Dhcp Table Screen
Click Show DHCP Table in the HOME screen. Read-only information here relates to your DHCP status. The DHCP table shows current DHCP client information (including IP Address, Host Name and MAC Address) of all network clients using the ZyXEL Device’s DHCP server. NBG410W3G Series User’s Guide... -
Page 57: Figure 12 Home > Dhcp Table
You can select up to 128 entries in this table. After you click Apply, the MAC address and IP address also display in the corresponding LAN or DMZ Static DHCP screen (where you can edit them). Refresh Click Refresh to reload the DHCP table. NBG410W3G Series User’s Guide Chapter 2 Introducing the Web Configurator... - Page 58 Chapter 2 Introducing the Web Configurator NBG410W3G Series User’s Guide...
-
Page 59: Wizard Setup
Refer to information provided by your ISP to know what to enter in each field. Leave a field blank if you don’t have that information. 3.2.1 ISP Parameters The ZyXEL Device offers three choices of encapsulation. They are Ethernet, PPTP or PPPoE. NBG410W3G Series User’s Guide Wizard Setup to open the Wizard Setup Welcome... -
Page 60: Figure 14 Isp Parameters: Ethernet Encapsulation
Select Static If the ISP assigned a fixed IP address. The fields below are available only when you select Static. My WAN IP Enter your WAN IP address in this field. Address My WAN IP Enter the IP subnet mask in this field. Subnet Mask NBG410W3G Series User’s Guide... -
Page 61: Figure 15 Isp Parameters: Pppoe Encapsulation
DESCRIPTION ISP Parameter for Internet Access Encapsulation Choose an encapsulation method from the pull-down list box. PPP over Ethernet forms a dial-up connection. Service Name Type the name of your service provider. NBG410W3G Series User’s Guide Chapter 3 Wizard Setup... -
Page 62: Pptp Encapsulation
Virtual Private Network (VPN) using TCP/ IP-based networks. PPTP supports on-demand, multi-protocol, and virtual private networking over public networks, such as the Internet. The ZyXEL Device supports one PPTP server connection at any given time. NBG410W3G Series User’s Guide... -
Page 63: Figure 16 Isp Parameters: Pptp Encapsulation
Type the (static) IP address assigned to you by your ISP. My IP Subnet Mask Type the subnet mask assigned to you by your ISP (if given). Server IP Address Type the IP address of the PPTP server. NBG410W3G Series User’s Guide Chapter 3 Wizard Setup... -
Page 64: Internet Access Wizard Setup Complete
DNS server, you must know the IP address of a machine in order to access it. Click Back to return to the previous wizard screen. Click Finish to save your changes and go to the next screen. NBG410W3G Series User’s Guide... -
Page 65: Tutorials
Internet and also from computers located on the LAN. You can use either public or private IP addresses for your DMZ, however the DMZ must be on a different subnet or network from the LAN. NBG410W3G Series User’s Guide Tutorials Internet... -
Page 66: File Server
3 Click Apply. That completes setup of static DHCP on the ZyXEL Device. Appendix C on page 377 for information on subnetting.) You can also use 192.168.2.0 File server 192.168.2.33 Section 4.2.1.3 on page Internet WAN1: 123.11.11.11 NBG410W3G Series User’s Guide... -
Page 67: Figure 20 Dmz Tutorial: Network > Dmz > Static Dhcp
ADVANCED > NAT. For your WAN connection select . In this example NAT is enabled in the Enable NAT field on WAN1 and SUA is selected. For more information on this screen see Chapter 12 on page NBG410W3G Series User’s Guide 225. Chapter 4 Tutorials... -
Page 68: Advanced Setup
To turn on the ZyXEL Device’s FTP ALG, click ADVANCED > ALG. Select Enable FTP ALG and click Apply. Figure 23 DMZ Tutorial: ADVANCED > ALG for more information.) for more information) and for port-forwarding the file server NBG410W3G Series User’s Guide... -
Page 69: Port Forwarding Setup
WAN to your DMZ, and blocking traffic from the DMZ to the LAN. However, you can further enhance network security by defining firewall rules specifically for traffic from the WAN to the DMZ. NBG410W3G Series User’s Guide Chapter 4 Tutorials... -
Page 70: Figure 25 Dmz Tutorial: Security > Firewall > Rule Summary
9 In the Edit Service section select FTP and click the arrow icon. Then select HTTP and click the arrow icon again so that FTP and HTTP appear in the Selected Service(s) field. 10 Click Apply. NBG410W3G Series User’s Guide... -
Page 71: Figure 26 Dmz Tutorial: Network > Firewall > Rule Summary: Firewall - Edit
12 In the Action for Matched Packets field select Permit from the drop-down list and click Apply. 13 In the Rule Summary screen select Any and Any from the drop-down list in the Packet Direction fields and click Refresh to check your firewall rule settings. NBG410W3G Series User’s Guide Chapter 4 Tutorials... -
Page 72: Figure 27 Dmz Tutorial: Security > Firewall > Rule Summary Example
2 Type the MAC address of your device in the MAC Address field and a valid IP address on your LAN in the IP Address field. In this example the MAC address is 00:A0:C5:00:00:02 and the IP address is 192.168.1.33. 3 Click Apply. Internet WAN: 123.23.23.23 NBG410W3G Series User’s Guide... -
Page 73: Figure 29 H.323 Tutorial: Network > Lan > Static Dhcp
4 Type a descriptive name for the port forwarding rule in the Name field. In this example H.323 is used. 5 Type 1720 in the Incoming Port(s) field. This port number is used for the H.323 services. NBG410W3G Series User’s Guide Chapter 4 Tutorials Chapter 18 on page 293.) -
Page 74: Figure 31 H.323 Tutorial: Advanced > Nat > Port Forwarding
In this example LAN2WAN1 - H.323 is used. 4 In the Edit Source Address section select Single Address in the drop-down box in the Address Type field. Type the source address of H.323 traffic in the Start IP Address NBG410W3G Series User’s Guide... - Page 75 Address field - 192.168.1.33 and click Add so that the IP address appears in the Source Address(es) field. 6 In the Edit Service section select H.323 and click the arrow icon so that H.323 appears in the Selected Service(s) field. 7 Click Apply. NBG410W3G Series User’s Guide Chapter 4 Tutorials...
-
Page 76: Figure 33 H.323 Tutorial: Security > Firewall > Rule Summary
WAN to the LAN, using the same WAN IP address and LAN IP address settings. 9 In the Rule Summary screen select Any and Any from the drop-down list in the Packet Direction fields and click Refresh to check your firewall rule settings. NBG410W3G Series User’s Guide... -
Page 77: Using Nat With Multiple Public Ip Addresses
• Forward FTP traffic using port 21 from WAN 1 to a specific local computer (192.168.1.39). • The last public IP address (1.2.3.7) is not mapped to any device and is reserved for future use. NBG410W3G Series User’s Guide 1.2.3.4 to 1.2.3.7 Chapter 4 Tutorials... -
Page 78: Configuring The Wan Connection With A Static Ip Address
192.168.1.12 <---> 1.2.3.5 (1-1) 192.168.1.13 <---> 1.2.3.6 (1-1) Other outgoing LAN traffic ---> 1.2.3.4 (M-1) Incoming traffic <--- 1.2.3.4 (Server) 192.168.1.1 Mail 192.168.1.13 PPPoE 1.2.3.4 1.2.3.5 1.2.3.6 1.2.3.7 1.2.3.89 255.255.255.0 exampleuser abcd1234 1.2.1.1 1.2.1.2 1.2.3.4 1.2.3.5 1.2.3.6 1.2.3.7 NBG410W3G Series User’s Guide... -
Page 79: Figure 36 Tutorial Example: Wan Connection With A Static Public Ip Address
4 In the WAN IP Address Assignment section, select Use Fixed IP Address and enter the first fixed public IP address (1.2.3.4 in this example). 5 Click Apply. Figure 37 Tutorial Example: WAN 1 Screen 6 Click ADVANCED > DNS. NBG410W3G Series User’s Guide 192.168.1.1 1.2.3.4 Chapter 4 Tutorials... -
Page 80: Figure 38 Tutorial Example: Dns > System
DNS server’s IP address as follows. Click Apply. To resolve a domain name, theZyXEL Device checks it against the name server record entries in the order that they appear in this list. NBG410W3G Series User’s Guide... -
Page 81: Figure 40 Tutorial Example: Dns > System Edit-2
10 The DNS > System screen should look as shown. Figure 41 Tutorial Example: DNS > System: Done 11 Go to the Home screen to check your WAN connection status. Make sure the status is not down. NBG410W3G Series User’s Guide Chapter 4 Tutorials... -
Page 82: Public Ip Address Mapping
IP address (1.2.3.4, that is, the ZyXEL Device’s WAN 1 IP address) to outgoing LAN traffic. It allows other local computers on the same subnet as the ZyXEL Device’s LAN IP address to use this IP address to access the Internet. NBG410W3G Series User’s Guide... -
Page 83: Figure 43 Tutorial Example: Mapping Multiple Public Ip Addresses To Inside Servers
1 Click ADVANCED > NAT. 2 Enable NAT and select Full Feature for the WAN 1 interface as you have multiple public IP addresses to map to private IP addresses. Click Apply. NBG410W3G Series User’s Guide Mapping rules: 192.168.1.12 <---> 1.2.3.5 (1-1) 192.168.1.13 <--->... -
Page 84: Figure 44 Tutorial Example: Nat > Nat Overview
Figure 44 Tutorial Example: NAT > NAT Overview 3 Click the Address Mapping tab. 4 Select WAN 1. 5 Click the first rule’s Edit icon ( ) in the Modify column to display the Address Mapping Rule screen. NBG410W3G Series User’s Guide... -
Page 85: Figure 45 Tutorial Example: Nat > Address Mapping
8 Map a public IP address to the mail server. Select the One-to-One type and enter 192.168.1.13 as the local start IP address and 1.2.3.6 as the global start IP address. Click Apply. NBG410W3G Series User’s Guide Chapter 4 Tutorials... -
Page 86: Figure 47 Tutorial Example: Nat Address Mapping Edit: One-To-One (2)
Figure 48 Tutorial Example: NAT Address Mapping Edit: Many-to-One 11 After the configurations, the Address Mapping screen looks as shown. You still have one IP address (1.2.3.7) that can be assigned to another internal server when you expand your network. NBG410W3G Series User’s Guide... -
Page 87: Forwarding Traffic From The Wan To A Local Computer
(server mapping) rule. In this example, you want to forward FTP traffic using port 21 to the computer with the IP address of 192.168.1.39. NBG410W3G Series User’s Guide Chapter 4 Tutorials Section 4.5.5 on page 89... -
Page 88: Figure 50 Tutorial Example: Forwarding Incoming Ftp Traffic To A Local Computer
5 Select the Active check box, enter a descriptive name (FTP for example), incoming port number (21) and 192.168.1.39 as the server IP address. Click Apply. Mapping rules: Incoming traffic <--- 1.2.3.4 (Server) Mail 192.168.1.13 ) to configure a server rule. 1.2.3.4 1.2.3.5 1.2.3.6 1.2.3.7 NBG410W3G Series User’s Guide... -
Page 89: Allow Wan-To-Lan Traffic Through The Firewall
In this example, you create the firewall rules to allow traffic from the WAN to the following servers on the LAN: • Web server • Mail server • FTP server Figure 53 Tutorial Example: Forwarding Incoming FTP Traffic to a Local Computer 192.168.1.39 192.168.1.39 Mail 192.168.1.12 192.168.1.13 NBG410W3G Series User’s Guide Chapter 4 Tutorials... -
Page 90: Figure 54 Tutorial Example: Firewall Default Rule
3 Go to the Rule Summary screen. 4 Select WAN1 to LAN as the packet direction and click Refresh. 5 Click the insert icon to create a new firewall rule. Figure 55 Tutorial Example: Firewall Rule: WAN1 to LAN NBG410W3G Series User’s Guide... -
Page 91: Figure 56 Tutorial Example: Firewall Rule: Wan To Lan Address Edit For Web Server
Figure 56 Tutorial Example: Firewall Rule: WAN to LAN Address Edit for Web Server 7 Select HTTP(TCP:80) and HTTPS(TCP:443) in the Available Services box on the left, and click >> to add them to the Selected Service(s) box on the right. Click Apply. NBG410W3G Series User’s Guide Chapter 4 Tutorials... -
Page 92: Figure 57 Tutorial Example: Firewall Rule: Wan To Lan Service Edit For Web Server
8 Click the insert icon to configure a firewall rule to allow traffic from the WAN to the mail server. Enter a descriptive name (W-L_Mail for example). Select Any in the Destination Address(es) box and click Delete. Select Single Address as the destination address type. Enter 192.168.1.13 and click Add. NBG410W3G Series User’s Guide... -
Page 93: Figure 58 Tutorial Example: Firewall Rule: Wan To Lan Address Edit For Mail Server
9 Select Any(All) in the Available Services box on the left, and click >> to add it to the Selected Service(s) box on the right. Click Apply. Figure 59 Tutorial Example: Firewall Rule: WAN to LAN Service Edit for Mail Server NBG410W3G Series User’s Guide... -
Page 94: Figure 60 Tutorial Example: Firewall Rule: Wan To Lan Address Edit For Ftp Server
Figure 60 Tutorial Example: Firewall Rule: WAN to LAN Address Edit for FTP Server 11 Select FTP(TCP:20,21) in the Available Services box on the left, and click >> to add it to the Selected Service(s) box on the right. Click Apply. NBG410W3G Series User’s Guide... -
Page 95: Figure 61 Tutorial Example: Firewall Rule: Wan To Lan Service Edit For Ftp Server
Chapter 4 Tutorials Figure 61 Tutorial Example: Firewall Rule: WAN to LAN Service Edit for FTP Server 12 When you are done, the Rule Summary screen looks as shown. Figure 62 Tutorial Example: Firewall Rule Summary NBG410W3G Series User’s Guide... -
Page 96: Testing The Connections
LAN traffic. See information about IP address mapping. When you finish configuration, the screen looks as shown. Section 4.5.2 on page 78), use the NAT > Address Section 4.5.3 on page 82 NBG410W3G Series User’s Guide for more... -
Page 97: Figure 63 Tutorial Example: Nat Address Mapping Done: Game Playing
Figure 63 Tutorial Example: NAT Address Mapping Done: Game Playing To allow traffic from the WAN to be forwarded through the ZyXEL Device, you must also create a firewall rule. Refer to Section 4.5.5 on page 89 for more information. NBG410W3G Series User’s Guide... - Page 98 Chapter 4 Tutorials NBG410W3G Series User’s Guide...
-
Page 99: Network
Network LAN Screens (101) WAN Screens (111) DMZ Screens (135) -
Page 101: Lan Screens
ISP will assign you a dynamic IP address when the connection is established. If this is the case, it is recommended that you select a network number from 192.168.0.0 to 192.168.255.0 and you must enable the Network Address Translation (NAT) NBG410W3G Series User’s Guide LAN Screens Chapter 6 on page 111... -
Page 102: Private Ip Addresses
ZyXEL Device relay DHCP information from another DHCP server. If you disable the ZyXEL Device’s DHCP service, you must have another DHCP server on your LAN, or else the computers must be manually configured. NBG410W3G Series User’s Guide... -
Page 103: Ip Pool Setup
(including gateways). All hosts must join the 224.0.0.1 group in order to participate in IGMP. The address 224.0.0.2 is assigned to the multicast routers group. NBG410W3G Series User’s Guide for the default IP pool range. Do not assign your LAN... -
Page 104: Wins
Click NETWORK > LAN to open the LAN screen. Use this screen to configure the ZyXEL Device’s IP address and other LAN TCP/IP settings as well as the built-in DHCP server capability that assigns IP addresses and DNS servers to systems that support DHCP client capability. Figure 65 NETWORK > LAN NBG410W3G Series User’s Guide... -
Page 105: Table 12 Network > Lan
Type the IP address of the DHCP server to which you want the ZyXEL Device to Address relay DHCP requests. Use dotted decimal notation. Alternatively, click the right mouse button to copy and/or paste the IP address. NBG410W3G Series User’s Guide Chapter 5 LAN Screens... -
Page 106: Lan Static Dhcp
00:A0:C5:00:00:02. To change your ZyXEL Device’s static DHCP settings, click NETWORK > LAN > Static DHCP. The screen appears as shown. NBG410W3G Series User’s Guide... -
Page 107: Lan Ip Alias
The ZyXEL Device has a single LAN interface. Even though more than one of ports 1~4 may be in the LAN port role, they are all still part of a single physical Ethernet interface and all use the same IP address. NBG410W3G Series User’s Guide Chapter 5 LAN Screens... -
Page 108: Figure 67 Physical Network & Partitioned Logical Networks
To change your ZyXEL Device’s IP alias settings, click NETWORK > LAN > IP Alias. The screen appears as shown. Figure 68 NETWORK > LAN > IP Alias A: 192.168.1.1 - 192.168.1.24 B: 192.168.2.1 - 192.168.2.24 C: 192.168.3.1 - 192.168.3.24 NBG410W3G Series User’s Guide... -
Page 109: Lan Port Roles
The screen appears as shown. The radio buttons correspond to Ethernet ports on the front panel of the ZyXEL Device. On the ZyXEL Device, ports 1 to 4 are all LAN ports by default. NBG410W3G Series User’s Guide Chapter 5 LAN Screens... -
Page 110: Figure 69 Network > Lan > Port Roles
Select a port’s DMZ radio button to use the port as part of the DMZ. The port will use the ZyXEL Device’s DMZ IP address and MAC address. Click Apply to save your changes. Click Reset to begin configuring this screen afresh. NBG410W3G Series User’s Guide... -
Page 111: Wan Screens
The DDNS high availability feature lets you have the ZyXEL Device use the other WAN interface for a domain name if the configured WAN interface's connection goes down. See Section 14.10.2 on page 256 NBG410W3G Series User’s Guide WAN Screens Chapter 12 on page 225 281). -
Page 112: Tcp/Ip Priority (Metric)
6.4 WAN General Click NETWORK > WAN to open the General screen. Use this screen to configure operation mode, route priority and connection test. WAN 2 refers to the 3G card on the supported ZyXEL Device. NBG410W3G Series User’s Guide... -
Page 113: Figure 71 Network > Wan General
Chapter 6 WAN Screens Figure 71 NETWORK > WAN General NBG410W3G Series User’s Guide... -
Page 114: Table 16 Network > Wan General
(for example, your ISP's DNS server address) to have the ZyXEL Device ping that address. For a domain name, use up to 63 alphanumeric characters (hyphens, periods and the underscore are also allowed) without spaces. NBG410W3G Series User’s Guide... -
Page 115: Wan Ip Address Assignment
However, the Internet Assigned Numbers Authority (IANA) has reserved the following three blocks of IP addresses specifically for private networks. Table 17 Private IP Address Ranges 10.0.0.0 172.16.0.0 192.168.0.0 NBG410W3G Series User’s Guide 10.255.255.255 172.31.255.255 192.168.255.255 Chapter 6 WAN Screens... -
Page 116: Dns Server Address Assignment
MAC address from a computer on your LAN. Once it is successfully configured, the address will be copied to the "rom" file (ZyNOS configuration file). It will not change unless you change the setting or upload a different "rom" file. 248). Section NBG410W3G Series User’s Guide... -
Page 117: Wan 1
WAN-to-WAN/ZyXEL Device firewall rule for those packets. Contact your ISP to find the correct port number. The screen shown next is for Ethernet encapsulation. Figure 72 NETWORK > WAN > WAN 1 (Ethernet Encapsulation) NBG410W3G Series User’s Guide Chapter 6 WAN Screens... -
Page 118: Table 18 Network > Wan > Wan 1 (Ethernet Encapsulation)
(for example a private IP address used in a local Address network) to a different IP address known within another network (for example a Translation) public IP address used on the Internet). Select this check box to enable NAT. NBG410W3G Series User’s Guide... - Page 119 – IP you clone the MAC address prior to hooking up the WAN port. Address Apply Click Apply to save your changes. Reset Click Reset to begin configuring this screen afresh. NBG410W3G Series User’s Guide Chapter 6 WAN Screens...
-
Page 120: Pppoe Encapsulation
LAN do not need PPPoE software installed, since the ZyXEL Device does that part of the task. Furthermore, with NAT, all of the LANs’ computers will have access. The screen shown next is for PPPoE encapsulation. NBG410W3G Series User’s Guide... -
Page 121: Figure 73 Network > Wan > Wan 1 (Pppoe Encapsulation)
Type the user name given to you by your ISP. Password Type the password associated with the user name above. Retype to Type your password again to make sure that you have entered is correctly. Confirm NBG410W3G Series User’s Guide Chapter 6 WAN Screens... - Page 122 RIP multicast address and so will not receive the RIP packets. However, if one router uses multicasting, then all routers on your network must use multicasting, also. By default, the RIP Version field is set to RIP-1. Chapter 12 on page 225. NBG410W3G Series User’s Guide...
-
Page 123: Pptp Encapsulation
Virtual Private Network (VPN) using TCP/IP-based networks. PPTP supports on-demand, multi-protocol and virtual private networking over public networks, such as the Internet. The screen shown next is for PPTP encapsulation. NBG410W3G Series User’s Guide Chapter 6 WAN Screens... -
Page 124: Figure 74 Network > Wan > Wan 1 (Pptp Encapsulation)
PPTP parameters for a PPTP connection. Type the user name given to you by your ISP. Type the password associated with the user name above. Type your password again to make sure that you have entered it correctly. NBG410W3G Series User’s Guide... - Page 125 When set to None, the ZyXEL Device will not send any RIP packets and will ignore any RIP packets received. By default, RIP Direction is set to Both. NBG410W3G Series User’s Guide Chapter 6 WAN Screens Chapter 12 on page...
-
Page 126: G (Wan)
If you clone the MAC address of a computer on your LAN, it is recommended that you clone the MAC address prior to hooking up the WAN port. Click Apply to save your changes. Click Reset to begin configuring this screen afresh. NBG410W3G Series User’s Guide... -
Page 127: Table 21 2G, 2.5G, 2.75G, 3G And 3.5G Wireless Technologies
To change your ZyXEL Device's 3G WAN settings, click NETWORK > WAN > 3G (WAN 2) or WIRELESS > 3G (WAN 2). NBG410W3G Series User’s Guide CDMA-BASED Interim Standard 95 (IS-95), the first CDMA-based digital cellular standard pioneered by Qualcomm. -
Page 128: Figure 75 Network > Wan > 3G (Wan 2)
Chapter 6 WAN Screens The WAN 1 and WAN 2 IP addresses of a ZyXEL Device with multiple WAN interfaces must be on different subnets. Figure 75 NETWORK > WAN > 3G (WAN 2) NBG410W3G Series User’s Guide... -
Page 129: Table 22 Network > Wan > 3G (Wan 2)
ISP provides a string, which would include the APN, to initialize the 3G card. You can enter up to 72 ASCII printable characters. Spaces are allowed. NBG410W3G Series User’s Guide Table 21 on page 127 for more information. - Page 130 IP address known within another network (for example a Translation) public IP address used on the Internet). Select this checkbox to enable NAT. For more information about NAT see Chapter 12 on page 225. NBG410W3G Series User’s Guide...
- Page 131 You cannot select Allow and Drop at the same time. If you select Disallow and Keep, the ZyXEL Device allows you to transmit data using the current connection, but you cannot build a new connection if the existing connection is disconnected. NBG410W3G Series User’s Guide Chapter 6 WAN Screens...
-
Page 132: Traffic Redirect
(Subnet 2). Configure a LAN to LAN/ZyXEL Device firewall rule that forwards packets from the protected LAN (Subnet 1) to the backup gateway (Subnet 2). Figure 77 Traffic Redirect LAN Setup Backup Gateway NBG410W3G Series User’s Guide Internet... -
Page 133: Configuring Traffic Redirect
Device automatically forwards traffic to this IP address if the ZyXEL Device's Internet Address connection terminates. Apply Click Apply to save your changes. Reset Click Reset to begin configuring this screen afresh. NBG410W3G Series User’s Guide Internet Backup Gateway Subnet 2 192.168.2.0 - 192.168.2.24 Chapter 6 WAN Screens... - Page 134 Chapter 6 WAN Screens NBG410W3G Series User’s Guide...
-
Page 135: Dmz Screens
DMZ ports. From the main menu, click NETWORK > DMZ to open the DMZ screen. The screen appears as shown next. NBG410W3G Series User’s Guide DMZ Screens Appendix C on page 377 for information on IP Chapter 12 on page 225 for more information). -
Page 136: Figure 79 Network > Dmz
RIP multicast address and so will not receive the RIP packets. However, if one router uses multicasting, then all routers on your network must use multicasting, also. By default, RIP direction is set to Both and the Version set to RIP-1. NBG410W3G Series User’s Guide... - Page 137 Clear this check box to block all NetBIOS packets going from the DMZ to WAN 2 and from WAN 2 to the DMZ. Apply Click Apply to save your changes. Reset Click Reset to begin configuring this screen afresh. NBG410W3G Series User’s Guide Chapter 7 DMZ Screens...
-
Page 138: Dmz Static Dhcp
Type the MAC address of a computer on your DMZ. Type the IP address that you want to assign to the computer on your DMZ. Alternatively, click the right mouse button to copy and/or paste the IP address. NBG410W3G Series User’s Guide... -
Page 139: Dmz Ip Alias
Make sure that the subnets of the logical networks do not overlap. To change your ZyXEL Device’s IP alias settings, click NETWORK > DMZ > IP Alias. The screen appears as shown. NBG410W3G Series User’s Guide Chapter 7 DMZ Screens Chapter 12 on page 225... -
Page 140: Figure 81 Network > Dmz > Ip Alias
However, if one router uses multicasting, then all routers on your network must use multicasting, also. By default, RIP direction is set to Both and the Version set to RIP-1. Click Apply to save your changes. Click Reset to begin configuring this screen afresh. NBG410W3G Series User’s Guide... -
Page 141: Dmz Public Ip Address Example
135) and configure the other subnet in the Network > DMZ > IP Alias screen (see Figure 7.4 on page configure NAT for the private DMZ IP addresses. NBG410W3G Series User’s Guide IP: 192.168.1.1 IP: a.b.c.i IP: a.b.c.j 139) to use this kind of network setup. You also need to Chapter 7 DMZ Screens IP: a.b.d.b... -
Page 142: Dmz Port Roles
ZyXEL Device, ports 1 to 4 are all LAN ports by default. Your changes are also reflected in the LAN Port Roles screens. IP: 192.168.1.1 IP: a.b.c.i IP: a.b.c.j IP: a.b.d.b IP: a.b.c.h IP: 10.0.0.1 IP: 10.0.0.2 NBG410W3G Series User’s Guide... -
Page 143: Figure 84 Network > Dmz > Port Roles
Select a port’s DMZ radio button to use the port as part of the DMZ. The port will use the ZyXEL Device’s DMZ IP address and MAC address. Apply Click Apply to save your changes. Reset Click Reset to begin configuring this screen afresh. NBG410W3G Series User’s Guide Chapter 7 DMZ Screens... - Page 144 Chapter 7 DMZ Screens NBG410W3G Series User’s Guide...
-
Page 145: Wireless
Wireless Wi-Fi (147) -
Page 147: Wi-Fi
The wireless network is the part in the blue circle. In this wireless network, devices A and B are called wireless clients. The wireless clients use the access point (AP) to interact with other devices (such as the printer) or with the Internet. Your ZyXEL Device is the AP. NBG410W3G Series User’s Guide Wi-Fi... -
Page 148: Wireless Security Overview
These kinds of wireless devices might not have MAC addresses. Hexadecimal characters are 0, 1, 2, 3, 4, 5, 6, 7, 8, 9, A, B, C, D, E, and F. A MAC ; for example, 00A0C5000002 NBG410W3G Series User’s Guide... -
Page 149: User Authentication
Wireless networks can use encryption to protect the information that is sent in the wireless network. Encryption is like a secret code. If you do not know the secret code, you cannot understand the message. NBG410W3G Series User’s Guide Chapter 8 Wi-Fi... -
Page 150: Table 28 Types Of Encryption For Each Type Of Authentication
Device. Many types of encryption use a key to protect the information in the wireless network. The longer the key, the stronger the encryption. Every wireless client in the wireless network must have the same key. NBG410W3G Series User’s Guide... -
Page 151: Additional Installation Requirements For Using 802.1X
Apply to confirm. You must then change the wireless settings of your computer to match the ZyXEL Device’s new settings. Click WIRELESS > Wi-Fi to open the Wireless Card screen. Figure 86 WIRELESS > Wi-Fi > Wireless Card NBG410W3G Series User’s Guide Chapter 8 Wi-Fi... -
Page 152: Table 29 Wireless > Wi-Fi > Wireless Card
Note: All APs on the same subnet and the wireless clients must have can still use wireless access. The firewall will treat the wireless card as part of the LAN or DMZ respectively. the same SSID to allow roaming. NBG410W3G Series User’s Guide... -
Page 153: Ssid Profile
In the Wireless Card screen, click the edit icon next to an SSID profile to display the following screen. NBG410W3G Series User’s Guide connected to the wireless LAN and you change the ZyXEL Device’s SSID or security settings, you will lose your wireless connection when you press Apply to confirm. -
Page 154: Configuring Wireless Security
Select Enable from the drop down list box to activate MAC address filtering. Click Apply to save your customized settings and exit this screen. Click Cancel to exit this screen without saving. Section 8.4 on page for more information. NBG410W3G Series User’s Guide... -
Page 155: Figure 88 Wireless > Wi-Fi > Security
Click the edit icon to configure security settings for that profile. Click the reset default icon to clear all user-entered configuration information and return the security profile to its factory defaults. NBG410W3G Series User’s Guide DESCRIPTION Select this to have no data encryption. -
Page 156: No Security
Your ZyXEL Device allows you to configure up to four 64-bit, 128-bit or 152-bit WEP keys, but only one key can be used at any one time. In order to configure and enable WEP encryption, click WIRELESS > Wi-Fi > Security > Edit. NBG410W3G Series User’s Guide... -
Page 157: Ieee 802.1X Only
Click Apply to save your customized settings and exit this screen. Cancel Click Cancel to exit this screen without saving. 8.4.3 IEEE 802.1x Only Click the WIRELESS > Wi-Fi > Security > Edit. Select 8021X-Only from the Security Mode list. NBG410W3G Series User’s Guide Chapter 8 Wi-Fi... -
Page 158: Ieee 802.1X + Static Wep
Click Cancel to exit this screen without saving. 8.4.4 IEEE 802.1x + Static WEP Click the WIRELESS > Wi-Fi > Security > Edit. Select 8021X-Static 64 or 8021X- Static128 in the Security Mode field to display the following screen. NBG410W3G Series User’s Guide... -
Page 159: Figure 92 Wireless > Wi-Fi > Security: 802.1X + Static Wep
Click Local User to go to the Local User Database screen where you can view Databases and/or edit the list of users and passwords. Click RADIUS to go to the RADIUS screen where you can configure the ZyXEL Device to check an external RADIUS server. NBG410W3G Series User’s Guide Chapter 8 Wi-Fi... -
Page 160: Wpa, Wpa2, Wpa2-Mix
The re-keying process is the WPA equivalent of automatically changing the WEP key for an AP and all stations in a WLAN on a periodic basis. Setting of the Group Key Update Timer is also supported in WPA(2)-PSK mode. NBG410W3G Series User’s Guide... -
Page 161: Wpa-Psk, Wpa2-Psk, Wpa2-Psk-Mix
Timer order to stay connected. Enter a time interval between 600 and 65535 seconds. If wireless client authentication is done using a RADIUS server, the reauthentication timer on the RADIUS server has priority. NBG410W3G Series User’s Guide Chapter 8 Wi-Fi... -
Page 162: Mac Filter
To change your ZyXEL Device’s MAC filter settings, click the WIRELESS > Wi-Fi > MAC Filter. The screen appears as shown. To activate MAC filtering on a profile, select Enable from the Enable MAC Filtering drop-down list box in the Wireless Card > Edit screen and click Apply. NBG410W3G Series User’s Guide... -
Page 163: Figure 95 Wireless > Wi-Fi > Mac Filter
ZyXEL Device in these address fields. Apply Click Apply to save your changes back to the ZyXEL Device. Reset Click Reset to begin configuring this screen afresh. NBG410W3G Series User’s Guide Chapter 8 Wi-Fi... - Page 164 Chapter 8 Wi-Fi NBG410W3G Series User’s Guide...
-
Page 165: Security
Security Firewall (167) Certificates (195) Authentication Server (191) -
Page 167: Firewall
ZyXEL Device checks the source IP address, destination IP address and IP protocol type of network traffic against the firewall rules (in the order you list them). When the traffic matches a rule, the ZyXEL Device takes the action specified in the rule. NBG410W3G Series User’s Guide Firewall Internet... -
Page 168: Packet Direction Matrix
To set the ZyXEL Device to block traffic from WAN 1 from going to the DMZ interfaces, find where the From WAN1 row and the To DMZ column intersect and set the field to Drop as shown. A specific interface NBG410W3G Series User’s Guide... -
Page 169: Packet Direction Examples
These rules specify which computers on the LAN can access which computers or services connected to WAN 1. See for an example. NBG410W3G Series User’s Guide You can also configure the remote management settings to allow only a specific computer to manage the ZyXEL Device. -
Page 170: Security Considerations
WAN. You could configure one of these rules to allow a WAN computer to manage the ZyXEL Device. You also need to configure the remote management settings to allow a WAN computer to manage the ZyXEL Device. NBG410W3G Series User’s Guide... -
Page 171: Firewall Rules Example
• The first row blocks LAN access to the IRC service on the WAN. • The second row is the firewall’s default policy that allows all traffic from the LAN to go to the WAN. NBG410W3G Series User’s Guide DESTINATIO SCHEDULE... -
Page 172: Figure 100 Limited Lan To Wan Irc Traffic Example
LAN to WAN IRC traffic came first, the CEO’s IRC traffic would match that rule and the ZyXEL Device would drop it and not check any other firewall rules. Section 5.8 on page 106 for information on static DHCP). DESTINATIO SCHEDULE SERVICE ACTION Allow Drop Allow NBG410W3G Series User’s Guide... -
Page 173: Asymmetrical Routes
Figure 101 Using IP Alias to Solve the Triangle Route Problem Subnet 2 9.7 Firewall Default Rule Click SECURITY > FIREWALL to open the Default Rule screen. Use this screen to configure general firewall settings. NBG410W3G Series User’s Guide Subnet 1 Chapter 9 Firewall ISP 1 Internet... -
Page 174: Figure 102 Security > Firewall > Default Rule
LAN without passing through the ZyXEL Device. A better solution is to use IP alias to put the ZyXEL Device and the backup gateway on separate subnets. See 9.6.1 on page 173 for an example. Section NBG410W3G Series User’s Guide... -
Page 175: Firewall Rule Summary
The ordering of your rules is very important as rules are applied in the order that they are listed. Section 9.1 on page 167 NBG410W3G Series User’s Guide for more information about the firewall. Chapter 9 Firewall... -
Page 176: Figure 103 Security > Firewall > Rule Summary
Any. Service Type This drop-down list box displays the services to which this firewall rule applies. Custom services have an * before the name. See of common services. Appendix D on page 385 for a list NBG410W3G Series User’s Guide... -
Page 177: Firewall Edit Rule
Rule screen. Use this screen to create or edit a firewall rule. Refer to the following table for information on the labels. Section 9.1 on page 167 NBG410W3G Series User’s Guide for more information about the firewall. Chapter 9 Firewall... -
Page 178: Figure 104 Security > Firewall > Rule Summary > Edit
Chapter 9 Firewall Figure 104 SECURITY > FIREWALL > Rule Summary > Edit NBG410W3G Series User’s Guide... -
Page 179: Table 44 Security > Firewall > Rule Summary > Edit
Send Alert Select the check box to have the ZyXEL Device generate an alert when the rule is Message to matched. Administrator When Matched NBG410W3G Series User’s Guide Chapter 9 Firewall Appendix D on page 385 for a list of... -
Page 180: Anti-Probing
NAT address mapping rules) if you want to allow computers on the WAN to access devices on the LAN. settings if you want to allow a WAN computer to manage the ZyXEL Device or restrict management from the LAN. NBG410W3G Series User’s Guide... -
Page 181: Firewall Thresholds
ACK (acknowledgment). After this handshake, a connection is established. Figure 106 Three-Way Handshake For UDP, half-open means that the firewall has detected no return traffic. An unusually high number (or arrival rate) of half-open sessions could indicate a DOS attack. NBG410W3G Series User’s Guide Chapter 9 Firewall... -
Page 182: Threshold Values
9.11 Threshold Screen Click SECURITY > FIREWALL > Threshold to bring up the next screen. The global values specified for the threshold and timeout apply to all TCP connections. Figure 107 SECURITY > FIREWALL > Threshold NBG410W3G Series User’s Guide... -
Page 183: Table 46 Security > Firewall > Threshold
Deny new connection requests for the number of minutes that you specify (between 1 and 256). Apply Click Apply to save your changes. Reset Click Reset to begin configuring this screen afresh. NBG410W3G Series User’s Guide Chapter 9 Firewall... -
Page 184: Service
ZyXEL Device. Section 9.1 on page 167 Figure 108 SECURITY > FIREWALL > Service for more information about the firewall. NBG410W3G Series User’s Guide... -
Page 185: Firewall Edit Custom Service
Section 9.1 on page 167 Figure 109 Firewall Edit Custom Service NBG410W3G Series User’s Guide Appendix D on page 385 for a list of common services. the user’s guide appendices for a list of commonly used services and for more information about the firewall. -
Page 186: My Service Firewall Rule Example
Enter the type number in the Type field and select the Code radio button and enter the code number if any. Click Apply to save your customized settings and exit this screen. Click Cancel to exit this screen without saving. NBG410W3G Series User’s Guide... -
Page 187: Figure 111 My Service Firewall Rule Example: Edit Custom Service
5 The Edit Rule screen displays. Enter the name of the firewall rule. 6 Select Any in the Destination Address(es) box and then click Delete. 7 Configure the destination address fields as follows and click Add. NBG410W3G Series User’s Guide Chapter 9 Firewall... -
Page 188: Figure 113 My Service Firewall Rule Example: Rule Edit: Source And Destination Addresses
Service(s) to configure it as follows. Click Apply when you are done. Custom services show up with an * before their names in the Services list boxes and the Rule Summary screen’s Service Type list box. NBG410W3G Series User’s Guide... -
Page 189: Figure 114 My Service Firewall Rule Example: Edit Rule: Service Configuration
Chapter 9 Firewall Figure 114 My Service Firewall Rule Example: Edit Rule: Service Configuration Rule 1 allows a My Service connection from WAN 1 to IP addresses 10.0.0.10 through 10.0.0.15 on the LAN. NBG410W3G Series User’s Guide... -
Page 190: Figure 115 My Service Firewall Rule Example: Rule Summary: Completed
Chapter 9 Firewall Figure 115 My Service Firewall Rule Example: Rule Summary: Completed NBG410W3G Series User’s Guide... -
Page 191: Authentication Server
ZyXEL Device. The ZyXEL Device can use this list of user profiles to authenticate users. Use this screen to change your ZyXEL Device’s list of user profiles. NBG410W3G Series User’s Guide Appendix E on page 389... -
Page 192: Figure 116 Security > Auth Server > Local User Database
Chapter 10 Authentication Server Figure 116 SECURITY > AUTH SERVER > Local User Database NBG410W3G Series User’s Guide... -
Page 193: Radius
LABEL Authentication Server Active Server IP Address Port Number NBG410W3G Series User’s Guide DESCRIPTION Select the check box to enable user authentication through an external authentication server. Clear the check box to enable user authentication using the local user profile on the ZyXEL Device. - Page 194 The key is not sent over the network. This key must be the same on the external accounting server and ZyXEL Device. Click Apply to save your changes. Click Reset to begin configuring this screen afresh. NBG410W3G Series User’s Guide...
-
Page 195: Certificates
A certification path is the hierarchy of certification authority certificates that validate a certificate. The ZyXEL Device does not trust a certificate if any certificate on its path has expired or been revoked. NBG410W3G Series User’s Guide Certificates... -
Page 196: Advantages Of Certificates
2 Make sure that the certificate has a “.cer” or “.crt” file name extension. Figure 118 Certificates on Your Computer 3 Double-click the certificate’s icon to open the Certificate window. Click the Details tab and scroll down to the Thumbprint Algorithm and Thumbprint fields. NBG410W3G Series User’s Guide... -
Page 197: Configuration Summary
Use the Trusted Remote Hosts screens to import self-signed certificates from trusted remote hosts. Use the Directory Servers screen to configure a list of addresses of directory servers (that contain lists of valid and revoked certificates). NBG410W3G Series User’s Guide Chapter 11 Certificates... -
Page 198: My Certificates
My Certificate Import screen to import the certificate and replace the request. SELF represents a self-signed certificate. *SELF represents the default self-signed certificate, which the ZyXEL Device uses to sign imported trusted remote host certificates. CERT represents a certificate issued by a certification authority. NBG410W3G Series User’s Guide... - Page 199 Click Create to go to the screen where you can have the ZyXEL Device generate a certificate or a certification request. Refresh Click Refresh to display the current validity status of the certificates. NBG410W3G Series User’s Guide Chapter 11 Certificates...
-
Page 200: My Certificate Details
(not a certification authority). “X.509” means that this certificate was created and signed according to the ITU-T X.509 recommendation that defines the formats for public-key certificates. This field displays the X.509 version number. NBG410W3G Series User’s Guide... - Page 201 Cancel Click Cancel to quit and return to the My Certificates screen. NBG410W3G Series User’s Guide Chapter 11 Certificates...
-
Page 202: My Certificate Export
Click Apply and then Save in the File Download screen. The Save As screen opens, browse to the location that you want to use and click Save. Click Cancel to quit and return to the My Certificates screen. NBG410W3G Series User’s Guide... -
Page 203: My Certificate Import
ZyXEL Device. Be careful to not convert a binary file to text during the transfer process. It is easy for this to occur since many programs use text files by default. NBG410W3G Series User’s Guide Chapter 11 Certificates... -
Page 204: Figure 124 Security > Certificates > My Certificates > Import
Type the file’s password that was created when the PKCS #12 file was exported. Apply Click Apply to save the certificate on the ZyXEL Device. Cancel Click Cancel to quit and return to the My Certificates screen. NBG410W3G Series User’s Guide... -
Page 205: My Certificate Create
Certificate Create screen. Use this screen to have the ZyXEL Device create a self-signed certificate, enroll a certificate with a certification authority or generate a certification request. Figure 126 SECURITY > CERTIFICATES > My Certificates > Create (Basic) NBG410W3G Series User’s Guide Chapter 11 Certificates... -
Page 206: Figure 127 Security > Certificates > My Certificates > Create (Advanced)
<< Basic. The certification authority may add fields (such as a serial number) to the subject information when it issues a certificate. It is recommended that each certificate have unique subject information. NBG410W3G Series User’s Guide... - Page 207 Country The fields below display when you click Advanced >>. Subject Name NBG410W3G Series User’s Guide DESCRIPTION Select a radio button to identify the certificate’s owner by IP address, domain name or e-mail address. Type the IP address (in dotted decimal notation), domain name or e-mail address in the field provided.
- Page 208 RA (Registration Authority). The RA is an intermediary authorized by a CA to verify each subscriber’s identity and forward the requests to the CA. After the CA signs and issues the certificates, the RA distributes the certificates to the subscribers. NBG410W3G Series User’s Guide...
-
Page 209: Trusted Cas
NBG410W3G Series User’s Guide DESCRIPTION the drop-down list box. You must have the certificate already imported in the Trusted CAs screen. -
Page 210: Figure 128 Security > Certificates > Trusted Cas
Check incoming certificates issued by this CA against a CRL check box in the certificate’s details screen to have the ZyXEL Device check the CRL before trusting any certificates issued by the certification authority. Otherwise the field displays No. NBG410W3G Series User’s Guide... -
Page 211: Trusted Ca Details
ZyXEL Device to check a certification authority’s list of revoked certificates before trusting a certificate issued by the certification authority. NBG410W3G Series User’s Guide Chapter 11 Certificates... -
Page 212: Figure 129 Security > Certificates > Trusted Cas > Details
Certificate Revocation List (CRL). Clear this check box to have the ZyXEL Device not check incoming certificates that are issued by this certification authority against a Certificate Revocation List (CRL). NBG410W3G Series User’s Guide... - Page 213 This field displays general information about the certificate. For example, Subject Type=CA means that this is a certification authority’s certificate and “Path Length Constraint=1” means that there can only be one certification authority in the certificate’s path. NBG410W3G Series User’s Guide Chapter 11 Certificates...
-
Page 214: Trusted Ca Import
ZyXEL Device to check the CRL that the certification authority issues before trusting a certificate issued by the certification authority. Click Cancel to quit and return to the Trusted CAs screen. NBG410W3G Series User’s Guide... -
Page 215: Trusted Remote Hosts
You do not need to add any certificate that is signed by one of the certification authorities on the Trusted CAs screen since the ZyXEL Device automatically accepts any valid certificate signed by a trusted certification authority as being trustworthy. NBG410W3G Series User’s Guide Chapter 11 Certificates... -
Page 216: Figure 131 Security > Certificates > Trusted Remote Hosts
Click Import to open a screen where you can save the certificate of a remote host (which you trust) from your computer to the ZyXEL Device. Click this button to display the current validity status of the certificates. NBG410W3G Series User’s Guide... -
Page 217: Trusted Remote Hosts Import
Click Browse to find the certificate file you want to upload. Apply Click Apply to save the certificate on the ZyXEL Device. Cancel Click Cancel to quit and return to the Trusted Remote Hosts screen. NBG410W3G Series User’s Guide Chapter 11 Certificates... -
Page 218: Trusted Remote Host Certificate Details
Remote Hosts screen. Click the details icon to open the Trusted Remote Host Details screen. You can use this screen to view in-depth information about the trusted remote host’s certificate and/or change the certificate’s name. Figure 133 SECURITY > CERTIFICATES > Trusted Remote Hosts > Details NBG410W3G Series User’s Guide... -
Page 219: Table 62 Security > Certificates > Trusted Remote Hosts > Details
Subject Alternative Name Key Usage Basic Constraint NBG410W3G Series User’s Guide DESCRIPTION This field displays the identifying name of this certificate. If you want to change the name, type up to 31 characters to identify this key certificate. You may use any character (not including spaces). -
Page 220: Directory Servers
Click Apply to save your changes back to the ZyXEL Device. You can only change the name of the certificate. Click Cancel to quit configuring this screen and return to the Trusted Remote Hosts screen. NBG410W3G Series User’s Guide... -
Page 221: Directory Server Add Or Edit
The following table describes the labels in this screen. Table 64 SECURITY > CERTIFICATES > Directory Server > Add LABEL DESCRIPTION Directory Service Setting Name Type up to 31 ASCII characters (spaces are not permitted) to identify this directory server. NBG410W3G Series User’s Guide Chapter 11 Certificates... - Page 222 Type the password (up to 31 ASCII characters) from the entity maintaining the directory server (usually a certification authority). Click Apply to save your changes back to the ZyXEL Device. Click Cancel to quit configuring this screen and return to the Directory Servers screen. NBG410W3G Series User’s Guide...
-
Page 223: Advanced
Advanced Network Address Translation (NAT) (225) Static Route (243) DNS (247) Remote Management (259) UPnP (281) Custom Application (291) ALG Screen (293) -
Page 225: Network Address Translation (Nat)
This refers to the host on the WAN. Local This refers to the packet address (source or destination) as the packet travels on the LAN. Global This refers to the packet address (source or destination) as the packet travels on the WAN. NBG410W3G Series User’s Guide (NAT) -
Page 226: What Nat Does
Many-to-One and Many-to-Many Overload NAT mapping) in each packet and then forwards it to the Internet. The ZyXEL Device keeps track of the original addresses and port numbers so incoming reply packets can have their original values restored. The following figure illustrates this. NBG410W3G Series User’s Guide... -
Page 227: Nat Application
The following figure illustrates a possible NAT application, where three inside LANs (logical LANs using IP Alias) behind the ZyXEL Device can communicate with three distinct WAN networks. More examples follow at the end of this chapter. NBG410W3G Series User’s Guide Chapter 12 Network Address Translation (NAT) NAT Table... -
Page 228: Port Restricted Cone Nat
=IP1 (IGA 1) Internet WAN Addresses: LAN Addresses: (Default IPs) IGA 1 ---------------> 192.168.1.1 IGA 2 ---------------> 192.168.2.1 IGA 3 ---------------> 192.168.3.1 NBG410W3G Series User’s Guide Server in Sales Network =IP2 (IGA 2) Server in R&D Network =IP3 (IGA 3) -
Page 229: Nat Mapping Types
NAT to be accessible to the outside world although, it is highly recommended that you use the DMZ port for these servers instead. Port numbers do not change for One-to-One and Many-One-to-One NAT mapping types. NBG410W3G Series User’s Guide Chapter 12 Network Address Translation (NAT) 2, B 3, C... -
Page 230: Using Nat
IP MAPPING ILA1 IGA1 ILA1 IGA1 ILA2 IGA1 … IGA1 ILA2 IGA2 ILA3 IGA1 ILA4 IGA2 … ILA1 IGA1 ILA2 IGA2 ILA3 IGA3 … Server 1 IP IGA1 Server 2 IP IGA1 Server 3 IP IGA1 NBG410W3G Series User’s Guide... -
Page 231: Figure 139 Advanced > Nat > Nat Overview
The first number shows how many address mapping rules are configured on the ZyXEL Device. The second number shows the maximum number of address mapping rules that can be configured on the ZyXEL Device. NBG410W3G Series User’s Guide Chapter 12 Network Address Translation (NAT) -
Page 232: Nat Address Mapping
9. In the set summary screen, the new rule will be rule 7, not 9. Now if you delete rule 4, rules 5 to 7 will be pushed up by 1 rule, so old rules 5, 6 and 7 become new rules 4, 5 and 6. existing rules. for more on NAT. NBG410W3G Series User’s Guide... -
Page 233: Figure 140 Advanced > Nat > Address Mapping
Global Start IP This refers to the Inside Global IP Address (IGA), that is the starting global IP address. 0.0.0.0 is for a dynamic IP address from your ISP with Many-to-One and Server mapping types. NBG410W3G Series User’s Guide Chapter 12 Network Address Translation (NAT) -
Page 234: Nat Address Mapping Edit
Click the edit icon to display the NAT Address Mapping Edit screen. Use this screen to edit an address mapping rule. See mapping. Figure 141 ADVANCED > NAT > Address Mapping > Edit Section 12.1 on page 225 for information on NAT and address NBG410W3G Series User’s Guide... -
Page 235: Port Forwarding
12.5.1 Default Server IP Address In addition to the servers for specified services, NAT supports a default server IP address. A default server receives packets from ports that are not specified in this screen. NBG410W3G Series User’s Guide Chapter 12 Network Address Translation (NAT) -
Page 236: Management Setup
192.168.1.35 to a third (C in the example). You assign the LAN IP addresses and the ISP assigns the WAN IP address. The NAT network appears as a single host on the Internet. PORT NUMBER 1723 NBG410W3G Series User’s Guide... -
Page 237: Nat And Multiple Wan
In this example, anyone wanting to access server A from the Internet must use port 8080. Anyone wanting to access server B from the Internet must use port 8100. NBG410W3G Series User’s Guide Chapter 12 Network Address Translation (NAT) 192.168.1.1... -
Page 238: Port Forwarding Screen
WAN Encapsulation to Ethernet and the Service Type to something other than Standard. 192.168.1.1 Port Translation 192.168.1.33: 80 <----> a.b.c.d: 8080 192.168.1.34: 80 <----> a.b.c.d: 8100 for port numbers commonly used for particular services. NBG410W3G Series User’s Guide... -
Page 239: Figure 144 Advanced > Nat > Port Forwarding
Server IP Enter the inside IP address of the server here. Address Apply Click Apply to save your changes. Reset Click Reset to begin configuring this screen afresh. NBG410W3G Series User’s Guide Chapter 12 Network Address Translation (NAT) -
Page 240: Port Triggering
The ZyXEL Device times out in three minutes with UDP (User Datagram Protocol) or two hours with TCP/IP (Transfer Control Protocol/Internet Protocol). Click ADVANCED > NAT > Port Triggering to open the following screen. Use this screen to change your ZyXEL Device’s trigger port settings. Internet NBG410W3G Series User’s Guide... -
Page 241: Figure 146 Advanced > Nat > Port Triggering
Type a port number or the ending port number in a range of port numbers. Apply Click Apply to save your changes. Reset Click Reset to begin configuring this screen afresh. NBG410W3G Series User’s Guide Chapter 12 Network Address Translation (NAT) - Page 242 Chapter 12 Network Address Translation (NAT) NBG410W3G Series User’s Guide...
-
Page 243: Static Route
(R1). You create one static route to connect to services offered by your ISP behind router R2. You create another static route to communicate with a separate network behind a router (R3) connected to the LAN. Figure 147 Example of Static Routing Topology NBG410W3G Series User’s Guide Static Route... -
Page 244: Ip Static Route
WAN interfaces. You cannot modify or delete a static default route. The default route is disabled after you change the static WAN IP address to a dynamic WAN IP address. Figure 148 ADVANCED > STATIC ROUTE > IP Static Route NBG410W3G Series User’s Guide... -
Page 245: Ip Static Route Edit
255.255.255.255 in the subnet mask field to force the network number to be identical to the host ID. IP Subnet Mask Enter the IP subnet mask here. NBG410W3G Series User’s Guide Chapter 13 Static Route... - Page 246 Select this check box to keep this route private and not included in RIP broadcasts. Clear this check box to propagate this route to other hosts through RIP broadcasts. Apply Click Apply to save your changes. Cancel Click Cancel to exit this screen without saving. NBG410W3G Series User’s Guide...
-
Page 247: Dns
2 Use the DNS DHCP screen to configure the DNS server information that the ZyXEL Device sends to the DHCP client devices on the LAN or DMZ. 3 Use the REMOTE MGMT DNS screen to configure the ZyXEL Device to accept or discard DNS queries. NBG410W3G Series User’s Guide Section... -
Page 248: Address Record
LAN or from the ISP since these DNS servers cannot resolve domain names to private IP addresses on the remote private network. 14.6 System Screen Click ADVANCED > DNS to display the following screen. Use this screen to configure your ZyXEL Device’s DNS address and name server records. NBG410W3G Series User’s Guide... -
Page 249: Figure 150 Advanced > Dns > System Dns
A name server record with a domain zone is always put before a record without a domain zone. This is the index number of the name server record. NBG410W3G Series User’s Guide for information on the fields. Chapter 14 DNS... -
Page 250: Adding An Address Record
Click Insert to open a screen where you can insert a new name server record. Refer to Table 76 on page 252 for information on the fields. Section 14.4 on page 248 for more on address records. NBG410W3G Series User’s Guide... -
Page 251: Inserting A Name Server Record
A domain zone may also be included. A domain zone is a fully qualified domain name without the host. For example, zyxel.com.tw is the domain zone for the www.zyxel.com.tw fully qualified domain name. Figure 152 ADVANCED > DNS > Insert (Name Server Record) NBG410W3G Series User’s Guide Chapter 14 DNS... -
Page 252: Dns Cache
IP address from the entry. If the DNS query matches a negative entry, the ZyXEL Device replies that the DNS query failed. 14.8 Configure DNS Cache To configure your ZyXEL Device’s DNS caching, click ADVANCED > DNS > Cache. The screen appears as shown. NBG410W3G Series User’s Guide... -
Page 253: Figure 153 Advanced > Dns > Cache
This is the index number of a record. Cache Type This displays whether the response for the DNS request is positive or negative. Domain Name This is the domain name of a host. NBG410W3G Series User’s Guide Chapter 14 DNS... -
Page 254: Configuring Dns Dhcp
The ZyXEL Device passes a DNS (Domain Name System) server IP address to the DHCP clients. Select an interface from the drop-down list box to configure the DNS servers for the specified interface. These read-only labels represent the DNS servers. NBG410W3G Series User’s Guide... -
Page 255: Dynamic Dns
Enabling the wildcard feature for your host causes *.yourhost.dyndns.org to be aliased to the same IP address as yourhost.dyndns.org. This feature is useful if you want to be able to use, for example, www.yourhost.dyndns.org and still reach your hostname. NBG410W3G Series User’s Guide Chapter 14 DNS... -
Page 256: High Availability
Figure 155 ADVANCED > DNS > DDNS The following table describes the labels in this screen. LABEL Account Setup Active Service Provider DESCRIPTION Select this check box to use dynamic DNS. This is the name of your Dynamic DNS service provider. NBG410W3G Series User’s Guide... - Page 257 Apply Click Apply to save your changes. Reset Click Reset to begin configuring this screen afresh. NBG410W3G Series User’s Guide address if there is an HTTP proxy server between the ZyXEL Device and the DDNS server. traffic redirect. Chapter 14 DNS...
- Page 258 Chapter 14 DNS NBG410W3G Series User’s Guide...
-
Page 259: Remote Management
The priorities for the different types of remote management sessions are as follows. 1 Console port 2 SSH NBG410W3G Series User’s Guide Remote Management HTTPS HTTP Telnet for details on configuring firewall rules. -
Page 260: Remote Management Limitations
CA that is a trusted CA on the ZyXEL Device. Please refer to the following figure. 1 HTTPS connection requests from an SSL-aware web browser go to port 443 (by default) on the ZyXEL Device’s WS (web server). Chapter 11 on page 195 for more NBG410W3G Series User’s Guide... -
Page 261: Www
ZyXEL Device blocks all HTTP connection attempts. 15.3 WWW Click ADVANCED > REMOTE MGMT to open the WWW screen. Use this screen to configure the ZyXEL Device’s HTTP and HTTPS management settings. NBG410W3G Series User’s Guide Chapter 15 Remote Management... -
Page 262: Figure 158 Advanced > Remote Mgmt > Www
Server Port You may change the server port number for a service if needed, however you must use the same port number in order to use that service for remote management. Appendix F on page 403 NBG410W3G Series User’s Guide... -
Page 263: Https Example
When you attempt to access the ZyXEL Device HTTPS server, a Website Certified by an Unknown Authority screen pops up asking if you trust the server certificate. Click Examine Certificate if you want to verify that the certificate is from the ZyXEL Device. NBG410W3G Series User’s Guide Chapter 15 Remote Management... -
Page 264: Avoiding The Browser Warning Messages
• To have the browser trust the certificates issued by a certificate authority, import the certificate authority’s certificate into your operating system as a trusted certificate. Refer to Appendix F on page 403 EXAMPLE EXAMPLE EXAMPLE for details. NBG410W3G Series User’s Guide... -
Page 265: Login Screen
Figure 162 Example: Lock Denoting a Secure Connection Click Login and you then see the next screen. The factory default certificate is a common default certificate for all ZyXEL Device models. NBG410W3G Series User’s Guide Chapter 15 Remote Management Figure 164 on page 266... -
Page 266: Figure 163 Replace Certificate
My Certificates screen. You will see information similar to that shown in the following figure. Figure 164 Device-specific Certificate Click Ignore in the Replace Certificate screen to use the common ZyXEL Device certificate. You will then see this information in the My Certificates screen. NBG410W3G Series User’s Guide... -
Page 267: Ssh
ZyXEL Device for a management session. Figure 166 SSH Communication Over the WAN Example 15.6 How SSH Works The following table summarizes how a secure connection is established between two remote hosts. NBG410W3G Series User’s Guide Chapter 15 Remote Management... -
Page 268: Ssh Implementation On The Zyxel Device
You must install an SSH client program on a client computer (Windows or Linux operating system) that is used to connect to the ZyXEL Device over SSH. SSH Client Connection request Host Key, Server Key Session Key Encryption method to use Password / User name Data Transmission NBG410W3G Series User’s Guide... -
Page 269: Configuring Ssh
ZyXEL Device using this service. Apply Click Apply to save your customized settings and exit this screen. Reset Click Reset to begin configuring this screen afresh. NBG410W3G Series User’s Guide for details). Chapter 15 Remote Management Chapter 11 on page... -
Page 270: Secure Telnet Using Ssh Examples
192.168.1.1). A message displays indicating the SSH protocol version supported by the ZyXEL Device. Figure 170 SSH Example 2: Test $ telnet 192.168.1.1 22 Trying 192.168.1.1... Connected to 192.168.1.1. Escape character is '^]'. SSH-1.5-1.0.0 NBG410W3G Series User’s Guide... -
Page 271: Secure Ftp Using Ssh Example
ZyXEL Device. Type “yes” and press [ENTER]. 2 Enter the password to login to the ZyXEL Device. 3 Use the “put” command to upload a new firmware to the ZyXEL Device. NBG410W3G Series User’s Guide Chapter 15 Remote Management... -
Page 272: Telnet
Telnet access and from which IP address the access can come. It is recommended that you disable Telnet and FTP when you configure SSH for secure connections. Figure 173 ADVANCED > REMOTE MGMT > Telnet NBG410W3G Series User’s Guide... -
Page 273: Ftp
IP address the access can come. It is recommended that you disable Telnet and FTP when you configure SSH for secure connections. Figure 174 ADVANCED > REMOTE MGMT > FTP NBG410W3G Series User’s Guide Chapter 15 Remote Management... -
Page 274: Snmp
ZyXEL Device supports SNMP agent functionality, which allows a manager station to manage and monitor the ZyXEL Device through the network. The ZyXEL Device supports SNMP version one (SNMPv1). The next figure illustrates an SNMP management operation. SNMP is only available if TCP/IP is configured. NBG410W3G Series User’s Guide... -
Page 275: Supported Mibs
15.14.1 Supported MIBs The ZyXEL Device supports MIB II that is defined in RFC-1213 and RFC-1215. The focus of the MIBs is to let administrators collect statistical data and monitor status and performance. NBG410W3G Series User’s Guide Chapter 15 Remote Management... -
Page 276: Snmp Traps
A trap is sent with the message "System reboot by user!" if reboot is done intentionally, (for example, download new files, CI command "sys reboot", etc.). A trap is sent with the message of the fatal code if the system reboots because of fatal errors. NBG410W3G Series User’s Guide... -
Page 277: Dns
Use this screen to set from which IP address the ZyXEL Device will accept DNS queries and on which interface it can send them your ZyXEL Device’s DNS settings. Figure 177 ADVANCED > REMOTE MGMT > DNS NBG410W3G Series User’s Guide Chapter 15 Remote Management for more information. -
Page 278: Introducing Vantage Cnm
ZyXEL Device (using either the web configurator or commands) without notifying the Vantage CNM administrator. 15.17 Configuring CNM Vantage CNM is disabled on the device by default. Click ADVANCED > REMOTE MGMT > CNM to configure your device’s Vantage CNM settings. NBG410W3G Series User’s Guide... -
Page 279: Figure 178 Advanced > Remote Mgmt > Cnm
Vantage CNM Setup Enable Vantage CNM Server Address NBG410W3G Series User’s Guide DESCRIPTION This read only field displays Not Registered when Enable is not selected. It displays Registering when the ZyXEL Device first connects with the Vantage CNM server and then Registered after it has been successfully registered with the Vantage CNM server. -
Page 280: Additional Configuration For Vantage Cnm
("0" to "9", "a" to "z" or "A" to "Z") when you choose the 3DES encryption algorithm. The ZyXEL Device must use the same encryption key as the Vantage CNM server. Click Apply to save your changes. Click Reset to begin configuring this screen afresh. NBG410W3G Series User’s Guide... -
Page 281: Upnp
When a UPnP device joins a network, it announces its presence with a multicast message. For security reasons, the ZyXEL Device allows multicast messages on the LAN only. NBG410W3G Series User’s Guide for further information about NAT. UPnP... -
Page 282: Upnp And Zyxel
UPnP enabled application. Select this check box to allow traffic from UPnP-enabled applications to bypass the firewall. Clear this check box to have the firewall block all UPnP application packets (for example, MSN packets). NBG410W3G Series User’s Guide... -
Page 283: Displaying Upnp Port Mapping
Internal Client on the Internal Port. When this field displays an external IP address, the NAT rule has the ZyXEL Device forward inbound packets to the Internal Client from that IP address only. NBG410W3G Series User’s Guide DESCRIPTION Select through which WAN port you want to send out traffic from UPnP- enabled applications. -
Page 284: Installing Upnp In Windows Example
“0” if the port mapping is static. Apply Click Apply to save your changes. Refresh Click Refresh update the screen’s table. 16.4 Installing UPnP in Windows Example This section shows how to install UPnP in Windows Me and Windows XP. NBG410W3G Series User’s Guide... -
Page 285: Installing Upnp In Windows Me
Universal Plug and Play check box in the Components selection box. 4 Click OK to go back to the Add/ Remove Programs Properties window and click Next. 5 Restart the computer when prompted. NBG410W3G Series User’s Guide Chapter 16 UPnP... -
Page 286: Installing Upnp In Windows Xp
This section shows you how to use the UPnP feature in Windows XP. You must already have UPnP installed in Windows XP and UPnP activated on the ZyXEL device. Make sure the computer is connected to a LAN port of the ZyXEL device. Turn on your computer and the ZyXEL device. NBG410W3G Series User’s Guide... -
Page 287: Auto-Discover Your Upnp-Enabled Network Device
3 In the Internet Connection Properties window, click Settings to see the port mappings that were automatically created. NBG410W3G Series User’s Guide Chapter 16 UPnP You may edit or delete the port mappings or click Add to manually add port mappings. -
Page 288: Web Configurator Easy Access
With UPnP, you can access the web-based configurator on the ZyXEL device without finding out the IP address of the ZyXEL device first. This is helpful if you do not know the IP address of the ZyXEL device. NBG410W3G Series User’s Guide... - Page 289 Other Places. 4 An icon with the description for each UPnP-enabled device displays under Local Network. 5 Right-click the icon for your ZyXEL device and select Invoke. The web configurator login screen displays. NBG410W3G Series User’s Guide Chapter 16 UPnP...
- Page 290 Chapter 16 UPnP 6 Right-click the icon for your ZyXEL device and select Properties. A properties window displays with basic information about the ZyXEL device. EXAMPLE NBG410W3G Series User’s Guide...
-
Page 291: Custom Application
Click ADVANCED > Custom APP to open the Custom Application screen. This screen only specifies what port numbers the ZyXEL Device checks for specific protocol traffic. Use other screens to enable or disable the monitoring of the protocol traffic. NBG410W3G Series User’s Guide Custom Application... -
Page 292: Figure 181 Advanced > Custom App
If you are only entering a single port number, enter it here. End Port Enter the ending port for the range that the ZyXEL Device is to monitor for this application. Apply Click Apply to save your changes. Reset Click Reset to begin configuring this screen afresh. NBG410W3G Series User’s Guide... -
Page 293: Alg Screen
ZyXEL Device determines from its inspection of the data payload of the application’s packets. The firewall rule is automatically deleted after the application’s traffic has gone through. NBG410W3G Series User’s Guide ALG Screen... -
Page 294: Alg And Multiple Wan
• You must configure the firewall and port forwarding to allow incoming (peer-to-peer) calls from the WAN to a private IP address on the LAN or DMZ. The following example shows H.323 signaling (1) and audio (2) sessions between H.323 devices A and B. NBG410W3G Series User’s Guide... -
Page 295: Sip
IP address that NAT assigned, so the VoIP device can embed it in the SIP data stream. See RFC 3489 for details on STUN. You do not need to use STUN for devices behind the ZyXEL Device if you enable the SIP ALG. NBG410W3G Series User’s Guide Chapter 18 ALG Screen... -
Page 296: Sip Alg Details
You cannot hear anything and you will need to make a new call to continue your conversation. 18.6 ALG Screen Click ADVANCED > ALG to open the ALG screen. Use the ALG screen to turn individual ALGs off or on and set the SIP timeout. NBG410W3G Series User’s Guide... -
Page 297: Figure 185 Advanced > Alg
Device SIP timeout (default 60 minutes), the ZyXEL Device SIP ALG drops any incoming calls after the timeout period. Enter the SIP signaling session timeout value. Apply Click Apply to save your changes. Reset Click Reset to begin configuring this screen afresh. NBG410W3G Series User’s Guide Chapter 18 ALG Screen... - Page 298 Chapter 18 ALG Screen NBG410W3G Series User’s Guide...
-
Page 299: Logs And Maintenance
Logs and Maintenance Logs Screens (301) Maintenance (325) -
Page 301: Logs Screens
Click a column heading to sort the entries. A triangle indicates ascending or descending sort order. Figure 186 LOGS > View Log NBG410W3G Series User’s Guide Logs Screens Section 19.5 on page 312 for example log message Section 19.3 on page... -
Page 302: Log Description Example
NetBIOS UDP broadcast packet meant to discover devices on the network. Section 20.4 on page 327 Section 19.3 on page 304). Section 19.5 on page 312 source destination |172.21.255.255:137 NBG410W3G Series User’s Guide Section 19.3 on page for more log message... -
Page 303: About The Certificate Not Trusted Log
1 Go to http://www.myZyXEL.com and log in with your account. 2 Click Download Center and then Certificate Download. Figure 187 myZyXEL.com: Download Center 3 Click the link in the Certificate Download screen. NBG410W3G Series User’s Guide Chapter 19 Logs Screens... -
Page 304: Configuring Log Settings
Alerts are e-mailed as soon as they happen. Logs may be e-mailed as soon as the log is full (see Log Schedule). Selecting many alert and/or log categories (especially Access Control) may result in many e-mails being sent. NBG410W3G Series User’s Guide... -
Page 305: Figure 189 Logs > Log Settings
Chapter 19 Logs Screens Figure 189 LOGS > Log Settings NBG410W3G Series User’s Guide... -
Page 306: Table 90 Logs > Log Settings
Select a location from the drop down list box. The log facility allows you to log the messages to different files in the syslog server. Refer to the documentation of your syslog program for more details. Select the categories of logs that you want to record. Logs include alerts. NBG410W3G Series User’s Guide... -
Page 307: Configuring Reports
HTTP GET references to other web sites and the ZyXEL Device may count these as hits, thus the web hit count is not (yet) 100% accurate. Click LOGS > Reports to display the following screen. NBG410W3G Series User’s Guide DESCRIPTION Select the categories of alerts for which you want the ZyXEL Device to instantly e-mail alerts to the e-mail address specified in the Send Alerts To field. -
Page 308: Figure 190 Logs > Reports
IP addresses. Refresh Click Refresh to update the report display. The report also refreshes automatically when you close and reopen the screen. Flush Click Flush to discard the old report data and update the report display. NBG410W3G Series User’s Guide... -
Page 309: Viewing Web Site Hits
ZyXEL Device record and display the LAN or DMZ IP addresses that the most traffic has been sent to and/or from and how much traffic has been sent to and/or from those IP addresses. NBG410W3G Series User’s Guide Chapter 19 Logs Screens Table 95 on page... -
Page 310: Viewing Protocol/Port
In the Reports screen, select Protocol/Port from the Report Type drop-down list box to have the ZyXEL Device record and display which protocols or service ports have been used the most and the amount of traffic for the most used protocols or service ports. Table 95 on page 312). NBG410W3G Series User’s Guide... -
Page 311: Figure 193 Logs > Reports: Protocol/Port Example
The count starts over at 0 if a protocol or port passes the bytes count limit (see NBG410W3G Series User’s Guide Chapter 19 Logs Screens Table 95 on page... -
Page 312: System Reports Specifications
Starting Connectivity Monitor. The router got the time and date from the Daytime server. The router got the time and date from the time server. The router got the time and date from the NTP server. NBG410W3G Series User’s Guide... -
Page 313: Table 97 System Error Logs
SMTP fail (%s) SMTP authentication fail (%s) NBG410W3G Series User’s Guide DESCRIPTION The router was not able to connect to the Daytime server. The router was not able to connect to the Time server. The router was not able to connect to the NTP server. -
Page 314: Table 98 Access Control Logs
UDP idle timeout: 3 minutes TCP connection (three way handshaking) timeout: 270 seconds TCP FIN-wait timeout: 2 MSL (Maximum Segment Lifetime set in the TCP header). TCP idle (established) timeout (s): 150 minutes TCP reset timeout: 10 seconds NBG410W3G Series User’s Guide... -
Page 315: Table 100 Packet Filter Logs
Remote Management: TELNET denied Remote Management: HTTP or UPnP denied Remote Management: WWW denied NBG410W3G Series User’s Guide DESCRIPTION The router sent a TCP reset packet when the number of incomplete connections (TCP and UDP) exceeded the user- configured threshold. (Incomplete count is for all TCP and UDP connections through the firewall.)Note: When the number of... -
Page 316: Table 103 Cdr Logs
The PPP connection’s Internet Protocol Control Protocol stage is opening. The PPP connection’s Link Control Protocol stage is closing. The PPP connection’s Internet Protocol Control Protocol stage is closing. DESCRIPTION UPnP packets can pass through the firewall. NBG410W3G Series User’s Guide... -
Page 317: Table 106 Attack Logs
ICMP Source Quench ICMP ICMP Time Exceed ICMP ICMP Destination Unreachable ICMP ping of death. ICMP smurf ICMP NBG410W3G Series User’s Guide Table 110 on page 321. DESCRIPTION The firewall detected a TCP/UDP/IGMP/ESP/GRE/OSPF attack. The firewall detected an ICMP attack. -
Page 318: Table 107 3G Logs
This shows that the specified percentage of the time budget was exceeded. This also displays the ID number of the selected 3G interface or SIM card and the amount of time (in hours) the 3G connection can still be used. NBG410W3G Series User’s Guide... -
Page 319: Table 108 Pki Logs
Failed to decode the received user cert Failed to decode the received CRL NBG410W3G Series User’s Guide DESCRIPTION This shows that the preconfigured data limit was exceeded. The ID number of the selected 3G interface or SIM card is displayed. The amount of data (in Mbytes) sent and/or received (depending on your configuration) through the 3G connection is also displayed. - Page 320 Due to the reasons listed, the certificate with the listed subject name has not passed the path verification. The recorded reason codes are only approximate reasons for not trusting the certificate. Please see Table 113 on page 320 for the corresponding descriptions of the codes. NBG410W3G Series User’s Guide...
-
Page 321: Table 109 Acl Setting Notes
Redirect datagrams for the Host Redirect datagrams for the Type of Service and Network Redirect datagrams for the Type of Service and Host Echo NBG410W3G Series User’s Guide DIRECTION DESCRIPTION LAN to WAN ACL set for packets traveling from the LAN to the WAN. - Page 322 Time Exceeded Time to live exceeded in transit Fragment reassembly time exceeded Parameter Problem Pointer indicates the error Timestamp Timestamp request message Timestamp Reply Timestamp reply message Information Request Information request message Information Reply Information reply message NBG410W3G Series User’s Guide...
-
Page 323: Syslog Logs
Virus" encode="< uu | b64 >" NBG410W3G Series User’s Guide Chapter 19 Logs Screens DESCRIPTION This message is sent by the system ("RAS" displays as the system name if you haven’t configured one) when the router generates a syslog. -
Page 324: Table 112 Rfc-2408 Isakmp Payload Types
The definition of messages and notes are defined in the Anti-Spam log descriptions. PAYLOAD TYPE Security Association Proposal Transform Key Exchange Identification Certificate Certificate Request Hash Signature Nonce Notification Delete Vendor ID NBG410W3G Series User’s Guide... -
Page 325: Maintenance
Computer Name tab. Note the entry in the Full computer name field and enter it as the ZyXEL Device System Name. 20.2.1 General Setup Click MAINTENANCE to open the General screen. Use this screen to configure administrative and system-related information. NBG410W3G Series User’s Guide Maintenance... -
Page 326: Configuring Password
Click Apply to save your changes. Reset Click Reset to begin configuring this screen afresh. 20.3 Configuring Password Click MAINTENANCE > Password to open the following screen. Use this screen to change the ZyXEL Device’s management password. NBG410W3G Series User’s Guide... -
Page 327: Time And Date
To change your ZyXEL Device’s time and date, click MAINTENANCE > Time and Date. The screen appears as shown. Use this screen to configure the ZyXEL Device’s time based on your local time zone. NBG410W3G Series User’s Guide Chapter 20 Maintenance... -
Page 328: Figure 196 Maintenance > Time And Date
When you set Time and Date Setup to Manual, enter the new date in this field and then click Apply. Select this radio button to have the ZyXEL Device get the time and date from the time server you specified below. NBG410W3G Series User’s Guide... - Page 329 In Germany for instance, you would type 2 because Germany's time zone is one hour ahead of GMT or UTC (GMT+1). Apply Click Apply to save your changes. Reset Click Reset to begin configuring this screen afresh. NBG410W3G Series User’s Guide Chapter 20 Maintenance...
-
Page 330: Pre-Defined Ntp Time Server Pools
When the System Time and Date Synchronization in Process screen appears, wait up to one minute. Figure 197 Synchronization in Process Click the Return button to go back to the Time and Date screen after the time and date is updated successfully. Synchronize Now NBG410W3G Series User’s Guide... -
Page 331: F/W Upload Screen
Find firmware at www.zyxel.com in a file that (usually) uses the system model name with a .bin extension, for example, "NBG410W3G.bin". The upload process uses HTTP (Hypertext Transfer Protocol) and may take up to two minutes. After a successful upload, the system will reboot. -
Page 332: Figure 200 Maintenance > Firmware Upload
ZyXEL Device again. Figure 201 Firmware Upload In Process The ZyXEL Device automatically restarts in this time causing a temporary network disconnect. In some operating systems, you may see the following icon on your desktop. NBG410W3G Series User’s Guide... -
Page 333: Backup And Restore
F/W Upload screen. Figure 203 Firmware Upload Error 20.7 Backup and Restore Click MAINTENANCE > Backup & Restore. Information related to factory defaults, backup configuration, and restoring configuration appears as shown next. NBG410W3G Series User’s Guide Chapter 20 Maintenance... -
Page 334: Backup Configuration
Click Browse... to find the file you want to upload. Remember that you must decompress compressed (.ZIP) files before you can upload them. Upload Click Upload to begin the upload process. Do not turn off the ZyXEL Device while configuration file upload is in progress. NBG410W3G Series User’s Guide... -
Page 335: Back To Factory Defaults
20.7.3 Back to Factory Defaults Click the Reset button to clear all user-entered configuration information and return the ZyXEL Device to its factory defaults as shown on the screen. The following warning screen appears. NBG410W3G Series User’s Guide Chapter 20 Maintenance... -
Page 336: Restart Screen
Click MAINTENANCE > Restart. Click Restart to have the ZyXEL Device reboot. Restart is different to reset; (see configuration. Figure 209 MAINTENANCE > Restart for more information on the RESET button. Section 20.7.3 on page 335) reset returns the device to its default NBG410W3G Series User’s Guide... -
Page 337: Troubleshooting And Specifications
Troubleshooting and Specifications Troubleshooting (339) Product Specifications (345) -
Page 339: Troubleshooting
3 Inspect your cables for damage. Contact the vendor to replace any damaged cables. 4 Turn the ZyXEL Device off and on or disconnect and re-connect the power adaptor to the ZyXEL Device. 5 If the problem continues, contact the vendor. NBG410W3G Series User’s Guide Troubleshooting Section 1.5.1 on page... -
Page 340: Zyxel Device Access And Login
ZyXEL Device, skip this step.) (Section 5.7 on page I forgot the LAN IP address for the ZyXEL Device. Section 1.5.1 on page Appendix A on page 353. Section 2.3 Section 2.3 104), use the new IP address. NBG410W3G Series User’s Guide... - Page 341 I cannot Telnet to the ZyXEL Device. See the troubleshooting suggestions for configurator. Ignore the suggestions about your browser. NBG410W3G Series User’s Guide Appendix B on page 361. Your ZyXEL Device is a DHCP Section 2.3 on page I cannot see or access the Login screen in the web Chapter 21 Troubleshooting Section 2.3...
-
Page 342: Internet Access
I cannot access the Internet anymore. I had access to the Internet (with the ZyXEL Device), but my Internet connection is not available anymore. I cannot see or access the Login screen in the web Section 1.5.1 on page NBG410W3G Series User’s Guide... -
Page 343: Connection
• Check your 3G connection status in the HOME screen. If WAN2 has no IP address, click Dial to request your 3G ISP for an IP address. • Check your 3G account status with your 3G service provider. NBG410W3G Series User’s Guide Section 1.5.1 on page 111. -
Page 344: Table 118 Typical 3G Transmission Speeds
MAXIMUM DATA RATE Upload 236 kbps Download 236 kbps Upload 384 kbps Download 384 kbps Upload 384 kbps Download 3.6 Mbps NBG410W3G Series User’s Guide TYPICAL DATA RATE 100~130 kbps 100~130 kbps 100~300 kbps 100~300 kbps 100~300 kbps Up to 2 Mbps... -
Page 345: Product Specifications
SierraWireless MC8775 (NBG410W3G only) The USB port is reserved for future usage. It cannot transmit signals simultaneously with the internal 3G module. For installing a 3G SIM card (NBG410W3G only). NBG410W3G: One internal 3.6 dBi antenna One external 850/900/1800/1900/2100 MHz 3G antenna NBG412W3G: One external 3.6 dBi antenna... -
Page 346: Table 120 Firmware Specifications
Virtual Private Network (VPN). The ZyXEL Device supports one PPTP connection at a time. A UPnP-enabled device can dynamically join a network, obtain an IP address and convey its capabilities to other devices on the network. NBG410W3G Series User’s Guide... -
Page 347: Wall-Mounting Instructions
Table 119 on page 345 place them. 1 Select a position free of obstructions on a sturdy wall. 2 Drill two holes for the screws. NBG410W3G Series User’s Guide Chapter 22 Product Specifications DESCRIPTION The ZyXEL Device supports Time Warner’s RoadRunner Service in addition to standard cable modem services. -
Page 348: Figure 210 Wall-Mounting Example
ZyXEL Device on the screws. Figure 210 Wall-mounting Example The following are dimensions of an M4 tap screw and masonry plug used for wall mounting. All measurements are in millimeters (mm). Figure 211 Masonry Plug and M4 Tap Screw NBG410W3G Series User’s Guide... -
Page 349: Power Adaptor Specifications
UNITED KINGDOM PLUG STANDARDS AC POWER ADAPTOR MODEL INPUT POWER OUTPUT POWER POWER CONSUMPTION SAFETY STANDARDS NBG410W3G Series User’s Guide Chapter 22 Product Specifications PSA18R-120P (ZA)-R 100-240VAC, 50/60HZ, 0.5A 12VDC, 1.5A 18 W MAX. UL, CUL (UL 60950-1 FIRST EDITIONCSA C22.2 NO. - Page 350 Chapter 22 Product Specifications NBG410W3G Series User’s Guide...
-
Page 351: Appendices And Index
VIII Appendices and Index The appendices provide general information. Some details may not apply to your ZyXEL Device. Pop-up Windows, JavaScripts and Java Permissions (353) Setting up Your Computer’s IP Address (361) IP Addresses and Subnetting (377) Common Services (385) Wireless LANs (389) Importing Certificates (403) Legal Information (415) -
Page 353: Internet Explorer Pop-Up Blockers
1 In Internet Explorer, select Tools, Pop-up Blocker and then select Turn Off Pop-up Blocker. Figure 212 Pop-up Blocker You can also check if pop-up blocking is disabled in the Pop-up Blocker section in the Privacy tab. 1 In Internet Explorer, select Tools, Internet Options, Privacy. NBG410W3G Series User’s Guide... -
Page 354: Figure 213 Internet Options: Privacy
Alternatively, if you only want to allow pop-up windows from your device, see the following steps. 1 In Internet Explorer, select Tools, Internet Options and then the Privacy tab. 2 Select Settings…to open the Pop-up Blocker Settings screen. NBG410W3G Series User’s Guide... -
Page 355: Figure 214 Internet Options: Privacy
3 Type the IP address of your device (the web page that you do not want to have blocked) with the prefix “http://”. For example, http://192.168.167.1. 4 Click Add to move the IP address to the list of Allowed sites. Figure 215 Pop-up Blocker Settings NBG410W3G Series User’s Guide Appendix A Pop-up Windows, JavaScripts and Java Permissions... -
Page 356: Figure 216 Internet Options: Security
3 Scroll down to Scripting. 4 Under Active scripting make sure that Enable is selected (the default). 5 Under Scripting of Java applets make sure that Enable is selected (the default). 6 Click OK to close the window. NBG410W3G Series User’s Guide... -
Page 357: Java Permissions
3 Scroll down to Microsoft VM. 4 Under Java permissions make sure that a safety level is selected. 5 Click OK to close the window. Figure 218 Security Settings - Java NBG410W3G Series User’s Guide Appendix A Pop-up Windows, JavaScripts and Java Permissions... -
Page 358: Figure 219 Java (Sun)
Figure 219 Java (Sun) Mozilla Firefox Mozilla Firefox 2.0 screens are used here. Screens for other versions may vary. You can enable Java, Javascripts and pop-ups in one screen. Click Tools, then click Options in the screen that appears. NBG410W3G Series User’s Guide... -
Page 359: Figure 220 Mozilla Firefox: Tools > Options
Appendix A Pop-up Windows, JavaScripts and Java Permissions Figure 220 Mozilla Firefox: Tools > Options Click Content.to show the screen below. Select the check boxes as shown in the following screen. Figure 221 Mozilla Firefox Content Security NBG410W3G Series User’s Guide... - Page 360 Appendix A Pop-up Windows, JavaScripts and Java Permissions NBG410W3G Series User’s Guide...
-
Page 361: Appendix B Setting Up Your Computer's Ip Address
IP addresses that place them in the same subnet as the ZyXEL Device’s LAN port. Windows 95/98/Me Click Start, Settings, Control Panel and double-click the Network icon to open the Network window. NBG410W3G Series User’s Guide Address... -
Page 362: Installing Components
2 Select Client and then click Add. 3 Select Microsoft from the list of manufacturers. 4 Select Client for Microsoft Networks from the list of network clients and then click 5 Restart your computer so the changes you made take effect. NBG410W3G Series User’s Guide... -
Page 363: Figure 223 Windows 95/98/Me: Tcp/Ip Properties: Ip Address
• If you do not know your DNS information, select Disable DNS. • If you know your DNS information, select Enable DNS and type the information in the fields below (you may not need to fill them all in). NBG410W3G Series User’s Guide Appendix B Setting up Your Computer’s IP Address... -
Page 364: Verifying Settings
3 Select your network adapter. You should see your computer's IP address, subnet mask and default gateway. Windows 2000/NT/XP The following example figures use the default Windows XP GUI theme. 1 Click start (Start in Windows 2000/NT), Settings, Control Panel. NBG410W3G Series User’s Guide... -
Page 365: Figure 225 Windows Xp: Start Menu
2 In the Control Panel, double-click Network Connections (Network and Dial-up Connections in Windows 2000/NT). Figure 226 Windows XP: Control Panel 3 Right-click Local Area Connection and then click Properties. NBG410W3G Series User’s Guide Appendix B Setting up Your Computer’s IP Address... -
Page 366: Figure 227 Windows Xp: Control Panel: Network Connections: Properties
• If you have a dynamic IP address click Obtain an IP address automatically. • If you have a static IP address click Use the following IP Address and fill in the IP address, Subnet mask, and Default gateway fields. • Click Advanced. NBG410W3G Series User’s Guide... -
Page 367: Figure 229 Windows Xp: Internet Protocol (Tcp/Ip) Properties
Automatic metric check box and type a metric in Metric. • Click Add. • Repeat the previous three steps for each default gateway you want to add. • Click OK when finished. NBG410W3G Series User’s Guide Appendix B Setting up Your Computer’s IP Address... -
Page 368: Figure 230 Windows Xp: Advanced Tcp/Ip Properties
• If you know your DNS server IP address(es), click Use the following DNS server addresses, and type them in the Preferred DNS server and Alternate DNS server fields. If you have previously configured DNS servers, click Advanced and then the DNS tab to order them. NBG410W3G Series User’s Guide... -
Page 369: Figure 231 Windows Xp: Internet Protocol (Tcp/Ip) Properties
Network Connections, right-click a network connection, click Status and then click the Support tab. Macintosh OS 8/9 1 Click the Apple menu, Control Panel and double-click TCP/IP to open the TCP/IP Control Panel. NBG410W3G Series User’s Guide Appendix B Setting up Your Computer’s IP Address... -
Page 370: Figure 232 Macintosh Os 8/9: Apple Menu
2 Select Ethernet built-in from the Connect via list. Figure 233 Macintosh OS 8/9: TCP/IP 3 For dynamically assigned settings, select Using DHCP Server from the Configure: list. 4 For statically assigned settings, do the following: • From the Configure box, select Manually. NBG410W3G Series User’s Guide... -
Page 371: Macintosh Os X
• Select Automatic from the Location list. • Select Built-in Ethernet from the Show list. • Click the TCP/IP tab. 3 For dynamically assigned settings, select Using DHCP from the Configure list. NBG410W3G Series User’s Guide Appendix B Setting up Your Computer’s IP Address... -
Page 372: Figure 235 Macintosh Os X: Network
Check your TCP/IP properties in the Network window. Linux This section shows you how to configure your computer’s TCP/IP settings in Red Hat Linux 9.0. Procedure, screens and file location may vary depending on your Linux distribution and release version. NBG410W3G Series User’s Guide... -
Page 373: Using The K Desktop Environment (Kde)
2 Double-click on the profile of the network card you wish to configure. The Ethernet Device General screen displays as shown. Figure 237 Red Hat 9.0: KDE: Ethernet Device: General NBG410W3G Series User’s Guide Appendix B Setting up Your Computer’s IP Address... -
Page 374: Using Configuration Files
• If you have a dynamic IP address, enter following figure shows an example. is the name of the Ethernet card). Open the eth0 in the dhcp BOOTPROTO= NBG410W3G Series User’s Guide ifconfig- field. The... -
Page 375: Figure 240 Red Hat 9.0: Dynamic Ip Address Setting In Ifconfig-Eth0
Shutting down interface eth0: Shutting down loopback interface: Setting network parameters: Bringing up loopback interface: Bringing up interface eth0: NBG410W3G Series User’s Guide Appendix B Setting up Your Computer’s IP Address in the static BOOTPROTO= directory. The following figure shows an example where... -
Page 376: Figure 244 Red Hat 9.0: Checking Tcp/Ip Properties
UP BROADCAST RUNNING MULTICAST RX packets:717 errors:0 dropped:0 overruns:0 frame:0 TX packets:13 errors:0 dropped:0 overruns:0 carrier:0 collisions:0 txqueuelen:100 RX bytes:730412 (713.2 Kb) Interrupt:10 Base address:0x1000 [root@localhost]# HWaddr 00:50:BA:72:5B:44 Bcast:172.23.19.255 Mask:255.255.255.0 MTU:1500 Metric:1 TX bytes:1570 (1.5 Kb) NBG410W3G Series User’s Guide... -
Page 377: Introduction To Ip Addresses
Therefore, each octet has a possible range of 00000000 to 11111111 in binary, or 0 to 255 in decimal. The following figure shows an example IP address in which the first three octets (192.168.1) are the network number, and the fourth octet (16) is the host ID. NBG410W3G Series User’s Guide... -
Page 378: Subnet Masks
For example, an “8-bit mask” means that the first 8 bits of the mask are ones and the remaining 24 bits are zeroes. 1ST OCTET: OCTET: OCTET: (192) (168) 11000000 10101000 00000001 11111111 11111111 11111111 11000000 10101000 00000001 NBG410W3G Series User’s Guide 4TH OCTET 00000010 00000000 00000010... -
Page 379: Table 123 Subnet Masks
The following table shows some possible subnet masks using both notations. Table 125 Alternative Subnet Mask Notation ALTERNATIVE SUBNET MASK NOTATION 255.255.255.0 255.255.255.128 NBG410W3G Series User’s Guide Appendix C IP Addresses and Subnetting 4TH OCTET OCTET OCTET 00000000 00000000 00000000... -
Page 380: Figure 246 Subnetting Example: Before Subnetting
The following figure shows the company network after subnetting. There are now two sub- networks, A and B. ALTERNATIVE LAST OCTET NOTATION (BINARY) 1100 0000 1110 0000 1111 0000 1111 1000 1111 1100 LAST OCTET (DECIMAL) NBG410W3G Series User’s Guide... -
Page 381: Figure 247 Subnetting Example: After Subnetting
IP Address (Binary) Subnet Mask (Binary) Subnet Address: 192.168.1.0 Broadcast Address: 192.168.1.63 NBG410W3G Series User’s Guide Appendix C IP Addresses and Subnetting - 2 or 62 hosts for each subnet (a host ID of all NETWORK NUMBER 192.168.1. 11000000.10101000.00000001. 11111111.11111111.11111111. -
Page 382: Table 127 Subnet 2
Highest Host ID: 192.168.1.190 NETWORK NUMBER 192.168.1. 11000000.10101000.00000001. 11111111.11111111.11111111. Lowest Host ID: 192.168.1.193 Highest Host ID: 192.168.1.254 LAST FIRST ADDRESS ADDRESS NBG410W3G Series User’s Guide LAST OCTET BIT VALUE 01000000 11000000 LAST OCTET BIT VALUE 10000000 11000000 LAST OCTET BIT... -
Page 383: Table 131 24-Bit Network Number Subnet Planning
The following table is a summary for subnet planning on a network with a 16-bit network number. Table 132 16-bit Network Number Subnet Planning NO. “BORROWED” HOST BITS NBG410W3G Series User’s Guide Appendix C IP Addresses and Subnetting LAST FIRST ADDRESS ADDRESS SUBNET MASK NO. -
Page 384: Configuring Ip Addresses
For more information on address assignment, please refer to RFC 1597, Address Allocation for Private Internets and RFC 1466, Guidelines for Management of IP Address Space. SUBNET MASK NO. SUBNETS 255.255.255.252 (/30) 16384 255.255.255.254 (/31) 32768 NO. HOSTS PER SUBNET NBG410W3G Series User’s Guide... -
Page 385: Appendix D Common Services
AUTH BOOTP_CLIENT BOOTP_SERVER CU-SEEME TCP/UDP User-Defined (IPSEC_TUNNEL) FINGER NBG410W3G Series User’s Guide Common Services PORT(S) DESCRIPTION The IPSEC AH (Authentication Header) tunneling protocol uses this service. 5190 AOL’s Internet Messenger service. It is also used as a listening port by ICQ. - Page 386 PPTP (Point-to-Point Tunneling Protocol) enables secure transfer of data over public networks. This is the data channel. Remote Command Service. 7070 A streaming audio service that enables real time sound over the web. Remote Execution Daemon. Remote Login. NBG410W3G Series User’s Guide...
- Page 387 SQL-NET TCP/UDP STRM WORKS SYSLOG TACACS TELNET TFTP VDOLIVE NBG410W3G Series User’s Guide Appendix D Common Services PORT(S) DESCRIPTION Remote Telnet. The Real Time Streaming (media control) Protocol (RTSP) is a remote control for multimedia on the Internet. Simple File Transfer Protocol.
- Page 388 Appendix D Common Services NBG410W3G Series User’s Guide...
-
Page 389: Wireless Lan Topologies
A and B can access the wired network and communicate with each other. When Intra-BSS is disabled, wireless client A and B can still access the wired network but cannot communicate with each other. NBG410W3G Series User’s Guide Wireless LANs... -
Page 390: Figure 249 Basic Service Set
An ESSID (ESS IDentification) uniquely identifies each ESS. All access points and their associated wireless clients within the same ESS must have the same ESSID in order to communicate. NBG410W3G Series User’s Guide... -
Page 391: Figure 250 Infrastructure Wlan
(AP) or wireless gateway, but out-of-range of each other, so they cannot "hear" each other, that is they do not know if the channel is currently being used. Therefore, they are considered hidden from each other. NBG410W3G Series User’s Guide Appendix E Wireless LANs... -
Page 392: Fragmentation Threshold
AP will fragment the packet into smaller data frames. A large Fragmentation Threshold is recommended for networks not prone to interference while you should set a smaller threshold for busy networks or networks that are prone to interference. NBG410W3G Series User’s Guide... -
Page 393: Preamble Type
Wireless Security Overview Wireless security is vital to your network to protect wireless communication between wireless clients, access points and the wired network. NBG410W3G Series User’s Guide MODULATION DBPSK (Differential Binary Phase Shift Keyed) DQPSK (Differential Quadrature Phase Shift Keying) -
Page 394: Table 135 Wireless Security Levels
RADIUS is based on a client-server model that supports authentication, authorization and accounting. The access point is the client and the server is the RADIUS server. The RADIUS server handles the following tasks: • Authentication Determines the identity of the users. • Authorization NBG410W3G Series User’s Guide... -
Page 395: Types Of Eap Authentication
EAP to interact with an EAP-compatible RADIUS server, an access point helps a wireless station and a RADIUS server perform authentication. The type of authentication you use depends on the RADIUS server and an intermediary AP(s) that supports IEEE 802.1x. . NBG410W3G Series User’s Guide Appendix E Wireless LANs... - Page 396 However, PEAP only supports EAP methods, such as EAP-MD5, EAP-MSCHAPv2 and EAP-GTC (EAP-Generic Token Card), for client authentication. EAP-GTC is implemented only by Cisco. LEAP LEAP (Lightweight Extensible Authentication Protocol) is a Cisco implementation of IEEE 802.1x. NBG410W3G Series User’s Guide...
-
Page 397: Dynamic Wep Key Exchange
RADIUS server or not. Select WEP only when the AP and/or wireless clients do not support WPA or WPA2. WEP is less secure than WPA or WPA2. NBG410W3G Series User’s Guide EAP-MD5 EAP-TLS EAP-TTLS... - Page 398 AP and does not need to go with the authentication process again. Pre-authentication enables fast roaming by allowing the wireless client (already connecting to an AP) to perform IEEE 802.1x authentication with another AP before connecting to it. NBG410W3G Series User’s Guide...
-
Page 399: Wireless Client Wpa Supplicants
(PSK) must consist of between 8 and 63 ASCII characters or 64 hexadecimal characters (including spaces and symbols). 2 The AP checks each wireless client's password and allows it to join the network only if the password matches. NBG410W3G Series User’s Guide Appendix E Wireless LANs... -
Page 400: Security Parameters Summary
Disable Enable without Dynamic WEP Key Enable with Dynamic WEP Key Enable without Dynamic WEP Key Disable Enable with Dynamic WEP Key Enable without Dynamic WEP Key Disable TKIP/AES Enable TKIP/AES Disable TKIP/AES Enable TKIP/AES Disable NBG410W3G Series User’s Guide... -
Page 401: Antenna Characteristics
The angle of the beam determines the width of the coverage pattern. Angles typically range from 20 degrees (very directional) to 120 degrees (less directional). Directional antennas are ideal for hallways and outdoor point-to-point applications. NBG410W3G Series User’s Guide Appendix E Wireless LANs... -
Page 402: Positioning Antennas
For a single AP application, place omni-directional antennas as close to the center of the coverage area as possible. For directional antennas, point the antenna in the direction of the desired coverage area. NBG410W3G Series User’s Guide... -
Page 403: Import Zyxel Device Certificates Into Netscape Navigator
The following example procedure shows how to import the ZyXEL Device’s (self-signed) server certificate into your operating system as a trusted certification authority. NBG410W3G Series User’s Guide... -
Page 404: Figure 255 Login Screen
1 In Internet Explorer, double click the lock shown in the following screen. Figure 255 Login Screen 2 Click Install Certificate to open the Install Certificate wizard. Figure 256 Certificate General Information before Import 3 Click Next to begin the Install Certificate wizard. NBG410W3G Series User’s Guide... -
Page 405: Figure 257 Certificate Import Wizard 1
Figure 257 Certificate Import Wizard 1 4 Select where you would like to store the certificate and then click Next. Figure 258 Certificate Import Wizard 2 5 Click Finish to complete the Import Certificate wizard. NBG410W3G Series User’s Guide Appendix F Importing Certificates... -
Page 406: Figure 259 Certificate Import Wizard 3
Appendix F Importing Certificates Figure 259 Certificate Import Wizard 3 6 Click Yes to add the ZyXEL Device certificate to the root store. Figure 260 Root Certificate Store NBG410W3G Series User’s Guide... -
Page 407: Enrolling And Importing Ssl Client Certificates
Authenticate Client Certificates to be active (see the Certificates chapter for details). Apply for a certificate from a Certification Authority (CA) that is trusted by the ZyXEL Device (see the ZyXEL Device’s Trusted CA web configurator screen). NBG410W3G Series User’s Guide Appendix F Importing Certificates... -
Page 408: Figure 262 Zyxel Device Trusted Ca Screen
The CA sends you a package containing the CA’s trusted certificate(s), your personal certificate(s) and a password to install the personal certificate(s). Installing the CA’s Certificate 1 Double click the CA’s trusted certificate to produce a screen similar to the one shown next. NBG410W3G Series User’s Guide... -
Page 409: Figure 263 Ca Certificate Example
Double-click the personal certificate given to you by the CA to produce a screen similar to the one shown next 1 Click Next to begin the wizard. Figure 264 Personal Certificate Import Wizard 1 NBG410W3G Series User’s Guide Appendix F Importing Certificates... -
Page 410: Figure 265 Personal Certificate Import Wizard 2
3 Enter the password given to you by the CA. Figure 266 Personal Certificate Import Wizard 3 4 Have the wizard determine where the certificate should be saved on your computer or select Place all certificates in the following store and choose a different location. NBG410W3G Series User’s Guide... -
Page 411: Figure 267 Personal Certificate Import Wizard 4
5 Click Finish to complete the wizard and begin the import process. Figure 268 Personal Certificate Import Wizard 5 6 You should see the following screen when the certificate is correctly installed on your computer. Figure 269 Personal Certificate Import Wizard 6 NBG410W3G Series User’s Guide Appendix F Importing Certificates... -
Page 412: Figure 270 Access The Zyxel Device Via Https
ZyXEL Device. This screen displays even if you only have a single certificate as in the example. Figure 271 SSL Client Authentication 3 You next see the ZyXEL Device login screen. Figure 272 ZyXEL Device Secure Login Screen NBG410W3G Series User’s Guide... - Page 413 Appendix F Importing Certificates NBG410W3G Series User’s Guide...
- Page 414 Appendix F Importing Certificates NBG410W3G Series User’s Guide...
-
Page 415: Appendix G Legal Information
ZyXEL Communications Corporation. Published by ZyXEL Communications Corporation. All rights reserved. -
Page 416: Fcc Radiation Exposure Statement
Changes or modifications not expressly approved by the party responsible for compliance could void the user's authority to operate the equipment. This device has been designed for the WLAN 2.4 GHz network throughout the EC region and Switzerland, with restrictions in France. NBG410W3G Series User’s Guide... -
Page 417: Zyxel Limited Warranty
Registration Register your product online to receive e-mail notices of firmware upgrades and information at www.zyxel.com for global products, or at www.us.zyxel.com for North American products. NBG410W3G Series User’s Guide Appendix G Legal Information... - Page 418 Appendix G Legal Information NBG410W3G Series User’s Guide...
-
Page 419: Appendix H Customer Support
• Sales E-mail: sales@zyxel.com.tw • Telephone: +886-3-578-3942 • Fax: +886-3-578-2439 • Web: www.zyxel.com • Regular Mail: ZyXEL Communications Corp., 6 Innovation Road II, Science Park, Hsinchu 300, Taiwan China - ZyXEL Communications (Beijing) Corp. • Support E-mail: cso.zycn@zyxel.cn • Sales E-mail: sales@zyxel.cn •... - Page 420 Czech Republic • E-mail: info@cz.zyxel.com • Telephone: +420-241-091-350 • Fax: +420-241-091-359 • Web: www.zyxel.cz • Regular Mail: ZyXEL Communications, Czech s.r.o., Modranská 621, 143 01 Praha 4 - Modrany, Ceská Republika Denmark • Support E-mail: support@zyxel.dk • Sales E-mail: sales@zyxel.dk •...
- Page 421 • Support: http://zyxel.kz/support • Sales E-mail: sales@zyxel.kz • Telephone: +7-3272-590-698 • Fax: +7-3272-590-689 • Web: www.zyxel.kz • Regular Mail: ZyXEL Kazakhstan, 43 Dostyk Ave., Office 414, Dostyk Business Centre, 050010 Almaty, Republic of Kazakhstan NBG410W3G Series User’s Guide Appendix H Customer Support...
- Page 422 • Support Telephone: +1-800-978-7222 • Sales E-mail: sales@zyxel.com • Sales Telephone: +1-714-632-0882 • Fax: +1-714-632-0858 • Web: www.zyxel.com • Regular Mail: ZyXEL Communications Inc., 1130 N. Miller St., Anaheim, CA 92806- 2001, U.S.A. Norway • Support E-mail: support@zyxel.no • Sales E-mail: sales@zyxel.no •...
- Page 423 • Support E-mail: support@zyxel.es • Sales E-mail: sales@zyxel.es • Telephone: +34-902-195-420 • Fax: +34-913-005-345 • Web: www.zyxel.es • Regular Mail: ZyXEL Communications, Arte, 21 5ª planta, 28033 Madrid, Spain Sweden • Support E-mail: support@zyxel.se • Sales E-mail: sales@zyxel.se • Telephone: +46-31-744-7700 •...
- Page 424 • Sales E-mail: sales@zyxel.co.uk • Telephone: +44-1344-303044, 0845 122 0301 (UK only) • Fax: +44-1344-303034 • Web: www.zyxel.co.uk • Regular Mail: ZyXEL Communications UK Ltd., 11 The Courtyard, Eastern Road, Bracknell, Berkshire RG12 2XB, United Kingdom (UK) NBG410W3G Series User’s Guide...
-
Page 425: Index
35, 36 broadband connection asymmetrical routes vs virtual interfaces authentication type CHAP backup configuration Basic Service Set, See BSS broadcast NBG410W3G Series User’s Guide Index 195, 396 Certificate Authority See CA. certificates thumbprint algorithms thumbprints verifying fingerprints Certification Authority. See CA. - Page 426 IGMP 103, 104 version Independent Basic Service Set See IBSS Initialization Vector (IV) Internet access setup Internet Assigned Number Authority. See IANA. Internet Assigned Numbers AuthoritySee IANA IP address pool 103, 105, 137 private NBG410W3G Series User’s Guide...
- Page 427 NAT works inside global address inside local address many to many no overload many to many overload many to one mapping types NBG410W3G Series User’s Guide one to one port forwarding port restricted cone server single user account what NAT does...
- Page 428 Single User Account. See SUA. SIP ALG SMTP service SNMP getnext manager trap SNMP service source address how SSH works implementation SSID hide SSID profile stateful inspection firewall static WEP key storage temperature STUN subnet subnet mask 101, 378 NBG410W3G Series User’s Guide...
- Page 429 NAT traversal port mapping UPnP Implementers Corp. (UIC) user authentication local (user) database RADIUS server weaknesses NBG410W3G Series User’s Guide vantage CNM virtual interfaces vs asymmetrical routes vs triangle routes WAN IP address warranty note web configurator web site hits...
- Page 430 Index with RADIUS application example WPA2 user authentication vs WPA2-PSK wireless client supplicant with RADIUS application example WPA2-Pre-Shared Key WPA2-PSK 397, 398 application example WPA-PSK 397, 398 application example NBG410W3G Series User’s Guide...
Need help?
Do you have a question about the NBG410W3G and is the answer not in the manual?
Questions and answers