Table of Contents

Related Manuals for Patlite WD-Z2 Series

Summary of Contents for Patlite WD-Z2 Series
- Page 1 GA0000218 01 Wireless Data Acquisition System WD-Z2 Series Installation Guidelines Rev. Transmitter: WDT-5E-Z2, WDT-6M-Z2 WDT-5LR-Z2, WDT-6LR-Z2 Receiver: WDR-L(E)-Z2 Copyright © 2018 PATLITE Corporation. All Rights Reserved...
-
Page 2: Table Of Contents
1. Introduction ........................- 3 - 2. WD-Z2 Installation Kits ..................... - 4 - 3. WD-Z2 Series Wireless Capability ................... - 5 - (1) WD-Z2 Wireless Network System Overview ..................- 5 - (2) Using with other Wireless Systems ....................... - 6 - (3) Stable Wireless Communication Zone .................... -
Page 3: Introduction
This manual contains the installation guidelines with step-by-step instructions from the start of operation for a smooth installation of the WD-Z2 series. Refer to this manual to check the tasks required for each step and it is also recommended to plan an installation schedule and share information with relevant departments. -
Page 4: Wd-Z2 Installation Kits
WD-Z2 Series Installation Guidelines Rev.5 WD-Z2 Installation Kits Below is a list of the items included in each installation kit and their description. Signal Tower Compatibility Item Description LE / LME Startup Kit Receiver Receiver for standard operation use. (with AC adaptor) -
Page 5: Wd-Z2 Series Wireless Capability
WD-Z2 Series Installation Guidelines Rev.5 WD-Z2 Series Wireless Capability (1) WD-Z2 Wireless Network System Overview ① Mesh Network Transmission This is a function that automatically connects the WDT over an optimum communication route to the WDR when transmitting information. A dense mesh status can be used to increase communication redundancy. -
Page 6: Using With Other Wireless Systems
WD-Z2 Series Installation Guidelines Rev.5 ③ MAC Address for Identification - For identification, fixed addresses are assigned to the WDT, which is called a MAC Address (IEEE Address). The MAC address is printed on the WDT, in the locations indicated below:... -
Page 7: Stable Wireless Communication Zone
WD-Z2 Series Installation Guidelines Rev.5 (3) Stable Wireless Communication Zone - It is required to have a good line of sight for each device (WDR, WDT) free from any obstacles (hereafter referred to as the Fresnel Zone). - The Fresnel Zone is a three-dimensional space, in which its size is estimated as follows: With a line of sight at L: 20m, the Fresnel Zone diameter D is about 1.6m. -
Page 8: Radio Wave Environmental Investigation Service
The link below introduces a tool that can be used for investigation by the customer. The tool is used in the “Radio Wave Environmental Investigation Service” at PATLITE for checking the wireless environment (as shown in the above diagram) and selecting the optimal wireless channels for the WD series. -
Page 9: Wd Installation Startup
(1) Use the PATLITE WDS application (WDS-AUTO2/WDS-WIN01) when generating CSV log data. => Before selecting which WDS to use, refer to "Reference 7: WDS Selection". (2) Operation data can be collected from the receiver via LAN communication, without the PATLITE (WDS-AUTO2/WDS-WIN01) application software. -
Page 10: Step 3. Radio Wave Environmental Investigation
WD-Z2 Series Installation Guidelines Rev.5 Step 3. Radio Wave Environmental Investigation ●Purpose For a stable use of the WD system, check with the “Radio Wave Environmental Investigation System” in the targeted installation area, deciding upon the best possible WD wireless for each area, and the location for the receiver installation. -
Page 11: Step 4. Equipment Investigation With Signal Tower
WD-Z2 Series Installation Guidelines Rev.5 Step 4. Equipment Investigation with Signal Tower ●Purpose To check that the Signal Tower model is one which can be attached with the WD and be attached to the targeted equipment. If the WD cannot be attached to the Signal Tower, this next step is to review the specifications to find a compatible LR/LME/LE Series model. -
Page 12: Step 5. Device Settings List
WD-Z2 Series Installation Guidelines Rev.5 Step 5. Device Settings List ●Purpose After investigating the “Radio Wave Environment” and target equipment, first group the equipment based on the floor layout and verify the WD settings, then group the equipment according to the layout diagram, etc. of the factory, and verify the WD setting contents. - Page 13 WD-Z2 Series Installation Guidelines Rev.5 Point ExtendedPanID is an ID for wireless groups when there are multiple receivers. A receiver and transmitter that operate in the same group have the same ExtendedPanID. The initial value is "0000 0000 0000 0000", which connects to any receiver by default.
- Page 14 WD-Z2 Series Installation Guidelines Rev.5 ③ Receiver's LAN setting Adjustment - Get the number of receivers with IP addresses connected to the internal LAN. Setup Item Initial value IP address 192.168.0.1 Subnet mask 255.255.255.0 Default gateway 0.0.0.0 DNS server 0.0.0.0...
-
Page 15: Step 6. Wd Initial Setup
WD-Z2 Series Installation Guidelines Rev.5 Step 6. WD Initial Setup - This section explains how to run an initial setup of the transmitter with the use of a USB connection as an example. The USB connection is the most popular connection method for initial setups. - Page 16 WD-Z2 Series Installation Guidelines Rev.5 LR series Signal Tower (Receiver for setup) - Configuration Table Item Number of configuration items Models Number as required WDT-5LR-Z2 / WDT-6LR-Z2 Setup Kit WDX-5LRB / WDX-6LRB AC Adaptor Included in the Startup Kit WDR (Receiver for setup)
-
Page 17: Using "Wd-Z2-Specific System Settings" For Le/Lme Series
WD-Z2 Series Installation Guidelines Rev.5 ② Setup Items Information required for setup Description Kitting sheet item number ③ ExtendedPanID ExtendedPanID Wireless settings ④ Wireless channel Wireless channels ⑤ Flashing cycle Determining Signal Tower Input ⑥ Power supply wire Run time settings... -
Page 18: Initial Receiver Setup
WD-Z2 Series Installation Guidelines Rev.5 (2) Initial receiver setup ① Hardware Configuration When using with the USB connection When using with the LAN connection WDR (for operation) Maintenance PC WDR (for operation) Maintenance PC USB Cable AC Adaptor LAN Cable... -
Page 19: When Using The "Wd-Z2-Specific System Settings" For Le/Lme Series
WD-Z2 Series Installation Guidelines Rev.5 ② Setup Items Information required Description ExtendedPanID Wireless Settings Wireless channels Network startup method *1 IP address *2 Subnet mask LAN Communication Default gateway DNS server (Use the default value) Port number (Use the default value) *1: For the network startup method, use "Auto Startup". - Page 20 WD-Z2 Series Installation Guidelines Rev.5 ③ Settings for LAN Connections - Set one receiver at a time with the browser. Network Menu WDR: IP address Subnet mask Default gateway DNS server Port Connection Menu CAUTION ◆ Do not change any settings for items not described in this manual.
-
Page 21: Step 7. Installation
WD-Z2 Series Installation Guidelines Rev.5 Step 7. Installation (1) Transmitter Installation LE/LME series Signal Tower (1-1) Mounting the transmitter onto the Signal Tower For the Signal Tower that requires a WDT Installation, mount the WDT transmitter after the settings are already prepared, to the Signal Tower. - Page 22 WD-Z2 Series Installation Guidelines Rev.5 - 22 -...
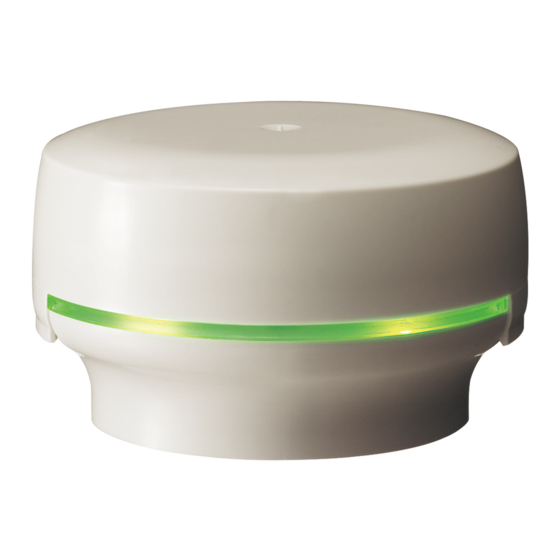
- Page 23 WD-Z2 Series Installation Guidelines Rev.5 (1-3) Verify Operation - The product's status indicator lamp can be used to determine the wireless communication status. - After installation is complete, turn on the main power supply to the equipment and with all the signal tower lamps off, check the transmitter indicator lamp, verifying that it is not in the off state.
-
Page 24: Lr Series Signal Tower
WD-Z2 Series Installation Guidelines Rev.5 LR series Signal Tower (1-1) Mounting the transmitter on the signal tower - For the Signal Tower that requires a WDT Installation, mount the WDT transmitter after the settings are already prepared, to the Signal Tower. - Page 25 WD-Z2 Series Installation Guidelines Rev.5 (1-2) Wiring the Signal Tower to equipment CAUTION ◆ Constant WDT power supply - To operate the WDT, the power needs to be constantly supplied to the LR series Signal Enforced Tower power line. ◆ Signal Tower Rated Voltage: 12 / 24 VDC ◆...
-
Page 26: Receiver Installation
WD-Z2 Series Installation Guidelines Rev.5 (2) Receiver Installation Because the installation location is always in a high place, do the installation only after completing the initial settings (wireless settings, LAN settings, etc.). Install the receiver in the location (position, height, direction) described in the “Radio Wave Environment Investigation Report”. - Page 27 WD-Z2 Series Installation Guidelines Rev.5 ③ Radio reception with the receiver installed in a corner of the area [× Not good] The relay load tends to be biased toward some of the transmitters, so the wireless path is not distributed well.
- Page 28 WD-Z2 Series Installation Guidelines Rev.5 (2-1-3) Receiver Direction ◎ Horizontal, with the cover facing downward ○ Wall-mounting (2-1-4) Adverse effect of the material used in the receiver installation location If the receiver is mounted on an H-beam pillar, the metal construction will cause reception to be unstable, even if the receiver is placed in the center of the area.
- Page 29 WD-Z2 Series Installation Guidelines Rev.5 (2-1-5) Example of an optimal receiver installation location The receiver is mounted in the center of the area, facing in the downward direction, secured to a cable rack with cable ties. The targeted equipment is in line-sight of the receiver, and mounting the receiver and extending the LAN wiring is easy.
-
Page 30: Step 8. System Operation Check
WD-Z2 Series Installation Guidelines Rev.5 Step 8. System Operation Check WDS-AUTO2 Operation Check (1) Register the WDT “username” (create an .init file) - The following explains the settings in WDS-AUTO2 to associate the equipment name with the transmitter’s MAC address for each equipment. - Page 31 WD-Z2 Series Installation Guidelines Rev.5 (2-2) Set the receiver’s connection destination. Set up the information of the receiver to connect with, based on the LAN network settings in the “Receiver Kit” sheet. Note The initial values for all settings, except the settings marked in red in the [Settings] window's [Receiver Communication Settings] tab, can be set.
-
Page 32: Check Transmitter/Receiver Connections And .Csv Log File
WD-Z2 Series Installation Guidelines Rev.5 (3) Check transmitter/receiver connections and .csv log file The receiver list appears in the WD List window (as shown below), and the transmitters are displayed in a tree configuration. Check that all receivers and transmitters are connected, then check that the transmitters are connected to their designated receivers. -
Page 33: Checking Using Wds-Win01
WD-Z2 Series Installation Guidelines Rev.5 Checking using WDS-WIN01 (1) WDS-WIN01 Default Settings (1-1) Start-up the WDS-WIN01 application. (1-2) Enter the license key. CAUTION WDS-WIN01 requires administrator privileges prior to use. - 33 -... -
Page 34: Register The Wdt "Username
WD-Z2 Series Installation Guidelines Rev.5 (2) Register the WDT “username” - The following explains the settings in WDS-WIN01 to associate the equipment name with the transmitter’s MAC address for each equipment. Note In the MAC address field marked in red, enter the transmitter MAC address for each equipment in the “Kit Sheet”, and in the User name field, register the equipment name from the “Target Equipment Investigation”... -
Page 35: Check Transmitter/Receiver Connections And .Csv Log File
WD-Z2 Series Installation Guidelines Rev.5 (3) Check transmitter/receiver connections and .csv log file Two lists are displayed; the receiver list appears in the WDR Information window (as shown below), and the transmitters are displayed by their receiver in the WDT Information window. Check that all receivers and transmitters are connected, then check that the transmitters are connected to their designated receivers. -
Page 36: Maintenance
WD-Z2 Series Installation Guidelines Rev.5 Maintenance (1) New Equipment Installation Specify the equipment manufacturer to install in the WD. After equipment delivery, remove the transmitter to re-configure the various settings by using the Startup Kit. (See Step 6) If the LME or LE Series WD compatible signal towers is specified, request the color and wiring for the transmitter power supply. -
Page 37: Equipment Relocation
WD-Z2 Series Installation Guidelines Rev.5 (2) Equipment Relocation - Remove the transmitter from equipment be relocated, that will use the Startup Kit at the office to change the settings for the WD wireless channel and ExtendedPanID to the area where equipment will be relocated. -
Page 38: Reference 2: Body Unit Pin Assignments
WD-Z2 Series Installation Guidelines Rev.5 Reference 2: Body Unit Pin Assignments Body Unit, MJ Connector Pin Assignments: CAUTION Connect a non-voltage contact such as a switch to the MJ connector. Reference 3: Sample Target Equipment Investigation Sheet - 38 -... -
Page 39: Reference 4: Sample Kit Check Sheet
WD-Z2 Series Installation Guidelines Rev.5 Reference 4: Sample Kit Check Sheet Transmitters Create the transmitter “Kit check sheet” along with the “Installation Equipment Check Sheet”. Receivers The yellow highlighted items above are required setting items for basic WD functions described in this manual. -
Page 40: Reference 5: Installation Steps And Task Allocation
WD-Z2 Series Installation Guidelines Rev.5 Reference 5: Installation Steps and Task Allocation AirGRID WD-Z2 series installation and task assignment table Step Task Description / Check Item Primary Contact Decide on target facility Target facility should consider collecting equipment operation data. -
Page 41: Reference 6: Signal Tower Model Code
WD-Z2 Series Installation Guidelines Rev.5 Reference 6: Signal Tower Model Code LME Model Code: LE Model Code: LR Series Model Code: - 41 -... -
Page 42: Reference 7: Wds Selection
WD-Z2 Series Installation Guidelines Rev.5 Reference 7: WDS Selection Select the WDS application in accordance with the system needs. Select WDS-AUTO2 or WDS-WIN01 based on the Settings by Model table and Function Compatibility table below. (1) Model vs. WDS application Table... - Page 43 WD-Z2 Series Installation Guidelines Rev.5 (2) Function Compatibility Table Yes: Function available No: Function not available Function WDS-AUTO2 WDS-WIN01 Data collection Maximum number of transmitters (WDT units) 400 units 600 units CSV file specifications Common Common (file name) File creation method...
-
Page 44: Reference 8: Wds-Auto2 To Wds-Win01 Migration
WD-Z2 Series Installation Guidelines Rev.5 Reference 8: WDS-AUTO2 to WDS-WIN01 Migration (1) Statement Comparison Table Because the statements displayed in the WDS-AUTO2/WD-Z2-specific system settings are partially different than those for WDS-WIN01, replacement names are shown in the table below. a. WDS-AUTO2 and WDS-WIN01 comparison table... -
Page 45: Notes When Migrating To Wds-Win01
WD-Z2 Series Installation Guidelines Rev.5 (2) Notes when migrating to WDS-WIN01 Only if the migration is from WDS-AUTO2 to WDS-WIN01, and the visualization application in the customer's system configuration is not changed, note the following. a. (2-1) CSV file output method b.... - Page 46 WD-Z2 Series Installation Guidelines Rev.5 ② If a Fixed CSV file name is selected for "CSV output": Select "Common (file name)" Set 2-10 for CSV format as shown in the diagram. Select "Do not divide" (2-2) WDT-5LR-Z2/WDT-6LR-Z2 power settings and signal tower information format In WDS-AUTO2, the WDT monitoring status ("0", "9") output is exported as CSV data to the signal wire...
-
Page 47: Reference 9: Using Wdt-5Lr-Z2/Wdt-6Lr-Z2 In Wds-Auto2
WD-Z2 Series Installation Guidelines Rev.5 Reference 9: Using WDT-5LR-Z2/WDT-6LR-Z2 in WDS-AUTO2 In WDS-AUTO2, the WDT monitoring status ("0", "9") output is exported as CSV data to the signal wire information string specified in the transmitter's power settings. Therefore, when the CSV output is set in (2-1), it is necessary to set one of the signal wires as the transmitter's power settings.
Need help?
Do you have a question about the WD-Z2 Series and is the answer not in the manual?
Questions and answers