Advertisement
Your new HDX-66C-NOV kit includes:
Universal Sender
Pack
Installation
1. Remove the stock gauges from the dash. Disassemble the stock instrument system by removing the
seven (7) screws holding the instrument housing to the bezel.
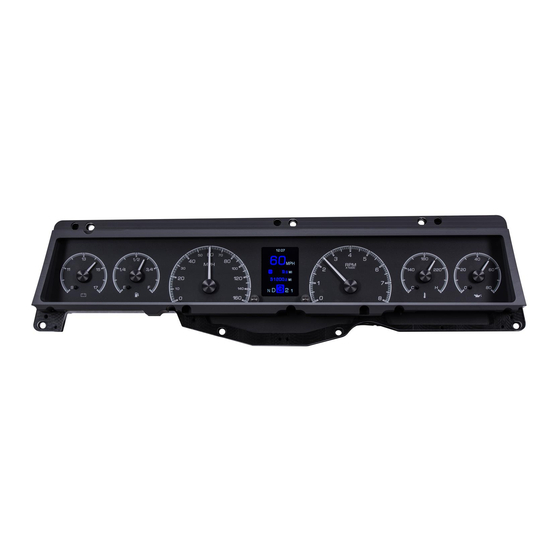
HDX-66C-NOV
Dakota Digital HDX Instrument Installation
For 1966-'67 Chevy Nova
Buzzer
Installation Manuals
Main Harness
HDX Display
Control Box
(x7) #6-20x1.25" Screws
(x5) #8-18x.375" Screws
(x7) #6 Washers
Manual # 650593A
Advertisement
Table of Contents

Related Manuals for Dakota Digital HDX-66C-NOV


Summary of Contents for Dakota Digital HDX-66C-NOV
- Page 1 HDX-66C-NOV Dakota Digital HDX Instrument Installation For 1966-‘67 Chevy Nova Your new HDX-66C-NOV kit includes: HDX Display Buzzer Universal Sender Pack Installation Manuals (x7) #6-20x1.25” Screws (x5) #8-18x.375” Screws (x7) #6 Washers Control Box Main Harness Installation 1. Remove the stock gauges from the dash. Disassemble the stock instrument system by removing the seven (7) screws holding the instrument housing to the bezel.
- Page 2 2. Detach the lens from the bezel and separator plate by removing the two (2) screws shown below. The only item to be reused is the original front bezel and hardware. 3. Place the HDX system into the bezel, taking care to align all mounting holes. Using the seven (7) provided #6-20x1-1/4”...
- Page 3 5. Secure the cluster to the dash using the five (5) provided #8-18x.375” screws at the base of the bezel; use the four (4) factory flat head screws at the top of the bezel (4) Factory screws (5) Provided screws 6.
Need help?
Do you have a question about the HDX-66C-NOV and is the answer not in the manual?
Questions and answers