Advertisement
Quick Links
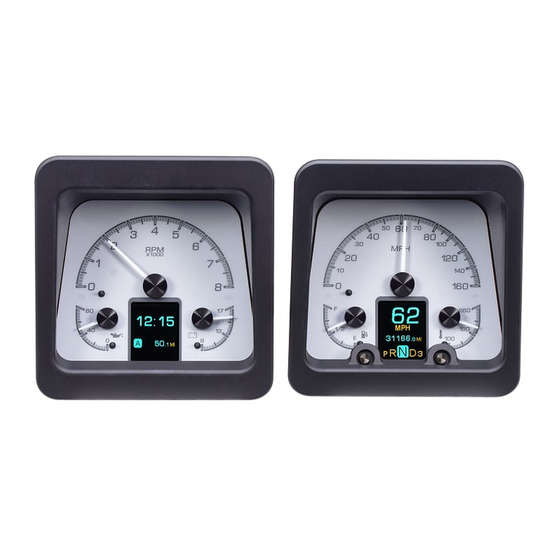
Your new HDX-69C-CAM kit includes:
Universal Sender
Pack
Installation
1. Remove the clear lenses, light bulbs, indicator light panels, and gauge internals; they are held into
the housing with nuts from the backside. You may be able to access all of the fasteners with the
dash carrier installed; removing the entire assembly may not be necessary.
HDX-69C-CAM
Dakota Digital HDX Instrument Installation
For 1969 Chevrolet Camaro
HDX Displays
Buzzer
Installation Manuals
Main Harness
2X 10-32x1" Mounting Screws w/
nylon washers
2X 10-32x1.5" Mounting Screws w/
nylon shoulder washers
Foam Tape
Interconnect
Harness
Control Box
Manual # 650566
Advertisement

Subscribe to Our Youtube Channel
Related Manuals for Dakota Digital HDX-69C-CAM


Summary of Contents for Dakota Digital HDX-69C-CAM
- Page 1 HDX-69C-CAM Dakota Digital HDX Instrument Installation For 1969 Chevrolet Camaro Your new HDX-69C-CAM kit includes: HDX Displays Universal Sender Pack Buzzer Installation Manuals 2X 10-32x1” Mounting Screws w/ nylon washers 2X 10-32x1.5” Mounting Screws w/ nylon shoulder washers Foam Tape...
- Page 2 2. For each gauge opening, cut three pieces of the supplied foam tape, 2” long. Install foam strips on the top and sides of each opening about ½” down from the face of the housing. This foam provides a cushion where the new HDX cans are installed and forms a tight, rattle-free fit.
- Page 3 5. To install the tachometer, route the appropriate end of the interconnect harness back through the housing indicator light opening on the tachometer side of the housing and connect to the back of the tachometer gauge. Use the two 10-32 x 1” screws and two flat nylon washers to secure the gauge 6.
- Page 4 WARNING: This product can expose you to chemicals including lead, which is known to the State of California to cause cancer and birth defects or other reproductive harm. For more information go to www.P65Warnings.ca.gov Manual # 650566...
Need help?
Do you have a question about the HDX-69C-CAM and is the answer not in the manual?
Questions and answers