Advertisement
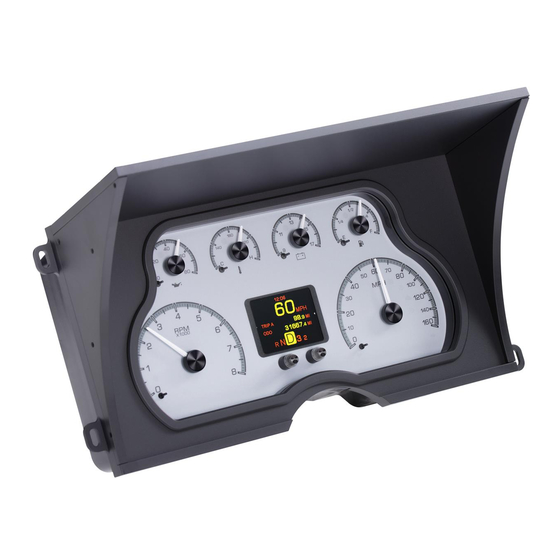
HDX-88C-PU
Dakota Digital HDX Instrument Installation
For 1988-94 Chevrolet/GMC Full-Size Pickup
Your new HDX-88C-PU kit includes:
HDX Display
Universal Sender
Pack
Buzzer
Installation Manuals
Cut Template
and Cut Guard
Control Box
Main Harness
Alternator Load Harness
(Used with 3 wire alternators)
Installation
1. The first step is to remove the
stock gauge cluster from the dash.
Manual # 650619
Advertisement
Table of Contents

Related Manuals for Dakota Digital HDX-88C-PU


Summary of Contents for Dakota Digital HDX-88C-PU
- Page 1 HDX-88C-PU Dakota Digital HDX Instrument Installation For 1988-94 Chevrolet/GMC Full-Size Pickup Your new HDX-88C-PU kit includes: HDX Display Universal Sender Pack Buzzer Installation Manuals Cut Template and Cut Guard Control Box Main Harness Alternator Load Harness (Used with 3 wire alternators) Installation 1.
- Page 2 Remove the plastic cover under the steering column to access the mounts, drop the column by removing the two bolts shown in picture, also slide the gear indicator clip off the column. The front plastic face needs to be removed, this is done by removing the (4) four Torx T20 screws and disconnecting the headlight and dimmer connectors.
- Page 3 2. At your own discretion, use the supplied aluminum template\cut guard to open up the inner structure to allow more length on the harness side for the required cut and splice wiring. Also, the harness connector will need to be pushed back to clear the HDX cluster; opening up the inner structure will allow space needed for it to clear otherwise, the connector will need to be removed.
- Page 4 4. Refer to the main manual for wiring instructions and re-install the cluster in reverse order using all stock hardware to complete the HDX installation. 5. Stock 3-Wire alternators will need an additional wiring connection at the gauge cluster connecter. You will need to add resistance from the Pink/Black wire in the A10 location to the Brown wire in the A3 location.
Need help?
Do you have a question about the HDX-88C-PU and is the answer not in the manual?
Questions and answers