
Subscribe to Our Youtube Channel
Summary of Contents for HARWI ORCA Series
- Page 1 MANUAL ORCA Harwi Holland BV Lage Dijk 28 5705 BZ Helmond the Netherlands Tel. + 31 (0)492 543355 Fax + 31 (0)492 522305 Email info@harwi.nl...
- Page 2 Orca Eng. 9-2004...
-
Page 3: Table Of Contents
CONTENTS GENERAL SAFETY REGULATIONS..................6 GENERAL INFORMATION ....................7 TECHNICAL DATA.......................8 TRANSPORT FRAME WITH CRANE/FORKLIFTRUCK ...............9 TRANSPORT BEAM WITH CRANE/FORKLIFTTRUCK ............. 10 SETTING UP THE MACHINE....................11 POSITIONING VERTICAL SLIDE WAY ................. 12 ADJUSTING THE FRAME....................13 ADJUSTING THE FRAME....................14 CONNECTING TO THE ELECTRICITY SUPPLY ..............15 DIRECTION ROTATION OF THE MAIN SAW-BLADE ............. - Page 4 CONTENTS EXPLODED VIEW TRANSPORT ROLLERS (OPTIONAL)............52 PARTS LIST TRANSPORT ROLLERS (OPTIONAL).............. 53 EXPLODED VIEW LENGTH STOP ..................54 PARTS LIST LENGTH STOP....................55 EXPLODED VIEW VERTICAL SLIDEWAY................56 PARTS LIST VERTICAL SLIDE WAY ..................57 PARTS LIST VERTICAL SLIDEWAY ..................58 EXPLODED VIEW STOPS FOR HORIZONTAL CUTS...............
- Page 5 One has to be acquainted and comply with the country's applicable safety regulations. Only original Harwi parts are to be used. We cannot give warranty or be held responsible for damage caused by using non- original Harwi parts.
-
Page 6: General Safety Regulations
GENERAL SAFETY REGULATIONS Harwi Holland B.V. has bestowed great care Flexible hoses of the dust extractor have to on compiling this manual. Read the complete be from a highly inflammable quality manual carefully before operating the (according to DIN 4102). -
Page 7: General Information
EU DECLARATION OF CONFORMITY FOR MACHINERY (according to Annex II A of the Machinery Directive) We, HARWI Holland B.V. Lage Dijk 28, 5705 BZ Helmond, the Netherlands herewith declare, on our own responsibility, that the product mentioned above, which this declaration refers to, is in conformity with the following standards;... -
Page 8: Technical Data
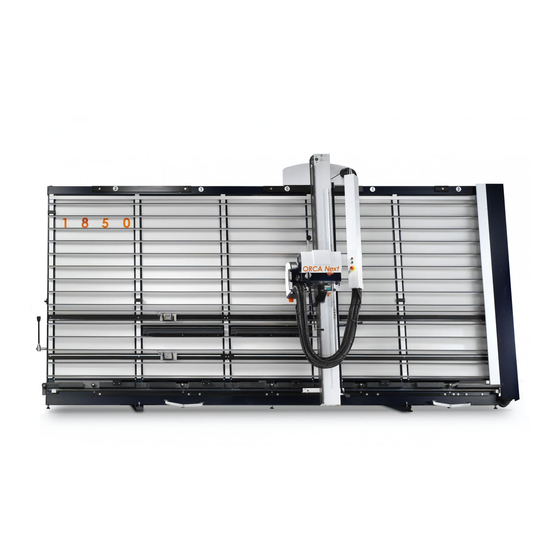
TECHNICAL DATA MEASURES AND WEIGHTS Type Orca 1850 2150 Length of cut 4300 4300 Height of cut 1850 2150 Depth of cut Speed main blade 5000 5000 Speed scoring blade (optional) 13000 13000 Diameter main blade Ø mm Ø mm Diameter scoring blade (optional) Motor power Voltage... -
Page 9: Transport Frame With Crane/Forkliftruck
TRANSPORT FRAME WITH CRANE/FORKLIFTRUCK The frame may only be lifted with the special cask grips (see fig. 1 and 2) Recommended carrying capacity of crane or forklift truck:……………..1000 Kgs. The frame may only be loosened from the slings if it is stable on the floor. Fig. -
Page 10: Transport Beam With Crane/Forklifttruck
TRANSPORT BEAM WITH CRANE/FORKLIFTTRUCK The sideway may only be lifted with the special cask grips (see fig. 3 and 4). Recommended carrying capacity of crane or forklift truck:……………………………..1000 kgs. The slide way may only be lifted with the special cask grip on the topside of the slide way. -
Page 11: Setting Up The Machine
SETTING UP THE MACHINE SETTING UP Place the machine on a flat and solid floor. The back side of the machine has to be attainable. Secure the machine to the floor. In both supports of the machine are holes. Drill the holes into the floor through these holes, and secure the machine with expanding bolts to the floor. -
Page 12: Positioning Vertical Slide Way
POSITIONING VERTICAL SLIDE WAY Regard the centre of gravity when removing the slide way from the crate or the supports. Use the cask grips on the top when lifting the slide way. (see Transport of the slide way with crane/forklift truck fig. 3 and 4). Dismantle bearing support at the bottom side of the slide way by removing the two bolts (see figure 5). -
Page 13: Adjusting The Frame
ADJUSTING THE FRAME In case one of the following malfunctions occurs, the frame needs adjusting. The vertical slide way cannot be locked in the notches. The frame is twisted. (The panel is not fully supported by the aluminium strips). 0 Overall drawing adjusting points (Fig. 8) Position the vertical slide way near a Fig. -
Page 14: Adjusting The Frame
ADJUSTING THE FRAME Adjust the angle between frame and bottom at 80º with the M16 nuts (Fig. 11). Attach cables with (lead)weights to the horizontal bearing track at the same heights as the vertical supports (Fig. 12). 10 Check if the distance between frame and cables is identical. -
Page 15: Connecting To The Electricity Supply
CONNECTING TO THE ELECTRICITY SUPPLY 400V – 3 phase You will find the wiring diagram in the switch box. Connecting the machine may only be performed by a skilled craftsman. Insert cable with four supply leads with a diameter of 1.5 mm into the junction box at the back side of the frame. -
Page 16: Direction Rotation Of The Main Saw-Blade
DIRECTION ROTATION OF THE MAIN SAW-BLADE Block the carriage and put the saw-blade in vertical position. The direction of rotation is indicated on the pressure pad (figure 14). PROPER DIRECTION IS ANTI-CLOCKWISE (standing at the left side of the casting) Switch motor on and off. -
Page 17: Adjusting The Measure For Vertical Cuts
ADJUSTING THE MEASURE FOR VERTICAL CUTS Lock the slide way at the zero point of the measure scale. Move saw unit upwards. Place length stop at the left or at the right side of the zero point. Adjust measure and swing the clamp forwards. -
Page 18: Adjusting The Measure For Horizontal Cuts
ADJUSTING THE MEASURE FOR HORIZONTAL CUTS The zero of the measure scale on the slide way corresponds to the upper side of the support. Put the saw-blade in horizontal position (see chapter Horizontal cutting). Set the correct height by means of the scale on the slide way (Figure 16). -
Page 19: Vertical Cutting
VERTICAL CUTTING LOCKING CONTROLLER VERTICAL CUTS The machine is equipped with a locking controller against vertical cutting of the plastic strips. The vertical slide way has to be locked in the notches and the saw- unit has to be positioned for vertical cutting. -
Page 20: Horizontal Cutting
HORIZONTAL CUTTING PROTECTION HORIZONTAL CUTTING The machine can be equipped with a manually operated or self-moving panel support. It prevents damaging the plastic strips when cutting horizontally. If the saw-unit is adjusted on the same height as one of the aluminium supports, the panel support can be operated manually or moves automatically when pushing the saw unit forward for making the cut. -
Page 21: Reiteration Stop
REITERATION STOP The purpose of the reiteration stop is to cut smaller sheets of equal widths quickly and repeatedly (horizontal) (Fig 19). Put the saw-unit in the horizontal position. Smoothen the panel horizontally. Adjust the reiteration stop at the wanted height and fasten it (Fig. -
Page 22: Stops For Horizontal Cuts
STOPS FOR HORIZONTAL CUTS The purpose of the stops for horizontal cuts is to adjust measures only once and cut panels in series (horizontal). Preferably use the first notch to smoothen the panel. Put the saw unit in the horizontal position. -
Page 23: Adjusting The Riving Knife
ADJUSTING THE RIVING KNIFE The riving knife has to be adjusted in such a way that the distance between riving knife and teeth of the saw-blade is between 3 and 8 mm (Fig. 22). During cutting the riving knife has to be in the most forward position). -
Page 24: Fitting The Main Saw-Blade
FITTING THE MAIN SAW-BLADE An end switch is mounted in the cover of the saw-unit. If after changing the saw- blade the cover is not closed properly the motor will not start. Disconnect mains supply. Open the cover of the saw unit. Insert the delivered 8 mm allen key in the saw spindle. -
Page 25: Cleaning
MAINTENANCE CLEANING Clean the machine, specially the work spots and the aluminium strips, frequently. Perform following maintenance weekly: Clean tracks at the lower and upper side of the frame. Clean bearings at the down and upper side of the slide-way. Clean tracks of the slide-way and clean bearings of the carriage. -
Page 26: Check Brushes On Horizontal Tracks
MAINTENANCE CHECK BRUSHES ON HORIZONTAL TRACKS The brushes are fitted to the carriage with tape (Figure 24). If the brushes are worn out fit new ones. It prevents dirt deposit on the bearings and ruggedly running of the slide way when cutting horizontally. -
Page 27: Smoothening Midway Fences
MAINTENANCE SMOOTHENING MIDWAY FENCES Notice: See to it that the frame is adjusted properly before smoothening wooden midway-fences. Notice: All midway fences should be smoothened at the same time. Notice: The midway fences have to be clamped so they cannot fold away while Fig. -
Page 28: Smoothening The Bottom Support
MAINTENANCE SMOOTHENING THE BOTTOM SUPPORT Notice: See to it that the frame is adjusted properly before the bottom support is smoothened. Notice: All the bottom supports have to be smoothened at the same time. Remove the plates at the front side of Fig. -
Page 29: Adjusting Measure
MAINTENANCE ADJUSTING MEASURE Re-adjusting the pointers for horizontal measuring of the midway fences. After the midway fences have been smoothened, the pointer has to be re- adjusted. Put the saw-unit in horizontal position. Position the saw-blade on the midway fence, in such a way that it just touches the material. -
Page 30: Adjusting Measure For Horizontal Cutting
MAINTENANCE ADJUSTING MEASURE FOR HORIZONTAL CUTTING Position length stop in the profile of the upper scale at the left side of the saw unit. Lock the slide way in the zero position. Put a reference gauge (a strip with an exact width) on the machine with the right side against the saw-blade. -
Page 31: Malfunctions
MALFUNCTIONS The brake does not operate: The machine cannot be switched on: Switch off the machine and contact a Check if the cover of the safety guard is skilled electrical fitter. closed properly and the end switch connects. Saw-blade does not rotate: Checked if the vertical slide way is locked in the notches and if the saw unit is Disconnect the machine of the mains... -
Page 32: Operating The Scoring Blade (Optional)
OPERATING THE SCORING BLADE (OPTIONAL) The scoring saw unit is specially used for cutting double side plastic covered panels. The scoring blade always rotates simultaneously with the main saw-blade. The position of the scoring blade is determined by the place of the pressure pad. -
Page 33: Operating The Scoring Blade (Optional)
OPERATING THE SCORING BLADE (OPTIONAL) ALIGN SCORING BLADE WITH MAIN SAW- BLADE Make a test cut to check side wards deviation in regard to the main saw-blade (Fig. 34). SCORING BLADE IS AT THE LEFT OF MAIN SAW-BLADE. Open the cover of the saw-unit. Loosen the nut (M12) of the scoring blade a little bit. -
Page 34: Transport Rollers (Optional)
TRANSPORT ROLLERS (OPTIONAL) The purpose of the transport rollers is easy positioning of the panels on the machine. Push the foot pedal at the left side of the machine till it locks (Fig. 36). Place the panel on the machine and position. -
Page 35: Digital Read Out (Optional)
DIGITAL READ OUT (OPTIONAL) The digital read out is used for accurate adjusting of the measure for cutting horizontally. The measure can be adjusted from bottom supports, from the midway fences and from the top side of the material. ADJUSTING FROM THE BOTTOM SUPPORTS Put the saw unit in horizontal position (Fig. -
Page 36: Digital Read Out (Optional)
DIGITAL READ OUT (OPTIONAL) ADJUSTING FROM THE TOP SIDE OF THE MATERIAL Put the saw unit in horizontal position (Fig. 38) Fasten the motor carriage with the knob at the right side at the top of the panel. Smoothen the panel at the top side. Press button The digital read out shows an off-set value of -3,2 mm (Fig. -
Page 37: Digital Read Out (Optional)
DIGITAL READ OUT (OPTIONAL) RE-ADJUST ABSOLUTE REFERENCE POINT Re-adjust the absolute reference point when bottom supports are smoothened or when the midway fences are smoothened. Check the absolute reference point when battery is replaced. Disconnect the machine of the mains supply. -
Page 38: Digital Read Out (Optional)
DIGITAL READ OUT (OPTIONAL) RE-ADJUST THE REFERENCE POINT OF THE STANDARD VALUES MIDWAY FENCES Press three seconds the F-button to check Re-adjust the reference point when bottom the standard values. Press shortly the F- supports are smoothened or when the button to go to the next value. -
Page 39: Exploded View Type Orca
EXPLODED VIEW TYPE ORCA... -
Page 40: Parts List Type Orca
PARTS LIST TYPE ORCA Number Description Page Frame Aluminium back support TRK-L dust extraction system (optional) TRK-R dust extraction system (optional) Midway fence Transport rollers (optional) Length stop Vertical slide way Stops for horizontal cuts Hinge fence (optional) Extraction pipe Motor carriage Operating system fence (optional) Reiteration stop... -
Page 41: Exploded View Frame
EXPLODED VIEW FRAME... -
Page 42: Parts List Frame
PARTS LIST FRAME Number Part number Description Quantity 520105 Frame welded 1550 520106 Frame welded 1850 520107 Frame welded 2150 511012 Bush bottom support 520038 Centre bottom support 520114 Bracket 520092 Cable mounting/rod 520047 Steel cable 520006 Foot welded 520016 Adjusting Tube 520161 Shelf holder... -
Page 43: Parts List Frame
PARTS LIST FRAME Number Part number Description Quantity 900011 Washer M10 900201 Hexagon nut M6 900012 Hexagon socket head cap screw M6*16 998856 Hexagon socket head cap screw M6*12 900711 Washer M6 900115 Washer M6 902248 Hexagon nut M16 902541 Lifting eye bolt M16 902416 Hexagon bolt M10*75... -
Page 44: Exploded View Aluminium Back Support
EXPLODED VIEW ALUMINIUM BACK SUPPORT... -
Page 45: Parts List Aluminium Back Support
PARTS LIST ALUMINIUM BACK SUPPORT Number Part number Description Quantity 520028 Aluminium profile type 1850 520029 Aluminium profile type 2150 520121 Cover profile type 1850 520121 Cover profile type 2150 520026 Aluminium profile type 1850 520026 Aluminium profile type 2150 520141 Guide beam fence type 1850/2150 510316... -
Page 46: Exploded View Trk-System-L (Optional)
EXPLODED VIEW TRK-SYSTEM-L (OPTIONAL) -
Page 47: Parts List Trk-System-L (Optional)
PARTS LIST TRK-SYSTEM-L (OPTIONAL) Number Part number Description Quantity 520071 Cover type 1850 520072 Cover type 2150 520124 Upper cover 520123 Lower cover with elbow 520126 TRK-cover type 1850 520127 TRK-cover type 2150 520129 Upper TRK cover 520128 Lower TRK cover 520155 Support frame 902543... -
Page 48: Exploded View Trk-System-R (Optional)
EXPLODED VIEW TRK-SYSTEM-R (OPTIONAL) -
Page 49: Parts List Trk-System-R (Optional)
PARTS LIST TRK-SYSTEM-R (OPTIONAL) Number Part number Description Quantity 520071 Cover type 1850 520072 Cover type 2150 520124 Upper cover 520123 Lower cover with elbow 520126 TRK-cover type 1850 520127 TRK-cover type 2150 520129 Upper TRK cover 520128 Lower TRK cover 520155 Support frame 902644... -
Page 50: Exploded View Midway Fence
EXPLODED VIEW MIDWAY FENCE... -
Page 51: Parts List Midway Fence
PARTS LIST MIDWAY FENCE Number Part number Description Quantity 520061 Cover Midway fence 520102 Midway fence 520063 Clamp 520065 End strip 520064 Connection strip 902523 Tube clamp 520143 Rod midway fence 520086 Handle holder 520154 Roller midway fence 520158 Cover midway fence 520156 Collar 900940... -
Page 52: Exploded View Transport Rollers (Optional)
EXPLODED VIEW TRANSPORT ROLLERS (OPTIONAL) -
Page 53: Parts List Transport Rollers (Optional)
PARTS LIST TRANSPORT ROLLERS (OPTIONAL) Number Part number Description Quantity 500066 Pedal welded 500067 Pedal bracket 510190 Roller support 1550 510191 Roller support 1850/2150 510071 Transport roller 510197 Strip transport roller 500068 Lever tension spring welded 511117 Tension spring transport roller 510202 Eye bolt transport roller 998866... -
Page 54: Exploded View Length Stop
EXPLODED VIEW LENGTH STOP... -
Page 55: Parts List Length Stop
PARTS LIST LENGTH STOP Number Part number Description Quantity 523005 Length stop 520096 Clamp 510857 Eccentric-roller 500817 Eccentric 520162 Stop 520035 Lens 510298 Key length stop 510314 Holder length stop 599203 Measure scale 902019 Washer M10 902018 Hexagon nut M8 aluminium 902004 Hexagon socket set screw M4*14 902595... -
Page 56: Exploded View Vertical Slideway
EXPLODED VIEW VERTICAL SLIDEWAY 190 200 190 180... -
Page 57: Parts List Vertical Slide Way
PARTS LIST VERTICAL SLIDE WAY Number Part number Description Quantity 500883 Beam type 1550 500884 Beam type 1850 500885 Beam type 2150 510083 Carriage 500833 Bracket stop 500882 Bearing carriage 511101 Cover bearing See exploded view Stops for horizontal cuts 520030 Measure scale 1000 mm 520032... -
Page 58: Parts List Vertical Slideway
PARTS LIST VERTICAL SLIDEWAY Number Part number Description Quantity 900173 Hexagon bolt M8*20 902235 Hexagon bolt M10*40 902351 Belleville washer 900005 Prevailing torque hexagonal nut M10 900201 Hexagon nut M6 900843 Cross recessed countersunk head screw M6*30 900711 Washer M6 998856 Hexagon socket head cap screw M6*12 900008... -
Page 59: Exploded View Stops For Horizontal Cuts
EXPLODED VIEW STOPS FOR HORIZONTAL CUTS... -
Page 60: Parts List Stops For Horizontal Cuts
PARTS LIST STOPS FOR HORIZONTAL CUTS Number Part number Description Quantity 510236 Omega profile 511093 Stop 510232 Clamping strip 511091 Bracket 902614 Locking bolt 902233 Hexagon thin nut M16x1,5 900174 Hexagon bolt M8*25 900998 Cross recessed countersunk head screw M6*12 900079 Cross recessed countersunk head screw M5*8... -
Page 61: Exploded View Hinge Fence (Optional)
EXPLODED VIEW HINGE FENCE (OPTIONAL) -
Page 62: Parts List Hinge Fence (Optional)
PARTS LIST HINGE FENCE (OPTIONAL) Number Part number Description Quantity 520145 Hinge 520113 Omega profile type 1850 520101 Omega profile type 2150 520103 Guider 520194 Spacer Sprocket 520193 Hinge strip 900204 Hexagon nut M10 900203 Hexagon nut M8 902235 Hexagon bolt M10*40 900935 Hexagon bolt M8*25 900042... -
Page 63: Exploded View Extraction Pipe
EXPLODED VIEW EXTRACTION PIPE... -
Page 64: Parts List Extraction Pipe
PARTS LIST EXTRACTION PIPE Number Part number Description Quantity 520108 Support switchbox type 1850 520109 Support switchbox type 2150 520049 Rear cover switchbox 520050 Front cover switchbox 902530 Housing switch 902190 On/off switch 902193 No volt relay 902531 Button emergency stop 902533 Symbol label 902534... -
Page 65: Exploded View Motor Carriage
EXPLODED VIEW MOTOR CARRIAGE 340 320... -
Page 66: Parts List Motor Carriage
PARTS LIST MOTOR CARRIAGE Number Part number Description Quantity 510942 Bearing carriage 500825 Support motor carriage 511056 0-90º Support 510538 Chain attachment 511160 0-90º vertical slide block 510915 0-90º horizontal slide block 511072 Clamping strip 0-90º slide 500831 Clamping profile Track 511061 Spacer 510934... -
Page 67: Exploded View Operating System Fence
EXPLODED VIEW OPERATING SYSTEM FENCE (OPTIONAL) -
Page 68: Parts List Operating System Fence (Optional)
PARTS LIST OPERATING SYSTEM FENCE (OPTIONAL) Number Part number Description Quantity 520069 Roller attachment 520066 Actuator 520067 Pusher 520068 Guiding spindle 520044 Handle 520043 Bearing house 520046 Roller 520045 Bearing house 520051 Bearing track 902037 Hexagon socket head cap screw M8*16 900139 Hexagon socket set screw M6*12 900043... -
Page 69: Exploded View Reiteration Stop
EXPLODED VIEW REITERATION STOP... -
Page 70: Parts List Reiteration Stop
PARTS LIST REITERATION STOP Number Part number Description Quantity 520088 Stop support 520089 Clamping 520090 Roller stop 511088 Attachment plate 520091 Measure scale 520095 Roller stop 900060 Bearing 6000-2RS 900116 Washer M8 900055 Liftable clamp lever M8 model 8 900020 Hexagon socket head cap screw M6*30 900273 Adjusting ring... -
Page 71: Exploded View Housing
EXPLODED VIEW HOUSING... -
Page 72: Parts List Housing
PARTS LIST HOUSING Number Part number Description Quantity 510940 Housing 511164 Bracket support 511006 Cover pulley 511053 Cover 511051 Pressure pad 510865 Guiding spindle 511070 Tension spring pressure pad 510864 Guiding spindle 510907 Compression spring pressure pad 510908 Housing spring pressure pad 511097 Spacer 510917... -
Page 73: Parts List Housing
PARTS LIST HOUSING Number Part number Description Quantity 900174 Hexagon bolt M8*25 900313 Hexagon socket head cap screw M8*20 901036 Motor 3 kW/400V/3~ 900940 Hexagon nut M8 900116 Washer M8 901082 Glyco plain bearing Gly PG303415B 900062 Bearing 6200-2Z 900034 Retaining ring for bore J30 900017 Hexagon socket head cap screw M6*16... -
Page 74: Parts List Housing
PARTS LIST HOUSING Number Part number Description Quantity 902132 Cross recessed countersunk head screw M6*16 902270 Cross recessed countersunk head screw M3*10 900548 Cross recessed countersunk head screw M5*12 902060 Hexagon socket head cap screw M6*70 900933 Hexagon bolt M8*30 902130 Dowel pin 4m6 902569... -
Page 75: Exploded View Spindle Without Scoring Unit
EXPLODED VIEW SPINDLE WITHOUT SCORING UNIT... -
Page 76: Exploded View Spindle With Scoring Unit (Optional)
EXPLODED VIEW SPINDLE WITH SCORING UNIT (OPTIONAL) -
Page 77: Parts List Spindle Without Scoring Unit
PARTS LIST SPINDLE WITHOUT SCORING UNIT Number Part number Description Quantity 902201 Hexagon nut M20*1,5 900120 Washer M20 900805 Collar front 90 mm 900241 Saw-blade 900806 Collar rear 90 mm 511166 Spacer 511165 Clamping nut 510845 Saw spindle 901079 Key 6*6 L=25 901078 Key 6*6 L=30 900778... -
Page 78: Parts List Spindle With Scoring Unit (Optional)
PARTS LIST SPINDLE WITH SCORING UNIT (OPTIONAL) Number Part number Description Quantity 902201 Hexagon nut M20*1,5 900120 Washer M20 900805 Collar front 90 mm 902084 Saw-blade 510845 Saw-spindle 901079 Key 6*6 L=25 901078 Key 6*6 L=30 900778 Bearing 6205-2RS 510866 Bush saw-spindle 510859 Pulley timing belt... -
Page 79: Parts List Spindle With Scoring Unit
PARTS LIST SPINDLE WITH SCORING UNIT (OPTIONAL) Number Part number Description Quantity 902132 Cross recessed countersunk head screw M6*16 900201 Hexagon nut M6 900169 Hexagon bolt M6*20 510924 Bracket 998856 Hexagon socket head cap screw M6*12 900727 Wrench 902289 Allen key 10 m 500855 900548 Cross recessed countersunk head screw M5*12...
Need help?
Do you have a question about the ORCA Series and is the answer not in the manual?
Questions and answers