Table of Contents
Advertisement
Quick Links
Made in America
Lifetime Guarantee
Thank you for purchasing this instrument from Intellitronix. We value our customers!
INSTALLATION GUIDE
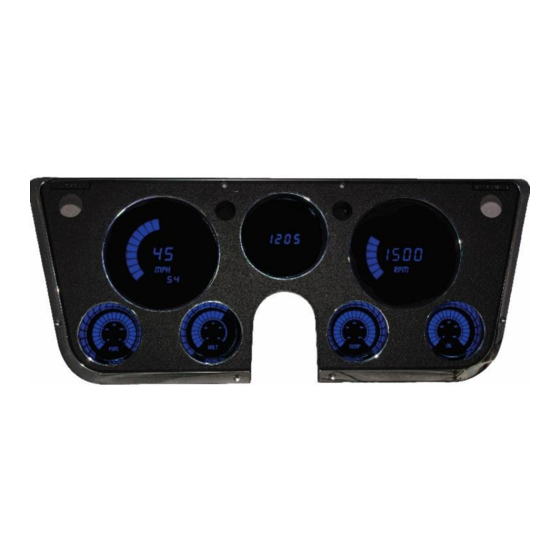
1967-1972 Chevrolet Truck
Digital Direct Replacement Dash
Part #: BG6003
Always disconnect the battery before attempting any electrical work on your vehicle.*
***Always Remove Protective Film from Your New Dash***
•
1 – BG6003
www.intellitronix.com
(rev. 02/19/2020)
Advertisement
Table of Contents

Summary of Contents for Intellitronix BG6003
- Page 1 Made in America Lifetime Guarantee Thank you for purchasing this instrument from Intellitronix. We value our customers! INSTALLATION GUIDE 1967-1972 Chevrolet Truck Digital Direct Replacement Dash Part #: BG6003 Always disconnect the battery before attempting any electrical work on your vehicle.* ***Always Remove Protective Film from Your New Dash*** •...
-
Page 2: Kit Components
The stock gauge bezel is the only stock component re-used in this installation. Remove the stock gauges by removing the six (6) screws. Retain these 6 screws to reuse to mount new cluster. Wire the gauges and sending units as instructed in the next section. 2 – BG6003 www.intellitronix.com (rev. 02/19/2020) -
Page 3: Wiring Instructions
Resistors if the Tachometer does not have a push button for programing, please call Tech Support at Intellitronix, as you may need to send the gauge back to us to be reconfigured. There is no charge for this additional service. - Page 4 This wire is an optional wire some vehicles may not require High-Beam – Brown - Connect the brown wire on the Dash unit to your high beam headlight circuit. This wire is powered on when the high beam is turned on. 4 – BG6003 www.intellitronix.com (rev. 02/19/2020)
- Page 5 The easiest way to test this is to use a voltmeter and test for continuity on wires going to fuel sender. With wire disconnected from Fuel Gauge check for continuity to ground. Without this the Gauge will not work. 5 – BG6003 www.intellitronix.com (rev. 02/19/2020)
-
Page 6: To Change Settings
Resistors if the Tachometer does not have a push button for programing, please call Tech Support at Intellitronix, as you may need to send the gauge back to us to be reconfigured. There is no charge for this additional service. - Page 7 Ground at the Engine block. To find High and Low output wire color or pin location will need to be looked up by Vehicle vin or Model and year or (Consults Pinout Chart 3.)Speedometer - White (Intellitronix Speed Sender) - Disconnect the mechanical speedometer cable from the transmission and thread the new electronic sensor onto the transmission. This panel comes with a 3-wire sensor.
- Page 8 The odometer will continue to display the pulse reading for a few seconds. Once it reverts to the default mode, you have successfully calibrated your speedometer. 8 – BG6003 www.intellitronix.com (rev. 02/19/2020)
-
Page 9: Setting The Odometer
The highest speed measured over multiple runs will be retained in memory. Clock Setting Press the setting button under each section for hour and minute settings. 9 – BG6003 www.intellitronix.com (rev. 02/19/2020) -
Page 10: Lifetime Guarantee
CHECK OUT THE SUPPORT PAGE AT www.intellitronix.com FOR QUICK ANSWERS (Q&A) TO YOUR QUESTIONS This product carries a limited Lifetime Warranty. This warranty is limited to replacement or repair of the unit at the discretion of Intellitronix. 10 – BG6003 (rev. 02/19/2020) www.intellitronix.com... - Page 11 RETURN POLICY PROCEDURES Return Policy Instructions 1. Download the Intellitronix Return/Repair Form and fill in the information on the form about the product. 2. Place the product being returned in the original packaging that it came in and include a copy of the completed Intellitronix Return/Repair Form.


Need help?
Do you have a question about the BG6003 and is the answer not in the manual?
Questions and answers