Table of Contents

Related Manuals for Exerpeutic Momentum Bike


Summary of Contents for Exerpeutic Momentum Bike
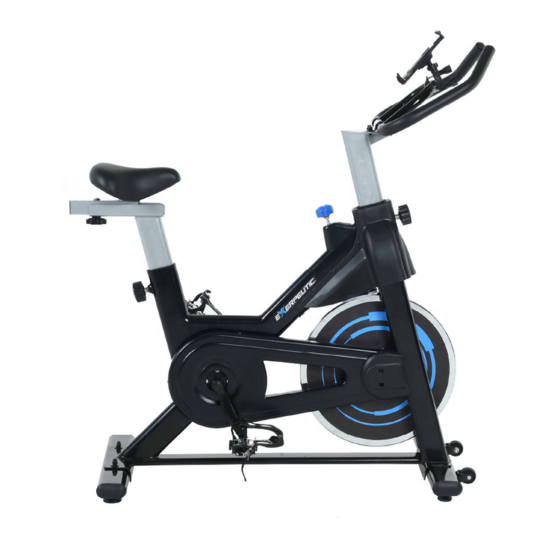
- Page 1 ® Momentum Bike IMPORTANT: Read all instructions carefully before using this product. Retain this owner’s manual for future reference. The specifications of this product may vary from this photo, subject to change without notice. 4210.2-032320...
- Page 2 PLEASE DO NOT RETURN THIS PRODUCT TO THE STORE. STOP. Contact customer service if you have any questions regarding assembly or proper operation of the machine. Email us at: Service@paradigmhw.com Or call us at: 1-844-641-7921 Hours: 8:00 am to 5:00 pm (PST) Monday thru Friday...
-
Page 3: Table Of Contents
TABLE OF CONTENT SERVICE ------------------------------------------------------------------------ LABEL PLACEMENT --------------------------------------------------------- IMPORTANT SAFETY GUIDELINES ------------------------------------- OVERVIEW DRAWING ------------------------------------------------------ PARTS LIST ------------------------------------------------------------------- ASSEMBLY ---------------------------------------------------------------------- ADJUSTMENTS --------------------------------------------------------------- CONSOLE----------------------------------------------------------------------- TROUBLESHOOTING & MAINTENANCE ------------------------------ WARRANTY -------------------------------------------------------------------- PARTS REQUEST FORM---------------------------------------------------... -
Page 4: Service
SERVICE IMPORTANT: FOR NORTH AMERICA ONLY For damaged or defective product, questions, replacement parts or any other service support, please contact our customer service department by the below methods: For The Best Service, please Email: service@paradigmhw.com Response Time: 1-2 Business Days Emailing us with the information above will be the best method to receive a response during peak business hours Website:... -
Page 5: Label Placement
LABEL PLACEMENT... -
Page 6: Important Safety Guidelines
IMPORTANT SAFETY GUIDELINES Read all instructions before using the equipment. When using the equipment, basic precautions should always be followed. WARNING - To reduce the risk of injury to persons, read and under the following: Make sure your equipment is correctly assembled before you use it. Be sure all screws, nuts, and bolts are tightened prior to use. - Page 7 IMPORTANT SAFETY GUIDELINES Do NOT use this equipment if you have any of the following conditions or ailments: Pregnancy Extreme obesity Middle ear infection Hiatus hernia or Ventral hernia Glaucoma, retinal detachment or conjunctivitis Use of anticoagulants including Aspirin in high doses. ...
-
Page 8: Overview Drawing
OVERVIEW DRAWING... -
Page 9: Parts List
PARTS LIST Description Description Self-Tapping Phillips Screw Main Frame ST4.2*16 Front Stabilizer Hex Bolt M4*6 Rear Stabilizer Bluetooth Box 0515 Seat Post Foam Grip Handlebar Post Device Holder Seat Bracket Round End Cap Handlebar Hex Bolt M8*16 Brake Knob Bracket Oval End Cap Knob M10 10 Adjustable Leveler... - Page 10 HARDWARE PACK...
-
Page 11: Assembly
ASSEMBLY TOOL: 6mm Allen Wrench with Phillips Screwdriver CAUTION: PLEASE REMOVE THE FLYWHELL HOLDER BEFORE ASSEMBLY THE BIKE. STEP 1 1a. Front Stabilizer Installation: Lift up the front of the Main Frame (1), and attach the Front Stabilizer (2) onto the front bracket of the Main Frame (1) with two Hex Bolts (13), two Spring Washers (52) and two Flat Washers (14). - Page 12 ASSEMBLY TOOL: IMPORTANT: Ensure that the Right Pedal (11) matches up with the Right Crank (15) and the Left Pedal (12) matches up with the Left Crank (16). If reversed, the 17-19mm Wrench 13-15mm Wrench cranks may become damaged or stripped. Tip: Only turn the pedals in the direction instructed.
- Page 13 ASSEMBLY TOOL: 13-15mm Wrench STEP 3 3a. Remove the Seat Post (4) from the Main Frame (1) by turning the Spring Knob (77) Counter- clockwise and pulling the Seat Post (4) up. See Fig. A 3b. Seat Post & Seat Installation: Pull the Spring Knob (77) out, insert the Seat Post (4) into the Main Frame (1), release the Spring Knob (77), Press down on the Seat Post (4) until it “Pops”...
- Page 14 ASSEMBLY TOOL: 6mm Allen Wrench with Phillips Screwdriver STEP 4 4a. Hardware Removal: Remove four Hex Bolt (42), four Spring Washers (52) and four Flat Washers (14) from the Handlebar Post (5) 4b. Installing the Front Post to the Main Frame: Loosen the Spring Knob (25) by turning it Counter-Clockwise then pull Spring Knob (25) out, insert the Handlebar Post (5) into the Main Frame (1), release the Spring Knob (25), Press down on the Handlebar Post (5) until it “Pops”...
- Page 15 ASSEMBLY Fig. A Fig. B STEP 5 5a. Remove two Knobs from the U bolt as shown in Fig. A. 5b. Fit the U bolt and Device Holder (88) around the Handlebar (7) tube with the Rubber Grips facing the tube. Fully tighten the two Knobs to secure the Device holder (40). See Fig. B. IMPORTANT: This Device Holder is not designed for outdoor use on intensively moving bikes such as, mountain bikes.
-
Page 16: Adjustments
ADJUSTMENTS Adjustable Levelers (10) Front Stabilizer (2) Rear Stabilizer (3) Adjustable Levelers (10) Adjusting the Foot Pad Turn the Adjustable Levelers (10) on the Front and Rear Stabilizers (2) & (3) as needed to level the bike. Proper leveling will reduce noises and wobbling. Tension Knob (72) Adjusting the Tension To increase the tension, turn the Tension Knob (72) in a CLOCKWISE direction. - Page 17 ADJUSTMENTS Fig. C Front Post (5) Spring Knob (25) Adjusting the Handlebar Height TIP: When adjusting the height of Front Post (5), the STOP line cannot be higher than the edge of plastic bushing. See Fig. C. Loosen the Spring Knob (25) by turning it COUNTER-CLOCKWISE direction until it can be pulled out.
- Page 18 ADJUSTMENTS Seat Bracket (6) Knob (44) Adjusting the Seat Forward or Back: Loosen the Knob (44) by turning it in a COUNTER-CLOCKWISE direction. Slide the Seat Bracket (6) FORWARD or BACKWARDS direction to the suitable position. Lock the Seat Bracket (6) in place by turning it in a CLOCKWISE direction.
- Page 19 ADJUSTMENTS 1. Make sure the Phone Mount 2. Change the angle by turning the t-notch adapter is attached into knob counter-clockwise. Adjust the the holder’s four slots. Push holder for vertical or horizontal down firmly to lock you should viewing. Turn the knob clockwise to hear a click when the parts are tighten and secure position.
-
Page 20: Console
CONSOLE BATTERY INSTALLATION: Remove the Battery Cover from the Console (38) and install Two AAA batteries provided into the battery tray in the correct polarity. Please be sure to install batteries in correct order or damage will occur. When the batteries are installed the red battery indicator light will blink three times. NOTE* When the batteries become low the red battery indicator light will blink once every 4 seconds. -
Page 21: Troubleshooting & Maintenance
TROUBLESHOOTING & MAINTENANCE TROUBLE SHOOTING 1. PROBLEM: The bike wobbles when in use. 1) SOLUTION: Turn the Adjustable Levelers (10) on the Front and Rear Stabilizer (2) & (3) or as needed to level the bike. 2. PROBLEM: The bike makes a squeaking noise when in use. 1) SOLUTION: The bolts may be loose on the recumbent bike. -
Page 22: Warranty
WARRANTY MANUFACTURER’S LIMITED WARRANTY Paradigm Health & Wellness warrants to the original purchaser that this product is free from defects in material and workmanship when used for the purpose intended, under the conditions that it has been installed and operated in accordance with Paradigm’s Owner’s Manual. -
Page 23: Parts Request Form
PARTS REQUEST FORM Paradigm Health & Wellness, Inc. EMAIL THIS FORM WITH YOUR RECEIPT OF PURCHASE TO Service@paradigmhw.com NAME:_____________________________________________________________________________________ ADDRESS:__________________________________________________________________________________ CITY:________________________ STATE:_____________ ZIP:_______________________________________ TELEPHONE: (Day)______________________________________________________________________ (Night)_____________________________________________________________________ SERIAL#:___________________________________________________________________________________ MODEL#:___________________________________________________________________________________ PURCHASE DATE:___________________________________________________________________________ PLACE OF PURCHASE:_______________________________________________________________________ PART # DESCRIPTION “YOUR ORDER WILL BE PROCESSED WITHIN 3 BUSINESS DAYS” This form can also be faxed to #: 626-810-2166...
Need help?
Do you have a question about the Momentum Bike and is the answer not in the manual?
Questions and answers