SMART Board MX Series User Manual
Hide thumbs
Also See for SMART Board MX Series:
- Installation and maintenance manual (115 pages) ,
- Instruction for installation and maintenance (90 pages) ,
- User manual (62 pages)

Subscribe to Our Youtube Channel
Related Manuals for SMART SMART Board MX Series


Summary of Contents for SMART SMART Board MX Series
- Page 1 SMART Board MX series interactive displays USER’S GUIDE SBID-MX265 SBID-MX275 SBID-MX286 SBID-MX365 SBID-MX375 SBID-MX386 Was this document helpful? smarttech.com/docfeedback/171284...
- Page 2 © 2020 SMART Technologies ULC. All rights reserved. No part of this publication may be reproduced, transmitted, transcribed, stored in a retrieval system or translated into any language in any form by any means without the prior written consent of SMART Technologies ULC. Information in this manual is subject to change without notice and does not represent a commitment on the part of SMART.
-
Page 3: Important Information
1, IDX86-2 Responsible Party – U.S. Contact Information The power cable or plug is damaged SMART Technologies Inc. Liquid is spilled into the display 2401 4th Ave., 3rd Floor Objects fall into the display... - Page 4 Important information Innovation, Science and Economic NOTE Development Canada statement This equipment has been tested and found to comply with the limits for a Class A digital device, pursuant to part 15 of the FCC This device complies with RSS-247 of the Innovation, Science and Rules.
- Page 5 Important information Compliance to Malaysia specification The SMART Technologies ULC Interactive Display SBID-MX265, SBID-MX275, and SBID- MX285 meet the Malaysian requirements as defined by the Certifying Agency, SIRIM QAS International. United Arab Emirates – TRA registration details Regulatory model SBID-MX065, SBID-MX065, SBID-MX075, SBID-MX086 OPS –...
-
Page 6: Table Of Contents
Chapter 4: Connecting and using the Intel Compute Card Chapter 5: Connecting and using computers Installing SMART software on computers you want to connect to the display Setting the resolutions and refresh rates of computers you want to connect to the display Connecting computers to the display Viewing a connected computer’s input... - Page 7 Resolving issues with touch and digital ink Resolving issues with remote management Resolving issues with the iQ experience Resolving issues with the Intel Compute Card Resolving issues with software Referring to the SMART knowledge base for additional troubleshooting information Contacting your reseller for additional support smarttech.com/kb/171284...
-
Page 8: Chapter 1: Welcome
SMART Audio 400 classroom amplification system USB extenders SMART PCM8 series OPS PC More information This chapter introduces the SMART Board® MX series interactive displays. Identifying your specific model SMART offers several different models of the SMART Board MX series interactive display and iQ appliance. smarttech.com/kb/171284... -
Page 9: Features
Refer to the specifications for detailed technical information for this model, including product dimensions and weights (see More information on page 15). Identifying your iQ appliance model The iQ appliance is installed in the accessory slot to enable iQ functionality. SMART offers several different iQ appliance models. Use the Identifying your iQ appliance model wizard to identify the specific model of iQ appliance installed in your display. -
Page 10: Components
Audio support The display includes integrated speakers for presenting audio from connected input sources. Components The display consists of the following components: Requires SMART Product Drivers to be installed. Some applications might not support all touch points. smarttech.com/kb/171284... -
Page 11: Iq Appliance (And Intel Compute Card)
Remote control sensor / status light Page 13 Pen (×2) Page 12 Speakers Page 14 Page 13 Front connector panel Side connector panel See SMART Board MX series interactive displays installation and maintenance guide ( smarttech.com/kb/171257 iQ appliance (and Intel Compute Card) Page 11 Not pictured AC switch See SMART Board MX... -
Page 12: Screen
Windows 10 solution at your fingertips, without the need for an external PC or cables. Use the Identify your iQ appliance model on the SMART support site to identify your model of iQ appliance. For more information about the iQ experience, see Chapter 3: Using the iQ experience on page 22. Screen... -
Page 13: Front Connector Panel
Chapter 1 Welcome CAUTION When you return a pen to the magnetic holder, make sure it’s centered in its holder to keep it from falling and being damaged. Front connector panel The front connector panel includes connectors for USB peripherals and a computer or other input source. -
Page 14: Accessories
Ambient light sensor The ambient light sensor can detect the room brightness and adjust the display’s brightness. Make sure Auto is enabled in Brightness and volume in the display’s settings. See SMART Board MX series interactive displays installation and maintenance guide (smarttech.com/kb/171257). -
Page 15: More Information
SMART recommends only using USB extenders with the USB connectors on the side and bottom connector panels on the display. For more information, see: Troubleshooting and extending the USB 2.0 and USB 3.0 connection to your SMART interactive display USB cables and connectors SMART PCM8 series OPS PC... - Page 16 Comparison smarttech.com/kb/171161 These documents are available in the Support section of the SMART website (smarttech.com/support). Scan the QR code on the cover of this guide to view the SMART Board MX series interactive displays pages in the Support section. smarttech.com/kb/171284...
-
Page 17: Chapter 2: Getting Started
To return the display to a partial sleeping state, press the Power button on the front control panel. For information about turning the display off, see SMART Board MX series interactive displays installation and maintenance guide (smarttech.com/kb/171257). Using the front control panel The front control panel contains the Power, Input Select, Menu, Freeze, Mute and volume control buttons. - Page 18 Chapter 2 Getting started Name SMART Board MX procedure Menu Press to open the display’s settings. Press to freeze and unfreeze the screen. See Freeze Freezing the screen below Mute Press to mute or unmute the volume. Volume decrease Press to turn down the volume.
-
Page 19: Using The Remote Control
Chapter 2 Getting started Using the remote control The table below lists the functions available for the remote control. NOTE The buttons listed in this table and highlighted in gray in the image above are the only ones that have an effect on the display. -
Page 20: Using Touch
Chapter 2 Getting started Name Function POWER Wake the display. Enter Sleep mode. FREEZE Freezes the screen. Freezing the screen does not pause any applications running on the connected computer. It simply freezes the display of those applications. Using touch By touching the display’s surface, you can do everything on the display that you can do at your computer. -
Page 21: Writing, Drawing And Erasing
NOTE When you’re viewing a connected computer’s input, SMART Ink enables you to write or draw in digital ink over applications, files, folders, websites and any other open window on the computer. -
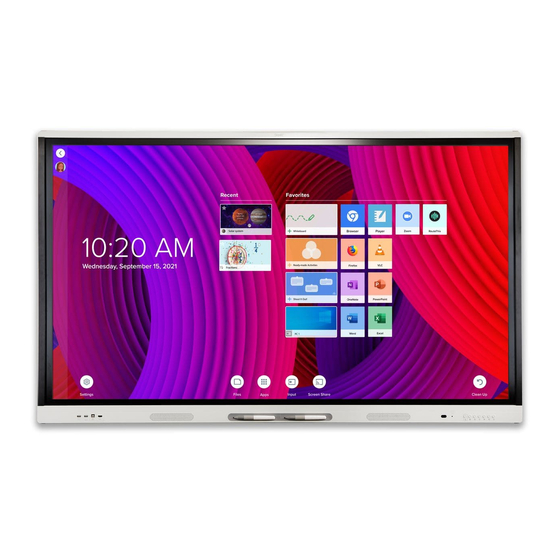
Page 22: Chapter 3: Using The Iq Experience
Using the iQ experience Switching to the iQ experience Using the Home screen Using the Apps Library Using the Files Library Using kapp Whiteboard Using SMART Notebook Player Using Browser Using Screen Share Using screenshots Installing third-party apps Cleaning up the display Switching to the iQ experience 1. -
Page 23: Using The Apps Library
Using kapp Whiteboard, you can write and erase notes on the display just as you do on a traditional dry erase board. You can also save your notes for later reference and share them using the SMART kapp® app. To learn how to use the display’s pens and eraser to write, draw and erase in Whiteboard, see Writing, drawing and erasing on page 21. -
Page 24: Using Smart Notebook Player
Player makes it easy to present SMART Notebook files and play SMART lab™ activities on the display. SMART Notebook Player is also the default whiteboard for education models. You can also install the Notebook Player app on your iOS device to view and control SMART Notebook files from the device. -
Page 25: Using Screenshots
To learn more about screenshots, see Writing and drawing over apps. Installing third-party apps You can install third-party apps from the Google Play Store using SMART Remote Management. To learn more about installing third-party apps, see Deploying third-party apps on your display. -
Page 26: Chapter 4: Connecting And Using The Intel Compute Card
SMART Board MX series interactive displays installation and maintenance guide (smarttech.com/kb/171257). If the Intel Compute Card meets the minimum requirements for SMART software, you can install the SMART software included with the display on the Intel Compute Card. For more information about installing software, see Chapter 5: Connecting and using computers on page 27. -
Page 27: Chapter 5: Connecting And Using Computers
You can purchase additional copies of SMART software to install on other computers. Contact your authorized SMART reseller (smarttech.com/where) for more information. NOTE In addition to SMART Notebook software, you need to install the following software on any computers you connect to the display: Software... -
Page 28: Setting The Resolutions And Refresh Rates Of Computers You Want To Connect To The Display
(smarttech.com/kb/171257). For full interactivity, connect a USB cable to the associated USB Type-B receptacle on the connector panel or convenience panel (as shown in the above diagrams and install SMART Product Drivers and SMART Ink on the connected computer). -
Page 29: Viewing A Connected Computer's Input
HDMI connector as either HDMI 1.4 or HDMI 2.0. This allows you to connect HDMI 1.4 devices that are incompatible with HDMI 2.0 connectors and would otherwise appear as DVI devices, see the SMART Board MX series interactive displays installation and maintenance guide (smarttech.com/kb/171257). - Page 30 Resolving issues with the iQ experience Resolving issues with the Intel Compute Card Resolving issues with software Referring to the SMART knowledge base for additional troubleshooting information Contacting your reseller for additional support Finding the display’s serial number Finding the iQ appliance serial number...
-
Page 31: Chapter 6 Troubleshooting
The pen is broken. Contact SMART Support. The Freeze button is not working. The Freeze button is not working on SMART Board MX series interactive displays. Resolving issues with power Issue Solutions The display doesn’t turn on and its Make sure the power cable is securely fastened to the power outlet and the display. -
Page 32: Resolving Issues With Image Or Video Quality
NOTE Take a photograph of the screen that shows the variation in brightness and send it to SMART support. If SMART support determines that the issue is with the screen and the It is normal for some areas of the display is under warranty, you may be eligible for a replacement. - Page 33 Perform a factory reset. Take a photograph of the screen that shows the issue with color and send it to SMART support. If SMART support determines that the issue is with the screen and the display is under warranty, you may be eligible for a replacement.
- Page 34 VGA port is cut-off or not centered. Switch to a different video input source, then switch back to the VGA input. You’re experiencing other issues with See Referring to the SMART knowledge base for additional troubleshooting information video or image quality, or the previous on page 39.
-
Page 35: Resolving Issues With Audio
Use a digital HDMI connection for video and audio. Audio hum is far less common with digital connections than it is with analog. You’re experiencing other issues with See Referring to the SMART knowledge base for additional troubleshooting information audio, or the previous solutions don’t on page 39. - Page 36 See the SMART Board MX series interactive displays installation and maintenance guide (smarttech.com/kb/171257). Make sure the latest version of SMART Product Drivers is installed on your computer. SMART Board MX series interactive displays require SMART Product Drivers 12.10 or later.
-
Page 37: Resolving Issues With Remote Management
Solutions The display doesn’t respond to touch A red X appearing on the SMART Product Drivers icon in your Windows task bar or Mac at all. menu bar indicates that no display is connected. If a red X appears, open SMART Settings and use the connection wizard for assistance. -
Page 38: Resolving Issues With The Iq Experience
(AM50) and Intel Compute Card. Resolving issues with software For information on resolving issues with SMART software, see the following pages in the Support section of the SMART website: Troubleshooting SMART Notebook 18 Troubleshooting SMART Learning Suite Online... -
Page 39: Referring To The Smart Knowledge Base For Additional Troubleshooting Information
Finding the iQ appliance serial number You can find the iQ appliance’s serial number in the following ways: In the iQ settings. See SMART Board MX series interactive displays installation and maintenance guide (smarttech.com/kb/171257). Look on the iQ appliance NOTE You need to remove the iQ appliance from the display to locate the serial number. -
Page 40: Finding The Intel Compute Card Serial Number
Chapter 6 Troubleshooting Finding the Intel Compute Card serial number You can find the Intel Compute Card’s serial number in the following ways: Look on the label on the back of the Intel Compute Card. For information about ejecting the Intel Compute Card from the iQ appliance, see Ejecting and inserting the Intel Compute Card. - Page 41 SMART TECHNOLOGIES smarttech.com/support smarttech.com/contactsupport smarttech.com/kb/171284...
Need help?
Do you have a question about the SMART Board MX Series and is the answer not in the manual?
Questions and answers