
Subscribe to Our Youtube Channel
Related Manuals for SMART SBID-MX165


Summary of Contents for SMART SBID-MX165
- Page 1 Was this document helpful? smarttech.com/docfeedback/171289 SMART Board MX100 series interactive displays USER’S GUIDE FOR MODELS: SBID-MX165 SBID-MX175 SBID-MX186...
- Page 2 © 2018 SMART Technologies ULC. All rights reserved. No part of this publication may be reproduced, transmitted, transcribed, stored in a retrieval system or translated into any language in any form by any means without the prior written consent of SMART Technologies ULC. Information in this manual is subject to change without notice and does not represent a commitment on the part of SMART.
-
Page 3: Important Information
Opening the casing also voids the warranty. Do not stand (or allow children to stand) on a chair to touch the surface of the display. To reduce the risk of fire or electric shock, do not expose the SMART product to rain or moisture. -
Page 4: Federal Communication Commission Interference Statement
IMPORTANT INFORMATION Federal Communication Commission interference statement This device complies with Part 15 of the FCC Rules. Operation is subject to the following two conditions: 1. This device may not cause harmful interference, and 2. this device must accept any interference received, including interference that may cause undesired operation. NOTE This equipment has been tested and found to comply with the limits for a Class A digital device, pursuant to part 15 of the FCC Rules. -
Page 5: Table Of Contents
Chapter 1: Welcome About the SMART Board MX100 Components Related products More information Chapter 2: Getting started with your SMART Board MX100 Waking up the display and putting it back to sleep Using e³ experience apps Using SMART software on connected computers Interacting with content... -
Page 7: Chapter 1: Welcome
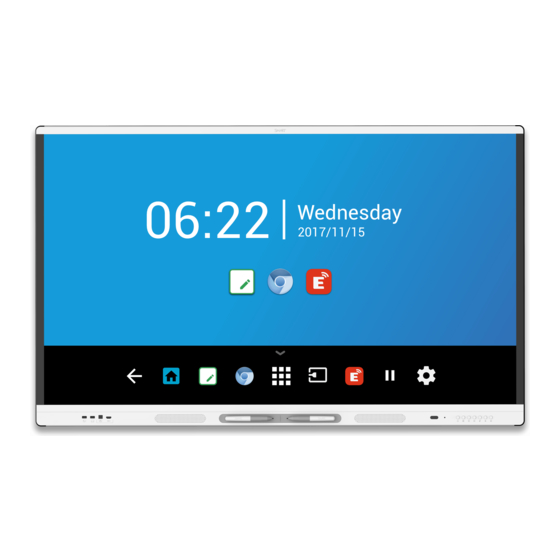
This chapter introduces the SMART Board® MX100 series interactive displays. About the SMART Board MX100 The SMART Board MX100 series interactive display is the hub of your classroom or meeting room. The e³ experience provides one-touch access to collaborative tools, including a whiteboard, wireless screen sharing and a web browser. -
Page 8: Features
Refer to the specifications for detailed technical information for this model, including product dimensions and weights (see More information on page 9). For help identifying your display, see Appendix B: Identifying your display on page 43. Requires SMART Product Drivers to be installed. Some applications might not support all touch points. smarttech.com/kb/171289... -
Page 9: Components
Light sensor page 7 Remote control sensor / status light page 3 Pen (×2) Page 4 Speakers Page 7 Page 4 Front connector panel Side connector panel page 11 Not pictured AC switch See SMART Board MX100 series interactive displays installation and maintenance guide ( smarttech.com/kb/171288 smarttech.com/kb/171289... -
Page 10: Screen
CHAPTER 1 WELCOME Name More information Bottom connector panel See SMART Board MX100 series interactive displays installation and maintenance guide ( smarttech.com/kb/171288 Remote control page 6 Screen The following are the dimensions for the display: Model Diagonal Active touch area Active image area SBID-MX165 64 1/2"... -
Page 11: Front Control Panel
(see page 11). Front control panel The front control panel contains the Power, Input Select, Menu, Freeze, Mute and volume control buttons. Name SMART Board MX100 procedure Power Press to wake the display. Press to again enter Sleep mode. Input select Press to switch input source. -
Page 12: Remote Control
CHAPTER 1 WELCOME Remote control The table below lists the functions available for the remote control. Name Function POWER Wake the display. Enter Sleep mode. SCREENSHOT Take a screenshot. MUTE Mute or unmute the volume HOME Return to the home screen [Up] Move selection up [Left]... -
Page 13: Related Products
Ambient light sensor The ambient light sensor can detect the room brightness and adjust the display’s brightness. Make sure Auto is enabled in Brightness and volume in Settings. See SMART Board MX100 series interactive displays installation and maintenance guide (smarttech.com/kb/171288). Internal speakers The display includes two 10 W rms integrated speakers. -
Page 14: Sba-100 Projection Audio System
For more information, see the SMART Audio 400 classroom amplification system specifications (smarttech.com/kb/171137). NOTE The SMART Audio 400 classroom amplification system is available only in Canada and U.S. USB extenders As noted in the SMART Board MX100 series interactive displays installation and maintenance guide (smarttech.com/kb/171288), the USB connection between the display and computer should... -
Page 15: More Information
Comparison smarttech.com/kb/171161 These documents are available in the Support section of the SMART website (smarttech.com/support). Scan the QR code on the cover of this guide to view the SMART Board MX100 series interactive displays pages in the Support section. smarttech.com/kb/171289... -
Page 17: Chapter 2: Getting Started With Your Smart Board Mx100
(see Chapter 3: Using apps on your SMART Board MX100 on page 15). Using SMART software on connected computers In addition to the e³ experience, the display comes with SMART software, which you or your organization’s system administrators can install on computers that you connect to the display. - Page 18 (smarttech.com/kb/171288). For full interactivity, connect a USB cable to the associated USB Type-B receptacle on the connector panel or convenience panel (as shown in the above diagrams and install SMART Product Drivers and SMART Ink on the connected computer). Your organization’s installers might have connected cables to the side and bottom connector panels or the front control panel and run the cables behind a wall or under the floor to a desk or table where you can place your computer.
-
Page 19: Interacting With Content
CHAPTER 2 GETTING STARTED WITH YOUR SMART BOARD MX100 Interacting with content By touching the display’s surface, you can do everything on the display that you can do at your computer. You can also use an array of gestures within applications. -
Page 20: Writing, Drawing And Erasing
NOTE When you’re viewing a connected computer’s input, SMART Ink enables you to write or draw in digital ink over applications, files, folders, websites and any other open window on the computer. -
Page 21: Chapter 3: Using Apps On Your Smart Board Mx100
Chapter 3 Using apps on your SMART Board MX100 Using the launcher on your SMART Board MX100 Opening and closing the launcher Using acetates Writing, drawing and erasing ink on an acetate Acetate tools Zoom tools Exiting an acetate Using Whiteboard Whiteboard tools and controls... -
Page 22: Using The Launcher On Your Smart Board Mx100
Supported Apple devices and operating systems Verifying that the display and mobile device or computer are connected to the same network This chapter introduces the e³ experience apps on the SMART Board MX100 series interactive displays. Using the launcher on your SMART Board MX100 The launcher contains all your apps and settings. -
Page 23: Writing, Drawing And Erasing Ink On An Acetate
CHAPTER 3 USING APPS ON YOUR SMART BOARD MX100 NOTE Acetates are not available in the Whiteboard app. Writing, drawing and erasing ink on an acetate The display includes two pens, which you can use to write or draw in digital ink. You can erase digital ink using gestures. -
Page 24: Acetate Tools
CHAPTER 3 USING APPS ON YOUR SMART BOARD MX100 Acetate tools Tool Icon Description Zoom Opens up the zoom menu. See Zoom tools below. Tap the button to change pen type, ink width and ink color. Back Tap the button to exit the pen options menu. -
Page 25: Using Whiteboard
CHAPTER 3 USING APPS ON YOUR SMART BOARD MX100 Using Whiteboard You can view and erase notes, open a saved note and share images of your whiteboard using a QR code. Whiteboard tools and controls The Whiteboard has several tools and controls for accessing and managing whiteboard sessions. -
Page 26: Navigation Tools
CHAPTER 3 USING APPS ON YOUR SMART BOARD MX100 Navigation tools Tool Icon Description Add a page Add a new page to the whiteboard. Next page Advanced to the next page. Previous page Return to the previous page. Writing and erasing notes The Whiteboard has several tools for drawing and erasing. -
Page 27: Starting A New Whiteboard
CHAPTER 3 USING APPS ON YOUR SMART BOARD MX100 Starting a new whiteboard To start a new whiteboard 1. Tap Menu. 2. Tap New. A new whiteboard appears. Changing the background You can change the background of the whiteboard. If there are multiple pages in the Whiteboard, each page can have a different background. -
Page 28: Opening A Whiteboard
CHAPTER 3 USING APPS ON YOUR SMART BOARD MX100 Use two fingers to pinch to zoom out Opening a Whiteboard You can easily continue from where you left off in a saved Whiteboard. To open a saved Whiteboard 1. Tap Menu, and then tap Open. -
Page 29: Using Browser
2. Enter a folder name. Each page in the Whiteboard is saved as a sequentially-numbered .png. You can copy or move those files to a USB drive. See Using File Manager on your SMART Board MX100 on the next page. Saving a Whiteboard You can save a Whiteboard. -
Page 30: Using File Manager On Your Smart Board Mx100
NOTE Restoring user settings doesn’t delete bookmarks. You can’t install plug-ins and add-ons. Using File Manager on your SMART Board MX100 Use the File Manager to view images, or play audio or videos saved on the display. About File Manager File Manager on the display is very similar to Windows Explorer or Finder on Mac computers. You can view images, or play audio or videos that have been saved to the display. -
Page 31: Viewing Content
CHAPTER 3 USING APPS ON YOUR SMART BOARD MX100 Viewing content To view an export from the Whiteboard app 1. Export your drawing from the Whiteboard app. See Exporting notes on page 23. Remember the folder name. 2. In File Manager, browse to the folder and tap it. - Page 32 CHAPTER 3 USING APPS ON YOUR SMART BOARD MX100 11. Tap Paste. The file is saved to the display and removed from the USB drive. To copy content from the USB drive to the display 1. Connect a USB drive to the display on the front connector panel.
-
Page 33: Supported File Formats
CHAPTER 3 USING APPS ON YOUR SMART BOARD MX100 6. Tap the file’s checkbox to select it. 7. Tap Move. 8. Tap USB drive. 9. Browse to the folder you want to move the file to. 10. Tap the folder to open it. -
Page 34: Using Input
CHAPTER 3 USING APPS ON YOUR SMART BOARD MX100 Using Input Connect a computer, DVD player or other video source to a SMART Board MX100 series interactive display to present content on the display Showing content on the display NOTE For best image quality, make sure the computer’s resolution matches the display’s native resolution. -
Page 35: Using Eshare
SMART software on computers you connect to the display. SMART Learning Suite includes SMART Notebook software, SMART Ink, SMART Product Drivers and other software. SMART Ink enables you to write and draw in digital ink over applications, files, folders websites and any other open window on your computer. -
Page 36: Sharing Your Device's Screen To The Display
CHAPTER 3 USING APPS ON YOUR SMART BOARD MX100 Use a QR code scanning app to scan the QR code on the display’s screen. 4. Select the app for your device. Sharing your device’s screen to the display To use Mirroring 1. Open the EShare app on your device. -
Page 37: Using Remote
CHAPTER 3 USING APPS ON YOUR SMART BOARD MX100 To use TV Mirror 1. Open the EShare app on your device. 2. Connect the EShare app to the display. 3. On your device, tap TV Mirror. Using Remote You can also use the buttons in your device’s app to control the display’s volume, enter text, exit apps or return to the home screen. - Page 38 CHAPTER 3 USING APPS ON YOUR SMART BOARD MX100 To change the display’s name 1. On the display, tap the Home button on the screen to open the launcherOn the display, open the launcher. 2. Tap EShare 3. Tap Settings. 4. Tap Edit beside the Device Name field.
-
Page 39: Using Imirror
CHAPTER 3 USING APPS ON YOUR SMART BOARD MX100 Device requirements Device Requirement iOS devices iOS 8.0 and later Android devices Android 2.2 and later Windows computers Windows 8 and later Mac computers Mac OS X 10.8 and later Using iMirror You can use the iMirror app to share your Mac computer, iPhone or iPad’s screen to... -
Page 40: Mirroring Your Mac Computer's Desktop To The Display
CHAPTER 3 USING APPS ON YOUR SMART BOARD MX100 Mirroring your Mac computer’s desktop to the display 1. On the display, tap the Home button on the screen to open the launcher. The launcher appears. 2. Tap iMirror. NOTE Remember the display’s name. -
Page 41: Verifying That The Display And Mobile Device Or Computer Are Connected To The Same Network
CHAPTER 3 USING APPS ON YOUR SMART BOARD MX100 Verifying that the display and mobile device or computer are connected to the same network To verify that the display and mobile device or computer are connected to the same network 1. On the display, tap the Home button on the screen to open the launcher. -
Page 43: Appendix A: Troubleshooting The E³ Experience
If the app is missing from the launcher, enable the app in Settings. See SMART Board MX100 series interactive displays installation and maintenance guide (smarttech.com/kb/171288). The app might not be included with the SMART Board MX100 series interactive display. See Chapter 3: Using apps on your SMART Board MX100 on page 15. smarttech.com/kb/171289... -
Page 44: Resolving Issues With Whiteboard
The Whiteboard app doesn’t support writing with two pens. Use SMART software like SMART Notebook to draw with two pens. The pen nib is worn. Replacement pens are available from the Store for SMART Parts (see smarttech.com/Support/PartsStore). A previously shared image isn't Whiteboards are only available for one week after sharing. -
Page 45: Resolving Issues With Input
See the SMART Board MX100 series interactive displays installation and maintenance guide (smarttech.com/kb/171288). Make sure the latest version of SMART Product Drivers is installed on your computer. SMART Board MX100 series interactive displays require SMART Product Drivers 12.10 or later. -
Page 46: Resolving Issues With Eshare
The display’s name doesn’t appear Make sure your computer or device is on the same network as the display. in the list of available devices. Make sure the network is configured properly. See SMART Board MX100 series interactive displays installation and maintenance guide (smarttech.com/kb/171288). -
Page 47: Resolving Issues With Imirror
Your device can’t connect to the Make sure your computer or device is on the same network as the display. display. Make sure the network is configured properly. See SMART Board MX100 series interactive displays installation and maintenance guide (smarttech.com/kb/171288). Make sure your computer or device is on the same subnet as the display. -
Page 49: Appendix B: Identifying Your Display
A list of input sources appears. 2. If the input source list doesn’t include SMART MX e³, the display is a SMART Board MX series interactive display. The display has an iQ appliance installed. If the input source list includes SMART MX e³, the display is a SMART Board MX100 series interactive display. - Page 52 SMART TECHNOLOGIES smarttech.com/support smarttech.com/contactsupport smarttech.com/kb/171289...
Need help?
Do you have a question about the SBID-MX165 and is the answer not in the manual?
Questions and answers