Table of Contents
Advertisement
Quick Links
Advertisement
Table of Contents

Related Manuals for Invacare Scorpius Series


Summary of Contents for Invacare Scorpius Series
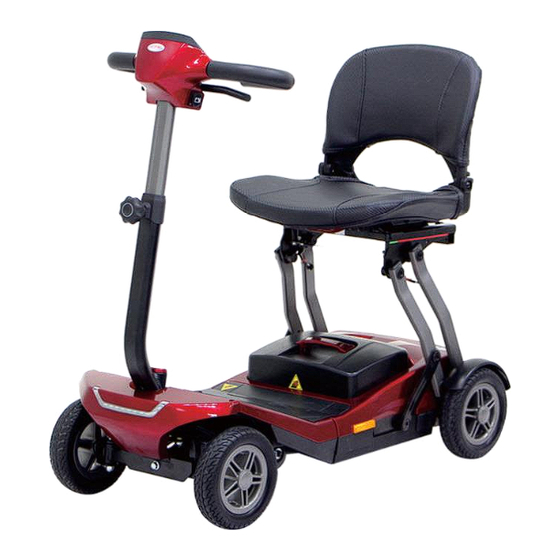
- Page 1 Invacare® Scorpius® Series Scorpius, Scorpius-A Scooter Service Manual...
- Page 2 Scorpius Service Manual Scorpius This product has passed certifications of CE, GMP Taiwan. ISO9001and ISO13485. In case of any discrepancy between the illustrations and accessories in this manual and the actual vehicle, the actual vehicle shall prevail. CTM reserves the right to design and modify this scooter. 1654773~A...
-
Page 3: Table Of Contents
Scorpius Service Manual Contents Repair Items ..........................5 Preparations for Repairs ..................... 5 Service Manual Reading Instructions .................. 5 Torque Limit Conversion Chart ................... 6 Description of Failure ......................6 Folding/ Unfolding Errors ....................8 Self-Diagnostic Warning Light ..................... 9 Battery Indicator Instructions .................... - Page 4 Scorpius Service Manual 2.10 SERVICE-10 Front Top Shroud Repair ................35 2.10.1 SERVICE-10-1 Front Top Shroud - Side Shroud Repair ..........35 2.10.2 SERVICE-10-2 Footplate Shroud Replacement ............36 2.11 SERVICE-11 Rear Top Shroud Repair ................37 2.11.1 SERVICE-11-1 DR Controller Repair ................. 39 2.11.2 SERVICE-11-2 Taillight Repair ..................
-
Page 5: Repair Items
Scorpius Service Manual 1 Repair Items 1.1 Preparations for Repairs • Please read this service manual carefully before attempting any repairs. Make sure you have identified the cause of the failure before you start. • Before starting to work on the scooter remove the battery to avoid electric shock or damage to components of the electrical system. -
Page 6: Torque Limit Conversion Chart
Scorpius Service Manual Caution Recommendation Frequent reference to the manual If these instructions are not during the repairs will facilitate the followed carefully the result operation. could be damage to the scooter, or even personal injury. 1.3 Torque Limit Conversion Chart You can use this chart as an orientation to find the correct torque. - Page 7 Scorpius Service Manual Seat Seat damage repair or seat replacement SERVICE-7 Seat repair Seat has become loose SERVICE-8-3 Seat locking pin repair Seat spring action abnormal SERVICE-8-2 Seat base spring repair Steering bar Height adjustment problem SERVICE-2 Steering bar repair Rear fender Rear fender damaged or makes an unusual SERVICE-11-4...
-
Page 8: Folding/ Unfolding Errors
Scorpius Service Manual 1.5 Folding/ Unfolding Errors Number Description What to do Turn off the main power switch Power On Charge the battery immediately Battery Low Refer to SERVICE-07-1 Seat Spring Repair Seat springs fall off Flip down the seatback and restart the folding/ unfolding Seatback is not flipped down procedure. -
Page 9: Self-Diagnostic Warning Light
Scorpius Service Manual 1.6 Self-Diagnostic Warning Light When the main power switch is turned on, the self-diagnostic warning light will flash if there be any malfunction or failure. A u t o m a t i c V e r s i o n : s e l f - d i a g n o s t i c w a r n i n g l i g h t , M a n u a l V e r s i o n : s e l f - d i a g n o s t i c w a r n i n g l i g h t , s h a r e d w i t h t h e b a t t e r y i n d i c a t o r . -
Page 10: Battery Indicator Instructions
Scorpius Service Manual 1.7 Battery Indicator Instructions After turning on the main power switch, the scooter battery indicator should be checked: Number Lead-acid Lithium Remarks of lights battery battery LED – ≥ 24.6 V ≥ 27.4 V 5 lights LED – <... -
Page 11: Battery Circuit Diagram
Scorpius Service Manual 1.8 Battery circuit diagram Lithium battery - Circuit diagram Lead-acid battery - Circuit diagram 1.9 Basic Maintenance Instructions Periodic maintenance of the scooter can prolong its life. This is particularly important after a rainy day, or when humidity is high. 1.10 Maintenance Recommendation Seat: Clean with soap water and do not sit until the seat dried out. -
Page 12: Scooter Information Label
Scorpius Service Manual 1.13 Scooter Information Label Scooter information label is the identification of the scooter and is attached to the inner side of the seat bar. The label has the following information: Product Model Number Maximum Load Date o f M a n u f a c t u r e Serial Number Factory Address 1.14 Repair Items... -
Page 13: Service Procedures
Scorpius Service Manual 2 Service Procedures 2.1 SERVICE-01 Steering Shroud Repair 1. Remove the steering head rear shroud and panel screws (12 mm, 2 pcs). 2. Remove the three screws (12 mm, 3 pcs) on the steering head rear shroud. 3. -
Page 14: Service-01-1 Top Control Panel Repair
Scorpius Service Manual SERVICE-01-1 Top Control Panel Repair 1. Remove the steering head rear shroud and panel screws (12 mm, 2 pcs). 2. Open the steering head top shroud. 3. Also remove all the connectors on the top control board (refer to the instructions on the previous page for connectors). -
Page 15: Service-01-2 Buzzer Repair
Scorpius Service Manual 2.1.1 SERVICE-01-2 Buzzer Repair Refer to Service Procedures SERVICE-01 Steering Shroud Repair steps as follows: 1. Find the buzzer connector (figure on the right) 2. Re-connect the buzzer connector (figure on the right) 3. If it is not effective, go to Buzzer Replacement below. Buzzer Replacement: Please refer to Service Procedures SERVICE-01 Steering Shroud Repair steps first, and then: 1. -
Page 16: Service-01-3 Starter Vr Repair
Scorpius Service Manual 2.1.2 SERVICE-01-3 Starter VR Repair Please refer to Service Procedures SERVICE-01 Steering Shroud Repair steps as follows: 1. Find the starter VR connector (figure on the right). 2. Re-connect the starter VR (figure on the right). 3. If function is not restored, go to Starter VR Replacement below. Starter VR Replacement: Refer to Service Procedures SERVICE-01 Steering Shroud Repair steps as follows: 1. -
Page 17: Service-01-4 Metal Power Switch Repair
Scorpius Service Manual 2.1.3 SERVICE-01-4 Metal Power Switch Repair Please refer to Service Procedures SERVICE-01 Steering Shroud Repair steps as follows: 1. Find the metal power switch connector (figure on the right). 2. Reconnect the metal power switch connector. 3. If it is not effective, go to Metal Power Switch Replacement below. Metal Power Switch Replacement: Please refer to Service Procedures SERVICE-01 Steering Shroud Repair steps as follows: 1. -
Page 18: Service-01-6 Steering Head Charger Socket Repair
Scorpius Service Manual • After four RF keys have been memorized, setting a fifth key will cause the first key to be erased. • Setting for the old version RF key (figure on the right) is the same, except in the new version the RF key is integrated in the remote control. -
Page 19: Service-02 Steering Bar Repair
Scorpius Service Manual • After changing the battery type from lead-acid to lithium, or vice-versa, make sure that the steering head charger socket and battery pack charger sockets match the type of battery installed. See SERVICE-06 Battery Pack Repair. • Self-modification of charging cables or plugs and sockets is extremely dangerous and can lead to short circuits and even fire. -
Page 20: Service-02-1 Main Cable Repair
Scorpius Service Manual • Step 5. If it cannot be removed or replaced easily, use a rubber hammer to drive bar into position. • After cutting (steps 2 and 3), when re-installing, use a new cable tie and place it in the original position. -
Page 21: Service-03 Headlight Shroud Repair
Scorpius Service Manual 2.3 SERVICE-03 Headlight Shroud Repair 1. Remove the screws (12 mm, 2 pcs) on the outside of the headlight shroud. 2. Remove the screws (12 mm, 2 pcs) from the inside of the headlight shroud. 3. Push the headlight shroud gently upward to separate it from the frame. ❖... -
Page 22: Service-03-1 Headlight Repair
Scorpius Service Manual 2.3.1 SERVICE-03-1 Headlight Repair Refer to Service Procedures SERVICE-01 Steering Shroud Repair steps first, and then: 1. Find the headlight connector. 2. Reconnect the headlight connector. 3. If it is not effective, carry out the Headlight Shroud Connector Inspection. -
Page 23: Service-04 Front Wheel Repair
Scorpius Service Manual 2.4 SERVICE-04 Front Wheel Repair 1. Rotate the wheel to find the notch on the wheel cap. 2. Insert a flat screwdriver into the notch. 3. Lift the wheel cap off to expose the hub. 4. Remove the hexagonal headed bolt (#12) and washer in the center of the axle. 5. -
Page 24: Service-05 Rear Wheel Repair
Scorpius Service Manual 2.5 SERVICE-05 Rear Wheel Repair 1. Rotate the wheel to find the notch on the wheel cap. 2. Insert a flat screwdriver into the notch. 3. Lift the wheel cap off to expose the hub. 4. Loosen the hexagonal headed bolt (#12). 5. -
Page 25: Service-06 Battery Pack Repair
Scorpius Service Manual 2.6 SERVICE-06 Battery Pack Repair 1. Remove the battery pack from the scooter. 2. Turn it around and find the battery pack power socket. 3. Use a multi-meter to measure the battery voltage. The black socket is negative, the red socket is positive. 4. - Page 26 Scorpius Service Manual ❖ If a check shows the wiring to be normal, but the charger still does not charge the battery pack, the charger may need to be replaced. Lead-Acid Battery Wiring Inspection: 1. Please follow the same steps as above to remove the battery pack. 2.
-
Page 27: Service-06-1 Battery Pack - Charger Socket Repair
Scorpius Service Manual 2.6.1 SERVICE-06-1 Battery Pack - Charger Socket Repair Please refer to SERVICE-06 Battery Pack Repair steps and then: 1. Find the charger socket connector inside the battery pack (Figure 1 below). 2. Reconnect the battery pack charger socket connector. 3. -
Page 28: Service-06-3 Battery Pack - Battery Removal
Scorpius Service Manual Re-installation Instruction: ❖ When replacing the charger socket be sure it is the right way around. Please refer to the pictures on the right. If the connector position is incorrect, it will not be possible to reinstall the battery pack. -
Page 29: Service-06-4 Charger Repair
Scorpius Service Manual ❖ A lead-acid battery is heavy and does not need to be secured with screws. Place it directly into the pack and make the connections. Lithium battery relevant specification. Lithium battery warnings. QR Code: Use such code to obtain information related to the lithium battery. -
Page 30: Service-07 Seat Repair
Scorpius Service Manual 2. Lead-acid battery charger (see figure on the right) Output connector. Input range 100~240 V (The mains plug may vary depending on the sockets used in the country or region.) Input connector: three pins. Description: The charging indicator shows Standby: red light/ Charging: orange light/ Charged: green light. -
Page 31: Service-07-1 Seat Spring Repair
Scorpius Service Manual 2.7.1 SERVICE-07-1 Seat Spring Repair Please refer to SERVICE-07 Seat Repair steps first, then: 1. Remove the holding screws (6 mm, 2 pcs) at the front end of the seat base. 2. Take out the spring. ❖ Please follow the exact reverse sequence of these steps for reassembly. -
Page 32: Service-08 Seat Bar Mechanism Repair
Scorpius Service Manual 2.8 SERVICE-08 Seat Bar Mechanism Repair Follow the steps in SERVICE-07 Seat Repair to remove the seat. 1. Locate the rear fender and locking pin of the seat bar mechanism. 2. Push the rear fender outwards carefully to separate it from the seat bar mechanism. 3. -
Page 33: Service-08-2 Seat Base Spring Repair
Scorpius Service Manual 2.8.2 SERVICE-08-2 Seat Base Spring Repair Please refer to SERVICE-07 Seat Repair steps first and follow Step 2 of SERVICE-08-1 Seat Base Repair, then: 1. Remove the seat bar screws (6 mm, 2 pcs). 2. Take out the seat base spring. -
Page 34: Service-09 Front Lower Shroud Repair
Scorpius Service Manual Note for re-installation: When re-installing, apply a little amount of silicon oil to the pin. See the rectangular area shown in the picture on the right. 2.9 SERVICE-09 Front Lower Shroud Repair 1. There are 9 holding screws at the bottom of the scooter front lower shroud. 2. -
Page 35: Service-10 Front Top Shroud Repair
Scorpius Service Manual 2.10 SERVICE-10 Front Top Shroud Repair Please follow the SERVICE-03 Headlight Shroud Repair and SERVICE-09 Front Lower Shroud Repair steps first, then: 1. Remove the headlight shroud and front lower shroud. 2. Remove the central screw (16 mm, 1 pc) at the center of the front end of the top shroud. 3. -
Page 36: Service-10-2 Footplate Shroud Replacement
Scorpius Service Manual 2.10.2 SERVICE-10-2 Footplate Shroud Replacement Please follow SERVICE-10 Front Top Shroud Repair to remove the shroud, then: 1. Press the front top shroud downwards by hand. 2. Allow the shroud to disengage from the center locking pin. 3. -
Page 37: Service-11 Rear Top Shroud Repair
Scorpius Service Manual Spring Re-Installation Instructions 1. Spring location (Figure a. on the right): Long end to the left/ short end to the right. 2. Re-install at the locking pin on the left side of the footplate shroud. 3. Spring mounted into the locking pin on the left side. 4. - Page 38 Scorpius Service Manual • Step 5. Lift the top shroud carefully. Do not use force because this could damage the three circuit connectors. These should be disconnected carefully. 1654773~A...
-
Page 39: Service-11-1 Dr Controller Repair
Scorpius Service Manual 2.11.1 SERVICE-11-1 DR Controller Repair Picture showing rear top shroud circuit connectors. Rear top shroud - folding board control connector Rear top shroud - taillight connector Rear top shroud - battery power connector Remote control board - folding suppression connector Main cable connector Micro switch connector Electromagnetic brake connector... -
Page 40: Service-11-2 Taillight Repair
Scorpius Service Manual 2.11.2 SERVICE-11-2 Taillight Repair Follow the Service Procedures SERVICE-01 Steering Shroud Repair steps, then: 1. Find the main cable connector (see picture on the right). 2. Check the connector for security and reconnect if necessary (picture on the right). 3. -
Page 41: Service-11-3 Power Socket Repair
Scorpius Service Manual 2.11.3 SERVICE-11-3 Power Socket Repair Please follow the SERVICE-11 Rear Top Shroud Repair steps, then: 1. Find the power socket connector (picture on the right). 2. Check the connector for security and reconnect (picture on the right). 3. - Page 42 Scorpius Service Manual 1654773~A...
-
Page 43: Service-11-4 Rear Fender Repair
Scorpius Service Manual Re-Installation Instructions: ❖ When re-installing the power socket, make sure it is the right position, see the picture on the right. If the connector position is incorrect, it will not be possible to reinstall the battery pack. 2.11.4 SERVICE-11-4 Rear Fender Repair Please follow the SERVICE-11 Rear Top Shroud Repair steps for removal, then: 1. -
Page 44: Service-12 Rear Lower Shroud Repair
Scorpius Service Manual 2.12 SERVICE-12 Rear Lower Shroud Repair Please follow the SERVICE-11 Rear Top Shroud Repair steps for removal, then: 1. Remove the rear top shroud and find the cable ties on both sides. 2. Cut and remove the cable ties on the wires on both sides. 3. - Page 45 Scorpius Service Manual Connector Instructions: Solenoid valve connector - left. Solenoid valve connector - right. For other connectors, please refer to the instructions in SERVICE-11 Rear Top Shroud Repair. For solenoid valve repair, please refer to SERVICE- 13-1 Solenoid Valve Repair. Re-Installation Instructions: 1.
-
Page 46: Service-12-1 Micro Switch Repair
Scorpius Service Manual 2.12.1 SERVICE-12-1 Micro Switch Repair Please carry out the SERVICE-12 Rear Lower Shroud Repair steps first, then: 1. Find the micro switch which is located on the inside of the rear lower shroud. 2. Remove the two screws (8 mm, 2 pcs) on the shroud. 3. - Page 47 Scorpius Service Manual 4. Turn off the main power switch. 5. Press the folding/ unfolding button to check if the setting has been successful. Repeat the setting if the scooter does not fold. ❖ Step 2. In setting state, a long press of 5 seconds on either the folding or unfolding button will erase all remote control settings.
- Page 48 Scorpius Service Manual • The remote control board can be set for a maximum of four remote controls at the same time. When it is necessary to set more, erase the settings on the remote control (instructions are on the previous page) and start the setting again.
-
Page 49: Service-12-3 Supporting Wheel Repair
Scorpius Service Manual • Set the four screws and the remote control board main cable aside carefully because these parts are not included with a new board. • When making the installation be careful not to damage the terminal on the control board. •... -
Page 50: Service-13 Frame Repair
Scorpius Service Manual 200+-20kgf-cm 200+-20kgf-cm 2.13 SERVICE-13 Frame Repair Please refer to SERVICE-09 Front Lower Shroud Repair, SERVICE-10 Front Top Shroud Repair, SERVICE- 04 Front Wheel Repair, SERVICE-11 Rear Top Shroud Repair, SERVICE-12 Rear Lower Shroud Repair, SERVICE-05 Rear Wheel Repair, SERVICE-02 Steering Bar Repair and SERVICE-11-1 DR Controller Repair, and after removing the above items, then: 1. - Page 51 Scorpius Service Manual Re-Installation Instructions: ❖ During re-installation of the screws and washers, please be careful about the placement of the gears on each side. The flat side of the gear must be flush with the front frame and the white dot must face upwards.
-
Page 52: Service-13-1 Solenoid Valve Repair
Scorpius Service Manual 2.13.1 SERVICE-13-1 Solenoid Valve Repair Please refer to SERVICE-12 Rear Lower Shroud Repair steps first, then: 1. Find the left and right solenoid valve wiring inside the lower shroud. 2. Check the connections and re-connect the wires if necessary. 3. -
Page 53: Service-13-2 Folding Unit Repair (Manual Only)
Scorpius Service Manual 2.13.2 SERVICE-13-2 Folding Unit Repair (Manual Only) Carry out all the SERVICE-11 Rear Top Shroud Repair, SERVICE-12 Rear Lower Shroud Repair and SERVICE-11-5 Folding/ Unfolding Board Repair steps, and when this has been done, then: 1. Locate the folding unit locking pins on each side of the bottom of the scooter frame. 2. -
Page 54: Service-13-3 Sliding Track Repair
Scorpius Service Manual The right folding unit locking pin (shorter steel cable) passes inside the sliding base. • With the scooter upright on an even surface confirm that it operates properly and does not jerk or skip. • If the folding unit steel cable has been damaged, please replace it with a new one. •... -
Page 55: Service-13-4 Motor Repair
Scorpius Service Manual Re-Installation Instructions: ❖ Before re-installing the sliding tracks apply a little amount of oil to the holes (see picture on the right) to facilitate folding and deployment. 2.13.4 SERVICE-13-4 Motor Repair Please carry out the SERVICE-11 Rear Top Shroud Repair, SERVICE-12 Rear Lower Shroud Repair and SERVICE-05 Rear Wheel Repair steps, and then: 1. -
Page 56: Service-13-6 Sliding Base Repair
Scorpius Service Manual • When reinstalling the electromagnetic brake device, make sure that the lever is in the right place, to the rear, before fastening the four screws that hold it in place. • Step 3. When removing the electromagnetic brake, be careful not to pull, or put any force, on the motor cable which would disturb the connections. -
Page 57: Service-13-7 Linear Actuator Repair (Automatic Version Only)
Scorpius Service Manual 2.13.7 SERVICE-13-7 Linear Actuator Repair (Automatic Version Only) Please refer to SERVICE-13-6 Sliding Base Repair. 1. Locate the linear actuator and sliding base fastening point at the top end of the linear actuator. 2. Use an Allen driver (#5) to remove the holding screw (40 mm, 1pc). 3. - Page 58 Scorpius Service Manual 100+-10kgf-cm 1654773~A...
- Page 60 España: France: Ireland: Italia: Invacare SA Invacare Poirier SAS Invacare Ireland Ltd, Invacare Mecc San s.r.l., Avda. Del Oeste n.50, 1 Route de St Roch Unit 5 Seatown Business Via dei Pini 62, E-Valencia-46001 F-37230 Fondettes Campus I-36016 Thiene (VI)
Need help?
Do you have a question about the Scorpius Series and is the answer not in the manual?
Questions and answers