
Related Manuals for Invacare Leo


Summary of Contents for Invacare Leo
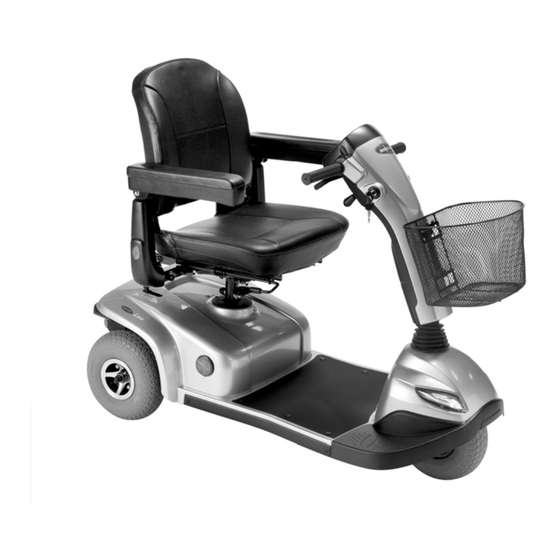
- Page 1 Invacare® Leo™ Scooter User Manual This manual MUST be given to the user of the product. BEFORE using this product, read this manual and save for future reference.
-
Page 2: Table Of Contents
Removing/Installing the Seat ..........................................33 Adjusting Seat Height............................................35 Adjusting 90° Seat Swivel............................................37 Adjusting the Seat Position Forward/Rearward....................................38 Adjusting the Arm Width ............................................38 Replacing Armrest Pad ............................................39 Adjusting Armrest Angle............................................39 Installing the Seat Positioning Strap ........................................40 Invacare® Leo™ Scooter Part No. 1163141... - Page 3 Removing/Installing the Front Wheels - Three Wheel Models ..............................44 10 BATTERIES Recommended Battery Type ..........................................47 Removing/Installing the Batteries ........................................48 Charging the Batteries ............................................50 11 TRANSPORTING Transporting the Scooter.............................................52 12 MAINTENANCE Suggested Maintenance Procedures ........................................54 13 TROUBLESHOOTING General Troubleshooting.............................................55 Service Indicator Error Codes..........................................57 Part No. 1163141 Invacare® Leo™ Scooter...
-
Page 4: General
Caution indicates a potentially hazardous situation which, if not avoided, may result in property damage or minor injury or both. IMPORTANT Indicates a hazardous situation that could result in damage to property if it is not avoided. Gives useful tips, recommendations and information for efficient, trouble-free use. Invacare® Leo™ Scooter Part No. 1163141... -
Page 5: Limited Warranty
Invacare warrants all electronics and electrical components (excluding batteries), transaxle and frame to be free from defects in materials and workmanship for a period of twelve (12) months from the date of purchase from Invacare or a dealer. Invacare warrants all batteries to be free from defects in materials and workmanship for a period of six (6) months from the date of purchase from Invacare or a dealer. -
Page 6: Safety
NOTICE THE INFORMATION CONTAINED IN THIS DOCUMENT IS SUBJECT TO CHANGE WITHOUT NOTICE. Check all parts for shipping damage and test before using. In case of damage, DO NOT use. Contact Invacare/Carrier for further instruction. As a manufacturer of powered scooters, Invacare endeavors to supply a wide variety of powered scooters to meet many needs of the end user. -
Page 7: Operation Information
It is Invacare’s position that users of powered scooters should be transferred into appropriate seating in vehicles for transportation and use be made of the restraints made available by the auto industry. Invacare cannot and does not recommend any powered scooter transportation systems. - Page 8 Extreme caution is advised when moving an unoccupied powered scooter up or down the stairs. Invacare recommends disassembling the scooter and transporting the components independently up or down the stairs. ONLY use secure, non-detachable parts on each component for hand-hold supports.
-
Page 9: Repair Or Service Information
Use this information only as a “basic” guide. The techniques that are discussed have been used successfully by many. Individual users often develop skills to deal with daily living activities that may differ from those described in this manual. Invacare recognizes and encourages each individual to try what works best for him/her in overcoming obstacles that they may encounter;... - Page 10 DO NOT attempt to move up or down an incline with water, ice or oil film. Avoid operating the scooter in dark or poorly lit areas. DO NOT climb and/or go up or down ramps or traverse slopes greater than 8°. Invacare® Leo™ Scooter Part No. 1163141...
- Page 11 ALWAYS use anti-tippers. When outdoors on wet, soft ground or on gravel surfaces, anti-tippers may not provide the same level of protection against tip over. Extra caution MUST be observed when traversing such surfaces. Part No. 1163141 Invacare® Leo™ Scooter...
- Page 12 RAIN TEST Invacare has tested its powered scooters in accordance with ISO 7176 “Rain Test”. This provides the end user or his/her attendant sufficient time to remove his/her powered scooter from a rain storm and retain powered scooter operation.
-
Page 13: Weight Training
Check to ensure that all electrical connections are secure at all times. GROUNDING INSTRUCTIONS DO NOT, under any circumstances, cut or remove the round grounding prong from any plug used with or for Invacare products. Some devices are equipped with three-prong (grounding) plugs for protection against possible shock hazards. -
Page 14: Emi Information
There are a number of sources of relatively intense electromagnetic fields in the everyday environment. Some of these sources are obvious and easy to avoid. Others are not apparent and exposure is unavoidable. However, we believe that by following the warnings listed below, your risk to EMI will be minimized. Invacare® Leo™ Scooter Part No. 1163141... - Page 15 Electromagnetic interference (EMI) from sources such as radio and TV stations, amateur radio (HAM) transmitters, two-way radios, and cellular phones can affect powered wheelchairs and motorized scooters. FOLLOWING THE WARNINGS LISTED BELOW SHOULD REDUCE THE CHANCE OF UNINTENDED BRAKE RELEASE OR POWERED WHEELCHAIR MOVEMENT WHICH COULD RESULT IN SERIOUS INJURY. Part No. 1163141 Invacare® Leo™ Scooter...
- Page 16 2) This device has been tested to a radiated immunity level of 20 volts per meter. 3) The immunity level of the product is unknown. Modification of any kind to the electronics of this scooter as manufactured by Invacare may adversely affect the EMI immunity levels.
-
Page 17: Product Labeling
DO NOT lean against or pull forward on the tiller while mounting or dismounting the scooter. Otherwise, injury may occur. Label -------------------------------------------------------------------------------------------- DO NOT lift scooter up by the front or rear shroud. Otherwise injury or damage to the scooter may occur. 1118373 Rev A Part No. 1163141 Invacare® Leo™ Scooter... - Page 18 DO NOT operate this product on roads, streets or highways - otherwise, serious injury or damage may occur. 1171793 Rev A The battery wiring label is located on the underside of the top shroud. Invacare® Leo™ Scooter Part No. 1163141...
-
Page 19: Technical Data
23 to 29 in (armrest adjustment range) Overall Height: 39 in Seat Dimensions 3 WHEEL 4 WHEEL Width: 19 in Depth: 16 in Seat Height: 16.5 to 19.5 in Arm Dimensions 3 WHEEL 4 WHEEL Armrest Height: 8 in Part No. 1163141 Invacare® Leo™ Scooter... - Page 20 Example: If weight limitation of the scooter is 350 lbs and additional items equal 25 lbs, subtract 25 lbs from 350 lbs this means the maximum weight limitation of the user is 325 lbs. Invacare® Leo™ Scooter Part No. 1163141...
-
Page 21: Inspection
As with any vehicle, the wheels and tires should be checked periodically for cracks and wear, and should be replaced. Initial adjustments should be made to suit your personal body structure needs and preference. Thereafter follow these maintenance procedures: Part No. 1163141 Invacare® Leo™ Scooter... - Page 22 Ensure that tiller adjustment mechanism engages and disengages properly and securely. ❑ Ensure that the scooter stops completely when throttle is released (i.e., does not continue to roll as if the throttle is activated). ❑ Inspect tires for flat spots and wear. Invacare® Leo™ Scooter Part No. 1163141...
- Page 23 Inspect the seat upholstery for rips and tears. ❑ Ensure armrest pad sits flush against arm tube. ❑ Check that all labels are present and legible. ❑ Inspect electrical components for signs of corrosion. Replace if corroded or damaged. Part No. 1163141 Invacare® Leo™ Scooter...
-
Page 24: Operating The Powered Scooter
The status display LED is located on the top of the control panel. The status display indicates if the scooter is On or Off and also flashes to indicate error codes. Refer to Service Indicator Error Codes on page 57. Invacare® Leo™ Scooter Part No. 1163141... -
Page 25: Horn Button
The right and left direction indicator buttons are located on lower left and right sides of the control panel. Press these to activate and deactivate the right and left direction indicators. The direction indicators will automatically switch off after 30 seconds. Part No. 1163141 Invacare® Leo™ Scooter... - Page 26 6 OPERATING THE POWERED SCOOTER Battery Status Display Charge Speed Control Display Knob Horn Warning Blinker Left Direction Indicator Lighting Right Direction Indicator FIGURE 6.1 Control Panel Invacare® Leo™ Scooter Part No. 1163141...
-
Page 27: Operating The Scooter
Adjust speed control knob to the appropriate setting. For driving indoors or on uneven terrain, a slower speed is recommended. For soft terrain or steep inclines (no greater than 8°), a faster speed may be necessary. Part No. 1163141 Invacare® Leo™ Scooter... - Page 28 When first learning to drive, adjust speed control knob for a slow speed and try to drive the powered scooter as slowly as possible by depressing the throttle control lever only slightly. This exercise will help you learn to utilize the full potential of the proportional control and allow you to start and stop smoothly. Invacare® Leo™ Scooter Part No. 1163141...
-
Page 29: Engaging/Disengaging The Brake Release Lever
The brake must be engaged in normal driving conditions. Activation of the throttle control lever automatically releases the brake so that the powered scooter can drive. Releasing the throttle control lever automatically engages the brake so as to prevent the powered scooter from rolling on its own. Part No. 1163141 Invacare® Leo™ Scooter... - Page 30 To disengage the brake release lever (Push) - Push forward the brake release lever. Button Push Forward to Disengage (Push) Brake Release Lever Pull Back to Engage (Drive) FIGURE 6.2 Engaging/Disengaging the Brake Release Lever Invacare® Leo™ Scooter Part No. 1163141...
-
Page 31: Activating/Deactivating The Audible Signals
Wait two seconds until the appropriate blink code is displayed on the battery charge display, then release the buttons. DO NOT hold the buttons for more than 5 seconds. If LED 7 blinks five times the audible signal has been successfully activated. The scooter will return to normal operating status automatically. Part No. 1163141 Invacare® Leo™ Scooter... - Page 32 3 + 4 Activated Hazard Lamps Lighting + Warning Blinker Deactivated 5 + 6 Activated Battery Charge Display LED Numbers Left Direction Warning Blinker Indicator Lighting Right Direction Indicator FIGURE 6.3 Activating/Deactivating the Audible Signals Invacare® Leo™ Scooter Part No. 1163141...
-
Page 33: Seat And Arms
Turn the seat so it faces forward and locks into position. the seat. Lift up on seat assembly to ensure the seat is secure. Lift the seat assembly up and away from the seat post. Part No. 1163141 Invacare® Leo™ Scooter... - Page 34 7 SEAT AND ARMS Backrest Seat Lock Lever Front Edge of the Seat FIGURE 7.1 Removing/Installing the Seat Invacare® Leo™ Scooter Part No. 1163141...
-
Page 35: Adjusting Seat Height
Install the locknut and cap onto the mounting screw to secure the seat post to the frame tube. Install the top shroud (Detail “A”). 10. Install the seat. Refer to Removing/Installing the Seat on page 33. Part No. 1163141 Invacare® Leo™ Scooter... - Page 36 DETAIL “B” - TOP SHROUD DETAIL “C” - SEAT POST REMOVED MOUNTING HARDWARE Seat Post Seat Post Mounting Screw Washer Washer Mounting Holes Locknut Frame Tube Frame Tube Mounting Hole Mounting Hardware Top Shroud FIGURE 7.2 Adjusting Seat Height Invacare® Leo™ Scooter Part No. 1163141...
-
Page 37: Adjusting 90° Seat Swivel
Release the seat lock lever to lock the seat in the desired position. Ensure that the seat is locked in the forward facing Seat position before operating the scooter. Seat Lock Lever FIGURE 7.3 Adjusting 90° Seat Swivel Part No. 1163141 Invacare® Leo™ Scooter... -
Page 38: Adjusting The Seat Position Forward/Rearward
Seat Frame Loosen the knob securing the arm tube to the seat frame. Push the arm in or out to the desired position. Tube FIGURE 7.5 Adjusting the Arm Width Invacare® Leo™ Scooter Part No. 1163141... -
Page 39: Replacing Armrest Pad
Loosen the jam nut. Screw Rotate the screw up or down for the desired arm angle. Tighten the jam nut. Jam Nut If necessary, repeat STEPS 1-3 for the other armrest. FIGURE 7.7 Adjusting Armrest Angle Part No. 1163141 Invacare® Leo™ Scooter... -
Page 40: Installing The Seat Positioning Strap
Repeat STEPS 1-2 on the opposite side of the seat with the remaining side of the seat positioning strap. DETAIL “A” - DETAIL “B” - HARDWARE BRACKET Seat DETAIL “C” - SEAT POSITIONING Bolt Bracket Bracket STRAP INSTALLED Seat Positioning Seat Strap Positioning Strap FIGURE 7.8 Installing the Seat Positioning Strap Invacare® Leo™ Scooter Part No. 1163141... -
Page 41: Tiller Adjustment
Release the tiller adjustment lever to lock the tiller into the desired position. Gently push/pull against tiller to ensure that the tiller is securely Tiller Adjustment locked. Lever FIGURE 8.1 Adjusting the Tiller Angle Part No. 1163141 Invacare® Leo™ Scooter... -
Page 42: Wheels And Casters
Remove the large washer from the drive shaft. Remove keystock from drive shaft. Set aside. FIGURE 9.1 Removing/Installing the Drive Wheels If necessary, repeat STEPS 1-7 to remove other drive wheel. Invacare® Leo™ Scooter Part No. 1163141... -
Page 43: Removing/Installing The Front Wheels - Four Wheel Models
Remove the cap, locknut and washer that secure the front wheel to Securely tighten the front wheel mounting hardware. the front axle. Install the cap. Remove the front wheel from the front axle. Part No. 1163141 Invacare® Leo™ Scooter... -
Page 44: Removing/Installing The Front Wheels - Three Wheel Models
Remove the bolt, axle, washer, nut and two spacers that secure the wheel to the fork. Remove the wheel from the fork. Installing Use the bolt, axle, washer, nut and two spacers to secure the wheel to the fork. Securely tighten the front wheel mounting hardware. Invacare® Leo™ Scooter Part No. 1163141... - Page 45 9 WHEELS AND CASTERS Washer Short Spacer Wheel Axle Short Spacer Bolt Fork FIGURE 9.3 Removing/Installing the Front Wheels - Three Wheel Models Part No. 1163141 Invacare® Leo™ Scooter...
-
Page 46: Batteries
DO NOT tip the batteries. Keep the batteries in an upright position. Invacare strongly recommends that battery installation and battery replacement always be done by a qualified technician. All battery terminals caps (two on the left battery and two on the right battery) MUST be installed prior to use. -
Page 47: Recommended Battery Type
10 BATTERIES 10.1 Recommended Battery Type WARNING The warranty and performance specifications contained in this manual are based on the use of AGM batteries. Invacare strongly recommends their use as the power source for this unit. CAUTION Failure to use the correct battery size and/or voltage may cause damage to the powered scooter and give unsatisfactory performance. -
Page 48: Removing/Installing The Batteries
The battery retention strap should go under the battery harnesses as shown in Detail “B” of FIGURE 10.2. Install the rear cover (Detail “A” of FIGURE 10.2). Reinstall the seat. Refer to Removing/Installing the Seat on page 33. Invacare® Leo™ Scooter Part No. 1163141... - Page 49 NEGATIVE (-) NEGATIVE (-) Battery Terminal Battery Wire DETAIL “D” - BATTERY HARNESS Mounting Screws POSITIVE (+) Battery Wire RED POSITIVE (+) Battery RED POSITIVE (+) Battery Terminal Cover Terminal FIGURE 10.2 Removing/Installing the Batteries Part No. 1163141 Invacare® Leo™ Scooter...
-
Page 50: Charging The Batteries
The battery charging LED will be ORANGE while charging. If the battery charging LED turns GREEN immediately and the battery is not charged, contact a Dealer or Invacare for assistance. If the battery charging LED is Off, the battery is already fully charged. - Page 51 10 BATTERIES If the charging LED does not turn from ORANGE to GREEN contact a Dealer or Invacare for assistance. Unplug the battery charger from the wall outlet. Unplug the battery charger from the scooter. Move the battery charger port cap to cover the battery charger port.
-
Page 52: Transporting
Lift the seat post to separate the front frame assembly from the Bracket On rear frame assembly. Rear Frame Fold tiller down to lowest locked position. Refer to Adjusting the Front of Scooter Post Tiller Angle on page 41. FIGURE 11.1 Transporting the Scooter Invacare® Leo™ Scooter Part No. 1163141... - Page 53 Ensure the release lever is locked and the front and rear frame assemblies are connected. Connect the main wiring harness connector. Install the batteries. Refer to Refer to Removing/Installing the Batteries on page 48. Install the seat. Refer to Removing/Installing the Seat on page 33. Install the basket. Part No. 1163141 Invacare® Leo™ Scooter...
-
Page 54: Maintenance
Regularly check for loose nuts and/or bolts in the front and drive wheels. If loose, have them adjusted by a qualified technician. Clean dirt, dust and grease from exposed components. Periodically have the bearings of the front wheel checked to make sure they are clean and free from moisture. Invacare® Leo™ Scooter Part No. 1163141... -
Page 55: Troubleshooting
Charger not working. Have charger checked. Service or replace the charger. Contact low - too soon after being recharged. Dealer or a qualified technician. Weak batteries. Replace batteries. Refer to Removing/Installing the Batteries on page 48. Part No. 1163141 Invacare® Leo™ Scooter... - Page 56 Check all connections. Secure connections. Refer to Removing/ Installing the Batteries on page 48. Status bar indicator is blinking. An error has occurred. Count the number of blinks and refer to Service Indicator Error Codes on page 57. Invacare® Leo™ Scooter Part No. 1163141...
-
Page 57: Service Indicator Error Codes
Speed Pot Fault Scooter stops driving The throttle, speed limit pot, SRW or their associated wiring may be faulty. • Check the throttle and speed pot and associated connections and wiring. Contact your Invacare Dealer. Motor Voltage Fault Scooter stops driving The motor or its associated wiring is faulty. - Page 58 NOTES Notes Invacare® Leo™ Scooter Part No. 1163141...
- Page 59 NOTES Notes Part No. 1163141 Invacare® Leo™ Scooter...
- Page 60 Invacare. Trademarks are identified by ™ and ®. All trademarks are owned by or licensed to Invacare Corporation or its subsidiaries unless otherwise noted. For more information regarding Invacare products, parts, and Part No. 1163141 Rev B - 05/11 services, please visit www.invacare.com.
Need help?
Do you have a question about the Leo and is the answer not in the manual?
Questions and answers