Advertisement
General Setup Instructions
•The setup instructions are created specifically for your configuration.
•Setup instructions are laid out sequentially in levels, including exploded
views and a logical series of steps for assembly. We encourage you to study
the instructions before attempting to assemble your exhibit.
Cleaning and Packing
•Use non-abrasive cleaners when cleaning extrusions or ECO Glass inserts.
•Use mild cleaners and soft materials such as cotton to clean all laminates.
•Keep exhibit components away form extreme heat and long exposure to
sun light. This will prevent warping and fading.
•Retain all packing material for ease of re-packing. This protects the exhibit
components and keeps each part organized.
Disassembling
•When disassembling exhibit, tighten all setscrews to prevent loss of hardware
in the shipping process.
866.463.2611 • www.ecosystemsdisplays.com
Hex Tool & Phillips Screwdriver are included for Assembling Exhibit
Numbering Instructions for Setups/Packing
Inline Connection between Extrusions
Baseplate Connection for Vertical Extrusions
Extrusion Lock Connectors
Advertisement
Table of Contents

Related Manuals for Eco-Systems ECO-37C


Summary of Contents for Eco-Systems ECO-37C
- Page 1 General Setup Instructions •The setup instructions are created specifically for your configuration. •Setup instructions are laid out sequentially in levels, including exploded views and a logical series of steps for assembly. We encourage you to study the instructions before attempting to assemble your exhibit. Cleaning and Packing •Use non-abrasive cleaners when cleaning extrusions or ECO Glass inserts.
- Page 2 ECO Panel Install Place ECO panel together with a vertical offset, slide down to lock connector in place. Panel Corner Connectors are installed just like ECO panels. Remove by off-setting top lock clips horizontally followed by separating vertically. SEG Graphic Install Graphic is installed corners first.
- Page 3 Top View of Each Level Setup Hardware ECO-37C Counter Top ECO-37C Counter Leg Level 1 Level 2 (Bottom level) (Top level) 866.463.2611 • www.ecosystemsdisplays.com...
- Page 4 Top View of Each Level Graphic ECO-37C Shelf ECO-37C Pedestal Top Shelf Supports Level 1 Level 2 Level 3 Level 4 Level 5 Level 6 (Bottom level) (Top level) 866.463.2611 • www.ecosystemsdisplays.com...
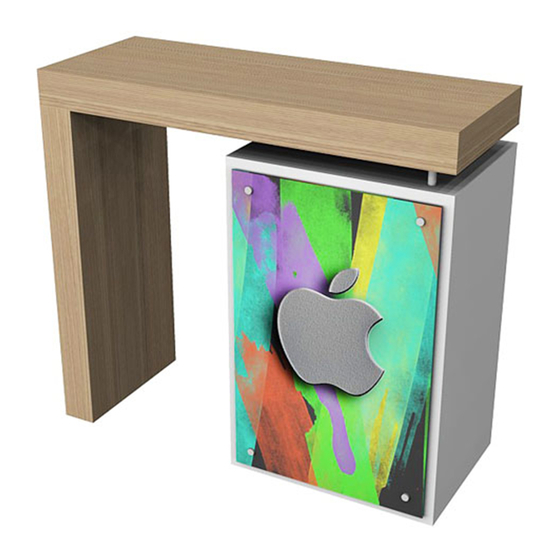
- Page 5 21.388”w x 35”h ECO Panel w/ Door 2) Affix Shelf Supports to inside of panel assembly; place internal Shelf. 35”h 90° Connector 3) Place pedestal top onto assembled base. ECO-37C 15.888”w x 35”h ECO Panel 4) Attach Graphic to front of pedestal assembly. See Graphic Attachment detail.
Need help?
Do you have a question about the ECO-37C and is the answer not in the manual?
Questions and answers