
Related Manuals for Oracle Acme Packet 1100


Summary of Contents for Oracle Acme Packet 1100
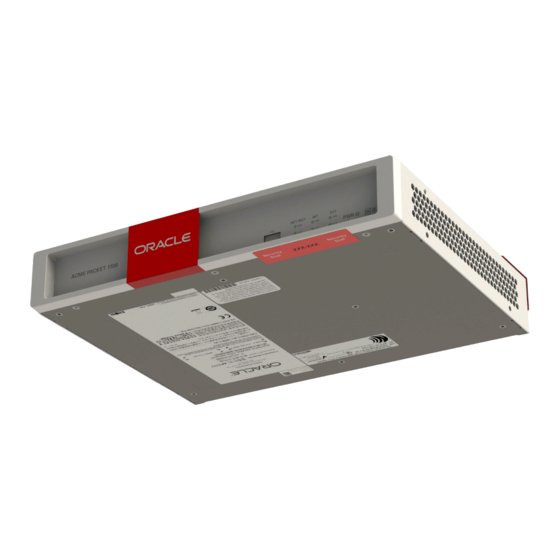
- Page 1 Oracle® Acme Packet 1100 Hardware Installation and Maintenance Guide Release 1.0 February 2018...
- Page 2 Oracle Corporation and its affiliates disclaim any liability for any damages caused by use of this software or hardware in dangerous applications. Oracle and Java are registered trademarks of Oracle and/or its affiliates. Other names may be trademarks of their respective owners.
-
Page 3: Table Of Contents
Contents About This Guide Safety Safety and Regulatory Certifications General Safety Precautions Fan Module System Maintenance Environmental Specifications Electrical Safety Precautions Precautions Battery Warning ESD Safety Precautions Component Overview Chassis Mounting Hardware System Processor Processor Module (CPU) System Control Panels Front Panel Rear Panel AC Power... - Page 4 Installing the Rack Mount Flanges Installing the Flange-Mounted Chassis Wall-Mounting the Chassis Installing the Wall Brackets Table Top/Shelf Installation of the Chassis Cabling the Acme Packet 1100 System Cabling the T1/E1 Port 3-10 Cabling the SER MGT Console Port 3-10...
- Page 5 Power Cycling Forcing Switchover for HA Nodes Chassis Removal Removing the Acme Packet 1100 from an Equipment Rack Cooling System Maintenance Maintaining the Cooling Components Specifications Safety and Regulatory Certifications Acme Packet 1100 System Specifications Chassis Mounting Flanges Physical Specifications (Optional)
- Page 6 About This Guide About This Guide The Acme Packet 1100 is an enterprise session border controller (E-SBC) optimized for remote office/branch office (ROBO) applications. The compact platform provides the critical controls for delivering trusted, real-time communications, such as voice, video, and multimedia sessions, across IP network borders.
- Page 7 About This Guide Date Description January 2015 • Updated the book name to Acme Packet 1100 Installation and Maintenance Guide. • Corrected graphic for Serial Management Port. • Elaborated on how to install the external power supply. • Inserted a paragraph referring the reader to the Safety and Compliance Guide for details on the topic.
-
Page 8: Safety
To ensure general safety, follow the safety precautions listed in this section. Fan Module To avoid overheating the system, do not block the air inlets or the fan module, or otherwise obstruct airflow to the system. Keep the area around the Acme Packet 1100 clean and clutter- free. System Maintenance Aside from the power supply, there are no user-serviceable parts inside the Acme Packet 1100. -
Page 9: Battery Warning
ESD procedures and wear the proper protective devices (such as an ESD wrist strap) when handling any and all Acme Packet 1100 hardware and while performing any Acme Packet 1100 System hardware procedures. There is an ESD receptacle in the top left corner in the rear of the Acme Packet 1100. - Page 10 • Use a grounded ESD wrist strap when working on the Acme Packet 1100 to prevent static discharge. •...
-
Page 11: Component Overview
Figure 2-1 Acme Packet 1100 - Front Panel Figure 2-2 Acme Packet 1100 - Rear Panel Mounting Hardware The Acme Packet 1100 can be mounted in a variety of ways that are explained in the chapter on installation of the chassis. System Processor... -
Page 12: Front Panel
Chapter 2 System Control Panels Front Panel The Acme Packet 1100 front panel features a USB port as well as indicators to reflect power to the chassis, Ethernet link/activity status of the rear panel interface ports, and HA status. OK LED The bi-colored OK LED is a high availability (HA) indicator. -
Page 13: Rear Panel
(Options are available for providing a country-specific AC cable.) Reset Button A hard reset of the Acme Packet 1100 can be performed by pressing the reset button. This button is recessed and can only be pressed by inserting a thin wire (e.g., a paper clip) through the reset button channel. - Page 14 System Control Panels Pressing the reset button causes a hard reset by immediately rebooting the Acme Packet 1100. After the reset button is released, the Acme Packet 1100 begins its boot sequence and loads the configured software file. T1/E1 Connector(s) (Optional) The optional T1/E1 ports allow for connection to TDM connections.
- Page 15 The Acme Packet 1100 SER MGT system console port is accessed through the RJ45 jack in the rear of the system. Because the Acme Packet 1100 does not employ any type of flow control on its RS-232 ports, only the RX, TX, and GND pins are used. The following table identifies the pin assignments and signal names/descriptions for the SER MGT console connector.
-
Page 16: Ac Power
Intake Fans A single intake fan provides cooling air for the Acme Packet 1100. The fan — located on the left side of the chassis — blows cool air over electronic components from the left side of the... -
Page 17: Transcoding/Digital Signal Processors
Digital Signal Processor (DSP) module installed inside the chassis. Note: DSP modules may not be installed in existing Acme Packet 1100 in the field, even by Oracle Service. If you want to add DSPs, a new chassis must be ordered. -
Page 18: System Installation
This chapter provides information about how to install the Acme Packet 1100 and its associated components, includes cabling information. Shipped Parts Each Acme Packet 1100 ships in one box. Inside this box is the Acme Packet 1100 chassis and the accessory kit. The following table lists the contents of one Acme Packet 1100 order. -
Page 19: Rack System Instructions
The Acme Packet 1100 shall only be installed in a restricted access location. The Acme Packet 1100 must have access to reliable power and cooling. When choosing a location for your Acme Packet 1100, follow the guidelines listed in this section. -
Page 20: Mounting Guidelines
Mounting Hardware The Acme Packet 1100 features four non-skid rubber feet that allow the unit to be installed securely either on a table top or on a shelf. Mounting Installation... -
Page 21: Unpacking The Acme Packet 1100
Equipment Rack Installation Hardware The Acme Packet 1100 can be front- or center-mounted in a standard 19 in or 23 in wide rack. Optional rack mount flanges are available to attach to each side of the front of the chassis and then directly to the rack. -
Page 22: Installing The Chassis In A Cabinet-Style 2- Or 4-Post Chassis
Rack mount flanges (2) • #6-32 x 5/16" screws with square cone washers (4) On the right side of the Acme Packet 1100 chassis, align the holes in the rack mount flange with the two holes toward the front of the chassis. -
Page 23: Installing The Flange-Mounted Chassis
Installing the Chassis in a Cabinet-Style 2- or 4-Post Chassis Figure 3-3 Rack Mount Flange Installed on the Right Side of the Acme Packet 1100 Attach the rack mount flange to the chassis as shown by inserting a #6-32 x 5/16" screw into each of the holes, and use a Phillips screwdriver to hand-tighten and secure each screw. -
Page 24: Wall-Mounting The Chassis
When the Acme Packet 1100 is installed on the wall, it is secured in place to each side of the chassis with 2 screws/washers and to the wall with 2 screws/washers on each wall bracket. - Page 25 Insert customer-supplied screws/washers/anchors into each hole in the bracket to secure the chassis to the mounting surface. Ensure that the wall bracket screws are tight and that the Acme Packet 1100 is securely fastened to the wall.
-
Page 26: Cabling The Acme Packet 1100 System
Figure 3-8 Wall Bracket Mount Points for Wall Mounting of the Acme Packet 1100 Table Top/Shelf Installation of the Chassis The Acme Packet 1100 chassis features four non-skid rubber feet mounted on the base of the unit for freestanding table top or shelf installations. When mounting the Acme Packet 1100 chassis on a table top or shelf, please follow these guidelines: •... -
Page 27: Cabling The T1/E1 Port
An RJ48C also uses a different pin out arrangement, voltage level, and line capacitance than an RJ45. To create a physical T1 or E1 connection to the Acme Packet 1100 T1/E1 port, use the top rear port marked T1/E1 for a permanent connection to Wide Area Network (WAN). -
Page 28: Cabling Network Management (Int/Ext/Net Mgt) Ports
RJ45 jack will click into place when you insert it properly into the port. Figure 3-11 Network Management Ethernet Ports Route the cable away from the Acme Packet 1100. Make sure that the Ethernet cables are not stretched tightly or subject to extreme stress. -
Page 29: Cabling For Ha Deployments
HA node. Figure 3-12 HA-Sharing Ports To cable the Acme Packet 1100 in an HA configuration using single rear interface support: Insert one end of an Ethernet cable into the NET MGT port on the rear panel of each Acme Packet 1100. - Page 30 There is no ON/OFF switch on these power supplies. When you plug them in, the power is on and the system starts to boot. Note: To power down the Acme Packet 1100, unplug the power adapter from the AC outlet. 3-13...
-
Page 31: Startup
This section explains how to create a console connection. Prerequisites In order to create a console connection to the Acme Packet 1100 you need to configure the terminal hardware and software appropriately. Ensure that your terminal is configured with the settings presented in the following table. -
Page 32: Powering On The Acme Packet 1100
Powering On the Acme Packet 1100 Figure 4-1 SER MGT Console Port If the Acme Packet 1100 is already powered on, press Enter a few times to activate the console connection. When ACLI text is displayed on the screen, the console connection has been successfully created. - Page 33 Password: ORACLE# You can now begin configuring your Acme Packet 1100. Refer to the Acme Packet Configuration Guide to learn how to establish an IP address for your Acme Packet 1100 System.
-
Page 34: Maintenance
Packet 1100 maintenance procedures require that you shut down the system. Before you shut down or restart the Acme Packet 1100, ensure that there are no active calls in progress. Procedures to reroute call and network traffic around the Acme Packet 1100 are outside the scope of this guide. -
Page 35: Rebooting, Resetting, And Power Cycling
Reboot this SD [y/n]?: y System Reset Resetting the Acme Packet 1100 via the reset button on the rear of the chassis performs a cold reboot. This is the equivalent to disconnecting the power from the system and then reconnecting it. There is no orderly termination of tasks, and the system shuts down abruptly. -
Page 36: Power Cycling
HA node, only work on the Acme Packet 1100 that is in standby mode. To determine the HA state of each Acme Packet 1100 in an HA pair, review the HA LED on the front panel or use the ACLI show health command. Once the Acme Packet 1100 due for maintenance is in standby mode, continue with the appropriate procedures to service it. - Page 37 The following procedure is only applicable to Acme Packet 1100s in an HA deployment. To force a switchover between Acme Packet 1100 nodes: Confirm that the relevant systems on the active/standby are synchronized with the show health command. Type show health and press Enter on each system.
-
Page 38: Chassis Removal
Refer to the Upgrade section of the Maintenance and Troubleshooting Guide (400-0063-40A) for more information. Chassis Removal This section explains how to remove the Acme Packet 1100 from an equipment rack. Note: Always disconnect the Acme Packet 1100 power supply from the power source when removing a chassis from an equipment rack. -
Page 39: Cooling System Maintenance
Reference the System Installation chapter for more information. Pull the Acme Packet 1100 forward and out of the equipment rack. Lift the Acme Packet 1100 out of the equipment rack, and move it to an ESD-safe location. Note: For the procedure to reinstall the Acme Packet 1100 in an equipment rack, see the chapter on System Installation in this document. -
Page 40: Specifications
Specifications This chapter provides information regarding the specifications of the Acme Packet 1100. Safety and Regulatory Certifications For information regarding safety and regulatory certifications applicable to the Acme Packet 1100, refer to the Acme Packet Platforms Safety and Compliance Guide in addition to this chapter. -
Page 41: Chassis Mounting Flanges Physical Specifications (Optional)
18 AWG 240 VAC 7.5 AMP 18 AWG Environmental Specifications For the Acme Packet 1100 to function properly, Acme Packet recommends that you follow the environmental guidelines in the following table. Table 6-5 Acme Packet 1100 Environmental Specifications (cont.) Specification Description... -
Page 42: Connector Specifications
Table 6-5 (Cont.) Acme Packet 1100 Environmental Specifications (cont.) Specification Description Maximum Altitude The Acme Packet 1100 System is required to operate below the maximum altitude of 10,000 feet. Air Flow Single fan: 2.2 CFM (3.6 CFM Max) Dual fans: 3.6 CFM (7.2 CFM Max) -
Page 43: Alarms
Pending failures or unexpected events are imminent (e.g., an LOS) Critical Catastrophic condition has occurred (e.g., the system is overheating) The Acme Packet 1100 polls its hardware components to ensure they are functioning properly. If it encounters a fault condition, it will report alarms in these categories: •... -
Page 44: Fan Speed Alarms
For each possible network interface, an alarm exists that indicates whether the link goes up or down. The following tables list detailed information about the Acme Packet 1100 link alarms, including their ID assignments, severities, causes, log messages, and messages printed in the graphic display window. -
Page 45: Management Ethernet Link Alarms
Appendix A Link and SDP Alarms Table A-5 Media Ethernet Link Alarm Information (cont.) Alarm Name Alarm Alarm Cause(s) Example Log Graphic Display Message Severity Message LINK UP 131073 MAJOR GigE S0P0 link Slot 0 port 0 UP X LINK ALARMS (where ALARM X is number of alarming GIGPORT...
Need help?
Do you have a question about the Acme Packet 1100 and is the answer not in the manual?
Questions and answers