
Related Manuals for Image Sensing Systems RTMS Echo

Summary of Contents for Image Sensing Systems RTMS Echo
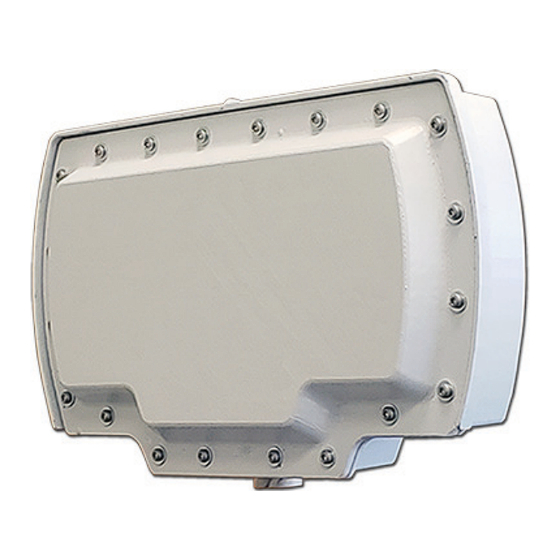
- Page 1 RTMS Echo User Guide RTMS Echo User Guide ©2019 Image Sensing Systems Inc. PN A900-1280-5 Rev A...
- Page 2 RTMS Copyright © 2019 Image Sensing Systems, Inc. All Rights Reserved. No part of this document may be reproduced or quoted without written permission from Image Sensing Systems, Inc. RTMS and Echo are trademarks of Image Sensing Systems, Inc., registered in the United States and other countries. All other product names referenced in this guide are trademarks of their respective owners.
-
Page 3: Table Of Contents
Installing RTMS Echo on Sign Structures- - - - - - - - - - - - - - - - - - - - - - - - - - - - - - - - - - -... - Page 4 Logging in to the RTMS Echo - - - - - - - - - - - - - - - - - - - - - - - - - - - - - - - - - -...
- Page 5 Reboot Device - - - - - - - - - - - - - - - - - - - - - - - - - - - - - - - - - - - - - - - - - - - - - - - - - - - - - - - 4-54 RTMS Echo User Guide...
-
Page 6: Preface
Rules. Operation is subject to the following two conditions: (1) This device may not cause harmful interference, and (2) this device must accept any interference received, including interference that may cause undesired operation. RTMS Echo User Guide ©2019 Image Sensing Systems Inc. -
Page 7: Industry Canada (Ic) Notices
• IC: 6549A-W8997M1216 The FCC and IC IDs can also be found on the label affixed to the outside of the RTMS Echo. CE Certification Certified for the RTMS Echo. RTMS Echo User Guide ©2019 Image Sensing Systems Inc. -vii... -
Page 8: Chapter 1:Introduction
The data collected by the RTMS Echo is highly accurate and can be formatted to fit the needs of your organization or agency’s objectives. -
Page 9: Rtms Echo Technical Specifications
24.245 GHZ 20 dBm max 24.145 GHZ 24.245 GHZ 20 dBm max *RTMS Echo meets the requirements of the minimum sweep rate as specified by ERC recommendation (70-03) as specified in IR2030/12/9 2014/88/UK June 2014. Table 1-2: Wi-Fi Frequencies Bottom... -
Page 10: Electromagnetic Interference
Class A; CE. For additional information, see “Preface” on page Firmware Upgrade Capability User upgrades of firmware is available through the same web interface used to set up and configure the RTMS Echo (see “Install Firmware” on page 4-44). RTMS Echo User Guide... -
Page 11: Chapter 2:Pre-Installation Considerations
660 mA of current; at 24 volts roughly 330 mA. Using an adaptor that provides 12 volts and 100 mA of current means that the total power to the RTMS Echo will be 12*0.1 = 1.2 watts, or roughly 15% of the power needed to turn on the RTMS Echo. -
Page 12: Cabling Considerations
120 VAC to 24 volts DC), the output voltage may be higher than specified when the current draw is less than maximum available from the supply. This may cause the RTMS Echo to sense an overvoltage condition and shut down to protect itself. -
Page 13: Breakout Boxes
Breakout Boxes The design of an RTMS Echo installation should include a breakout box close to the RTMS Echo that can be used for setup and maintenance purposes, and can include surge suppression circuitry and external communications devices as required. Reference designs are available. The breakout box should be no more than 50 ft (15.24 m) from the RTMS Echo sensor (see... -
Page 14: Surge Suppression/Filtering
Surge Suppression: The CITEL MJ8-POE-B Filtering: The COSEL SNR-10-23-DT line noise has been tested and is the recommended filter has been tested and is the recommended transient suppressor for RTMS Echo sensors. filter for RTMS Echo sensors. Figure 2-4: Citel Surge Suppressor •... -
Page 15: Connecting Power And Communications
Chapter 2: Pre-Installation Considerations Connecting Power and Communications After the RTMS Echo has been mounted to the pole the connections for power and data communications must be made. For cable pinouts see “Cabling Considerations” on page 2-2. A 50 ft (15.24m) Cat 5e cable containing wires for both power and communications is included with the RTMS Echo sensor. - Page 16 Chapter 2: Pre-Installation Considerations Figure 2-6: Single Surge Suppressor RTMS Echo User Guide ©2019 Image Sensing Systems Inc.
-
Page 17: Providing A Proper Ground
Figure 2-7) should be at least 1.83 m (6 ft) in length and placed as close as possible to the base of the RTMS Echo mounting pole. The grounding conductor should be flexible copper braid or copper wire 12AWG or larger. - Page 18 Because lightning is a major influence on power line surge, it is important to understand the exposure to thunderstorms in the area where the RTMS Echo sensor is being installed. In areas that are exposed to large number of thunderstorms, protecting sensors will be more challenging.
-
Page 19: Placement In Side-Fired Highway Configuration
2-12). • Case 2 — Overpass installations: Do not mount the RTMS Echo on a perpendicular overpass. Instead, use poles located at least 5 m (17 ft) from the overpass to avoid multi-path. Multi-path is a situation in which... - Page 20 Chapter 2: Pre-Installation Considerations Setback Figure 2-9: RTMS Echo Side-Fired Highway Sites RTMS Echo User Guide ©2019 Image Sensing Systems Inc. 2-10...
-
Page 21: Height, Setback, Tilt Requirements
Pre-Installation Considerations Height, Setback, Tilt Requirements The RTMS Echo has a detection area of 250 ft (76 m), and is able to detect up to 12 lanes of traffic within that distance. ISS recommends mounting the Echo sensor between 15 and 35 ft (4.6 and 10.7 m) from the ground. The height is based on the distances from the closest and furthest zones. -
Page 22: Guardrails And Barriers
Figure 2-11: False Target Generated by Fence Or Wall To avoid this problem install the RTMS Echo higher and increase the elevation angle to detect the far lanes of traffic excluding the nearest lanes, as shown on the right in Figure 2-11. -
Page 23: Elevated Roadway
Pre-Installation Considerations Elevated Roadway On elevated or sunken roadways with insufficient outside shoulders, it may be an impossible job for a single sensor. Two RTMS Echo units, configured as shown by Figure 2-12, will cover all lanes if detection zones are defined as... -
Page 24: Installing Rtms Echo On Sign Structures
Installing RTMS Echo on Sign Structures The installation of the RTMS Echo on Message Sign structures is acceptable only if the RTMS Echo is mounted to be offset from the overhead span of the structure. Structures can reflect the microwave signal and distort the accuracy of detection. -
Page 25: Grade Differentials
Trees Trees and bushes in the path of the microwave beam (in the setback or in medians) must be avoided. RTMS Echo units must be relocated or a gap in vegetation maintained in the path of the beam. RTMS Echo User Guide ©2019 Image Sensing Systems Inc. -
Page 26: Chapter 3:Sensor Installation & Setup
• Use the RTMS Echo only for its intended purposes as described in this manual. Changes or modifications not expressly approved by the manufacturer could void the user's authority to operate the equipment. -
Page 27: Installing The Sensor
Installing the Sensor Warning Installation of RTMS Echo hardware may require that you work above the ground on a ladder or bucket truck. Please make sure you have all the required equipment and are aware of potential safety issues before starting any installation. - Page 28 3. Adjust the RTMS Echo to be perpendicular to the travel lanes and level side to side. 4. Tilt the RTMS Echo so that the top of the sensor is aimed at the farthest monitored zone. NOTE: Steps 3 and 4 are general guidelines. Actual mounting and tilt may need to be adjusted based on multiple factors such as obstacles and number of lanes.
-
Page 29: Setting Up The Sensor
The following equipment and personnel will be needed in order to perform the configuration process. • At least two persons • A hand-held tally counter • Light Detecting and Ranging (LIDAR) radar gun • Stop watch RTMS Echo User Guide ©2019 Image Sensing Systems Inc. -
Page 30: Logging In To The Sensor For The First Time
Logging in to the Sensor For the First Time 1. Start your internet browser. Note, the screen shots shown below are taken from Google Chrome and Firefox. 2. In the address field, type the IP address of the RTMS Echo. The default is 192.168.0.10. 3. Press Enter. -
Page 31: Aiming The Sensor
4. Tilt the sensor forward or back to adjust the tilt to match the specifications “Height, Setback, Tilt Requirements” on page 2-11. 5. Tighten the nuts securing the sensor to the mounting bracket. 6. Detect and adjust zones. RTMS Echo User Guide ©2019 Image Sensing Systems Inc. -
Page 32: Detect And Adjust Zones
Detect and Adjust Zones The automated zone setup process requires free flowing traffic in all lanes of interest. It scans the range of the RTMS Echo beam and positions up to 12 detection zones, representing lanes where vehicles are detected. - Page 33 All zones found to stop the process. 3. Click on the first zone. 4. Enter a name for the zone. A maximum of 25 characters can be entered. RTMS Echo User Guide ©2019 Image Sensing Systems Inc.
-
Page 34: Verifying Vehicle Counts
The vehicle count verification of a successful zone setup is an essential part of the installation. During the process you will compare RTMS Echo volume counts over a period of time to a manual (visual) count for the same interval. - Page 35 Save. A download option appears. 10. To download the saved file to your computer, click Download. The file is saved to your default folder as a CSV file. RTMS Echo User Guide ©2019 Image Sensing Systems Inc. 3-10...
-
Page 36: Configure Settings
“Settings Tab” on page 4-44. NOTE: At minimum, the setting for Local area network should be changed to set the IP address of the sensor for your network. RTMS Echo User Guide ©2019 Image Sensing Systems Inc. 3-11... -
Page 37: Chapter 4:Operations And Adjustments
RTMS Echo is installed and configured. Logging in to the RTMS Echo The following describes the procedure for logging in to the RTMS Echo. after you have set the network parameters for the sensor (see “Local Area Network... -
Page 38: Home Tab
The display can be set to show either the speed or length of each detected vehicle. This page also shows how much of the sensor’s memory has been used and the input voltage for the sensor. Figure 4-1: Home Page RTMS Echo User Guide ©2019 Image Sensing Systems Inc. - Page 39 Percentage of the number of per vehicle records currently in this data table. The input voltage to the sensor. The best performance is when the value is between 12V and 24V. RTMS Echo User Guide ©2019 Image Sensing Systems Inc.
-
Page 40: Aim Tab
Operations and Adjustments Aim Tab This page is used to set the roll and tilt of the sensor during the installation process. For more information see “Aiming the Sensor” on page 3-6. RTMS Echo User Guide ©2019 Image Sensing Systems Inc. -
Page 41: Zones Tab
This tab is used to add, remove and edit zones, and to set the direction of traffic for a zone. This tab is also used to start the automatic zone detection operation. RTMS Echo User Guide ©2019 Image Sensing Systems Inc. -
Page 42: Add A Zone
1. Click the Zones tab. 2. Click Add Zone. 3. Move the cursor onto the zone until a hand icon appears, then click the zone to select it and display the control panel. RTMS Echo User Guide ©2019 Image Sensing Systems Inc. -
Page 43: Edit A Zone
5. After all changes have been made, click Save changes. Remove a Zone This function removes a zone permanently from the configuration. 1. Select the zone to be removed. 2. Click the remove (trash can) icon. 3. Click Save changes. RTMS Echo User Guide ©2019 Image Sensing Systems Inc. -
Page 44: Auto Detect Zones
Click to clear all values. Click to view the last saved set of values. Select to perform lane count verification. Select to perform vehicle speed calibration. (Table continues on the next page.) RTMS Echo User Guide ©2019 Image Sensing Systems Inc. - Page 45 The adjustment the sensor is to make when reporting the data for each detection. For Speed, the adjustment is in MPH or Kp/h. For length, the adjustment is in feet or meters. RTMS Echo User Guide ©2019 Image Sensing Systems Inc.
-
Page 46: Optimizing Volume Count Accuracy
Figure 4-3: Over/Under Count: Adjacent Zones The above could indicate that vehicles from zone 2 are being detected in zone 3. Fine tune the zone boundary between the two zones. RTMS Echo User Guide ©2019 Image Sensing Systems Inc. 4-10... -
Page 47: Condition B: Under Count In Near Zone
The above is probably due to aiming issues. The sensor may be missing small profile vehicles. Check the aiming of the RTMS Echo and make sure it is aimed down enough to view the first zone of traffic (zone 1). -
Page 48: Condition C: Under Count In Far Zone
The above is probably due to aiming issues. The sensor may be missing small profile vehicles. Check the aiming of the RTMS Echo and make sure it is aimed up enough to view the last zone of traffic (zone 6). -
Page 49: Condition D: Under Count In Several Zones
Figure 4-6: Under Count: Many Zones In the above situation the signal strength reflection may be too low. This could be caused by the aiming angle is not perpendicular to the traffic. RTMS Echo User Guide ©2019 Image Sensing Systems Inc. 4-13... -
Page 50: Condition E: Over Count In Several Zones
4-7, the count for many zones is above what is Count in Several expected. Zones Figure 4-7: Over Count: Many Zones In the above situation the signal strength reflection may be too high, causing “splashing” into adjacent lanes. RTMS Echo User Guide ©2019 Image Sensing Systems Inc. 4-14... -
Page 51: Condition F: Under Count In First Zone Past A Barrier
Fine tune zone 4 by moving the zone boundary closest to the barrier further away from the barrier (move away +1). A slight adjustment can make a large improvement. RTMS Echo User Guide ©2019 Image Sensing Systems Inc. 4-15... -
Page 52: Speed Calibration
Speed Calibration This function is used to adjust the vehicle speed detected by the Echo sensor if required. NOTE: RTMS Echo cannot be used for speed enforcement. 1. Click the Calibrate tab. 2. Click Speed Calibration. 3. Select the check box to the left of each zone for which speeds are to be checked. -
Page 53: Length Calibration
The value specified can be between +/- 10 and can have one decimal place (e.g., 3.2, 1.4, etc.). All detected lengths for the lane will be adjusted by the amount specified. 6. To save the values, click Save. RTMS Echo User Guide ©2019 Image Sensing Systems Inc. 4-17... -
Page 54: Data Tab
In the list that appears there are two date ranges shown. The Interval Data Range indicates the earliest record available when doing an Interval Data query. The Per-vehicle Date Range indicates the earliest record available for all queries except Interval Data. RTMS Echo User Guide ©2019 Image Sensing Systems Inc. 4-18... -
Page 55: Classification By Binned Speed Query
The results can be reported for individual zones or aggregated over all zones. 1. Click the Reporting tab. 2. From the drop-down to the right of Query, select Classification, binned by speed. RTMS Echo User Guide ©2019 Image Sensing Systems Inc. 4-19... - Page 56 Multiple bins can be specified by separating the bins with a space (e.g., 5 7 10, etc.).If omitted, the default class bins will be 5, 7, 10, 15, and 20. RTMS Echo User Guide ©2019 Image Sensing Systems Inc. 4-20...
- Page 57 14. To run the query, click Download. The requested data is saved as a CSV file in the Downloads folder. The requested data is saved as a CSV file in the Downloads folder. RTMS Echo User Guide ©2019 Image Sensing Systems Inc. 4-21...
-
Page 58: Classification By Length Query
The name can be any number of alphanumeric, dash (-), underscore (_) or space characters. The default is class-bin. 4. Click the icon to the right of the date/time field. RTMS Echo User Guide ©2019 Image Sensing Systems Inc. 4-22... - Page 59 10, etc.).If omitted, the default class bins will be 5, 7, 10, 15, and 20. 11. To run the query, click Download. The requested data is saved as a CSV file in the Downloads folder. RTMS Echo User Guide ©2019 Image Sensing Systems Inc. 4-23...
-
Page 60: Gap Average Query
The name can be any number of alphanumeric, dash (-), underscore (_) or space characters. The default is average-gap. 4. Click the icon to the right of the date/time field. RTMS Echo User Guide ©2019 Image Sensing Systems Inc. 4-24... - Page 61 If omitted, the default is 15 minutes. 10. To run the query, click Download. The requested data is saved as a CSV file in the Downloads folder. RTMS Echo User Guide ©2019 Image Sensing Systems Inc. 4-25...
-
Page 62: Headway Average Query
The name can be any number of alphanumeric, dash (-), underscore (_) or space characters. The default is average-headway. 4. Click the icon to the right of the date/time field. RTMS Echo User Guide ©2019 Image Sensing Systems Inc. 4-26... - Page 63 If omitted, the default is 15 minutes. 10. To run the query, click Download. The requested data is saved as a CSV file in the Downloads folder. RTMS Echo User Guide ©2019 Image Sensing Systems Inc. 4-27...
-
Page 64: Interval Data Query
The name can be any number of alphanumeric, dash (-), underscore (_) or space characters. The default is aggregate-detection. 4. Click the icon to the right of the date/time field. RTMS Echo User Guide ©2019 Image Sensing Systems Inc. 4-28... - Page 65 8. Select the maximum number of records to be returned in the response. 9. To run the query, click Download. The requested data is saved as a CSV file in the Downloads folder. RTMS Echo User Guide ©2019 Image Sensing Systems Inc. 4-29...
-
Page 66: Per-Vehicle Data Query
The name can be any number of alphanumeric, dash (-), underscore (_) or space characters. The default is per-vehicle. 4. Click the icon to the right of the date/time field. RTMS Echo User Guide ©2019 Image Sensing Systems Inc. 4-30... - Page 67 (e.g., 2-5). To specify all zones, leave the field blank. 10. To run the query, click Download. The requested data is saved as a CSV file in the Downloads folder. RTMS Echo User Guide ©2019 Image Sensing Systems Inc. 4-31...
-
Page 68: Speed 85Th Percentile Query
The name can be any number of alphanumeric, dash (-), underscore (_) or space characters. The default is speed85. 4. Click the icon to the right of the date/time field. RTMS Echo User Guide ©2019 Image Sensing Systems Inc. 4-32... - Page 69 If omitted, the default is 15 minutes. 10. To run the query, click Download. The requested data is saved as a CSV file in the Downloads folder. RTMS Echo User Guide ©2019 Image Sensing Systems Inc. 4-33...
-
Page 70: Speed Average Query
The name can be any number of alphanumeric, dash (-), underscore (_) or space characters. The default is average-speed. 4. Click the icon to the right of the date/time field. RTMS Echo User Guide ©2019 Image Sensing Systems Inc. 4-34... - Page 71 If omitted, the default is 15 minutes. 10. To run the query, click Download. The requested data is saved as a CSV file in the Downloads folder. RTMS Echo User Guide ©2019 Image Sensing Systems Inc. 4-35...
-
Page 72: Speed By Bin Query
The results can be reported for individual zones or aggregated over all zones. 1. Click the Reporting tab. 2. From the drop-down to the right of Query, select Speed, binned. RTMS Echo User Guide ©2019 Image Sensing Systems Inc. 4-36... - Page 73 The value must be less than or equal the difference between the start and end times. If omitted, the default is 15 minutes. 10. Enter the speed of the initial bin. If omitted, the default value is 20. RTMS Echo User Guide ©2019 Image Sensing Systems Inc. 4-37...
- Page 74 12. Enter the speed increment of each bin after the initial setting. If omitted, the default is 5. 13. To run the query, click Download. The requested data is saved as a CSV file in the Downloads folder. RTMS Echo User Guide ©2019 Image Sensing Systems Inc. 4-38...
-
Page 75: Voltage Query
The name can be any number of alphanumeric, dash (-), underscore (_) or space characters. The default is input-voltage. 4. Click the icon to the right of the date/time field. RTMS Echo User Guide ©2019 Image Sensing Systems Inc. 4-39... - Page 76 NOTE: The defaults for date/time are the earliest record to the current date and time. 7. Click Set. 8. To run the query, click Download. The requested data is saved as a CSV file in the Downloads folder. RTMS Echo User Guide ©2019 Image Sensing Systems Inc. 4-40...
-
Page 77: Volume Query
The name can be any number of alphanumeric, dash (-), underscore (_) or space characters. The default is volume. 4. Click the icon to the right of the date/time field. RTMS Echo User Guide ©2019 Image Sensing Systems Inc. 4-41... - Page 78 If omitted, the default is 15 minutes. 10. To run the query, click Download. The requested data is saved as a CSV file in the Downloads folder. RTMS Echo User Guide ©2019 Image Sensing Systems Inc. 4-42...
-
Page 79: Log Tab
Chapter 4: Operations and Adjustments Log Tab Each RTMS Echo sensor maintains a log which contains messages about operational errors and warning and other helpful information about sensor operations. Figure 4-10: Log Page Table 4-2: Log Page Descriptions Item Description Click to refresh the displayed messages. -
Page 80: Settings Tab
For Device description enter a name for the sensor. Install Firmware This function is used to upgrade the firmware in the RTMS Echo sensor. 1. Click the Settings tab. 2. Click Install firmware. 3. Click Choose file. -
Page 81: Local Area Network Setting
Chapter 4: Operations and Adjustments Local Area Network Setting This function is used to set the IP address of the RTMS Echo sensor. 1. Click the Settings tab. 2. In the Local area network section, click change. 3. Enter the IP address, Subnet mask and Gateway. -
Page 82: Wi-Fi Setting
4. To change the password used to access the Wi-Fi, click in the field, enter then re-enter the new password. A minimum of 8 and a maximum of 63 characters can be entered. 5. If a change was made, click Save changes. RTMS Echo User Guide ©2019 Image Sensing Systems Inc. 4-46... -
Page 83: Location Setting
Chapter 4: Operations and Adjustments Location Setting This function is used to set the latitude and longitude of where the RTMS Echo sensor is installed. The location can either be set automatically by GPS or manually. 1. Click the Settings tab. -
Page 84: Date And Time Setting
Chapter 4: Operations and Adjustments Date and Time Setting This function is used to set the date and time in the RTMS Echo sensor. 1. Click the Settings tab. 2. In the Date and time section, click change. 3. Is the date and time to be set automatically or manually. -
Page 85: Traffic Data Storage Setting
Operations and Adjustments Traffic Data Storage Setting This function is used to determine what action is to be taken when the memory in the RTMS Echo sensor is full. 1. Click the Settings tab. 2. In the Data collection section, click change. -
Page 86: Interval Data
NOTE: The number of length classifications is one less than the number of classes selected because the last classification is everything greater than the last classification specified. 6. If a change was made, click Save changes. RTMS Echo User Guide ©2019 Image Sensing Systems Inc. 4-50... -
Page 87: Sx-300 Protocol Settings
Chapter 4: Operations and Adjustments Sx-300 Protocol Settings This function is used to set operating parameters allowing the RTMS Echo to simulate an RTMS Sx-300. 1. Click the Settings tab. 2. In the Sx-300 protocol section, click change. 3. To put the sensor in Stat mode, select the check box. If unchecked, the sensor is in polled mode. -
Page 88: Region Setting
Region Setting This function is used to set the units in which speed and length are displayed and to indicate the country in which the RTMS Echo is configured for. 1. Click the Settings tab. 2. In the Measurement section, click change. -
Page 89: Backup/Restore Device Configuration
– Software Version – Config Version – Actions • Sensors – Sensor Type (Radar) – Annotations • Zones – Zone Type (vertical line zone) – – Name – Start – RTMS Echo User Guide ©2019 Image Sensing Systems Inc. 4-53... -
Page 90: Download Diagnostics
NOTE: Depending on the amount of data in the databases this file can be extremely large, 100MB or more. Reboot Device This function is used to send a reboot command that will cause the sensor to restart. RTMS Echo User Guide ©2019 Image Sensing Systems Inc. 4-54...
Need help?
Do you have a question about the RTMS Echo and is the answer not in the manual?
Questions and answers