Table of Contents
Advertisement
Quick Links
Advertisement
Table of Contents

Related Manuals for Motorola PPC/CPCI-690


Summary of Contents for Motorola PPC/CPCI-690
- Page 1 PPC/CPCI-690 Reference Guide P/N 227356 Revision AC June 2006...
- Page 2 Electronic versions of this material may be read online, downloaded for personal use, or referenced in another document as a URL to the Motorola Embedded Communications Computing Web site. The text itself may not be published commercially in print or electronic form, edited, translated, or otherwise altered without the permis- sion of Motorola GmbH.
-
Page 3: Table Of Contents
Order Numbers ..............1-7 PPC/CPCI-690... - Page 4 Connectors ..............3-7 PPC/CPCI-690...
- Page 5 ..............4-28 PPC/CPCI-690...
- Page 6 Memory Bus ........... . . 5-7 PPC/CPCI-690...
- Page 7 External Interrupt Sources ............6-8 PPC/CPCI-690...
- Page 8 Last Reset Status Register 2 ............6-15 Battery Exchange Troubleshooting Index viii PPC/CPCI-690...
- Page 9 SENTINEL SPROM Contents ..........5-9 Table 18 PPC/CPCI-690...
- Page 10 Last Reset Status Register 2 ..........6-15 PPC/CPCI-690...
- Page 11 Connection to I2C Devices ......... . . 5-19 PPC/CPCI-690...
- Page 12 ........... . Dot Position on BatteryA-4 PPC/CPCI-690...
-
Page 13: Using This Guide
<text> Typical notation used for variables and keys [text] Typical notation for buttons and optional parameter in PowerBoot Repeated item Omission of information from example/command that is not neces- sary at the time being Ranges Extents Logical OR PPC/CPCI-690 xiii... - Page 14 Dynamic Random Access Memory Error Checking and Correction EPROM Erasable Programmable Read-Only Memory Electrostatic Discharge FIFO First In First Out Ground General Purpose Pins Intelligent Interface Controller IBMU Intelligent Board Management Unit ICMB Inter Chassis Management Bus Integrated Device Electronics PPC/CPCI-690...
- Page 15 Reverse Address Resolution Protocol Read-Only Memory Rear Transition Board Real Time Clock Single Board Computer Sensor Data Record SDRAM Synchronous Dynamic Random Access Memory SELV Safety Extra Low Voltage S.M.A.R.T. Software Maintenance and Repair Tool Serial Management Bus System Management Interrupt PPC/CPCI-690...
- Page 16 SRAM Static RAM Twisted-Pair Ethernet UART Universal Asynchronous Receiver/Transmitter PPC/CPCI-690...
- Page 17 Table 16 “J5 Connector Pinout Rows D and E” page 3-10 added “PowerBoot” chapter added “Buses” chapter, added “Maps and Registers” chapter, editorial changes 216049 January 2003 Modified “Other Sources of Information” page xx, added note to “Environmental Require- ments” page 2-5, PPC/CPCI-690 xvii...
- Page 18 Table 22 “On- Board I2C Devices” page 5-18, added sentence to “SENTINEL I2C Bus” page 5-19, editorial changes 221400 September Added IPMI firmware upgrade procedure 2003 In “Environmental Requirements”: updated requirements for vibration Updated list of deliverable board variants xviii PPC/CPCI-690...
- Page 19 Map” page 6-6 Editorial changes 223827 July 2004 Replaced IPMI firmware update procedure in “ipmi_flsupd” with reference to IPMI Firmware for PPC/CPCI-690 and PPC/CPCI- 695 Installation Guide, updated “Other Sources of Information”, editorial changes 227356 September Brought manual to Motorola-style (copy- 2005 right, logo etc.);...
-
Page 20: Other Sources Of Information
Motorola motorola.com/com- SENTINEL Rev.1 Reference Guide puters Only available via SMART IPMI Reference Guide Only available via Motorola literature cata- IPMI Firmware for PPC/CPCI-690 and PPC/CPCI-695 Installation Guide Only available via Motorola literature cata- Galileo marvell.com/prod- GT-64260A System Controller for PowerPC... - Page 21 Company www. Document RAMiX DDC no. Rx-URMH 090 Rev A Hardware Reference Manual PMC233/4/5 & PMC243/4/5 High Capacity Disk Solu- tions Samsung samsungsemi.com K4S560832C 256MBit LVTTL SDRAM search for K4S560832C Vitesse vitesse.com VSC215 Baseboard Management Controller search for VSC215 PPC/CPCI-690...
- Page 22 PPC/CPCI-690...
-
Page 23: Safety Notes
The board has been tested in a standard Motorola system and found to comply with the limits for a Class A digital device in this system, pursu- ant to part 15 of the FCC Rules respectively EN 55022 Class A. - Page 24 Hot Swap Installing the PPC/CPCI-690 into or removing it from a powered system not supporting hot swap or high availability causes board damage and data loss. Therefore, only install or remove it from a powered system if the system itself supports hot swap or high availability and if the system documen- tation explicitly includes appropriate guidelines.
- Page 25 Replacement/Expansion Only replace or expand components or system parts with those recom- mended by Motorola. Otherwise, you are fully responsible for the impact on EMC and the possibly changed functionality of the product. Check the total power consumption of all components installed (see the technical specification of the respective components).
- Page 26 • Connect TPE bushing of the system to safety extra low voltages (SELV) circuits only. • Make sure that the length of the electric cable connected to a TPE bushing does not exceed 100 meters. If in doubt, ask your system administrator. xxvi PPC/CPCI-690...
- Page 27 ID ROM and IPMI ID ROM. Updating the IPMI flash with wrong data will damage the IPMI control- ler. Only update the IPMI flash with data provided by Motorola. Battery Wrong battery installation may result in a hazardous explosion and board damage.
- Page 28 PPC/CPCI-690...
-
Page 29: Sicherheitshinweise
Wir sind darauf bedacht, alle notwendigen Informationen zum Einbau und zum Umgang mit dem Board in diesem Handbuch bereit zu stellen. Da es sich bei dem PPC/CPCI-690 um ein komplexes Produkt mit vielfältigen Einsatzmöglichkeiten handelt, wird die Vollständigkeit der im Handbuch enthaltenen Informationen nicht garantiert. - Page 30 Systembeschreibung dies ausdrücklich erlaubt. Installieren Sie das Board im laufenden Betrieb in einen Systemsteckplatz oder ziehen sie es aus einem Systemsteckplatz heraus, führt dies zu Datenverlusten und zu einer Beschädigung des Boards. Installieren Sie das Board deshalb nur im laufenden Betrieb in PPC/CPCI-690...
- Page 31 Stellen Sie sicher, dass Anschlüsse und Kabel des Boards während des Betriebs nicht berührt werden können. Austausch/Erweiterung Verwenden Sie bei Austausch oder Erweiterung nur von Motorola empfohlene Komponenten und Systemteile. Andernfalls sind Sie für mögliche Auswirkungen auf EMV und geänderte Funktionalität des Produktes voll verantwortlich.
- Page 32 Wenn Sie den PCI bus 0 Reset ausschalten, führt dies beim Zurücksetzen des Boards und gleichzeitig ausgeführten Datentransfers über SENTINEL zu einem Datenverlust des SENTINEL und zu einer Fehlfunktion des Boards. Betreiben Sie das Board deshalb nur mit der Schaltereinstellung SW2-4: OFF. xxxii PPC/CPCI-690...
- Page 33 Boards. Überschreiben Sie deshalb keine ID ROM und IPMI ID ROM relevanten Daten. Aktualisieren Sie das IPMI Flash mit falschen Daten, führt dies zur Beschädigung des IPMI Controllers. Aktualisieren Sie das IPMI Flash nur mit Daten, die Sie von Motorola bekommen. PPC/CPCI-690 xxxiii...
- Page 34 Sichern Sie deshalb vor dem Batterieaustausch Ihre Daten. Verwenden Sie beim Batteriewechsel immer den selben Batterietyp, der bereits eingesetzt wurde. Umweltschutz Entsorgen Sie alte Boards und Batterien gemäß der in Ihrem Land gültigen Gesetzgebung, wenn möglich immer umweltfreundlich. xxxiv PPC/CPCI-690...
-
Page 35: Introduction
Introduction... -
Page 37: About This Manual
This includes registers, inter- rupt and memory maps Device’ s Features and Data Paths Provides detailled information on the devices, such as controllers, CPU etc., used on the board and how they are intercon- nected PPC/CPCI-690 1 - 3... -
Page 38: Feedback
Describes how to deal with problems related to the operation of the board Feedback Motorola welcomes and appreciates your comments on its documentation. We want to know what you think about our manuals and how we can make them better. Mail comments to: •... -
Page 39: Features
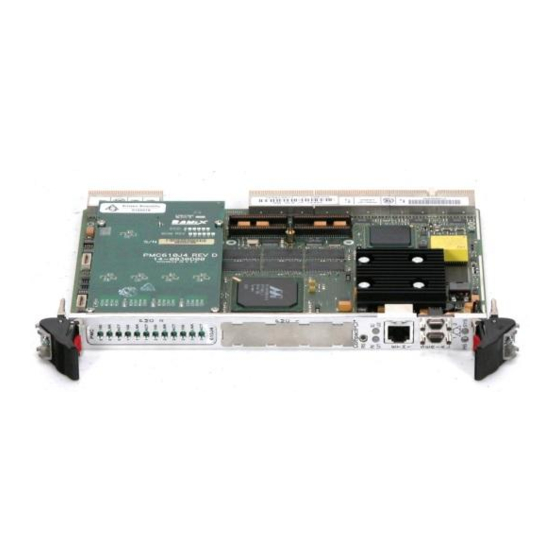
Introduction Features Features The PPC/CPCI-690 is a single-slot 6U universal CompactPCI hot-swap board using Motorola’ SENTINEL PCI-to-CompactPCI universal bridge technology. As it is based on an IBM 750FX or 750GX PowerPC processor of up to 1 GHz, the board offers high performance. Combined with full hot- swap capabilities it is an ideal component for multi-node processor sys- tems. -
Page 40: Standard Compliance
Standard Compliance Introduction Standard Compliance The PPC/CPCI-690 meets the following standards: Table 1: Standard Compliance Standard Description EN 60950 Legal safety requirements UL 60950 UL 94V-0/1 (predefined Motorola system) EN 55022 EMC requirements on system level EN 55024 FCC Part 15 Class A ANSI/IPC-A610 Rev. -
Page 41: Ordering Information
Processor clock frequency in MHz User flash capacity in MByte Packet switching backplane variant Order Numbers Depending on the PPC/CPCI-690 type, the available upgrades and accesso- ries may differ. Consult your local sales representative to check the possi- bility of combinations. Table 2: Ordering Information Excerpt Order No. -
Page 42: Table 2 Ordering Information Excerpt
32 MByte 121222 .../512-1000GX-32/PSB IBM 750GX PowerPC processor, 1 GHz with 512 MByte main memory, user flash 32 MByte, for PICMG 2.16 Packet Switching Backplane systems Hardware Accessories PPC/CPCI-690 110196 ACC/RTB-602 Rear transition board and Installation Guide 110197 ACC/RTB-602/PSB Rear transition board and Installation Guide for PICMG 2.16 Packet Switching... -
Page 43: Installation
Installation... -
Page 45: Action Plan
Installation Action Plan Action Plan To install the board, the following steps are necessary and described in detail in the sections of this chapter. PPC/CPCI-690 2 - 3... - Page 46 Action Plan Installation 2 - 4 PPC/CPCI-690...
-
Page 47: Requirements
Do not operate the product outside the specified environmental limits and do not operate the product below 0°C. Make sure the product is com- pletely dry and there is no moisture on any surface before applying power. PPC/CPCI-690 2 - 5... -
Page 48: Power Requirements
For information on the accessories’ power requirements, refer to the docu- mentation coming with the respective accessory or ask your local Motorola representative. The following table gives the typical power requirements for a board with: •... -
Page 49: Table 4 Power Requirements For Boards With 750Fx Processor (667 Mhz)
5V or 3.3V system environment exceeds the limits stated above. The +/-12V of the PMC slots are passively protected with positive temperature coefficient (PTC) fuses. PPC/CPCI-690 2 - 7... -
Page 50: Hardware Upgrades And Accessories
Hardware Upgrades and Accessories Installation Hardware Upgrades and Accessories The PPC/CPCI-690 itself allows an easy and cost-efficient way to adapt the system board to your application needs. The following table gives an overview on the possible product combina- tions, described in Table 2 “Ordering Information Excerpt” page 1-7. -
Page 51: Signaling Level
2. Store blind panel in safe place 3. Check that PMC module has a drill hole at 3.3V position If not, the PMC module cannot be installed. Figure 3: Location of 3.3V Voltage Key on PMC Module PPC/CPCI-690 2 - 9... -
Page 52: Figure 4 Pmc Connectors And Slots
5V and 3.3V level does not exceed 7.5W (total over all used voltages). 4. Plug PMC module into connectors of PMC slot 1 (PN11, 12, 13, 14) or PMC slot 2 (PN21, 22, 23 and 24) Figure 4: PMC Connectors and Slots 2 - 10 PPC/CPCI-690... -
Page 53: Removal Procedure
6. Place screws delivered with PMC module from bottom side into mounting holes 7. Fasten screws Removal Procedure 1. Remove screws 2. Disconnect PMC module from slot 3. Close front panel gap at free slot with blind panel PPC/CPCI-690 2 - 11... -
Page 54: Ide Devices
For further information, refer to the ACC/RTB-602 Installation Guide. Rear Transition Board As a separate price list item, Motorola offers the ACC/RTB-602. The RTB provides access to the board’s CompactPCI user I/O interfaces via industry standard connectors. For further information, refer to the ACC/RTB-602 Installation Guide. -
Page 55: Switch Settings
Disabling the PCI bus 0 reset and resetting the board when data trans- fer via SENTINEL is performed result in data loss and malfunction of the board. Only operate the board with SW2-4 in its default position (OFF). PPC/CPCI-690 2 - 13... - Page 56 Boot flash write enable OFF: Write disabled (default) Write enabled User flash write protection OFF: Protection disabled (default) Protection enabled PCI bus 0 reset OFF: PCI bus 0 reset enabled (default) PCI bus 0 reset disabled 2 - 14 PPC/CPCI-690...
- Page 57 Installation Switch Settings Table 7: Switch Settings Switch Number Description Reserved OFF: Default Reserved OFF: Default Reserved OFF: Default Reserved OFF: Default 1) The IPMI controller is BMC (SYSEN active) or PM (SYSEN inactive) PPC/CPCI-690 2 - 15...
-
Page 58: Board Installation
Note: EN 55022 Class A and FCC Part 15 Class A are achieved by using single-point grounding. If you ground the CPCI-690 at multiple points EMC problems may occur. 2 - 16 PPC/CPCI-690... -
Page 59: Installation In A Nonpowered System
5. Press handles inwards to lock board on rack frame 6. Fasten board with screws 7. Connect interface cables to front panel connectors, if applicable 8. Turn on system power PPC/CPCI-690 2 - 17... -
Page 60: Removal Procedure
Therefore, only install or remove it from a powered system if the system itself supports hot swap or high availability and if the system documen- tation explicitly includes appropriate guidelines. As a universal hot-swap board, the CPCI-690 can be installed in both 3.3V and 5V systems. 2 - 18 PPC/CPCI-690... -
Page 61: Man-Machine Interface
Before touching boards or electronic components, make sure that you are working in an ESD-safe environment. The installation procedure depends upon the system the board is to be in- stalled in. PPC/CPCI-690 2 - 19... -
Page 62: Removal Procedure
IDE interface via the ACC/RTB-602 results in data loss. Only remove the board from a powered system without IDE devices attached to the board’s primary or secondary IDE interface via the ACC/RTB-602. 2 - 20 PPC/CPCI-690... -
Page 63: Figure 8 Button On Handle
Removing the board from the backplane while the hot-swap LED is still off causes data loss. Therefore, wait until the blue hot-swap LED is on before removing the board. 5. Remove board from peripheral slot of powered system PPC/CPCI-690 2 - 21... - Page 64 Board Installation Installation 2 - 22 PPC/CPCI-690...
-
Page 65: Controls, Indicators, And Connectors
Controls, Indicators, and Connectors... -
Page 67: Front Panel
Compatibility Glyphs for CompactPCI Standard and PSB Board Variants The following figure highlights the position of the cutouts for the PMC modules, the keys, the connectors and the LEDs on the CPCI-690 front panel. Figure 10: CompactPCI Standard and PSB Front Panel PPC/CPCI-690 3 - 3... -
Page 68: Pmc Cutouts
Front Panel Controls, Indicators, and Connectors PMC Cutouts The front panel provides two cutouts to install PMC modules. 3 - 4 PPC/CPCI-690... -
Page 69: Key
Reset is held active until the key is released. For information on how to disable the key, see Table 7 “Switch Settings” page 2-14. For information on performing a reset via PowerBoot, refer to “Reset” page 4-47. PPC/CPCI-690 3 - 5... -
Page 70: Leds
Board must not be removed from the system System controller LED Yellow: Board is installed in a system slot and acts as system controller OFF: Board is installed in a peripheral slot and acts as intelligent I/O board 3 - 6 PPC/CPCI-690... -
Page 71: Connectors
• RJ45 for Ethernet 1 • Micro D-SUB for serial ports 1 and 2 The following connector pinouts provide information on signal assign- ments. Figure 11: Ethernet 1 Connector Pinout Figure 12: COM 1 and 2 Connector Pinout PPC/CPCI-690 3 - 7... -
Page 72: Compactpci Connectors
Figure 13: Location of CompactPCI Connectors J1 and J2 The J1 and J2 connectors implement the CompactPCI 64-bit connector pinout as specified by the CompactPCI specification PICMG 2.0 R3.0. Therefore, these pinouts are not documented in this Reference Guide. 3 - 8 PPC/CPCI-690... -
Page 73: Figure 14 J3 Connector Pinout
• Ethernet 2 and 3 • PMC1 user I/O Figure 14: J3 Connector Pinout Connector J5 provides interfaces to: • COM 1 and 2 • PMC2 user I/O • ICMB and IPMB1 port • RTB reset key and I2C devices PPC/CPCI-690 3 - 9... -
Page 74: Figure 15 J5 Connector Pinout Rows A To C
CompactPCI Connectors Controls, Indicators, and Connectors Figure 15: J5 Connector Pinout Rows A to C Figure 16: J5 Connector Pinout Rows D and E 3 - 10 PPC/CPCI-690... -
Page 75: Powerboot
PowerBoot... -
Page 77: Introduction
• Testing the board Booting the board is described in detail in “Booting the Board” page 4-5. The other tasks can be performed by means of entering commands de- scribed briefly in “Command Set” page 4-12. PPC/CPCI-690 4 - 3... -
Page 78: Address Mapping
KCS1 2 Bytes F1000000 .. F100FFFF Discovery registers 64 KByte F4000000 .. F7FFFFFF User flash (CS #3) max. 64 MByte FFF00000 .. FFFFFFFF Boot flash (CSBootCS) 1 MByte (2 x 512) 1) Interface of IPMI controller 4 - 4 PPC/CPCI-690... -
Page 79: Booting The Board
Not used A fully functional CPCI-690 will show the value 0x3B for all tests which are okay. A failure will not stop the power-up process since debug functional- ity is provided via console serial interface 1. PPC/CPCI-690 4 - 5... -
Page 80: Setting Boot Parameters
Boot address Address where to exe- Net, Go, Flash, ATA- cute the go command Ethernet 1, 2 or To select the controller 1, 2, 3 for autoboot Additional tftp Sets a higher retry value retries for netload 4 - 6 PPC/CPCI-690... - Page 81 To enable or disable the 0: Disable Optional for all checking SDRAM ECC option 1: Enable Enable shared To enable the Compact- 0: Disable Only setup on memory serial PCI shared memory 1: Enable peripheral slot communication interface PPC/CPCI-690 4 - 7...
-
Page 82: Selecting The Boot Device
4-52. 3. Enter ferase command to erase user flash ferase user_flash The following message appears Erasing flash memory ... done Erasing flash memory ... done Erasing flash memory ... done Erasing flash memory ... done 4 - 8 PPC/CPCI-690... - Page 83 7. Enter fprog command to program image from DRAM memory into user flash The DRAM memory contents from 100000 ..20FFFFF will be pro- grammed. PowerBoot> fprog user_flash 100000 Programming flash memory 0 ... 100% 0 ... 100% 0 ... 100% 0 ... 100% Done. PPC/CPCI-690 4 - 9...
-
Page 84: Autoboot
The board boots directly without executing a board reset • Via the autoboot option in setboot The board boots automatically after a reset has been executed • Via the go option in setboot The image loaded to the flash can directly be executed 4 - 10 PPC/CPCI-690... -
Page 85: Restoring Default Values
If you want to restore the default values via the NVRAM, proceed as fol- lows: 1. PowerBoot: m f0107c00 2. <Enter> 3. f0107c00 32313130 : 1 4. <Enter> 5. <Ctrl+C> 6. PowerBoot: reset PPC/CPCI-690 4 - 11... -
Page 86: Command Set
4-26 Copy Contents of a source memory area to a destina- 4-27 tion memory area NVRAM contents to a memory region nvramrd 4-27 Memory region into the NVRAM and generates nvramwr 4-28 the correct checksum 4 - 12 PPC/CPCI-690... -
Page 87: Devshow
Fill a memory area with values or an ASCII 4-49 neous string Search memory areas for values or an ASCII 4-50 string Compare two memory areas 4-51 Erase flash memory devices ferase 4-52 Start binary image located in DRAM memory 4-53 PPC/CPCI-690 4 - 13... - Page 88 : 2 [0x2] Buffer size : 1024 [0x400] Cylinders : 490 [0x0] Heads : 8 [0x0] Sect. p. track: 32 [0x0] Capabilities : 512 [0x200] Number of sectors LBA : 60160 [0xEB00] Number of sectors/card: 125440 [0x1EA00] 4 - 14 PPC/CPCI-690...
-
Page 89: Table 13 Bt Test Types
• test backward, i.e. memory is tested from end to begin If an error occurs during the test, the following error message will appear: error at location 0x12345678 value found:0xAB should be:0xBA YNTAX bt <begin> <end> [e] [c] PPC/CPCI-690 4 - 15... - Page 90 Walking ones test 32bit..done Walking ones test reverse...done Walking zeros test 32bit..done Walking zeros test reverse..done Increment test 32bit..done Prime test 32bit....done Prime test 32bit R/T..done March-b test ....done --- Blocktest runs 1 times - 00000000 errors --- PowerBoot>_ 4 - 16 PPC/CPCI-690...
- Page 91 = 2^06 : d = 2^07 : d = 2^08 : d = 2^09 : d = 2^10 : d = 2^11 : d = 2^12 : d = 2^13 : d = 2^14 : PowerBoot> PPC/CPCI-690 4 - 17...
- Page 92 = 2^06 : d = 2^07 : d = 2^08 : d = 2^09 : d = 2^10 : d = 2^11 : d = 2^12 : d = 2^13 : d = 2^14 : PowerBoot> 4 - 18 PPC/CPCI-690...
- Page 93 = 2^06 : d = 2^07 : d = 2^08 : d = 2^09 : d = 2^10 : d = 2^11 : d = 2^12 : d = 2^13 : d = 2^14 : PowerBoot> PPC/CPCI-690 4 - 19...
- Page 94 Note: If you chose a baud rate the terminal is not able to handle, you will not get any output on screen. Inform yourself about the settings of your screen and choose baud rates which provide a screen output. YNTAX baud <value> ARAMETERS 600|1200|2400|4800|9600|19200|38400|115200 XAMPLE PowerBoot> baud 9600 PowerBoot> reset 4 - 20 PPC/CPCI-690...
- Page 95 PowerBoot> cache d d Data cache disabled PowerBoot> execute Command to disable all caches and interrupts and start an executable ESCRIPTION image. YNTAX execute <address> ARAMETERS start address of the executable image. address XAMPLE PowerBoot> execute 100000 PPC/CPCI-690 4 - 21...
-
Page 96: Table 14 Navigation Commands
B, W, L, N, and E check whether the write access has been success- ful by performing a read access after the write access. If the written and the read data do not match, the command is terminated and an error mes- sage displayed. 4 - 22 PPC/CPCI-690... - Page 97 • O: Memory access is byte-sized and refers only to odd addresses XAMPLE PowerBoot> m 100000 b 00100000 00 : 4f 00100001 00 : = 00100001 00 : = 00100001 00 : - 0010000000 : #2000 00102000 00 : . PowerBoot> PPC/CPCI-690 4 - 23...
- Page 98 Power ON Self Test POST [1=disable, 0=enable], (0) -Primary Booter parameters [FORCE internal use only]- Primary Booter [0=disable, 1=enable], (0) Watchdog during booting (0) : Enable ECC checking (0) : Enable Shared Memory Serial (0): CSUM : 0xCEE PowerBoot> 4 - 24 PPC/CPCI-690...
- Page 99 User capability ID (0x0) : Message control (0x0) : MSI next item ptr (0x0) : Primary class code (0x6800000) : Secondary class code (0x6800000) : Do you really want to write data to the SROM? [y/n]:n Command -NOT- executed PowerBoot> PPC/CPCI-690 4 - 25...
- Page 100 Command to enable the watchdog. ESCRIPTION YNTAX wdog [<sec>] ARAMETERS Note: The parameter is interpreted as a hexadecimal value. Countdown in seconds before the reset XAMPLE PowerBoot> wdog 10 Setting watchdog counter to 16 sec Enable Watchdog! PowerBoot> 4 - 26 PPC/CPCI-690...
- Page 101 ESCRIPTION YNTAX nvramrd <dest-address> ARAMETERS dest- Memory address where to copy the NVRAM contents address XAMPLE PowerBoot> nvramrd 100000 Read NVRAM from offset 0x0000..0x7fff to 0x00100000 CSUM calculated : 0xCEC CSUM NVRAM read : 0xCEC PowerBoot> PPC/CPCI-690 4 - 27...
- Page 102 ARAMETERS scr- Location of the new NVRAM contents address XAMPLE PowerBoot> nvramwr 100000 Do you really want to write data to NVRAM [y/n]: y Write 32KB data at address 0x00100000 to NVRAM CSUM : 0xCEC PowerBoot> 4 - 28 PPC/CPCI-690...
-
Page 103: Displaying
[1|2|3|4] [<node>] [<verbose level>] ARAMETERS Selects the information level 1 to 4 1|2|3|4 Selects a specific node node Shows if child nodes exist or not verbose level Displays all found PCI devices and resources. ETURNS PPC/CPCI-690 4 - 29... - Page 104 [inst 1, loc 0/1/0, node 0x1ff213f0, ref 0] - Implements Classes: PCI - Implements bus type: PCI bus - Secondary location: 0x0/0x0/0x0 - Driver Rtn / Parm: 0xfff17458 / 0x1ff21584 - ID: 0x00000000 - Flags: 0x00000013 PowerBoot> 4 - 30 PPC/CPCI-690...
- Page 105 DRW - R/W test to check caches DWRITE - Write test to check caches EEPROM_INFO - Display information about EEPROMs EEPROM_READ - <device> <offs> <byteCnt> [dstAddr] EEPROM_WRITE - [-e] <device> [offs byteCnt srcAddr] EXECUTE - EXECUTE <address> PPC/CPCI-690 4 - 31...
-
Page 106: Hid
CONFIG_WR - Host:PCIbus cfg WR <dom#> <bus#> <dev#> <fun#> <reg#> <data> [B|W|L] PowerBoot> Command to display the HID0/1, MSR, PVR and L2CR processor register ESCRIPTION values. YNTAX None ARAMETERS XAMPLE PowerBoot> hid -CPU- HID0 = 0x8000C0A4 HID1 = 0x50000000 = 0x00009030 = 0x70000102 L2CR = 0x80080001 PowerBoot> 4 - 32 PPC/CPCI-690... - Page 107 If you want to return to the command line, enter the full stop (.) character. YNTAX md <address> [<size>] ARAMETERS First byte which is read in order to display the memory contents. address Specifies the memory access size size PPC/CPCI-690 4 - 33...
-
Page 108: Temp
Command to display the board temperature. For the location where the ESCRIPTION temperature is measured on the board, refer to section “Temperature Sen- sor” page 5-16. YNTAX temp None ARAMETERS XAMPLE PowerBoot> temp Board temperature: +27C PowerBoot> 4 - 34 PPC/CPCI-690... -
Page 109: Exchanging Data
Domain number of first or second PCI bus dom# Bus number bus# Device number dev# Function number fun# Register offset reg# Size of the read: byte, word or long B|W|L XAMPLE PowerBoot> config_rd 0 0 14 0 4 address: 0x8000A004 0x02100007 PowerBoot> PPC/CPCI-690 4 - 35... -
Page 110: Config_Wr
Bus number bus# Device number dev# Function number fun# Register offset reg# Data to write data Size of the read: byte, word or long B|W|L XAMPLE PowerBoot> config_wr 0 0 14 0 4 7 address: 0x8000A004 PowerBoot> 4 - 36 PPC/CPCI-690... -
Page 111: Eeprom_Read
Offset from which the read starts offs Count of bytes to be read byteCnt Destination of the read data dstAddr XAMPLE PowerBoot> eeprom_read ID_ROM_0 0 30 MSG: Begin of S-record S11300000C200C851C2500344653626A6C6E720009 S1130010464F52434520434F4D505554455253008B S113002009435043492D36393000103231313032D2 S9030000FC MSG: End of S-record PowerBoot> PPC/CPCI-690 4 - 37... -
Page 112: Eeprom_Write
Name of the device (given by the eeprom_info command) device Offset to write to offs Count of the bytes byteCnt Data address srcAddr XAMPLE PowerBoot> eeprom_write ID_ROM_0 MSG: Waiting for S-record data MSG: End of S-record PowerBoot> 4 - 38 PPC/CPCI-690... -
Page 113: Fprog
Do not reprogram BOOT_FLASH1, this would destroy the booter Device is write protected Boot flash 2 is programmed with the data stored at source address XAMPLE 00100000 PowerBoot> fprog boot_flash2 100000 Programming flash memory 0 |#################################################| 100% Done. PowerBoot> _ PPC/CPCI-690 4 - 39... -
Page 114: Ipmi_Flsupd
Command to start an IPMI flash update. An update via IPMB is possible ESCRIPTION with the address option. For a detailed description of the update procedure refer to the current version of IPMI Firmware for PPC/CPCI-690 and PPC/CP- CI-695 Installation Guide available via S.M.A.R.T. YNTAX IPMI_FLSUPD <begin>... -
Page 115: Ipmi_Request
Verifies the S-records, i.e. no data is loaded to the memory, but the memory contents and the S-records are compared Displays the number of errors occurred during the last loading PPC/CPCI-690 4 - 41... - Page 116 Command Set PowerBoot XAMPLE PowerBoot> lo 100200 PowerBoot> md 100200 10 00100200: 54 68 69 73 20 69 73 20 61 20 74 65 73 74 00 00 This is a test.. PowerBoot> _ 4 - 42 PPC/CPCI-690...
-
Page 117: Netload
Ethernet# manner aa:bb:cc:dd:ee:ff. Defines the Internet IP address of the CPU board (target) written in the fol- targetIP# lowing manner ggg.hhh.iii.kkk. Defines the Internet IP address of the server accessed for downloading the serverIP# TFTP file. PPC/CPCI-690 4 - 43... - Page 118 PowerBoot> netload test 100000 192.168.41.111 192.168.41.1 PHY-Device at 100MB/s and full duplex negotiated WANCOM MAC ADDRESS : 00:80:42:0E:88:88 Transmitting ARP-REQUEST... Reception of ARP-REPLY Transmitting TFTP-REQUEST to server 00:80:42:10:5B:C7, IP 192.168.41.1 PACKET:2049 - loaded $00100000..$00200000 (1048577 bytes) PowerBoot> 4 - 44 PPC/CPCI-690...
-
Page 119: Netsave
PowerBoot> netsave test 100000 1fffff PHY-Device at 100MB/s and full duplex negotiated WANCOM MAC ADDRESS : 00:80:42:11:67:C2 Transmitting RARP-REQUEST... Reception of RARP-REPLY Transmitting TFTP-REQUEST to server 00:80:42:10:5B:C7, IP 192.168.41.1 PACKET:2049 - saved $00100000..$001FFFFF (1048576 bytes) PowerBoot> PPC/CPCI-690 4 - 45... - Page 120 PowerBoot> netsave test 100000 1fffff 192.168.41.111 192.168.41.1 PHY-Device at 100MB/s and full duplex negotiated WANCOM MAC ADDRESS : 00:80:42:11:E7:24 Transmitting ARP-REQUEST... Reception of ARP-REPLY Transmitting TFTP-REQUEST to server 00:80:42:10:5B:C7, IP 192.168.41.1 PACKET:2049 - saved $00100000..$001FFFFF (1048576 bytes) PowerBoot> 4 - 46 PPC/CPCI-690...
-
Page 121: Reset
CompactPCI.0 is /PCI@0/CompactPCI@20 Ethernet 1:0080:42:11:67:C1 Ethernet 2:0080:42:11:67:C2 Ethernet 3:0080:42:11:67:C3 Found RTB-602 <<PowerBoot V4.00 for PowerCoreCPCI CPCI-690>> << c by FORCE COMPUTERS >> << (This is a nonreleased Version of >> << PowerBoot for PowerCore) >> PowerBoot> PPC/CPCI-690 4 - 47... -
Page 122: Reset
CompactPCI.0 is /PCI@0/CompactPCI@20 Ethernet 1:0080:42:11:67:C1 Ethernet 2:0080:42:11:67:C2 Ethernet 3:0080:42:11:67:C3 Found RTB-602 <<PowerBoot V4.xx for PowerCoreCPCI CPCI-690>> << c by FORCE COMPUTERS >> << (This is a nonreleased Version of >> << PowerBoot for PowerCore) >> PowerBoot> 4 - 48 PPC/CPCI-690... -
Page 123: Miscellaneous
A long constant followed by the character L, e.g. A5B6C7D8 L • String value An ASCII string followed by the character P. The ASCII string has to be set in inverted commas, e.g. “Hello” P XAMPLE PowerBoot> bf 100000 200000 FFFF PowerBoot> PPC/CPCI-690 4 - 49... - Page 124 A 4-KByte memory from 00002D00 .. 00003D00 is searched for the byte XAMPLE constant 3F . The byte constant is found at addresses 00002E01 00002E05 PowerBoot> bs 2D00 3D00 3F B Search: 00002E01 = 3F Search: 00002E05 = 3F PowerBoot> 4 - 50 PPC/CPCI-690...
- Page 125 XAMPLE tination memory starting at address 00007C00 . The two compared mem- ory areas are not identical at the locations 00004C10 and 00007C10 PowerBoot>bv 4C00 6C00 7C00 Verify:00004C10 = EE 00007C10 =3F PowerBoot> PPC/CPCI-690 4 - 51...
-
Page 126: Ferase
Suppose you want to erase boot flash 1 which is write-protected via switch XAMPLE setting. Since FERASE checks whether the flash is write-protected, the fol- lowing message appears: PowerBoot> ferase BOOT_FLASH1 Do not reprogram BOOT_FLASH1, this would destroy the booter Device is write protected 4 - 52 PPC/CPCI-690... - Page 127 After entering go you exit from PowerBoot. At the end of the binary image enter the opcode blr to return to PowerBoot. YNTAX go <address> ARAMETERS Specifies the starting address of the binary image address XAMPLE PowerBoot> go 10000 PPC/CPCI-690 4 - 53...
- Page 128 Command Set PowerBoot 4 - 54 PPC/CPCI-690...
-
Page 129: Buses
Buses... -
Page 131: Block Diagram
Buses Block Diagram Block Diagram The block diagram shows how the board’s devices work together and which data paths they use. PPC/CPCI-690 5 - 3... -
Page 132: System Controller
The UART ports are connected with two RS232 connectors at the front- panel and two on the RTB. Note: The serial port can only be used either via front panel or via RTB, but not simultaneously. 5 - 4 PPC/CPCI-690... -
Page 133: Watchdog
The watchdog is running with the system controller’s core frequency and time-out ranges are from 1.92 µs. to 32 s. Both time-out values are software programmable and can be changed during watchdog operation. Note: PowerBoot implements time-out ranges from 1 to 32 s only. PPC/CPCI-690 5 - 5... -
Page 134: Ppc Bus
The 60x PowerPC bus connecting the system controller with the CPU is a 64-bit bus running at 133 MHz. The PPC/CPCI-690 is equipped with one of the following CPUs: • PowerPC 750FX This CPU has an internal 64-KByte L1-cache and 512 KByte of L2-cache, both with 256-bit wide cache paths. -
Page 135: Memory Bus
1 GByte, two banks are equipped with 512 MBit devices using dense-pack three level stacking technology. Table 15: Memory Bus Characteristics Memory Characteristics Memory Capacity Memory Capacity below 1 GByte 1 GByte Memory speed 133 MHz 100 MHz CAS support CAS 3 CAS 2 PPC/CPCI-690 5 - 7... -
Page 136: Pci Bus 0
INTD# INTB# SENTINEL Motorola SENTINEL is used as PCI-to-CompactPCI universal bridge that enables the board to work as either CompactPCI system (host) or periph- eral board. SENTINEL is capable to run in either 3.3V or 5V VIO environ- ment. For further information, refer to “Installation in a Powered System Supporting Hot Swap”... -
Page 137: Table 18 Sentinel Sprom Contents
Upstream BAR 2 FFF00000 Defines a default PCI DSR setup window of 1 MByte. Upstream BAR 2 00000000 DSR translate Memory base pre- 0001 These two settings load effectively disable the memory window (base>limit). Memory limit 0000 preload PPC/CPCI-690 5 - 9... - Page 138 Chip control 0 0000 Chip control 1 0000 Arbiter con- 8000 trol/status Primary SERR# control Secondary SERR# control GPIO control GPIO write data GPIO IR mask User capability ID MSI next item User capability is dis- pointer abled. 5 - 10 PPC/CPCI-690...
- Page 139 This field defines code “Other Bridge”. Primary base class This field defines code “Bridge Device”. Secondary pro- gramming inter- face Secondary sub This field defines class code “Other Bridge”. Secondary base This field defines class code “Bridge Device”. PPC/CPCI-690 5 - 11...
-
Page 140: Pci Bus 1
INTC# INTB# INTD# INTC# INTA# INTD# INTB# PMC Slot 1 - Secondary PCI Agent (Pro- INTA# INTB# cessorPMC specification) INTB# INTC# INTC# INTD# INTD# INTA# PMC Slot 2 INTA# INTB# INTB# INTC# INTC# INTD# INTD# INTA# 5 - 12 PPC/CPCI-690... - Page 141 The PMC 1 interface is a 3.3V compliant PCI interface with its user I/O sig- nals routed towards CompactPCI connector J3. PMC slot 1 can be used for Motorola’s PMC-8260 module. Non-Monarch mode ProcessorPMC mod- ules and Ramix IDE modules (on-module primary IDE interface) are sup- ported.
-
Page 142: Device Bus
32 MByte: F4000000..F5FF.FFFF (default) E28F128J3A-150 (128 Mbit) 64 MByte: F4000000..F7FF.FFFF RTC/NVRAM The board carries a device where 8-bit wide non-volatile SRAM (NVRAM) for backup functionality of 32 KByte size and a real time clock (RTC) are implemented. 5 - 14 PPC/CPCI-690... -
Page 143: Ipmi Controller
• I2C bus 0: Connected to IPMB0 • I2C bus 1: Connected to IPMB1 • I2C bus 2: Connected to the ID-ROM of the PPC/CPCI-690 which con- tains the board information block (BIB) and of the attached boards/modules •... -
Page 144: Temperature Sensor
To check how many SDRs are provided, use the IPMI command “Get Device SDR Info” together with the API of the Motorola VxWorks IPMI driver. To read the SDRs into your system management software, use the IPMI command “Get Device SDR”. -
Page 145: I2C Bus Slave Addresses
Temperature sensor LM75 Available IPMI Drivers Motorola offers an IPMI driver to access the IPMI controller. It is part of the VxWorks 5.4/Tornado 2.0 BSP Rel. 2-1. For further information, refer to the VxWorks 5.4/Tornado 2.0 BSP Rel. 2-1 Installation Guide and Release Notes and the IPMI Specification V. -
Page 146: Local I2C Buses
Depends on used PMC module PMC 2 information block RTB ID- 24C02 This I2C bus can be accessed via: • IPMI controller and Master write/read command • JTAG connector • I2C interface integrated in system controller 5 - 18 PPC/CPCI-690... -
Page 147: Sentinel I2C Bus
Buses Local I2C Buses Figure 18: Connection to I2C Devices SENTINEL I2C Bus This bus connects the SENTINEL with the SROM for configuration regis- ters. A 24C04 device with 4 KBytes is used. PPC/CPCI-690 5 - 19... - Page 148 Local I2C Buses Buses 5 - 20 PPC/CPCI-690...
-
Page 149: Maps And Registers
Maps and Registers... -
Page 151: Overview
Last Reset Status register 1 Page 6-14 Last Reset Status register 2 Page 6-15 LED Control register Page 6-10 Memory Configuration register Page 6-13 Miscellaneous Status register Page 6-11 Software Reset register Page 6-11 Switch Status register Page 6-12 PPC/CPCI-690 6 - 3... -
Page 152: Address Maps
1) Contains up to four PCI memory windows for each PCI bus segment 2) Contains one PCI I/O window for each PCI bus segment 3) Interface of IPMI controller 4) Access to boot flash 1 and 2 is decoded by external logic 6 - 4 PPC/CPCI-690... -
Page 153: Table 26 Pci Memory Address Map
Address Device SENTINEL I2C 1010000x / A0 Serial ROM for SENTINEL registers Local I2C 1010000x / A0 Board information block Local I2C 1010101x / AA RTB information block Local I2C 1010111x / AE IPMI information block PPC/CPCI-690 6 - 5... -
Page 154: Interrupt Map
The GPP pins can be configured via the General Purpose Port registers. The required CPCI-690 settings for the registers are shown in the table below. Table 28: MPP and GPP Register Settings Register Address Data MPP Control 0 F100F000 88888888 MPP Control 1 F100F004 00669977 6 - 6 PPC/CPCI-690... -
Page 155: Table 29 System Controller Mpp Configuration
PowerPC interrupt SMI# Output Active low [12] INT#[0] PowerPC interrupt MCP# Output Active low [11] WDE# Watchdog expired reset Output Active low [10] WDNMI# Watchdog interrupt Output Active low REQ0[4]# PCI bus 0 REQ# Input Active low PPC/CPCI-690 6 - 7... -
Page 156: External Interrupt Sources
5-8 [25] PCI0_INTB# [24] PCI0_INTA# [23] WDNMI# NMI# interrupt from sys- Watchdog Active low tem controller’s internal watchdog [21] IPMI_IRQ2 Interrupts from the on- IPMI controller Active [20] IPMI_IRQ1 board IPMI controller high [19] IPMI_IRQ0 6 - 8 PPC/CPCI-690... - Page 157 PSB backplane without CompactPCI bus. [17] CPCI_DEG# Power supply status inter- CompactPCI Active low rupt from the Compact- PCI backplane [16] CPCI_FAL# Power supply status inter- CompactPCI Active low rupt from the Compact- PCI backplane PPC/CPCI-690 6 - 9...
-
Page 158: Register
00: OFF 01: Green 10: Red 11: Ethernet LED (default) 5..4 ETH_LEDx Controls Ethernet LED 00: Ethernet 1(default) 01: Ethernet 2 10: Ethernet 3 11: Reserved HS_LED Controls blue hot-swap LED. 0: OFF (default) 1: Blue 6 - 10 PPC/CPCI-690... -
Page 159: Software Reset Register
RTB_PRESENT Rear transition board 0: Not present 1: Present PMC1_PRESENT ProcessorPMC in PMC slot 1 0: Not present 1: Present PMC2_PRESENT ProcessorPMC in PMC slot 2 0: Not present 1: Present 7..3 Reserved Reserved 00000: Default PPC/CPCI-690 6 - 11... -
Page 160: Switch Status Register
1: PCI bus 0 reset disabled (switch is ON) SW4_RSV1 Reserved Switch 0: Default (switch is OFF) SW4_RSV2 Reserved Switch 0: Default (switch is OFF) SW4_RSV3 Reserved Switch 0: Default (switch is OFF) Reserved Reserved 0: Default 6 - 12 PPC/CPCI-690... -
Page 161: Memory Configuration Register
110: 2 GByte 111: Reserved FLASH_SIZE User flash configuration 0: 32 MByte 1: 64 MByte SDRAM CAS SDRAM CAS latency 0: CAS latency is 3 1: CAS latency is 2 7..5 FPGA_REVISION FPGA revision status 000: Revision 1.0 PPC/CPCI-690 6 - 13... -
Page 162: Last Reset Status Register 1
0: This type was not reason for last reset. 1: This type was reason for last reset. PMC2_RST PMC Slot 1 Reset (if PPMC is plugged) 0: This type was not reason for last reset. 1: This type was reason for last reset. 6 - 14 PPC/CPCI-690... -
Page 163: Last Reset Status Register 2
Table 37: Last Reset Status Register 2 Base Address: F0000000 Offset: 06 Signal Description Access SW_RST Software requested board reset 0: This type was not reason for last reset. 1: This type was reason for last reset. 7..1 Reserved Reserved 0000000: Default PPC/CPCI-690 6 - 15... - Page 164 Register Maps and Registers 6 - 16 PPC/CPCI-690...
-
Page 165: Battery Exchange
Battery Exchange... - Page 167 Battery Exchange The battery provides a data retention of ten years summing up all periods of actual battery use. Motorola therefore assumes that there usually is no need to exchange the lithium battery except for exchange in case of long- term spare part handling.
- Page 168 Board Installation” page 2-16. For board removal procedure, see “ 2. Remove battery 3. When installing new battery, ensure that dot on battery is in cor- rect position (see figure below). Figure 20: Dot Position on Battery A - 4 PPC/CPCI-690...
-
Page 169: Troubleshooting
Troubleshooting... - Page 171 Backplane voltages for 1. Check that all back- fails device not within the speci- plane voltages are fied range within their specific ranges 2. Check that power sup- ply is capable to drive the respective loads PPC/CPCI-690 B - 3...
- Page 172 Used I/O ranges do not Change application software match so that I/O ranges match I/O cards and host. Connected devices do Device defect Replace device not work Device not connected to Connect device to power sup- power supply B - 4 PPC/CPCI-690...
- Page 173 2. Replace module if spec- ifications do not match Module not installed cor- Check if module fits perfectly rectly in socket. Wrong board configura- Configure the board correctly tion, faulty switch setting for the respective module PPC/CPCI-690 B - 5...
- Page 174 RTB installed on wrong slot Install RTB on adjacent slot position position of the used board. RTB not defined for the Install RTB defined for the used peripheral or system used peripheral or system board board. B - 6 PPC/CPCI-690...
-
Page 175: Index
........1-5, 2-16, 3-3, 3-5 RJ45 ............. 3-7 SDRAM ....... 4-4, 4-7, 5-4, 5-7, 6-13 ..... 1-5, 2-19, 4-12, 4-20, 4-25 SENTINEL ....2-9 Signaling level of PMC interface System controller ..2-16, 3-6, 6-4, 6-7, 6-8 PPC/CPCI-690 I - 1... - Page 176 I - 2 PPC/CPCI-690...
Need help?
Do you have a question about the PPC/CPCI-690 and is the answer not in the manual?
Questions and answers