
Related Manuals for StarTech.com ARMBARDUO


Summary of Contents for StarTech.com ARMBARDUO
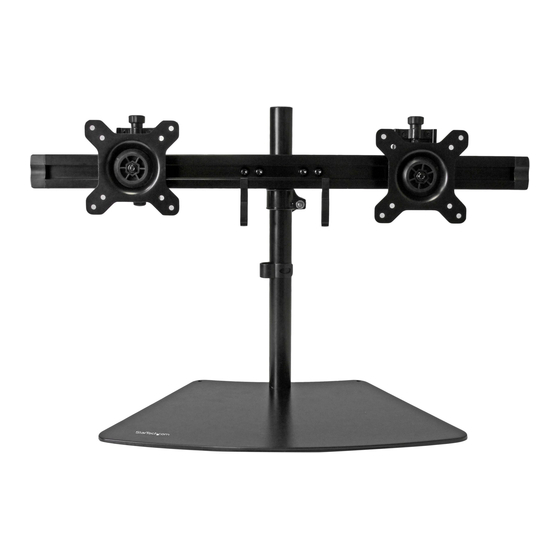
- Page 1 Desk Stand for Dual Monitors Actual product may vary from photos User Manual SKU#: ARMBARDUO For the latest information and specifications visit www.startech.com/ARMBARDUO Manual Revision: 04/23/2019...
-
Page 2: Compliance Statements
This manual may make reference to trademarks, registered trademarks, and other protected names and/or symbols of third-party companies not related in any way to StarTech.com. Where they occur these references are for illustrative purposes only and do not represent an endorsement of a product or service by StarTech.com, or an endorsement of the product(s) to which this manual... -
Page 3: Warning Statements
à votre structure de mur. To view manuals, videos, drivers, downloads, technical drawings, and more visit www.startech.com/support... - Page 4 • Este produto destina-se apenas a uma utilização no interior e não deve ser utilizado no exterior. • Este produto requer uma ligação à terra. Não utilize este produto sem uma ligação à terra. To view manuals, videos, drivers, downloads, technical drawings, and more visit www.startech.com/support...
- Page 5 注意 • 必ず取扱説明書に従って本製品の組み立てを行って下さい。 • 本製品で定められた最大積載重量を超えないようにして下さい。 最大積載重量をオーバーした 場合、 怪我をする恐れや器物破損の恐れがあります。 本製品は、 モニター1台あたり16kgまで支 持できます。 To view manuals, videos, drivers, downloads, technical drawings, and more visit www.startech.com/support...
-
Page 6: Safety Statements
Säkerhetsåtgärder • Kablar (inklusive elkablar och laddningskablar) ska dras och placeras på så sätt att risk för snubblingsolyckor och andra olyckor kan undvikas. To view manuals, videos, drivers, downloads, technical drawings, and more visit www.startech.com/support... -
Page 7: Table Of Contents
Attaching the Monitors - Recessed Installation ................17 Adjusting the Monitors .................19 Tilt Adjustment ............................19 Swivel Adjustment ............................ 19 Tightening the VESA Mount ........................20 Routing the Cables .................20 To view manuals, videos, drivers, downloads, technical drawings, and more visit www.startech.com/support... -
Page 8: Product Diagram
Product Diagram Front View Crossbar Height Adjustment Ring VESA Monitor Mounts (x 2) Cable-Management Clip Pole Baseplate Crossbar Cable- Management Clip To view manuals, videos, drivers, downloads, technical drawings, and more visit www.startech.com/support... -
Page 9: Product Dimensions
Product Dimensions To view manuals, videos, drivers, downloads, technical drawings, and more visit www.startech.com/support... -
Page 10: Product Information
Product Information Package Contents Pole Baseplate Qty: One Qty: One M6x15 mm Screws Cable-Management Clip Qty: Three Qty: One To view manuals, videos, drivers, downloads, technical drawings, and more visit www.startech.com/support... - Page 11 Pole Cap Height Adjustment Ring Qty: One Qty: One Crossbar VESA Monitor Mount Qty: One Qty: Two M4x12 mm Screw M4x30 mm Screw Qty: Eight Eight To view manuals, videos, drivers, downloads, technical drawings, and more visit www.startech.com/support...
- Page 12 Plastic Spacers M3 Hex Key Qty: Eight Qty: One M4 Hex Key Cable-Management Clips Qty: One Qty: Two To view manuals, videos, drivers, downloads, technical drawings, and more visit www.startech.com/support...
-
Page 13: Assembly
Baseplate and into the Pole. Inserting the M6x15 mm Screws into the Baseplate Using the M4 Hex Key, turn the M6x15 mm Screws clockwise to tighten them. To view manuals, videos, drivers, downloads, technical drawings, and more visit www.startech.com/support... -
Page 14: Attaching The Crossbar
Push the Pole Cap down onto the top of the Pole. Attaching the Crossbar Assembly Using the M3 Hex Key, turn the screw in the crossbar clockwise to tighten it and prevent the crossbar from moving To view manuals, videos, drivers, downloads, technical drawings, and more visit www.startech.com/support... -
Page 15: Adjusting The Monitor Plates
Tightening the Crossbar Adjusting the Monitor Plates Loosen the Plates on the Crossbar, by turning the Thumb Screws at the bottom of the plates counterclockwise. To view manuals, videos, drivers, downloads, technical drawings, and more visit www.startech.com/support... - Page 16 Screws at the bottom of the plates clockwise to lock the Plates in place. To move the Plates up or down, turn the Thumb Screws at the top of the Plates counterclockwise or clockwise. To view manuals, videos, drivers, downloads, technical drawings, and more visit www.startech.com/support...
-
Page 17: Attaching The Monitors - Flush Installation
Monitor Mount and into the Mounting Holes on the back of the Monitor. Use a Phillips Screwdriver to tighten the screws. Repeat steps 1 - 2 to install the second Monitor. To view manuals, videos, drivers, downloads, technical drawings, and more visit www.startech.com/support... -
Page 18: Attaching The Monitors - Recessed Installation
Monitor Mount, into four of the Plastic Spacers, and into the Mounting Holes on the back of the Monitor. Use a Phillips Screwdriver to tighten the screws. Repeat steps 1 - 2 to install the second Monitor. To view manuals, videos, drivers, downloads, technical drawings, and more visit www.startech.com/support... - Page 19 Slide each of the VESA Monitor Mounts onto the Plates on the Crossbar. Turn the screw on the side of each of the VESA Monitor Mounts clockwise to tighten the VESA Monitor Mounts in place. To view manuals, videos, drivers, downloads, technical drawings, and more visit www.startech.com/support...
-
Page 20: Adjusting The Monitors
The Monitors can be adjusted on a 360 degree swivel. Place both of your hands on either side of the Monitor and • apply light pressure either left or right. The Monitor will swivel 360 degrees. To view manuals, videos, drivers, downloads, technical drawings, and more visit www.startech.com/support... -
Page 21: Tightening The Vesa Mount
Crossbar and down the Pole so that they are out of your way. Make sure that the cables that you are routing are unplugged before you complete the following steps. To view manuals, videos, drivers, downloads, technical drawings, and more visit www.startech.com/support... - Page 22 Management Clip (pole) over the cables and onto the Pole. You can place the Cable-Management Clip on the front or the back of the Pole, depending on your preference. Routing the Cables To view manuals, videos, drivers, downloads, technical drawings, and more visit www.startech.com/support...
- Page 23 Limitation of Liability In no event shall the liability of StarTech.com Ltd. and StarTech.com USA LLP (or their officers, directors, employees or agents) for any damages (whether direct or indirect, special, punitive, incidental, consequential, or otherwise), loss of profits, loss of business, or any pecuniary loss, arising out of or related to the use of the product exceed the actual price paid for the product.
- Page 24 StarTech.com is an ISO 9001 Registered manufacturer of connectivity and technology parts. StarTech.com was founded in 1985 and has operations in the United States, Canada, the United Kingdom and Taiwan servicing a worldwide market.
Need help?
Do you have a question about the ARMBARDUO and is the answer not in the manual?
Questions and answers