Table of Contents
Advertisement
Available languages
Available languages
Advertisement
Table of Contents

Related Manuals for Nice ALTO


Summary of Contents for Nice ALTO
- Page 1 ALTO Motorisation pour portail à battants FR - Instructions et avertissements pour l’installation et l’utilisation EN - Instructions and warnings for installation and use IT - Istruzioni ed avvertenze per l’installazione e l’uso PL - Instrukcje i ostrze enia do instalacji i u ytkowania...
-
Page 2: Recommandations Générales : Sécurité - Installation - Utilisation
RECOMMANDATIONS GÉNÉRALES : SÉCURITÉ - INSTALLATION - UTILISATION (instructions originales en italien) ––– PHASE 1 ––– INSTRUCTIONS D’INSTALLATION • Avant d’installer la motorisation, contrôler que tous les organes méca- ATTENTION - Instructions importantes pour la sécurité. Il est im- niques sont en bon état, qu’ils sont correctement équilibrés et qu’au- portant de suivre toutes les instructions fournies étant donné... -
Page 3: Description Du Produit Et Application
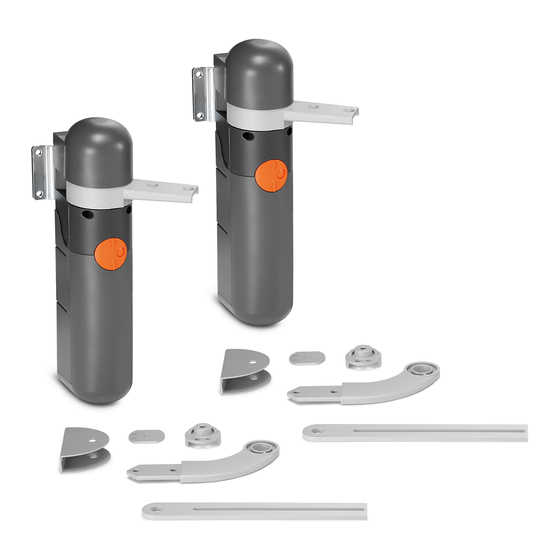
Notes importantes pour la consultation du guide o Dans ce manuel, les mots « système ALTO » se réfèrent à l’ensemble de tous les dispositifs qui forment l’automatisme. o Ce manuel décrit comment réaliser une automatisation complète comme celle montrée dans l’exemple de fig. 4. -
Page 4: Vérifier Les Limites D'application Du Produit
• si le point tombe dans la zone « A » = il est possible d’automa- sement - Le système « ALTO » ne peut pas automatiser un portail qui tiser le portail en utilisant le bras aussi bien de longueur standard (tel n’est pas déjà... - Page 5 3.3 - EFFECTUER LES TRAVAUX AVANT L’INSTALLATION course du vantail, en fermeture et en ouverture. Par conséquent, pour pouvoir installer le système « ALTO » il faudra installer au sol des butées auxiliaires en fermeture et en ouverture (ces butées ne 3.3.1 - Procurer les outils et les matériaux pour le travail...
- Page 6 Connexion Connexion Connexion en « cascade » en « étoile » « mixte » TABLEAU 2 - Caractéristiques des câbles électriques (réf. à la fig. 6 et au paragraphe 3.3.4) Connexion Type de câble (section minimum) Longueur max. autorisée A - Ligne électrique d’alimentation Câble 3 x 1,5 mm²...
-
Page 7: Très Important
Après avoir considéré les points a, b, c, observer la fig. 6 et dessiner sur une feuille de papier un schéma similaire en l’adaptant aux exigences spécifiques de votre installation. Ce schéma servira à guider l’exécution des tranchées et des saignées pour les conduits de protection ainsi qu’à faire une liste complète des câbles nécessaires. -
Page 8: Attention, Très Important
ATTENTION, TRÈS IMPORTANT ! trouvent pas dans l’emballage et ne font pas partie des produits de la gamme Nice Home. À ce point, si à côté du pilier se trouve un mur, un poteau b) - Mesurer l’angle d’ouverture du vantail. - Page 9 INSTALLATION : MONTAGE ET CONNEXIONS DES COMPOSANTS h) - Fixer au sol les butées de fin de course, de manière stable et défini- Attention ! • Toutes les opérations d’installation tive, dans la même position établie au début du paragraphe 3.4. et de connexion doivent être faites avec l’auto- 03.
- Page 10 ~45° ~45° 9 – Français...
- Page 11 A que l’on vient de trouver et tracer à partir de ce point une ligne les chevilles ; fixer ensuite l’opérateur en utilisant des vis et des ron- horizontale, jusqu’à l’intersection avec la ligne verticale tracée précé- delles appropriées. Note - Les vis ne sont pas comprises dans le kit demment.
- Page 12 07. Fixer le bras sur le vantail (fig. 20). a) - Percer le vantail aux endroits marqués ; détacher la patte du bras puis la fixer au vantail du portail avec des vis adéquates. Note - Les vis ne sont pas comprises dans le kit car leur typologie dépend du matériau et de l’épaisseur du vantail dans lequel elles doivent être vissées.
- Page 13 AA (ok) BB (no) AA (ok) Français – 12...
- Page 14 13 – Français...
- Page 15 ATTENTION ! - Se le pilier a une largeur comprise entre 80 et 135 mm, il faut tourner de 90° la patte arrière de fixation de l’opérateur (référence aux paragraphes 4.1A et 4.1B). (360°) 90° 9 mm (max) Français – 14...
- Page 16 D’AUTRES DISPOSITIFS En plus de l’opérateur avec logique de commande (ALTO100C), le sys- tème « ALTO » comprend d’autres dispositifs et accessoires en option qui peuvent être installés à tout moment dans l’automatisation. Les dispositifs nécessaires pour réaliser une automatisation de base sont décrits dans cette Phase 5 ;...
- Page 17 Connexion de l’opérateur ALTO100M (référence au paragraphe 5.1). Français – 16...
- Page 18 Installation et connexion de l’indicateur clignotant FL200 (référence au paragraphe 5.2). 05. A Ø = 6 mm 05. B Ø = 6 mm (flash) (aerial) 17 – Français...
- Page 19 Installation et connexion de une paire de photocellules FH200 (référence au paragraphe 5.3). Led SAFE Ø < 5 mm connecteur pour batterie PR200 / alimentation photovoltaïque SOLEKIT FL200 PH200 ALTO100M fusible FLASH connecteur moteur Led P3 ALTO100C Led P2 Led P1 FLASH STOP ALTO100M...
- Page 20 ALIMENTATION DE LA LOGIQUE ET PROGRAMMATION ––– PHASE 6 ––– ––– PHASE 7 ––– PREMIÈRE MISE EN SERVICE ET PROGRAMMATION DE BASE DE LA LOGIQUE VÉRIFICATION DES CONNEXIONS 7.1 - RECONNAISSANCE DE L’IDENTITÉ DES DISPOSI- 6.1 - CONNECTER LA LOGIQUE À L’ALIMENTATION TIFS CONNECTÉS ÉLECTRIQUE Après les vérifications initiales décrites à...
- Page 21 7.2 - RECONNAISSANCE DE L’ANGLE D’OUVERTURE à moitié » ; si elle est allumée on a sélectionné le « cycle complet ». Pour passer d’une option à l’autre presser encore une fois la touche P3. MAXIMUM DES VANTAUX Après la reconnaissance des dispositifs, il faut faire reconnaître à la 7.4 - VÉRIFICATION DU FONCTIONNEMENT DES logique de commande l’angle d’ouverture maximum des vantaux, à...
- Page 22 ESSAI ET MISE EN SERVICE DE L’AUTOMATISME 09. Tirer lentement le câble d’alimentation vers le bas, jusqu’à laisser un segment de câble suffisant à faire tourner et fermer le bloc d’alimen- tation. 10. Ensuite, positionner correctement le joint dans son logement et fer- mer le couvercle du bloc d’alimentation avec toutes les vis (atten- tion ! - L’absence du joint ou d’une vis peut compromettre l’électro- ATTENTION ! –...
-
Page 23: Mise En Service
(diamètre 5 cm ; longueur 30 cm) qui interrompt la communication optique (fig. 31).Passer le cylindre En général, les dispositifs du système « ALTO » n’ont pas besoin d’être d’abord près de la photocellule TX, puis près de la RX et enfin au soumis à... - Page 24 APPROFONDISSEMENTS A - AUTRES ACTIVITÉS CONCERNANT L’INSTALLATION ET LES CONNEXIONS Certaines opérations pour l’installation et le raccordement prévoient la dépose de la logique et du bloc d’alimentation. La dépose de la logique de commande est nécessaire quand il faut : •...
- Page 25 Pour connecter le SOLEKIT à la logique de commande du système « ALTO », se référer à la fig. 36 et à la procédure qui suit. 01. Extraire la logique de son logement comme décrit au paragraphe A.1.
- Page 26 Si le système « ALTO » est utilisé sur un portail à 1 vantail (un seul opé- pire période de l’année ; ensuite relever la valeur de Am correspon- rateur), le nombre maximum possible de cycles correspondra à...
- Page 27 B - RÉGLAGES AVANCÉS du dispositif reconnu. A.9 - Comment installer et connecter d’autres La logique de commande du système « ALTO » a une série de paramètres réglables qui permettent d’adapter le produit aux exigences spécifiques paires de photocellules de l’automatisme et de ses utilisateurs.
- Page 28 sée pendant environ 1 seconde, avec une pause d’environ 1 seconde 02. Sur l’émetteur, maintenir simultanément la pression sur les touches avant de la presser de nouveau. Cela donnera à la logique de commande T1 et T2 ou T1 et T3 (voir dans le Tableau 9) pendant au moins 5 le temps de reconnaître la commande envoyée par radio.
- Page 29 Tableau 8 - Réglages d’usine et autres options disponibles Paramètre Touches d’accès Valeur disponible à choisir Touche Nb pressions Temps de pause T1 + T2 10 secondes 1 fois 20 secondes (*) 2 fois 40 secondes 3 fois 80 secondes 4 fois Commande « Piéton »...
- Page 30 mande, répéter le point 03 dans les 10 s qui suivent sinon la procé- Tableau 9 dure de mémorisation s’arrêtera automatiquement. Touches Touche pour Pour mémoriser une autre touche répéter la procédure depuis le début. Paramètre d’accès affichage C.4 - Procédure de duplication d’un émetteur exis- Temps de pause T1 + T2 tant, déjà...
- Page 31 E.2 - Signalisations des leds sur la logique de E.3 - Signalisations du clignotant commande Durant la manœuvre, l’indicateur clignotant émet 1 clignotement toutes les secondes ; en présence d’anomalies, il émet des clignotements plus Il y a, sur la logique de commande, une série de leds qui peuvent donner fréquents (toutes les demi-secondes) ;...
- Page 32 Tableau 12 - Signalisations des problèmes de fonctionnement Symptômes Cause probable et solution possible L’émetteur radio n’émet aucun signal (la • Vérifier si les piles sont épuisées, le cas échéant les remplacer. led ne s’allume pas) La manœuvre ne démarre pas et la led •...
-
Page 33: Caractéristiques Techniques Du Produit
–––––––––––– NOTES : • Le kit ALTO101START et ALTO100 est produit par Nice S.p.a. (TV) I. • Dans le but d’améliorer les produits, Nice S.p.a. se réserve le droit d’en modifier à tout moment et sans préavis les caractéristiques techniques, en garantissant dans tous les cas le bon fonctionnement et le type d’uti- lisation prévus. - Page 34 NOTICE D’UTILISATION (à remettre à l’utilisateur final) ––– PHASE 11 ––– presque un tour complet. 04. Il est maintenant possible de déplacer manuellement le vantail dans la position désirée. Il est conseillé de conserver cette notice et de le remettre à 05.
-
Page 35: Déclaration De Conformité Ce
ANNEXE 1 DÉCLARATION DE CONFORMITÉ CE Selon la Directive 2006/42/CE, ANNEXE I, partie A (déclaration CE de conformité pour les machines) –––––––––––––––––––– Le soussigné / la société (nom ou raison sociale de la personne/société qui a mis en service la porte motorisé) : .. -
Page 36: Déclaration Ce De Conformité
––––––––––––––– Note : Le contenu de cette déclaration de conformité correspond à ce qui est déclaré dans le document officiel, déposé au siège de Nice S.p.a., et en particulier à sa dernière révision disponible avant l’impression de ce guide. Ce texte a été réadapté pour des raisons d’édition. -
Page 37: Installation Precautions
GENERAL SAFETY WARNINGS AND PRECAUTIONS (Instructions translated from Italian) ––– STEP 1 ––– • Unless a selector is used, the controls should be installed at least 1.5 m from the ground and must not be accessible • If the opening movement is controlled by a fire-prevention system, CAUTION - Important safety instructions. -
Page 38: Product Description And Intended Use
Important notes on manual consultation o In this manual, the text “ALTO system” refers to the entire series of devices that make up the automation. o This manual describes how to set up a complete automation, such as that shown in fig. 4. Some of these devices and accessories are optional and may not be present in the kit. - Page 39 Therefore, to enable installation of the “ALTO” system, some floor-mounted stops on opening and closing must be fitted (these stops are not supplied in the kit and are not part of the Nice Home product range). WIDTH (m)
-
Page 40: Preliminary Checks For Installation
- Opening travel limit stops (these are not part of the Nice Home prod- manoeuvre, locate the relative values in Table 1 and add them to the uct range;... - Page 41 Connection Connection Connection cascade Star “combined” TABLE 2 - Electric cable specifications (ref. fig. 6 and paragraph 3.3.4) Connection Type of cable (minimum section values) Max. admissible length A - Power line cable 3 x 1,5 mm² (note 1) 30 m (note 2) B - FLASH Flashing light output cable 2 x 0.5 mm²...
- Page 42 These stops are not supplied in the pack and are not part of the Nice Home prod- uct range. b) - Measure the leaf opening angle.
- Page 43 c) - On Graph 3 note the obtained value B on the horizontal axis and 05. Determining the procedure to be followed to complete gear- from this point, trace a vertical line until it intersects the line with your motor installation. maximum leaf opening angle (see example in graph).
- Page 44 INSTALLATION: ASSEMBLY AND CONNECTION OF COMPONENTS 1. remove the slotted arm from the fixing bracket on the leaf; Caution! • All installation operations and con- 2. loosen the bracket screws and move it by a few millimetres in the direction of the gearmotor; nections must be performed with the automation 3.
- Page 45 ~45° ~45° 9 – English...
- Page 46 (*) Warning! - If the post surface width is between 80 and 135 mm, a) - Move the gate leaf to the maximum leaf closing position against the before proceeding with installation, the rear gearmotor fixing bracket travel limit stop. must be turned through 90°.
- Page 47 3. refit the slotted arm on the bracket, close the leaf and ensure that it is aligned in contact with the travel stop and aligned with the other leaf (if present). Caution! - If necessary, repeat point 2 to obtain per- fect closure.
- Page 48 AA (ok) BB (no) AA (ok) English – 12...
- Page 49 13 – English...
- Page 50 CAUTION! - If the length of the gate post is between 80 and 135 mm, the rear gearmotor fixing bracket should be turned through 90° (ref. paragraphs 4.1A and 4.1B). (360°) 90° 9 mm (max) English – 14...
-
Page 51: Other Devices
INSTALLING AND CONNECTING OTHER DEVICES As well as the gearmotor with control unit (ALTO100C) the “ALTO” sys- tem also comprises other optional devices and accessories which can be installed at any time on the automation. The devices required to set up a standard automation are described here in Step 5;... - Page 52 ALTO100M gearmotor connection (ref. paragraph 5.1). English – 16...
- Page 53 Installation and connection of FL200 flashing light (ref. paragraph 5.2). 05. A Ø = 6 mm 05. B Ø = 6 mm (flash) (aerial) 17 – English...
- Page 54 Installation and connection the pair of photocells PH200 (ref. paragraph 5.3). Led SAFE Ø < 5 mm Connector for “PR200” battery SOLEKIT photovoltaic power supply FL200 PH200 ALTO100M fuse FLASH Motor connector Led P3 ALTO100C Led P2 Led P1 FLASH STOP ALTO100M ALTO100C...
- Page 55 CONTROL UNIT POWER SUPPLY AND PROGRAMMING ––– STEP 6 ––– ––– STEP 7 ––– INITIAL START-UP AND STANDARD CONTROL UNIT PROGRAMMING CONNECTION CHECK 7.1 - LEARNING THE IDENTITY OF CONNECTED DEVICES 6.1 - CONNECTING THE CONTROL UNIT TO THE POWER After the initial checks described in Step 6 the control unit must learn MAINS the identity of the devices connected to its terminals “BUS”...
- Page 56 7.2 - LEARNING THE MAXIMUM LEAF OPENING ANGLE 7.4 - CHECKING OPERATION OF THE RADIO TRANSMITTERS After learning the devices, the control unit must learn the maximum leaf opening angle, starting from the closing travel stop. Therefore proceed The control unit incorporates a radio receiver for ECCO5 transmitters as follows.
-
Page 57: Automation Testing And Commissioning
AUTOMATION TESTING AND COMMISSIONING unit cover with all screws (caution! - A missing seal or screw may cause problems with internal electronics). 11. Insert the protective cover on top of the motor. CAUTION! – All operations described in chap- ters 8, 9, 10 may constitute a hazard. Therefore they must be performed exclusively by skilled and qualified personnel, in observance of these instructions and current safety standards appli-... -
Page 58: Device Disposal
In general, the devices in the “ALTO” system do not require special main- tenance; however, periodic inspections will enable the user to maintain system efficiency and ensure correct operation of the safety systems installed. -
Page 59: Further Information
FURTHER INFORMATION A - OTHER TASKS REGARDING INSTALLATION AND CONNECTIONS Some installation and/or connection tasks require removal of the control unit and/or power supply unit. The control unit needs to be removed when the following is required; • control unit replacement (paragraph A.1); •... - Page 60 To connect the SOLEKIT to the “ALTO” control unit, refer to fig. 36 and the following procedure. 01. Remove the control unit from its seat as described in paragraph A.1.
- Page 61 “beep”. select the lowest point of the curve to calculate the worst period If the “ALTO” is used on a single leaf gate (with only one gearmotor), of the year; then read the corresponding value Am (e.g. December, the maximum possible number of cycles corresponds to the value in the January: Am= 200).
-
Page 62: B - Advanced Settings
(or removed from) the “STOP” terminal, the learning procedure must be performed as described in para- The control unit of the ALTO system has a series of modifiable param- graph A.10. eters to enable adaptation of the product to specific needs of the automa- During use of the automation, the control unit generates a stop command tion and relative users. - Page 63 B.2 - List of modifiable parameters (Table 8) C.2 - “Mode I” memorisation procedure • Pause time: this is the time implemented by the control unit after an When this procedure is used, the system automatically associates each opening manoeuvre before automatically closing the leafs. Warning – transmitter key with the following commands: the pause will only be enabled if the “complete cycle”...
- Page 64 Table 8 - Factory settings and other available options Parameter Access keys Value range available No. times pressed Pause Time T1 + T2 10 seconds Once 20 seconds (*) Twice 40 seconds Three times 80 seconds Four times “Pedestrian” command T1 + T2 Opening of 1 leaf to mid-travel Once...
-
Page 65: D - Troubleshooting
At this point the “new” transmitter is memorised on the control unit Table 9 with the same characteristics as the “old” transmitter. Access Key for To memorise other transmitters, repeat the same procedure. Parameter keys display C.5 - Deleting ALL radio transmitters memorised on Pause Time T1 + T2 the control unit... - Page 66 Table 11 - Led signals on control unit LED BUS Status Action Fault Check that the unit is powered; check that the fuses have not been activated; if this is the case check the cause of the fault and replace them with other fuses with the same characteristics.
- Page 67 Table 12 - Signals of operating problems Symptoms Probable cause and possible solution The radio transmitter does not emit any • Check whether the batteries are discharged; replace if necessary. signal (the LED does not light up) The manoeuvre does not start and the •...
-
Page 68: Technical Specifications Of The Product
–––––––––––– NOTES: • The kit ALTO101START and ALTO100 is produced by Nice S.p.a. (TV) I • In order to improve its products, Nice S.p.a. reserves the right to modify the technical characteristics at any time without prior notice. In any case, the manufacturer guarantees their functionality and fitness for the intended purposes. - Page 69 USER MANUAL (to be delivered to the end user) ––– STEP 11 ––– In the event of a gearmotor fault, it is still possible to try release the motor to check whether the fault lies in the release mechanism. This user guide should be stored and handed to all users of the 11.3 –...
-
Page 70: Ec Declaration Of Conformity
ANNEX 1 EC DECLARATION OF CONFORMITY In conformity to Directive 2006/42/EC, ANNEX I, Part A (EC declaration of conformity for machinery) –––––––––––––––––––– The undersigned / company (name or company name of the subject who/that commissioned the motor-driven door) ..................Address: . -
Page 71: Ce Declaration Of Conformity
––––––––––––––– Note: The contents of this declaration correspond to declarations in the official document deposited at the registered offices of Nice S.p.a. and in particular to the last revision available before printing this manual. The text herein has been re-edited for editorial purposes. A copy of the original declaration for each product can be requested from Nice S.p.a. -
Page 72: Avvertenze Installazione
AVVERTENZE GENERALI: SICUREZZA - INSTALLAZIONE - USO (istruzioni originali) ––– PASSO 1 ––– • Assicurarsi che gli elementi di comando siano tenuti lontani dagli orga- ni in movimento consentendone comunque una visione diretta. • A meno che non si utilizzi un selettore, gli elementi di comando vanno ATTENZIONE - Istruzioni importanti per la sicurezza. -
Page 73: Descrizione Del Prodotto E Destinazione D'uso
Note importanti alla consultazione del manuale o In questo manuale, la dicitura “sistema ALTO” fa riferimento all’insieme di tutti i dispositivi che formano l’automa- zione. o Questo manuale descrive come realizzare un’automazione completa come quella mostrata nell’esempio di fig. 4. -
Page 74: Verificare I Limiti D'impiego Del Prodotto
Avvertenza - cade il punto in cui si incrociano: Il sistema “ALTO” non può automatizzare un cancello che non sia già • se il punto cade nell’area “A” = è possibile automatizzare il vostro efficiente e sicuro;... - Page 75 ALL’INSTALLAZIONE ra e in apertura. Pertanto, per poter installare il sistema “ALTO” sarà necessario installare a pavimento dei fermi ausiliari in chiusura e in 3.3.1 - Procurare gli attrezzi e i materiali per il lavoro...
- Page 76 Collegamento Collegamento Collegamento a “Cascata” a “Stella” Misto TABELLA 2 - Caratteristiche dei cavi elettrici (rif. alla fig. 6 e al paragrafo 3.3.4) Collegamento Tipo di cavo (sezione minima) Lunghezza max consentita A - Linea elettrica di alimentazione Cavo 3 x 1,5 mm (nota 1) 30 m (nota 2) B - Uscita lampeggiante FLASH...
- Page 77 su un foglio di carta uno schema simile adattandolo però alle esigenze specifiche del vostro impianto. Questo schema sarà una guida utile per eseguire gli scavi delle tracce per i tubi di protezione e per fare una lista completa dei cavi necessari. 3.3.4 - Scegliere e dimensionare tutti i cavi di collegamento Per scegliere la tipologia dei cavi e tagliare questi alla lunghezza adeguata, consultare la Tabella 2;...
- Page 78 ATTENZIONE, MOLTO IMPORTANTE! massima Apertura e Chiusura dell’anta. Questi fermi non sono presenti nel kit e non fanno parte dei prodotti della linea Nice Home. A questo punto, se a ridosso del pilastro è presente un b) - Misurare l’angolo di apertura dell’anta.
-
Page 79: Installazione: Montaggio E Collegamento Dei Componenti
INSTALLAZIONE: MONTAGGIO E COLLEGAMENTO DEI COMPONENTI h) - Fissare a terra i fermi di finecorsa, in modo stabile e definitivo, nella Attenzione! • Tutte le operazioni di installazione stessa posizione stabilita all’inizio del paragrafo 3.4. e di collegamento devono av venire con l’automa- 03. - Page 80 ~45° ~45° 9 – Italiano...
- Page 81 appena trovata e tracciare, da questo punto, una linea orizzontale, re i tasselli; quindi, fissare il motoriduttore utilizzando viti e rondelle fino ad intersecare la linea verticale tracciata prima. L’incrocio tra le adeguate. Nota - Le viti non sono comprese nel kit in quanto la loro due linee definisce la quota C, cioè...
- Page 82 07. Fissare il braccio sull’anta (fig. 20). a) - Forare l’anta nei punti segnati; staccare la staffa dal braccio e fissarla all’anta del cancello con viti adeguate. Nota - Le viti non sono com- prese nel kit in quanto la loro tipologia dipende dal materiale e dallo spessore dell’anta in cui vanno inserite.
- Page 83 AA (ok) BB (no) AA (ok) Italiano – 12...
- Page 84 13 – Italiano...
- Page 85 ATTENZIONE! - Se il pilastro ha una larghezza compresa tra 80 e 135 mm, è necessario ruotare di 90° la staffa posteriore di fissaggio del motoriduttore (riferimento ai paragrafi 4.1A e 4.1B). (360°) 90° 9 mm (max) Italiano – 14...
- Page 86 ––– PASSO 5 ––– INSTALLA IONE E COLLEGAMENTO DI ALTRI DISPOSITIVI Oltre al motoriduttore con la centrale (ALTO100C) il sistema “ALTO” com- prende altri dispositivi e accessori opzionali che possono essere installati in qualsiasi momento nell’automazione. I dispositivi necessari per realizza- re un’automazione-base sono descritti in questo Passo 5;...
- Page 87 Collegamento del motoriduttore ALTO100M (riferimento al paragrafo 5.1). Italiano – 16...
- Page 88 Installazione e collegamento del segnalatore lampeggiante FL200 (riferimento al paragrafo 5.2). 05. A Ø = 6 mm 05. B Ø = 6 mm (flash) (aerial) 17 – Italiano...
- Page 89 Installazione e collegamento di una coppia di fotocellule PH200 (riferimento al paragrafo 5.3). Led SAFE Ø < 5 mm connettore per batteria PR200 / alimentazione fotovoltaica SOLEKIT FL200 PH200 ALTO100M fusibile FLASH connettore motore Led P3 ALTO100C Led P2 Led P1 FLASH STOP ALTO100M...
-
Page 90: Prima Accensione
ALIMENTAZIONE DELLA CENTRALE E PROGRAMMAZIONE ––– PASSO 6 ––– ––– PASSO 7 ––– PRIMA ACCENSIONE E PROGRAMMA IONE BASE DELLA CENTRALE VERIFICA DEI COLLEGAMENTI 7.1 - APPRENDIMENTO DELL’IDENTITÀ DEI DISPOSITIVI 6.1 - COLLEGARE LA CENTRALE ALL’ALIMENTAZIONE COLLEGATI ELETTRICA Dopo le verifiche iniziali descritte nel Passo 6 è necessario far apprendere alla centrale l’identità... - Page 91 7.2 - APPRENDIMENTO DELL’ANGOLO DI APERTURA 7.4 - VERIFICA DEL FUNZIONAMENTO DEI TRASMETTI- MASSIMA DELLE ANTE TORI RADIO Dopo l’apprendimento dei dispositivi è necessario far apprendere alla La centrale integra un ricevitore radio per trasmettitori ECCO5 (vari model- centrale l’angolo di apertura massima delle ante, a partire dal fermo del li).
-
Page 92: Collaudo E Messa In Servizio Dell'automazione
COLLAUDO E MESSA IN SERVIZIO DELL’AUTOMAZIONE i capicorda verso l’imboccatura da cui fuoriesce il cavo di alimenta- zione). 09. Tirare lentamente il cavo di alimentazione verso il basso, fino a lascia- re un tratto di cavo sufficiente a far ruotare e chiudere l’alimentatore. 10. -
Page 93: Messa In Servizio
(diametro 5 cm; lunghezza 30 cm) che interrompa la comuni- cazione ottica (fig. 31). Passare il cilindro prima vicino alla fotocellula In generale i dispositivi del sistema “ALTO” non necessitano di manuten- TX, poi vicino alla RX e infine al centro tra le due. Quindi, accertarsi zioni particolari;... - Page 94 APPROFONDIMENTI A - ALTRE ATTIVITÀ RIGUARDANTI L’IN- STALLAZIONE E I COLLEGAMENTI Alcune attività di installazione e/o di collegamento prevedono la rimozione della centrale e/o dell’alimentatore. La rimozione della centrale è necessaria quando occorre; • sostituire la centrale (paragrafo A.1); • sostituire il cavo di alimentazione (paragrafo 8.1.1); •...
- Page 95 Il sistema “ALTO” può funzionare anche con il sistema di alimentazione ad energia solare, modello SOLEKIT. Sono previste apposite tecniche per ridurre al minimo il consumo energetico quando l’automatismo è fermo, spegnendo tutti i dispositivi non essenziali al funzionamento (ad esempio, le fotocellule).
- Page 96 5 secondi accompagnato da un “beep” acustico. 03. Scegliere il periodo dell’anno per il quale si desidera fare il calcolo, Se il sistema “ALTO” viene impiegato su un cancello a 1 anta (un solo oppure scegliere il punto più basso della curva se si desidera eseguire motoriduttore), il numero massimo possibile di cicli corrisponderà...
- Page 97 Durante l’uso dell’automazione la centrale provocherà lo stop di una manovra in atto quando si verificherà una qualsiasi variazione rispetto allo La centrale del sistema “ALTO” ha una serie di parametri regolabili che stato del dispositivo appreso. permettono di adattare il prodotto alle esigenze specifiche dell’automa- zione e dei suoi utenti.
- Page 98 C - MEMORIZZAZIONE O CANCELLAZIO- 02. Sul trasmettitore mantenere premuti contemporaneamente i tasti T1 e T2 oppure T1 e T3 (vedere nella Tabella 8) per almeno 5 secondi; NE DEI TRASMETTITORI RADIO quindi, rilasciare i tasti. 03. (entro 3 secondi) Modificare il valore del parametro scelto premendo sul C.1 - Memorizzazione del PRIMO trasmettitore trasmettitore un tasto per un certo numero di volte: il tasto e il numero di pressioni sono specificati nella Tabella 8.
- Page 99 Tabella 8 - Impostazioni di fabbrica e altre opzioni disponibili Parametro Tasti di accesso Valore disponibile da scegliere Tasto N° pressioni Tempo pausa T1 + T2 10 secondi 1 volta 20 secondi (*) 2 volte 40 secondi 3 volte 80 secondi 4 volte Comando “Pedonale”...
-
Page 100: D - Risoluzione Dei Problemi
trasmettitore, il tasto al quale si vuole associare quel comando. Tabella 9 01. Posizionarsi con i due trasmettitori nel raggio di ricezione dell’auto- Tasti di Tasto per mazione e premere per almeno 5 secondi il tasto sul “nuovo” trasmet- Parametro accesso visualizzare titore radio;... - Page 101 Tabella 11 - Segnalazioni dei Led sulla centrale di comando LED BUS Stato Azione Spento Anomalia Verificare se c’è alimentazione; verificare che i fusibili non siano intervenuti; nel caso, verificare la causa del guasto e poi sostituirli con altri dello stesso valore. Acceso Anomalia grave C’è...
- Page 102 Tabella 12 - Segnalazioni di problemi di funzionamento Sintomi Probabile causa e possibile rimedio Il trasmettitore radio non emette alcun • Verificare se le pile sono scariche, eventualmente sostituirle. segnale (il LED non si accende) La manovra non parte ed il LED “BUS” •...
-
Page 103: Caratteristiche Tecniche Del Prodotto
–––––––––––– NOTE: • Il kit ALTO101START e ALTO101START è prodotto da NICE S.p.a. (TV) I. • Allo scopo di migliorare i prodotti, Nice S.p.a. si riserva il diritto di modificare le caratteristiche tecniche in qualsiasi momento e senza preavviso, garantendo comunque le funzionalità e la destinazione d’uso previste. - Page 104 GUIDA ALL’USO (da consegnare all’utilizzatore finale) ––– PASSO 11 ––– 04. A questo punto sarà possibile muovere manualmente l’anta del can- cello nella posizione desiderata. 05. Per ripristinare la funzionalità dell’automatismo, ruotare in senso an- Si consiglia di conservare questa guida all'uso e consegnarla a tiorario la chiave sul perno di sblocco e muovere manualmente l’anta tutti gli utilizzatori dell’automatismo.
-
Page 105: Dichiarazione Di Conformità Ce
ALLEGATO 1 DICHIARAZIONE DI CONFORMITÀ CE Secondo la direttiva 2006/42/CE ALLEGATO I parte A (dichiarazione CE di conformità per le macchine) –––––––––––––––––––– Il sottoscritto / ditta (nome o ragione sociale di chi ha messo in servizio il portone motorizzato): .... -
Page 106: Dichiarazione Ce Di Conformità
––––––––––––––– Nota: Il contenuto di questa dichiarazione corrisponde a quanto dichiarato nel documento ufficiale depositato presso la sede di Nice S.p.a., e in particolare, alla sua ultima revisione disponibile prima della stampa di questo manuale. Il testo qui presente è stato riadattato per motivi editoriali. - Page 107 OG LNE ZALECENIA I OSTRZE ENIA DOT CZ CE BEZPIECZE ST A (Instrukcja przet umaczona z j zyka oskiego) ––– KROK 1 ––– OSTRZE ENIA NA TEMAT MONTA U • Przed zamontowaniem silnika, nale y sprawdzi stan wszystkich cz - U AGA - a ne instrukcje bezpiecze st a.
- Page 108 4. Niekt re urz dzenia i wyposa enie wymienione w niniejszej instrukcji s opcjonalne i mog nie by obecne w zestawie. Aby uzyska pe ny przegl d urz dze , nale y si zapozna z katalogiem produkt w linii Nice Home lub odwiedzi stron www.niceforyou.com.
- Page 109 W celu poznania minimalnej wagi dopuszczonej do zapewni wystarczaj c ilo miejsca do wykonania manewru r czne- u ycia z systemem ALTO , nale y dzia a w nast puj cy spos b: go odblokowania si ownika. a) - zmierzy szeroko...
- Page 110 ALTO , nale y zainstalowa na pod o u niezb dne do wykonania prac. Upewni si , e s one w dobrym stanie i dodatkowe blokady w pozycji zamkni cia i otwarcia (blokady te nie s s zgodne z wymogami lokalnych przepis w bezpiecze stwa.
- Page 111 Po czenie w for- Po czenie w Po czenie mie kaskady formie gwiazdy mieszane TABELA 2 - Parametry kabli elektrycznych (odn. do rys. 6 i do paragrafu 3.3.4) Po czenie Typ kabla (przekr j minimalny ) Maks. dopuszczona d ugo A - Linia zasilaj ca Kabel 3 x 1,5 mm (u aga 1)
- Page 112 go , patrz Tabela 2; nast pnie, przy pomocy schematu wykre lonego poprzednio (patrz paragraf 3.3.3), dokona pomiar w w celu okre lenia d ugo ci ka dego kabla. U aga! - D ugo ka dego kabla nie mo e przekracza maksymalnej d ugo ci okre lonej w Tabeli 2.
- Page 113 Nice Home. b) - mierzenia k ta otwarcia drzwiczek. na, s up lub inny sta y element, celu zrozumienia, czy element ten b dzie utrudnia lub nie kompletny obr t 04.
- Page 114 MONTA : MONTA I POD CZANIE CZ ostateczny w tej samej pozycji ustalonej na pocz tku paragrafu 3.4. U aga! • szystkie czynno ci monta o e i po - 03. Spra dzi dok adne domkni cie skrzyd a. czenio e musz ykonane z automatyk a) - amkn ca kowicie skrzyd o i upewni si , e opiera si ono na blo-...
- Page 115 ~45° ~45° 9 – Polski...
- Page 116 z wyznaczon wcze niej pionow lini . Przeci cie obu linii okre la a ich rodza zale y od materia u i grubo ci s upa, kt rym b d odleg o C, tj. odleg o , jaka musi yst po a mi dzy umieszczone.
- Page 117 a ich rodza zale y od materia u i grubo ci skrzyd a, kt rym b d umieszczone. b) - Przymocowa rami do uchwytu, wk adaj c sworze i pier cie zabezpieczaj cy. a ne - Upewni si , e uchwyt i rami s idealnie wypoziomowane.
- Page 118 AA (ok) BB (no) AA (ok) Polski – 12...
- Page 119 13 – Polski...
- Page 120 U AGA! - e eli s up posiada d ugo zakresie od 80 do 135 mm, nale y obr ci o 90° tylny uch yt mocuj cy si o nika (odniesienie do paragraf w 4.1A i 4.1B). (360°) 90° 9 mm (max) Polski –...
- Page 121 MONTA I POD C ENIE INN CH UR Opr cz si ownika z central (ALTO100C), system ALTO zawiera inne urz dzenia i urz dzenia dodatkowe, kt re mog by zamontowane w automatyce w ka dej chwili. Urz dzenia konieczne do wykonania auto- matyki-podstawy s opisane w Kroku 5;...
- Page 122 Pod czenie si o nika ALTO100M (patrz paragraf 5.1). Polski – 16...
- Page 123 Monta i pod czenie lampy ostrzega czej FL200 (patrz rozdzia 5.2). 05. A Ø = 6 mm 05. B Ø = 6 mm (flash) (aerial) 17 – Polski...
- Page 124 Monta i pod czenie pary fotokom rek PH200 (patrz rozdzia 5.3). Led SAFE Ø < 5 mm z cze do akumulatora PR200 / zasilanie foto oltaiczne SOLEKIT FL200 PH200 ALTO100M bezpiecznik FLASH z cze sil- nika Dioda LED P3 ALTO100C Dioda LED P2 Dioda LED P1 FLASH...
- Page 125 ZASILANIE CENTRALI I PROGRAMO ANIE ––– KROK 6 ––– ––– KROK 7 ––– PIERWS E W C ENIE I KONTROLA PO PROGRAMOWANIE PODSTAWOWE CENTRALI 6.1 - POD CENTRAL DO ZASILANIA ELEK- 7.1 - CZ T ANIE POD CZON CH URZ DZE TR CZNEGO Po wykonaniu kontroli pocz tkowych opisanych w Kroku 6, nale y wczy- ta do centrali urz dzenia pod czone do jej zacisk w BUS i STOP .
- Page 126 7.2 - CZ T ANIE MAKS MALNEGO K TA OT ARCIA cykl automatyczny . W celu przej cia z jednej opcji na drug , nale y ponownie nacisn przycisk P3. SKRZ DE 7.4 - KONTROLA FUNKC ONO ANIA NADA NIK Po wczytaniu urz dze nale y wczyta do centrali k t maksymalnego RADIO otwarcia skrzyde , poczynaj c od blokady kra cowej w pozycji zamkni -...
- Page 127 ODBI R I PRZEKAZANIE AUTOMAT KI DO EKSPLOATAC I 09. Lekko poci gn kabel zasilaj cy, pozostawiaj c odcinek wystarczaj cy do obr cenia i zamkni cia zasilacza. 10. Nast pnie, umie ci uszczelki w odpowiednim gnie dzie i zamkn pokryw zasilacza przy u yciu wszystkich rub (u aga! - Brak uszczelki lub ruby mo e zak ci prac wewn trznych cz ci elek- tronicznych).
- Page 128 Sprawdzi , czy urz dzenie zadzia a we wszystkich przy- Urz dzenia systemu ALTO nie wymagaj szczeg lnej konserwacji; w padkach, przechodz c ze stanu aktywnego w stan alarmowy i vice...
- Page 129 INFORMAC E DODATKO E A - INNE CZ NNO CI DOT CZ CE MON- TA U I PO Niekt re czynno ci instalacyjne i/lub po czeniowe wymagaj wyj cie centrali i/lub zasilacza. Wyj cie centrali jest konieczne, gdy trzeba: • wymieni central (paragraf A.1); •...
- Page 130 W ten spos b, ca a dost pna energia zebrana w akumula- torze, zostanie u yta do poruszania bramy. W celu po czenia SOLEKIT do centrali steruj cej systemu ALTO , odnie si do rys. 36 i nast puj cej procedury.
- Page 131 SOLEKIT, odnale krzyw odnosz c si do stopni szero- Je eli system ALTO b dzie stosowany do bramy z 1 skrzyd em (tylko ko ci geograficznej miejsca (przyk ad: 45 N). jeden si ownik), maksymalna liczba mo liwych cykli b dzie odpowiada 03.
- Page 132 STOP”, nale y ykona procedur czyty ania opisan para- Centrala systemu ALTO posiada seri regulowanych parametr w umo - grafie A.10. liwiaj cych dostosowanie produktu do specyficznych wymaga automa- Podczas u ycia automatyki, centrala spowoduje zatrzymanie manewru w tyki i u ytkownik w.
- Page 133 CZ T ANIE LUB KASO ANIE B.2 - Lista programo alnych parametr (Tabela 8) NADA NIK RADIO • Czas przer y: jest to czas, na jaki zezwala centrala po wykonaniu manewru otwarcia, przed automatycznym zamkni ciem skrzyde . Ostrze enie – Przerwa b dzie aktywna, wy cznie, gdy zostanie C.1 - c yty anie PIER S nadajnik...
- Page 134 Tabela 8 - Ustawienia fabryczne i inne dost pne opcje Parametr Przycisk dost pu Dost pna arto Przycisk L. naci ni Czas przer y T1 + T2 10 sekund 1 raz 20 sekund (*) 2 razy 40 sekund 3 razy 80 sekund 4 razy Polecenie...
- Page 135 – je eli natomiast nadajnik przeznaczony do wczytania jest wczytany w Trybie Tabela 9 II, w chwili za dania naci ni cia przycisku konieczne jest naci ni cie na sta- rym nadajniku przycisku z poleceniem przeznaczonym do powielenia i na Przyciski Przycisk do Parametr...
- Page 136 Tabela 11 - Sygnalizacje diod LED na centrali steruj cej Dioda LED BUS Stan Dzia anie gaszona Anomalia Sprawdzi obecno zasilania; sprawdzi , czy nie zadzia a y bezpieczniki; ewentualnie zlokalizowa przyczyn usterki i wymieni bezpieczniki na inne o tej samej warto ci i charakterystyce. a wiecona Powa na anomalia Obecno...
- Page 137 Tabela 12 - Sygnalizacje problemy operacyjne Oznaki Pra dopodobna przyczyna i mo li e rodki zaradcze Nadajnik nie wysy a adnych sygna w • Sprawdzi , czy baterie nie s roz adowane. W razie potrzeby wymieni baterie. (dioda LED si nie wieci) Manewr si nie rozpoczyna i dioda LED •...
- Page 138 –––––––––––– U AGI: • estaw ALTO101START i ALTO100 zosta wyprodukowany przez NICE S.p.a. (TV) I. • Firma Nice zastrzega sobie prawo wprowadzania zmian parametr w technicznych w asnych produkt w w kt rejkolwiek chwili i bez uprzedzenia, ale gwarantuj c ich funkcjonalno i przewidziane zastosowanie.
-
Page 139: Ostrze Enia
INSTRUKC A OBS UGI (do dostarczenia ko co emu u ytko niko i) ––– KROK 11 ––– 03. Przekr ci klucz odblokowuj cy w prawo, wykonuj c prawie pe ny obr t. 04. Teraz mo na przesun r cznie skrzyd o bramy po o enie. Zaleca si przecho y anie instrukcji i udost pnienie jej 05. - Page 140 CZNIK 1 DEKLARAC A ZGODNO CI CE godnie z dyrektyw 2006/42/WE, A C NIK I, cz A (deklaracja zgodno ci CE dla maszyn) –––––––––––––––––––– Ni ej podpisany/firma (nazwisko lub nazwa firmy, kt ra odda a do u ytku bram z nap dem): ....
- Page 141 Adres: Via Pezza Alta N°13, 31046 Rustignè di Oderzo (TV) Italy Osoba upo a niona do sporz dzenia dokumentacji technicznej: NICE S.p.A. – Via Pezza Alta N°13, 31046 Rustignè di Oderzo (TV) Italy Typ produktu: Si ownik elektromechaniczny 24 Vdc...
- Page 142 Service Après Vente par téléphone ou par email : 0 820 859 203 Service 0,15 €/min + prix appel niceservice@niceforyou.com Merci de ne pas retourner le produit en magasin Worldwide Customer Service customerservice@niceforyou.com Nice S.p.A. Via Pezza Alta, 13 31046 Oderzo TV Italy www.niceforyou.com info niceforyou.com...
Need help?
Do you have a question about the ALTO and is the answer not in the manual?
Questions and answers