
Related Manuals for Nice RD400


Summary of Contents for Nice RD400
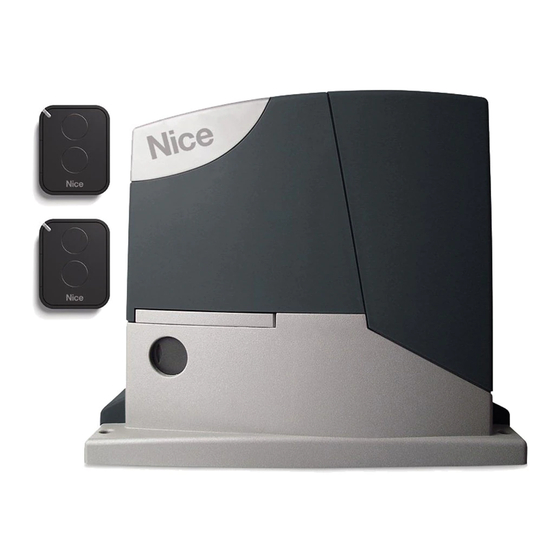
- Page 1 Nice RD400 For sliding gates EN - Instructions and warnings for installation and use...
-
Page 3: Table Of Contents
CONTENTS GENERAL WARNINGS: SAFETY - INSTALLATION - USE 1 - PRODUCT DESCRIPTION AND INTENDED USE 2 - OPERATING LIMITS 3 - INSTALLATION 4 - ELECTRICAL CONNECTIONS 4.1 - Types of electrical cables 4.2 - Electrical cable connections 5 - STARTING THE AUTOMATION AND CHECKING THE CON- NECTIONS 5.1 - Selecting the direction 5.2 - Connecting the automation to the mains electricity... -
Page 4: General Warnings: Safety - Installation - Use
GENERAL WARNINGS: SAFETY - INSTALLATION - USE (instructions translated from Italian) The following warnings are taken directly from the Regulations and apply, as far as possible, to the product described herein WARNING Important safety instructions. Observe all the instructions as improper installation may cause serious damage WARNING Important safety instructions. -
Page 5: Product Description And Intended Use
PRODUCT DESCRIPTION AND INTENDED USE ROAD (RD400) is an electromechanical gearmotor for the automatic movement of residential sliding gates; it is equipped with an electronic control unit with incorporated receiver for radio remote control. ROAD operates with electrical power. In the event of a power failure, the gearmotor can be released with an appropriate button in order to move the door manually. - Page 6 Before installing the system, check the gearmotor’s overall dimensions (Fig. 3) and installation measurements (Fig. 4): 300 mm 195 mm 0 – 10 mm 0 – 10 mm 192 mm 192 mm 330 mm 0 – 50 mm 0 – 50 mm 330 mm Dig the foundations and arrange the tubes for the electri- cal cables...
- Page 7 Wait for the concrete to harden. Secure the gearmotor: a - remove the top nuts of the anchor bolts b - place the gearmotor on the anchor bolts: make sure that it lies parallel to the gate leaf c - insert the washers and nuts provided and tighten them slightly d - adjust the gearmotor’s height by tightening the adjust- er grub screws: position the pinion at the right height by...
- Page 8 h - manually open the gate leaf fully i - place the first section of the rack on the gearmotor’s pinion: make sure that it corresponds to the start of the gate leaf and that there is a gap of 1–2 mm between the rack and the pinion (this so as to prevent the gate leaf weight from bearing on the gearmotor) l - secure the rack section...
- Page 9 n - cut any excess rack off the end Slide the gate open and closed by hand to check that the rack is properly aligned with the pinion. N.B.: make sure that there is a gap of 1–2 mm between the rack and pinion for the entire length of the gate 1÷2 mm Strongly tighten the nuts for fixing the gearmotor to the foundation plate and cover the nuts with the relevant caps...
- Page 10 CLOSE: a - slide the gate leaf closed by hand, stopping it 2/3 cm before the mechanical stop b - slide the limit switch bracket along the rack in the close direction until the limit switch intervenes (a “click” will be heard) c - after hearing the “click”, move the bracket further forward by 2 cm (minimum) d - secure the bracket to the rack with the grub screws provided 2-3 cm...
-
Page 11: Electrical Connections
7 - 8 FLASH - on this output it is possible to connect a Nice warning light (for the relevant models see Chapter 13 - Technical specifications). During the manoeuvre the light flashes at intervals of 0.5 s For the electrical connections, proceed as described below and refer to Fig. 7:... -
Page 12: Starting The Automation And Checking The Connections
FLASH 1 2 3 4 5 IBT4N STARTING THE AUTOMATION AND CHECKING THE CONNECTIONS 5.1 - Choosing the direction Choose the direction of the opening manoeuvre depending on the gearmotor’s position in relation to the gate leaf: - if the gate must open to- wards the left, shift the selector to the left (Fig. -
Page 13: Connecting The Automation To The Mains Electricity
5.2 - Connecting the automation to the mains electricity WARNING! – The automation must be connected to the mains electricity by an expert and qualified electrician, in accordance with established laws, standards and local regulations. Proceed as described below Manually release the gearmotor so that the gate can be opened and closed Move the gate leaf to the halfway position of its path Manually lock the gearmotor Power the automation and verify:... -
Page 14: Testing And Commissioning
TESTING AND COMMISSIONING These are the most important phases in the automation’s arrangement to ensure maximum system safety. They must be carried out by a qualified and expert technician who must define the necessary tests to verify the solutions adopted to counter any risks present, and check compliance with the laws, regulations and standards: in particular, with all the requirements of the EN 13241-1, EN 12445 and EN 12453 standards. -
Page 15: Programming
The force adjustment is an important safety factor and must be done with the utmost care by qualified technicians. Important! - Adjust the force sufficiently to enable the gate to move as intended; higher force values to those necessary for moving the gate can cause injury to animals and persons or damage to property if the gate collides with an obstacle Before commissioning the automation, adequately inform the owner in writing regarding the attendant residual risks PROGRAMMING... -
Page 16: Recognition Of The Gate Opening And Closing Positions
7.3 - Recognition of the gate opening and closing positions It is necessary for the control unit to recognise the gate leaf opening and closing positions; during this phase the length of the gate leaf is measured between the closing and opening limit switches, as it is necessary to calculate the slowdown and partial opening points. Besides the positions, the STOP input configuration is detected and memorised in this phase in addition to the presence or absence of the connection in “Phototest”... -
Page 17: Programming The Level 1 Functions (On-Off Functions)
7.6.2 - Programming the Level 1 functions (ON-OFF functions) By default, Level 1 functions are all set to “OFF” but can be modified at any time as described in Table 6. Take care during modification proce- dures, as there is a maximum time interval of 10 seconds between pressing of different buttons; otherwise the procedure terminates automati- cally and stores the changes made up to that time. -
Page 18: Transmitter Memorisation
Wait 10 seconds to exit the programming mode after the maximum time interval 10 s Steps 03 and 07 can be repeated during the same programming phase to modify multiple parameters 7.7 - Transmitter memorisation Each transmitter to be used in the system must be memorised in the control unit’s radio receiver; the transmitters can be memorised in two modes: Mode 1 and Mode 2 (Paragraphs 7.7.1 and 7.7.3). -
Page 19: Deleting All Memorised Transmitters From The Memory
On the NEW transmitter press and release the button slowly once Repeat the procedure for each transmitter to be memorised 7.9 - Deleting all memorised transmitters from the memory Warning! - This procedure can ONLY be performed if the radio memory has been unlocked. Table 14 - Transmitter deletion procedure Press and hold the radio button on the control unit up to Step 02... -
Page 20: Adding Or Removing Devices
FURTHER INFORMATION 8.1 - Adding or removing devices It is possible to add or remove devices at any time; in particular, various types of devices can be connected to the STOP input, as described in the following paragraphs; for the relevant procedure see Paragraph 7.3 (“Recognition of the gate opening and closing positions”). STOP input STOP is the input that causes the immediate interruption of the manoeuvre, followed by a brief inversion. -
Page 21: Buffer Battery
8.2 - Buffer battery ROAD comes with the optional buffer battery accessory model PS124 (1.2 Ah with integrated battery charger). To connect the buffer battery, proceed as shown below. WARNING! - The buffer battery should only be connected to the control unit after completing all the installation and programming phases, because the battery is an emergency power supply. -
Page 22: Full Deletion Of The Memory
8.4 - Full deletion of the memory When full deletion of the memory is required, to restore the default settings, perform the following procedure with the motor stationary: Table 16 - Procedure for fully deleting the memory Press and hold buttons s and t simultaneously for 3 seconds. When all the LEDs light up simultaneously, release the buttons. -
Page 23: Signals Of Leds On The Control Unit
8 flashes Command already present. Another command is already present. Remove the command present to be able to 1-sec pause send other commands. 8 flashes 10 flashes Manoeuvre time-out or lack of The time-out denotes that the manoeuvre is too long. Shorten the manoeuvre time by 1-sec pause motor power during the position increasing the speed or balancing the gate to reduce the motor’s effort. -
Page 24: Troubleshooting
TROUBLESHOOTING Table 20 contains useful instructions to help you solve malfunctions or errors that may occur during the installation stage or in case of fault. Table 20 - Troubleshooting Problem Solution The radio transmitter does not control the gate Check to see if the transmitter batteries are exhausted and replace them if necessary. and the LED on the transmitter does not light The radio transmitter does not control the gate - Check whether the transmitter has been memorised correctly in the radio receiver. -
Page 25: Technical Specifications
TECHNICAL SPECIFICATIONS All technical specifications stated herein refer to an ambient temperature of 20°C (± 5°C). • Nice S.p.A. reserves the right to modify its products at any time deemed necessary, while nonetheless maintaining the same intended use and functionality. -
Page 26: Ec Declaration Of Conformity
“partly-completed machinery” Note - The contents of this declaration correspond to that stated in the official document filed in the offices of Nice S.p.A. and, in particular, the latest version thereof available prior to the printing of this manual. The text herein has been re-edited for editorial purposes. A copy of the original declaration can be requested from Nice S.p.A. -
Page 27: User Manual (End User Version)
USER GUIDE (to be handed to the end user) This user guide should be stored and handed to all users of the automation. WARNINGS • Monitor the gate while it is moving and keep at a safe distance until it is fully open or closed; do not transit through it until the gate is fully open and stationary. - Page 28 Nice SpA Via Pezza Alta, 13 31046 Oderzo TV Italy www.niceforyou.com info@niceforyou.com...
Need help?
Do you have a question about the RD400 and is the answer not in the manual?
Questions and answers
where is the transmitter battery to replace it