Table of Contents
Advertisement
Quick Links
Advertisement
Table of Contents

Related Manuals for ADJ HYDRO BEAM X1


Summary of Contents for ADJ HYDRO BEAM X1
- Page 1 HYDRO BEAM X1 User Instructions...
- Page 2 All non-ADJ Products, LLC brands and product names are trademarks or registered trademarks of their respective companies. ADJ Products, LLC and all affiliated companies hereby disclaim any and all liabilities for property, equipment, building, and electrical damages, injuries to any persons, and direct or indirect economic...
-
Page 3: Table Of Contents
DMX Addressing DMX Channel Modes Gobos System Menu WiFly Control Error Codes Dimensional Drawings Updating the Software Power Linking I Cleaning Limited Warranty (USA Only) Technical Specifications ADJ Products, LLC - www.adj.com - Hydro Beam X1 User Manual Page 2... -
Page 4: Introduction
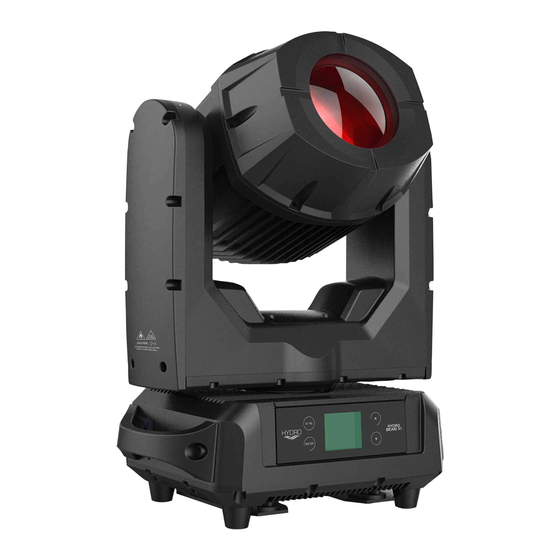
Do not return this unit to your dealer without first contacting customer support. Introduction: The ADJ Hydro Beam X1 is a DMX intelligent, IP rated, high powered, moving head fixture. To optimize the performance of this product, please read these operating instructions carefully to familiarize yourself with the basic operations of this unit. - Page 5 Hydro Beam X1 Warranty Registration The Hydro Beam X1 carries a 2 year limited warranty. Please fill out the enclosed warranty card to validate your purchase. All returned service items whether under warranty or not, must be freight pre- paid and accompany a return authorization (R.A.) number. The R.A. number must be clearly written on the outside of the return package.
- Page 6 Damages and/or performance issues resulting from installation in a marine and/or coastal environment will void the manufactures warranty and will NOT be subject to any warranty claims and/or repairs. ADJ Products, LLC - www.adj.com - Hydro Beam X1 User Manual Page 5...
-
Page 7: Safety Guidelines
(including amplifiers) that produce heat. • The fixture should be serviced by qualified service personnel when the appliance does not appear to operate normally or exhibits a marked change in performance. ADJ Products, LLC - www.adj.com - Hydro Beam X1 User Manual Page 6... - Page 8 HAS REACHED ROOM TEMPERATURE BEFORE POWERING ON. NEVER LOOK DIRECTLY INTO THE LIGHT SOURCE! RETINA INJURY RISK - MAY INDUCE BLINDNESS! SENSITIVE PERSONS MAY SUFFER AN EPILEPTIC SHOCK! ADJ Products, LLC - www.adj.com - Hydro Beam X1 User Manual Page 7...
- Page 9 Consistent operational breaks will ensure fixture will function properly for many years. ONLY use the original packaging and materials to transport the fixture in for service. ADJ Products, LLC - www.adj.com - Hydro Beam X1 User Manual Page 8...
- Page 10 LEDs. This issue is not specific only to ADJ lighting fixtures, it is a common issue with lighting fixtures from all manufacturers. Although there is no true way to fully prevent this issue from happening, the guidelines below can prevent any potential damage from occurring if followed.
-
Page 11: Overview
4. LCD Menu Control Display 5. DOWN Button 6. UP Button 7. Service Port 8. IP65 Locking 5-Pin XLR Connectors In/Out 9. Gore Valve 10. IP65 Locking Power Connectors In/Out ADJ Products, LLC - www.adj.com - Hydro Beam X1 User Manual Page 10... -
Page 12: Discharge Lamp Warning
NEVER operate this fixture with ANY of the protective covers removed. These covers have been specially designed to shield against UV radiation. ADJ Products, LLC - www.adj.com - Hydro Beam X1 User Manual Page 11... - Page 13 Lamp Life may vary depending on several factors including but not limited to: Enviromental Conditions, Power/Voltage, Usage Patterns (On-Off Cycling), Control, and Dimming. ADJ Products, LLC - www.adj.com - Hydro Beam X1 User Manual Page 12...
-
Page 14: Lamp Installation
4. Use a flat head screwdriver to turn the connected to the lamp. lamp centering screw clockwise until the lamp slides out of its holding mechanism on the right side. ADJ Products, LLC - www.adj.com - Hydro Beam X1 User Manual Page 13... - Page 15 7. Reconnect the (2x) spade terminals to the lamp and replace the cover and tighted the (4x) allen head screws. ADJ Products, LLC - www.adj.com - Hydro Beam X1 User Manual Page 14...
-
Page 16: Torque Settings & Ip Tester
CAUTION! DO NOT OVER TORQUE SCREWS AS THIS CAN CAUSE LEAKAGE ISSUES! TO CONFIRM THE IP65 INTENGRITY AFTER A LAMP REPLACEMENT, TEST THE FIXTURE USING THE ELATION IP TESTER. CONTACT ELATION SERVICE FOR MORE DETAILS. ADJ Products, LLC - www.adj.com - Hydro Beam X1 User Manual Page 15... -
Page 17: Screw Locations
Hydro Beam X1 Screw Locations ADJ Products, LLC - www.adj.com - Hydro Beam X1 User Manual Page 16... - Page 18 NEVER stand directly below the fixture when rigging, removing, or servicing. Allow approximately 60 minutes for the fixture to cool down before servicing. ADJ Products, LLC - www.adj.com - Hydro Beam X1 User Manual Page 17...
-
Page 19: Fixture Installation
Insert the end in the carabine and tighten the safety screw. CLAMP AND OMEGA BRACKET SET UP SAFETY CABLE ATTACHMENT POINTS OMEGA BRACKET ATTACHMENT POINTS CLAMP OMEGA BRACKET SAFETY CABLE ADJ Products, LLC - www.adj.com - Hydro Beam X1 User Manual Page 18... -
Page 20: Connections
NOT DROP IF THE CLAMP FAILS. CONNECTIONS. The Hydro Beam X1 is fully operational in three different mounting positions, hanging upside-down, mounted sideways on trussing, or set on a flat level surface. Be sure this fixture is kept at least 12m (40ft) away from any flammable materials (decoration etc.). - Page 21 GREASE (AVAILABLE AT MOST ELECTRICAL SUPPLIERS) TO PREVENT WATER CORROSION AND/OR ELECTRICAL SHORT CIRCUIT. TO MAINTAIN IP65 RATING INTEGRITY AND PREVENT WATER FROM ENTERING THE FIXTURE, ALL UNUSED CONNECTION RUBBER CAPS MUST BE SEALED. ADJ Products, LLC - www.adj.com - Hydro Beam X1 User Manual Page 20...
- Page 22 DMX chain. Data Cable (DMX Cable) Requirements (For DMX Operation): The Hydro Beam X1 can be controlled via DMX-512 protocol. Your unit and your DMX controller requires a 5-pin XLR connector for data input and data output.
-
Page 23: Dmx Addressing
In the case of the Hydro Beam X1, when in 11 Channel you should set the starting DMX address of the first unit to 1, the second unit to 12 (11 + 1), the third unit to 23 (12 + 11), and so on. (See the chart below for more details.) -
Page 24: Dmx Channel Modes
053-054 Medium Yellow + CTB 055-056 057-058 CTB + UV 059-060 061-063 UV + White 064-127 Indexing 128-189 Clockwise Rotation Fast-Slow Stop 190-193 194-255 Counter-Clockwise Rotation Slow-Fast ADJ Products, LLC - www.adj.com - Hydro Beam X1 User Manual Page 23... - Page 25 000-031 Shutter Closed 032-063 Shutter Open 064-095 Strobing Slow-Fast 096-127 Shutter Open 128-159 Pulse Effect in Sequences 160-191 Shutter Open 192-223 Random Strobing Slow-Fast 224-255 Shutter Open ADJ Products, LLC - www.adj.com - Hydro Beam X1 User Manual Page 24...
-
Page 26: Gobos
Gobo 2 Gobo 3 Gobo 4 Gobo 5 Gobo 6 Gobo 7 Gobo 8 Gobo 9 Gobo 10 Gobo 11 Gobo 12 Gobo 13 Gobo 14 Gobo 15 ADJ Products, LLC - www.adj.com - Hydro Beam X1 User Manual Page 25... -
Page 27: System Menu
If the MENU button is released before the timer reaches 9 seconds and/or is unlocked, the display will not unlock and the time will be reset. NOTE: The timer will not appear in the display if the lock function is disabled. ADJ Products, LLC - www.adj.com - Hydro Beam X1 User Manual Page 26... - Page 28 Factory Restore: Yes / No - Passcode = 011 Restore Factory Settings 000-255 Tilt 000-255 Color 000-255 MANUAL Gobo 000-255 Manual Control CONTROL Prism 000-255 RPrism 000-255 Shutter 000-255 Dimmer 000-255 Frost 000-255 ADJ Products, LLC - www.adj.com - Hydro Beam X1 User Manual Page 27...
- Page 29 Last 10 Fixture Error Codes Error Logs Reset Error Log: Yes / No (Pass Code = 050) Clear the Error Log Software Version VX.XX Current Software Version ADJ Products, LLC - www.adj.com - Hydro Beam X1 User Manual Page 28...
- Page 30 (1) Current Maximum Temperature - Maximum fixture temp. that has been recorded, before reset and after reset. (2) Maximum Temperature - Overall maximum fixture temp. that has been recorded. (Not Resettable). (3) DMX Value options depend on the DMX Channel mode setting. ADJ Products, LLC - www.adj.com - Hydro Beam X1 User Manual Page 29...
- Page 31 MANUAL CONTROL - This menu is for manual testing and manual control. Pan, tilt, color wheel, gobo wheel, prism, prism rotation, shutter, dimmer, and frost can all be tested/adjusted. ADJ Products, LLC - www.adj.com - Hydro Beam X1 User Manual Page 30...
- Page 32 • Reset Base Temp - Reset the “MAX RESETTABLE” base temperature. (Pass Code is “50”) - HUMIDITY Head Humidity - The current humidity of the moving head is displayed. ADJ Products, LLC - www.adj.com - Hydro Beam X1 User Manual Page 31...
- Page 33 - Lamp ON with Power - Lamp powers “ON” when power is applied. - Lamp ON via DMX - Power lamp “ON” using a DMX controller. - Lamp OFF via DMX - Power lamp “OFF” using a DMX controller. ADJ Products, LLC - www.adj.com - Hydro Beam X1 User Manual Page 32...
-
Page 34: Wifly Control
With this feature you are able to control the unit with DMX without the need of XLR cables. Your DMX controller must be connected to a ADJ WiFly Transceiver to use this function. You are able to communicate up to 2500 feet/760 meters (open line of sight). - Page 35 Careful planning and testing of the selected installation location is critical to ensure optimum and reliable wireless DMX operation. 9.8 ft (3m) Above Ground ADJ Products, LLC - www.adj.com - Hydro Beam X1 User Manual Page 34...
-
Page 36: Error Codes
Base Fan 1 Can’t Stop Base Fan 1 stop Errors Base Fan 2 Can’t Start Base Fan 2 start Errors Base Fan 2 Can’t Stop Base Fan 2 stop Errors ADJ Products, LLC - www.adj.com - Hydro Beam X1 User Manual Page 35... -
Page 37: Dimensional Drawings
Hydro Beam X1 Dimensional Drawings *NOT TO SCALE 7.2” / 183mm 12.5” / 317mm 8.25” / 210mm 13.25” / 336mm 10.25” / 260.35mm ADJ Products, LLC - www.adj.com - Hydro Beam X1 User Manual Page 36... -
Page 38: Updating The Software
17. Remove the USB flash drive. 18. After the reset process is complete check the new software version to confirm it is updated to the most recent software. ADJ Products, LLC - www.adj.com - Hydro Beam X1 User Manual Page 37... - Page 39 3. Always be sure to dry all parts completely before plugging the unit back in. Cleaning frequency depends on the environment in which the fixture operates (i.e. smoke, fog residue, dust, dew). ADJ Products, LLC - www.adj.com - Hydro Beam X1 User Manual Page 38...
-
Page 40: Limited Warranty (Usa Only)
ADJ Products, LLC concludes, after inspection, affects the reliability of the product; if the product has been repaired or serviced by anyone other than the ADJ Products, LLC factory unless prior written authorization was issued to purchaser by ADJ Products, LLC; if the product is damaged because not properly maintained as set forth in the instruction manual. -
Page 41: Technical Specifications
Enviromental Conditions, Power/Voltage, Usage Patterns (On-Off Cycling), Control, and Dimming. Please Note: Specifications and improvements in the design of this unit and this manual are subject to change. ADJ Products, LLC - www.adj.com - Hydro Beam X1 User Manual Page 40...
Need help?
Do you have a question about the HYDRO BEAM X1 and is the answer not in the manual?
Questions and answers