Table of Contents
Advertisement
Advertisement
Table of Contents

Related Manuals for ADJ SCENE SETTER 48


Summary of Contents for ADJ SCENE SETTER 48
- Page 1 SCENE SETTER 48 User Manual Revised 05/31/2022...
- Page 2 ©2022 ADJ Products, LLC all rights reserved. Information, specifications, diagrams, images, and instructions herein are subject to change without notice. ADJ Products, LLC logo and identifying prod- uct names and numbers herein are trademarks of ADJ Products, LLC. Copyright protection claimed includes all forms and matters of copyrightable materials and information now allowed by statutory or judicial law or hereinafter granted.
-
Page 3: Table Of Contents
T A B L E O F C O N T E N T S Introduction Limited Warranty (USA Only) Features General Instructions Overview Operation Guide 1. Begin Programming 1.1 Record Enable 1.2 Security for Your Programs 1.3 Program Scenes 2. -
Page 4: Introduction
I N T R O D U C T I O N Unpacking: Thank you for purchasing the Scene Setter 48 by ADJ Products, LLC. Every device has been thoroughly tested and has been shipped in perfect operating condition. Carefully check the ship- ping carton for damage that may have occurred during shipping. -
Page 5: Limited Warranty (Usa Only)
The sole responsibility of ADJ Products, LLC under this warranty shall be limited to the repair of the product, or replacement thereof, including parts, at the sole discretion of ADJ Products, LLC. All products covered by this warranty were manufactured after August 15, 2012, and bear identifying marks to that effect. -
Page 6: Features
F E A T U R E S • Digital Technology Adopted - As a stage light controller, this device is capable of controlling both intelligent and ordinary lighting fixtures. • Power Failure Memory - Automatically defaults to the last operational setting/condition when the device powers on. -
Page 7: General Instructions
G E N E R A L I N S T R U C T I O N S Read the instructions in this manual carefully and thoroughly, as they contain important information regarding safety during operation and maintenance. Keep this manual with the unit for future refer- ence. -
Page 8: Overview
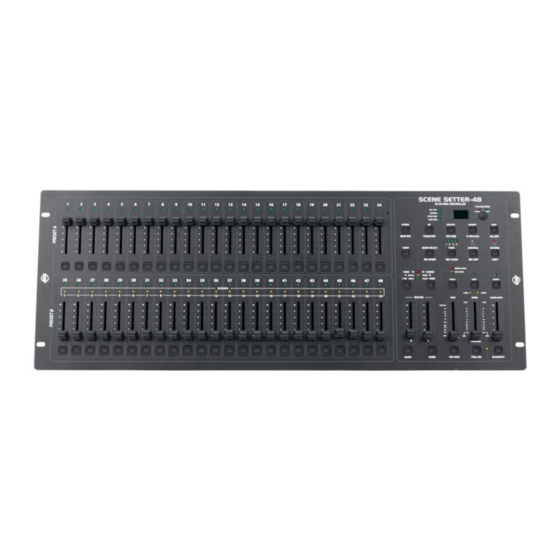
O V E R V I E W FRONT VIEW... - Page 9 O V E R V I E W FRONT VIEW Diagram Feature Description Show the current intensity of the relevant channel num- Preset A LEDs bered from 1 to 24. These 24 sliders are used to control and/or program the Channel Sliders 1-24 intensities of channels 1-24.
- Page 10 O V E R V I E W FRONT VIEW Diagram Feature Description Record is used to activate Record mode or program a step. Record / Shift Shift functions only used with other buttons. Master A Button Brings channel 1-12 to full of current setting. Used to select Single/Mix Chase, bring Channel 13-24 to Park Button full of current setting, or momentarily program a scene into...
- Page 11 O V E R V I E W REAR VIEW DC INPUT MIDI DMX OUT AUDIO REMOTE FOG MACHINE 1=Ground 1=Ground ON OFF 2=Data 2=Data + 1/4"stereo jack 3=Data + 3=Data LINE INPUT THRU Full on DC 12V~20V 100mV~1Vp-p Stand By 500mA min.
-
Page 12: Operation Guide
O P E R A T I O N G U I D E 1. BEGIN PROGRAMMING 1.1 Record Enable. 1. Press and hold the Record button. 2. While holding down the Record button, tap Flash buttons 1, 6, 6 and 8 in sequence. 3. -
Page 13: Program Scenes
O P E R A T I O N G U I D E 1.3 Program Scenes. 1. Activate Record Enable, as described in the Record Enable section. MODE SELECT 2. Select the 1-48 Single mode by tapping the the Mode Select button. - Page 14 O P E R A T I O N G U I D E 1.3 Program Scenes (continued). 7. Press a Flash button between 25-48 while holding RECORD down the Record button. All LEDs will flash to indicate that the scenes have been programmed into memory. FLASH 25-48 8.
-
Page 15: Editing
O P E R A T I O N G U I D E 2. EDITING 2.1 Edit Enable. 1. Activate Record Enable, as described in the Record Enable section. 2. Use the Page button to select the page where the pro- PAGE gram you wish to edit is located. -
Page 16: Erase A Program
O P E R A T I O N G U I D E 2.2 Erase a Program. 1. Activate Record Enable, as described in the Record Enable section. 2. User the Page button to select the page where the pro- PAGE gram you wish to erase is located. -
Page 17: Clear A Scene Or Scenes
O P E R A T I O N G U I D E 2.4 Clear a Scene or Scenes. 1. Activate Record Enable, as described in the Record Enable section. 2. Record a scene or scenes. 3. If you wish to delete these recorded scens, tap the Rec RECORD Clear button while pressing and holding the Record button. -
Page 18: Insert A Step Or Steps
O P E R A T I O N G U I D E 2.5 Delete a Step or Steps (continued). Example: Delete the third step of the program on Flash button 25 on Page 2. 1. Record enable. 2. Tap the Mode Select button to select CHNS SCENE mode. -
Page 19: Modify A Step Or Steps
O P E R A T I O N G U I D E 2.7 Modify a Step or Steps. 1. Enter Edit mode. STEP 2. Tap the Step button to scroll to the step you wish to modify. 3. Press and hold the Up button to raise the intensity, or press and hold down the Down button to lower the intensity. -
Page 20: Running
O P E R A T I O N G U I D E 3. RUNNING 3.1 Running Chase Programs. MODE SELECT 1. Tap the Mode Select button to select CHNS SCENE mode, as indicated by the LED CHNS SCENES DOUBLE PRESET 1-24 SINGLE... -
Page 21: Running A Program To Audio
O P E R A T I O N G U I D E 3.2 Running a Program to Audio. 1. Use built-in microphone, or plug the audio source into the RCA Audio jack. 2. Select your program as described above. AUDIO 3. -
Page 22: Running A Program With Standard Beat
O P E R A T I O N G U I D E 3.4 Running a Program with Standard Beat. 1. Disengage the Audio, then tape the Mode Select button to select CHNS SCENE mode. SINGLE CHASE MIX CHASE 2. -
Page 23: Changing The Speed Mode Between 5 And 10 Minutes
O P E R A T I O N G U I D E 3.5 Change the Speed Mode Between 5 and 10 Minutes. RECORD 1. Press and hold the Record button. RECORD 2. Tap the Flash Button 5 or 10 three times while holding the Record button. -
Page 24: Midi Operation
M I D I O P E R A T I O N 1. SETTING MIDI IN 1. Tap the Flash button 1 three times while holding down RECORD the Record button. The segment display should read “CHI”, indicating that MIDI IN channel setup is avail- able. -
Page 25: Receiving Midi File Dump
M I D I O P E R A T I O N 4. RECEIVING MIDI FILE DUMP Tap Flash button 3 three times while holding down the RECORD Record button. The Segment Display should read “IN” to indicate that the controller is ready to receive the MIDI file dump. -
Page 26: Implementation
M I D I O P E R A T I O N 6. IMPLEMENTATION 1. While receiving and sending MIDI data, all MIDI scenes and channels that are currently running will automatically paused if there is no response within 10 minutes. 2. -
Page 27: Dmx Channels
D M X C H A N N E L S 1. DMX CHANNEL SETUP 1.1 Add/Assign DMX Channel. 1. Hold the Record button and press the Flash 8 button 3 times. This will access the DMX channel setup. The display screen will show the current channel. 2. -
Page 28: Brief Of Main Functions
B R I E F O F M A I N F U N C T I O N S Reverse the direction of the scene. 1. Press the ALL REV Button to make all the scenes change their directions. 2. - Page 29 B R I E F O F M A I N F U N C T I O N S Dimmer Display. 1. The 3-Digit Segment Display is used to display intensity percentage or absolute DMX value. 2. To change between percentage and absolute value, press and hold the Shift Button. Then while continuing to hold down the Shift button, press the % or 0-255 Button to switch between percent- age and absolute values.
-
Page 30: Quick Reference Guide
Q U I C K R E F E R E N C E G U I D E CATEGORY FUNCTION OPERATION METHOD Record Enable Hold “RECORD” and key in record code on Prest A & B Erase All Programs Hold “RECORD”... - Page 31 Q U I C K R E F E R E N C E G U I D E CATEGORY FUNCTION OPERATION METHOD MIDI In Ch. Setup Hold “RECORD” and press “FLASH1, FLASH1, FLASH1” MIDI Out Ch. Setup Hold “RECORD” and press “FLASH2, FLASH2, FLASH2” MIDI Exclusive Input Hold “RECORD”...
-
Page 32: Technical Specifications
Full-On button for 100% momentary output to all 48 channels • Bright LCD display • Use in conjunction with the ADJ or Elation: DP-DMX20L, CYBER PAK, UNI PAK-II, UNI BAR, DP-415, DP-640, RMD620 & RMD1210 • Line level audio input and built in microphone for music sync operation •...
Need help?
Do you have a question about the SCENE SETTER 48 and is the answer not in the manual?
Questions and answers