Advertisement

SERVICE NOTES
Contents
1-1 COVERS .......................................................................................1
1-2 FRAME .......................................................................................... 2
1-3 X/Y DRIVE UNIT ........................................................................... 4
1-4 CARRIAGE ................................................................................... 5
1-5 CHASSIS ......................................................................................6
1-6 PINCH ROLLER ............................................................................ 7
1-7 OTHERS .......................................................................................8
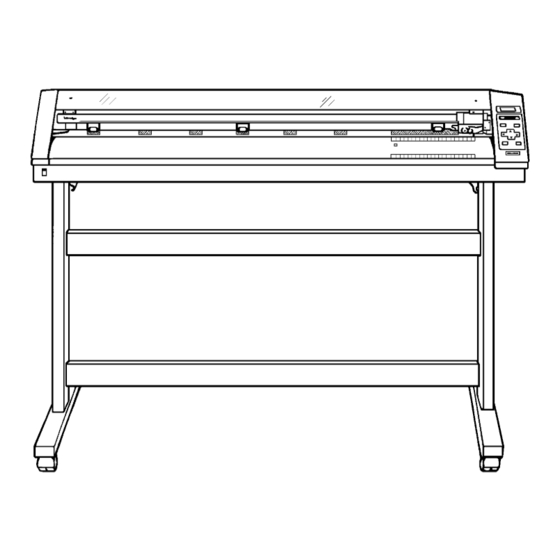
1-8 STAND .......................................................................................... 8
2-1 WIRING MAP ................................................................................ 9
2-2 MAIN BOARD ASS'Y .................................................................. 10
2-3 POWER BOARD ASS'Y .............................................................. 14
2-4 OTHER CIRCUIT BOARDS ........................................................ 16
3-1 PEN CARRIAGE ASSEMBLY_REMOVING ............................... 17
3-2 CARRIAGE WIRE_REMOVING ................................................. 20
3-3 PINCH ROLLER_FIXING ............................................................ 23
3-4 CUTTER PROTECTION_FIXING ............................................... 23
Windows is registered trademark or trademark of Microsoft Corporation in the United States and/or other countries.
Unauthorized copying or transferral, in whole or in part, of this manual is prohibited.
Printed in Japan
CM-500 / 400 / 300
4-1 Special Tool ................................................................................ 25
4-2 Service Mode .............................................................................. 26
4-3 HOW TO UPGRADE FIRMWARE .............................................. 28
4-4 TOOL HEIGHT ADJUSTMENT ................................................... 29
4-5 SPACER BED ADJUSTMENT .................................................... 31
4-6 TOOL PRESSURE ADJUSTMENT ............................................ 34
4-7 WIRE TENSION ADJUSTMENT ................................................. 37
4-8 MOTOR BALANCE ADJUSTMENT ............................................ 39
4-9 CALIBRATION ............................................................................ 42
4-10 SOFTLANDING ADJUSTMENT ................................................. 45
4-11 SEPARATING KNIFE ADJUSTMENT ........................................ 48
5-1 OPERATIONAL SEQUENCE ..................................................... 51
5-2 SENSOR MAP ............................................................................ 52
6-1 TROUBLESHOOTING ................................................................ 53
7-1 MAINTENANCE CHECK LIST .................................................... 55
7-2 INSTALLATION CHECK SHEET ................................................ 56
7-3 SPECIFICATIONS ...................................................................... 56
Copyright © 1998 ROLAND DG CORPORATION
Structure & Spare Parts
Electrical Section
Replacement of Main Parts
Adjustment
Supplemental Information
Troubleshooting
Supplement
First Edition
CM-500/400/300 '98.Jun.DE1
R1-980615
1
2
3
4
5
6
7

Advertisement

Table of Contents
loading
Need help?

Need help?

Do you have a question about the CAMM-1 PRO CM-500 and is the answer not in the manual?

Questions and answers

Subscribe to Our Youtube Channel

Summary of Contents for Roland CAMM-1 PRO CM-500

  • Page 1: Table Of Contents

    Windows is registered trademark or trademark of Microsoft Corporation in the United States and/or other countries. CM-500/400/300 '98.Jun.DE1 Unauthorized copying or transferral, in whole or in part, of this manual is prohibited. Copyright © 1998 ROLAND DG CORPORATION Printed in Japan R1-980615...
  • Page 2 To Ensure Safe Work To Ensure Safe Work About Notices Used for instructions intended to alert the operator to the risk of death or severe injury should the unit be used improperly. Used for instructions intended to alert the operator to the risk of injury or material damage should the unit be used improperly.
  • Page 3 About the Labels Affixed to the Unit Turn off the primary power SW before servicing. About the Labels Affixed to the Unit These labels are affixed to the body of this product. The following figure describes the location. The wiring terminal intended for connection of the protective earthing conductor associated with the supply wiring.
  • Page 4 -- MEMO --...
  • Page 5: Structure & Spare Parts

    1 Structure & Spare Parts 1 Structure & Spare Parts 1-1 COVERS ** column shows as below. If the part is not used, it is blank. If the part is used, it is marked " ". CM-300 CM-400 CM-500 PARTS LIST-Main Parts- PARTS LIST -Supplemental Parts- Parts No.
  • Page 6: Frame

    1 Structure & Spare Parts 1-2 FRAME...
  • Page 7 1 Structure & Spare Parts PARTS LIST-Main Parts- PARTS LIST -Supplemental Parts- Parts Name Parts No. Parts Name • • • 11879107 ABSORBER TK-12 BUSH ROLL • CLAMP WIRE PLWS-1U 22805283 ASS'Y,GRIT ROLLER CM-300 • LABEL CAMM-1 WARNING NO.453 22805295 ASS'Y,GRIT ROLLER CM-400 •...
  • Page 8: X/Y Drive Unit

    1 Structure & Spare Parts 1-3 X/Y DRIVE UNIT PARTS LIST -Supplemental Parts- PARTS LIST-Main Parts- Parts Name Parts No. Parts Name • • • BINDER T-18L 22805286 ASS'Y,CABLE CARD 26P 350L BB • • • PIPE POLY 22805293 ASS'Y,MOTOR XY CM-500 4X8X10 •...
  • Page 9: Carriage

    1 Structure & Spare Parts 1-4 CARRIAGE PARTS LIST -Supplemental Parts- PARTS LIST-Main Parts- Parts Name Parts No. Parts Name • • • BUSH ROLL 22805288 ASS'Y,CARRIAGE CM-500 • • • BUSH ROLL 3X5.5 22805292 ASS'Y,CLAMP BLADE CM-500 • • • CUSHION FELT(WH) W10XL30 22805291...
  • Page 10: Chassis

    1 Structure & Spare Parts 1-5 CHASSIS PARTS LIST-Main Parts- • • Parts No. Parts Name 22165163 SPACER,BED UPPER CM-500 • • • • • • 13429746 AC INLET SUP-J3G-E 7450123050 TRANS BOARD ASS'Y • • • • • • 23465134 CABLE-ASS'Y POWERSIGNAL TRANSFORMER-PW PNC-1860...
  • Page 11: Pinch Roller

    1 Structure & Spare Parts 1-6 PINCH ROLLER PARTS LIST -Supplemental Parts- PARTS LIST-Main Parts- Parts Name Parts No. Parts Name • • RING E-RING ETW-3 22805289 ASS'Y,P-ROLLER M CM-500 • • • WASHER FLAT 22805290 ASS'Y,P-ROLLER L R CM-500 Cr 4.3X7X0.5 •...
  • Page 12: Others

    1 Structure & Spare Parts 1-7 OTHERS PARTS LIST-Main Parts- Parts No. Parts Name ENGLISH JAPANESE • • • 13499109 A.C. CORD (117V) • • • 23495124 AC CORD (240VA) • • • 23495214 AC CORD 100V 3P • • • 13499111 AC CORD KP-610 240VE.BS •...
  • Page 13: Electrical Section

    2 Electrical Section 2 Electrical Section 2-1 WIRING MAP...
  • Page 14: Main Board Ass'y

    2 Electrical Section 2-2 MAIN BOARD ASS'Y CABLE CARD 26P 350L BB Character DESCRIPTION printed side. Indicates revision of the circuit board. MAIN Flash Memory EP ROM 2 VR 1 DIP SW FUNCTION VR.No. Description Model selection – CM-500 Model selection –...
  • Page 15 2 Electrical Section MAIN BOARD_1/3 Circuit Diagram RMLS8103J D1A DA227 DA227 DA227 DA227 DA227 DA227 DA227 DA227 EXBA10E103J EXBA10E103J EXBA10E103J U10D EXBA10E103J EXBA10E103J KSD-08 74HC32F PLED0 MNR34J5A101 PLED1 53014-0410 RA10 MNR34J5A101 TXDB TXDB PB11/TXD1 RXDB RXDB PB10/RXD1 TXDA TXDA PB9/TXD0 RXDA RXDA PB8/RXD0...
  • Page 16 2 Electrical Section MAIN BOARD_2/3 Circuit Diagram U14A U12E U12F U14C U14B BUSY 74LS07 74LS14 74LS14 U13A /ACK 74LS07 CEXT U14D 74LS07 3.3K 74LS373 ifD6 ifD7 ifD4 ifD6 REXT/CEXT ifD2 ifD5 U27B U27A ifD0 ifD4 74LS07 ifD1 ifD3 ifD3 ifD2 U14E CE1000p ifD5...
  • Page 17 2 Electrical Section MAIN BOARD_3/3 Circuit Diagram PENFRC 100K 74HC273F MTD2005 1KVR VMMA VMMB RA23 U25B OUT1 SOL- BA10324A OUT2 100K U25A 20KVR 100K DECAY OUT3 BA10324A CE1000p OUT4 SOL+ CE0.01u 2.2K ENA A LG A 8.2K ENA B LG B 100K 8.2K CE1000p...
  • Page 18: Power Board Ass'y

    2 Electrical Section 2-3 POWER BOARD ASS'Y POWER BOARD_1/2 Circuit Diagram VREF PO0.068u/50V 4.7K M5220L CE0.1u D9 1SS130 1.2K PO0.01u/50V 1KVR 1SS130 1SS130 PO4700p/50V NJU201A R100 INV1 1K1% 3.3K 10K2% 10K2% NONI1 CE0.022u GainC No mount R67 PO0.022u/50V No mount No mount INV2 UPC494...
  • Page 19 2 Electrical Section POWER BOARD_2/2 Circuit Diagram 1SR139-400A FS10 PFC5000 CEE-2AT PFC5000 TO MAIN 2SB1551 D5SBA20 S2L20U FS11 FS12 5566-06A PFC5000 CEE-5AT PFC5000 PFC5000 CEE-2AT PFC5000 3.3K 2W 10000u/63V DTC114EF Hi/Off MHPOW 2.2K Low/Off MLPOW FROM TRANS AN7815F 5566-10A PFC5000 CEE-1AT PFC5000 CE0.1u...
  • Page 20: Other Circuit Boards

    2 Electrical Section 2-4 OTHER CIRCUIT BOARDS OTHER CIRCUIT BOARD_Circuit Diagram LEDv SEL-6414E SEL-6414E SEL-6414E LEDg PLED0 1SS133 PLED1 10u/25V 1SS355 CE0.1u 1SS355 BUSY /ACK 56364-060-BXE 1SS355 test SW10 sheet cut 1SS355 enter 53014-1410 right 1SS355 down 1SS355 left 1SS355 menu pause FL10...
  • Page 21: Replacement Of Main Parts

    3 Replacement of Main Parts 3 Replacement of Main Parts Following table describes the necessary adjustment after the replacement of each parts. Replacement Parts Necessary Adjustment 1. Initialize 2. Select Model Type by DIP SW on Main Board. 3. Upgrade Firmware. MAIN BOARD 4.
  • Page 22 3 Replacement of Main Parts Remove the CARRIAGE BOARD STAY and detach the TOOL CARRIAGE from the GUIDE RAIL. TOOL CARRIAGE Remove the 2 screws shown in the figure and remove the SEPARATING KNIFE SEPARATING KNIFE from TOOL CARRIAGE. Remove the PINCH ROLL SENSOR. It is necessary to prepare a soldering iron or pin- disconnector to remove PINCH ROLL SENSOR.
  • Page 23 3 Replacement of Main Parts Fix the PINCH ROLL SENSOR. It is necessary to prepare a soldering iron or pin- disconnector to fix PINCH ROLL SENSOR. PINCH ROLL SENSOR Fix the TOOL CARRIAGE to the GUIDE RAIL. TOOL CARRIAGE Connect the PINCH ROLL SENSOR WIRE, SOLENOID CARRIAGE CABLE PINCH ROLL WIRE and CARRIAGE CABLE to the CARRIAGE...
  • Page 24: Carriage Wire_Removing

    3 Replacement of Main Parts 3-2 CARRIAGE WIRE_REMOVING Remove the GUIDE RAIL COVER, LEFT & RIGHT SIDE COVER and TOOL CARRIAGE. Loosen SCREW A and SCREW B in order to loosen the CARRIAGE WIRE TENSION. SCREW B SCREW A Remove the CARRIAGE WIRE from the DRIVE PULLEY. CARRIAGE WIRE Remove the CARRIAGE MOTOR.
  • Page 25 3 Replacement of Main Parts Remove the DRIVE PULLEY from the MOTOR BASE. DRIVE PULLEY Loosen the 4 screws and pull out the CARRIAGE WIRE and replace it with new one. CARRIAGE WIRE SCREWS Fix the DRIVE PULLEY to the MOTOR BASE by aligning it against the SHAFT STAY.
  • Page 26 3 Replacement of Main Parts Wind the CARRIAGE WIRE around the DRIVE PULLEY from the bottom to the top. DRIVE PULLEY ASSEMBLY Make sure that the CARRIAGE WIRE doesn't cross over. CARRIAGE WIRE Rotate the DRIVE PULLEY until the CARRIAGE WIRE comes to its center.
  • Page 27: Pinch Roller_Fixing

    3 Replacement of Main Parts 3-3 PINCH ROLLER_FIXING TAPERED TYPE is used for left and right PINCH ROLLERs and FLAT TYPE is used for the middle one. Red marking is put on the outside surface of left and right PINCH ROLLERs to show the direction. Red Marking 3-4 CUTTER PROTECTION_FIXING Put the CUTTER PROTECTION by leaving the equal space...
  • Page 28 3 Replacement of Main Parts -- MEMO --...
  • Page 29: Adjustment

    4 Adjustment 4 Adjustment 4-1 Special Tool Table shows a list of special tools recommended by Roland DG Corp. Tool No. ST-002 Tool name TENSION GAUGE 300g Tool Pressure Adjustment Purpose Tool No. ST-006 Tool name WHITE DUMMY PEN Tool Height Adjustment...
  • Page 30: Service Mode

    4 Adjustment 4-2 SERVICE MODE Move TOOL CARRIAGE fulley to right end. Turn on the POWER. and press [SETUP] key within 1 second. ] + [SETUP] key vice mode MA120 B110 Service mode ROM MA120 B110 Displays FLASHROM version. M = main, B = Boot Sensor Checks whether sensor is functioning properly.
  • Page 31 4 Adjustment Knock Select factor Knife test Knife adjust Knock Position Hit/Away->ENTER 0mm -> +1mm Position Knife-Cutter adj < 0.000mm > This is for adjusting AUTO CUTTER ADJUSTMENT. SYSTEM INFORMATION LANGUAGE SELECTION Turn on the powr while CAMM-1 PRO SERIES SYSTEM REPORT Turn on the powr while pressing [ MENU] key.
  • Page 32: How To Upgrade Firmware

    4 Adjustment 4-3 HOW TO UPGRADE FIRMWARE It is necessary to update the FIRMWARE when MAIN It is necessary to prepare followings to BOARD is replaced. update the FIRMWARE. Connect PC and CJ-70 with PARALLEL CABLE. 1. FIRMWARE DISK 2. PC with MS-DOS 3.
  • Page 33: Tool Height Adjustment

    4 Adjustment 4-4 TOOL HEIGHT ADJUSTMENT Remove the GUIDE RAIL COVER and CARRIAGE COVER and put the WHITE DUMMY PEN (ST-006) to the TOOL CARRIAGE. ST-006 WHITE DUMMY PEN Put the PINCH ROLLERs DOWN at both left and right ends PINCH ROLLER of the GRIT ROLLER.
  • Page 34 4 Adjustment Select "ORIGIN SET" by pressing the [MENU] key 3 times. Move the TOOL CARRIAGE to the position where the clearance between the pen tip and the BED is the smallest among the 5 positions (3 positions for CM-300) with [ ] and Press the [MENU] key 3 times.
  • Page 35: Spacer Bed Adjustment

    4 Adjustment 4-5 SPACER BED ADJUSTMENT This adjustment should not be carried out normally. It should be carried out only when the clearance between the pen tip and the BED is not 2.4—3.0 mm at the positions checked at 7 of TOOL HEIGHT ADJUSTMENT. Remove the GUIDE RAIL COVER and the CARRIAGE COVER and fix the WHITE DUMMY PEN (ST-006) on the TOOL CARRIAGE.
  • Page 36 4 Adjustment Turn on the power. Select "ROLL" with [ ] and [ ] keys and press the [ENTER] key. Then, press the [SETUP] key. [ENTER] [SETUP] Select "ORIGIN SET" by pressing the [MENU] key 3 times. Press the [MENU] key 3 times.
  • Page 37 4 Adjustment Secure the 2 screws shown in the figure with nut. SCREW SCREW Tighten the 2 screws. SCREW SCREW Adjust TOOL HEIGHT again.
  • Page 38: Tool Pressure Adjustment

    4 Adjustment 4-6 TOOL PRESSURE ADJUSTMENT Make sure to adjust TOOL HEIGHT before this adjustment. Put the WHITE DUMMY PEN (ST-006) on the TOOL CARRIAGE. ST-006 WHITE DUMMY PEN Put the PINCH ROLLERs DOWN at both left and right ends PINCH ROLLER of the GRIT ROLLER.
  • Page 39 4 Adjustment Move the TOOL CARRIAGE fully to the right end. Turn power on and press the [SETUP] key within 1 second. Press [SETUP] key while pressing [ ], [ ] and [ ] keys to enter the SERVICE MODE. And select "Force"...
  • Page 40 4 Adjustment Press the [ENTER] key and move the pen UP. [ENTER] key Change the "Force" to 200g with [ ] and [ ] keys. Then, press the [ENTER] key to move the pen DOWN. [ ]&[ ]keys [ENTER]key Adjust VR2 on the MAIN BOARD so that the pressure would be 199—200gf when pen tip leaves the BED.
  • Page 41: Wire Tension Adjustment

    4 Adjustment 4-7 WIRE TENSION ADJUSTMENT Turn off the power and move the TOOL CARRIAGE to the left end. PEN CARRIAGE Loosen SCREW A. SCREW A Measure the tension with the TENSION METER (ST-011) at the center. ST-011 TENSION METER Adjust the tension with SCREW B so that it will be 12—14 pounds.
  • Page 42 4 Adjustment Make sure to check the tension again after moving the TOOL CARRIAGE back and forward in a whole distance for 10 times. If the tension changes, re-adjust it. GUIDE RAIL PEN CARRIAGE Tighten SCREW A after the adjustment. SCREW A Check the tension again.
  • Page 43: Motor Balance Adjustment

    4 Adjustment 4-8 MOTOR BALANCE ADJUSTMENT Servo Motor feeds back to the CPU the actual rotation corresponds to the instruction. Command Motor tries to follow the instruction from the CPU. Difference between the actual rotation and the instruction could be adjusted with the Motor Balance (GAIN) Adjustment.
  • Page 44 4 Adjustment Move the TOOL CARRIAGE fully to the right end. Turn power on and press the [SETUP] key within 1 second. Press [SETUP] key while pressing [ ], [ ] and [ ] keys to enter the SERVICE MODE. Select "Ageing" with [ ] and ] keys, and press the [ENTER] key twice.
  • Page 45 4 Adjustment Check the displayed values. If the difference of the absolute values are more than 3, repeat adjustment from procedure 2 .
  • Page 46: Calibration

    4 Adjustment 4-9 CALIBRATION Calibration done in the factory is indicated on the sticker put LEFT FRAME on the LEFT FRAME. Put the 0.25 mm Standard Ceramic Pen to the TOOL CARRIAGE and set A2 size paper on the machine. Move the TOOL CARRIAGE fully to the right end.
  • Page 47 4 Adjustment Start "Test Draw Mode" by pressing the [SETUP] key. [SETUP]key Load the paper by selecting "PIECE" from the menu. [ENTER]key [SETUP]key CM500/400/300 starts drawing a figure when pressing the [SETUP] key and then [TEST] key. Calibrating amount can be calculated with the formula shown in the PROCEDURE 7 by using this figure.
  • Page 48 4 Adjustment Select the directions, GRIT ROLLER or CARRIAGE, to be calibrated. It can be selected by [ ] and [ ] keys. Enter the Calibrating Amount with [ ] and [ ] keys and press the [SETUP] key to save settings. Calibrating range is -0.20—+0.20% in an increment of 0.01%.
  • Page 49: Softlanding Adjustment

    4 Adjustment 4-10 SOFTLANDING ADJUSTMENT Softlanding function is a system to land the tool [Pen Height] smoothly to prevent pen bouncing. When the machine receives a command to move the pen down, it puts the pressure downwards and Pen Up Pressure starts moving the tool DOWN.
  • Page 50 4 Adjustment Move the TOOL CARRIAGE fully to the right end. Turn power on and press the [SETUP] key within 1 second. Press [SETUP] key while pressing [ ], [ ] and [ ] keys to enter the SERVICE MODE. And select "Landing"...
  • Page 51 4 Adjustment In case of pen bouncing problem, increase the "ATK" and decrease the "BRK" with [ ] and [ ] keys. Then, press the [ENTER] key for save settings. In case the timing of the landing is delayed, decreased the "ATK"...
  • Page 52: Separating Knife Adjustment

    4 Adjustment 4-11 SEPARATING KNIFE ADJUSTMENT Move the TOOL CARRIAGE fully to the right end. Turn power on and press the [SETUP] key within 1 second. Press [SETUP] key while pressing [ ], [ ] and [ ] keys to enter the SERVICE MODE. And select "Knife"...
  • Page 53 4 Adjustment Move the SEPARATING KNIFE PLATE fully to the right with your hand and check and make sure that the clearance with the STOPPER is 0.5—1.0 mm. STOPPER SEPARATING 0.5—1.0 mm KNIFE PLATE If the clearance measured at 4 is out of 0.5—1.0 mm, press [MENU] key and enter the KNIFE ADJUST MODE.
  • Page 54 4 Adjustment Press [ENTER] key to move the TOOL CARRIAGE to the right side. Make sure that SEPARATING KNIFE won't be in UP position during the movement. If it does, re-adjust the position.
  • Page 55: Supplemental Information

    5 Supplemental Information 5 Supplemental Information 5-1 OPERATIONAL SEQUENCE Power ON WORK RAM CHECK [PAUSE] LED flashes. NO FIRMWARE FIRMWARE CHECK Displayes Error Message. Read Data [SETUP] LED flashes. from EEROM. Displayes model name. CLOSE THE COVER OPENED Displayes Error Message. Checks FRONT COVER.
  • Page 56: Sensor Map

    5 Supplemental Information 5-2 SENSOR MAP REAR PAPER SENSOR It detects the rear edge of the media and also whether the media is set or not. When "ROLL" is selected, either one of the Front or Rear Paper Sensor detects whether the media is set or not. CARRIAGE LIMIT SENSOR It detects the CARRIAGE LIMIT.
  • Page 57: Troubleshooting

    6 Trouble Shooting 6 Trouble Shooting 6-1 TROUBLESHOOTING PEN UP/DOWN ERROR MOTOR ERROR Is there cut-line or bad contact in Replace CARRAIGE CABLE. Adjust MOTOR BALANCE. Is MOTOR BALANCE adjusted correctly? CARRIAGE CABLE? Is carraige solenoid OK? Replace the CARRIAGE ASSEMBLY. Is the FUSE blown up? Replace F2/F3 on POWER BOARD.
  • Page 58 6 Trouble Shooting CIRCLE DOESN'T MATCH STITCH CUT Are machine-offset & blade-offset Set the offset. Replace the blade. Is the blade worn out? matched? Bearing inside the blade holder rotates Is the blade worn out? Replace the blade. Replace the blade holder. smoothly? Bearing inside the blade holder rotate Replace the TOOL CARRIAGE.
  • Page 59: Supplement

    7 Supplement 7 Supplement Date: 7-1 MAINTENANCE CHECK LIST Model Serial No. CM-500 CM-400 CM-300 MECHANICAL PARTS Check Points Confirmation Carriage Driving Part 1. Drive Gear Dirty/Crack 2. Backlash Looseness Grit Driving Part 1. Drive Gear Cleaning 2. Backlash Looseness 3.
  • Page 60: Installation Check Sheet

    7 Supplement 7-2 INSTALLATION CHECK SHEET Check Points Reference Cleaning It must be recommended to use water or alcohol for cleaning the following parts. PLATEN, GRIT ROLLERS, PINCH ROLLERS, BLADE HOLDER CAP Consumables Explain the consumables and how to replace them. 1.
  • Page 61 7 Supplement ( * ) The following conditions must be satisfied: - Material type: 3M Scotchcal Mastercut Film, ARLON Series 2100 - Special stand (a roll material must be set at the rear and on the inner sheet hanger) - Side margins: 25 mm (1") or more for both the left and right margins - Front margin: 25 mm (1") or more (After loading the material, using the display menu to select “EDGE”...
  • Page 63 CM-500 / 400 / 300...

This manual is also suitable for:

Camm-1 pro cm-400Camm-1 pro cm-300

Table of Contents

Save PDF