Table of Contents
Advertisement
Advertisement
Table of Contents

Related Manuals for TOORX TRX8500


Summary of Contents for TOORX TRX8500
- Page 1 INSTRUCTION...
- Page 2 UNPACK AND VERIFY THE CONTENTS OF THE BOX: ●Lift up and remove the box that surrounds the Treadmill. ●Check the following items are present. If any of the parts are missing, contact with the dealer. Platform frame Left upright post Console 说明书...
- Page 3 Main parts Side rail Front roller Rear roller Running belt Console Running deck Motor cover Motor belt Plastic central parts of console Rear cover Incline motor Motor...
-
Page 4: Hardware Bag
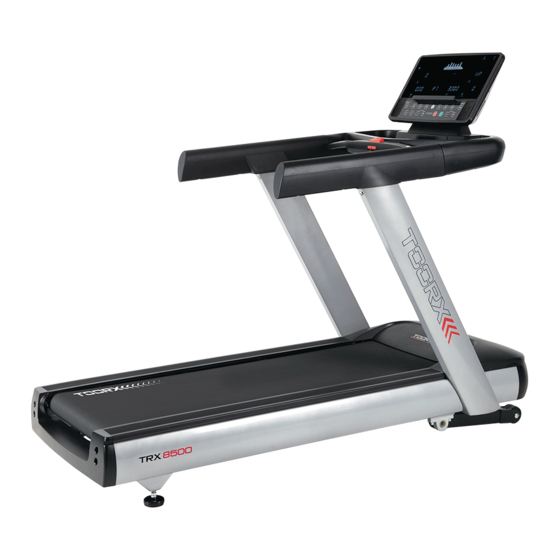
Hardware bag Allen C.K.S. Full thread screw Allen C.K.S. Full thread screw M8*15 M8*25 T shaped wretch L Allen wrench L Allen wrench 8×75 6×35×80 5×35×85S... - Page 5 Treadmill introduction Console PU handle bar Upright post Motor cover Side rail Running belt Incline frame Rear cover fbbrffco Feet pad vercover AC220V 50Hz Working voltage 2015*915*1595mm Dimension 1560*580mm Running surface 1.0-22.0Km/h Speed range...
- Page 6 Technical Information : *WE RESERVE THE RIGHT TO AMEND THE PRODUCT WITHOUT PRIOR NOTICE.
- Page 7 ASSEMBLY INSTRUCTIONS Step 1: Take out the machine from box and put it on the flat floor. Remove the screws on the left, right and front sides of the motor cover. Remove the motor cover.(As shown) Step 2: Fix the left upright post on platform with 4pcs Allen C.K.S. half thread screws M8*20. And then connect the communication cables which on right upright post and platform.Last, fix the right upright post with 4pcs Allen C.K.S.
- Page 8 Step 3: Insert clamping rings of the upright posts into handle bars on the both sides of the main frame, and then fix with 2pcs screws M8*20 each side. Draw out the signal wire when install the clamp ring of thr right upright post (with lock now). Step 4: Put the handle bar in a horizontal line (as the direction of the figures), then connect the console and upright posts with 4 pcs of M8*20.
- Page 9 Step 5: Put the Console A on the treadmill and connect all the wires well, use 2pcs Allen socket full thread screw M8*25 to tighten the console.(with lock now) Step 6: Install the motor cover on the main frame with 4 pcs screws M4*16. Fix all screws by tools, and then finished.
-
Page 10: Moving The Treadmill
MOVING THE TREADMILL The treadmill can be moved around in house safely in its fold-up position by using the transport wheels. When moving this machine, following things must be determined: 1.The main frame has been fallen to the lowest point. 2.The power switch has been closed. - Page 11 Method of usage 1: Switch on the power and unfold the treadmill to the lowest position. Check whether the mashine is normal. 2: Secure the safety tether clip to clothing chest. 3: Before exercising, check the stability and function of the treadmill. It is strictly prohibited to stand on the running belt to start.
- Page 12 Board instruction (I).LED window instruction: 1.1.“SPEED” window:Display the speed numerical value. 1.2.“TIME” window:Display the time numerical value. 1.3.“DISTANCE” “STEP” window:Display the distence and setps numerical value. 1.4.“CALORIES” window:Display the calories numerical value. 1.5.“PULSE” window:Display the pulse numerical value. 1.6.“INCLINE” window:Display the inclination numerical value. ( Ⅱ...
- Page 13 2.3. “START/PAUSE” key: When the treadmill is stopped, press the START key to turn on the treadmill. Press “START” key when running, it will pause. 2.4. “STOP” key, when the treadmill is running, stop the treadmill slowly by pressing the STOP key one time. 2.5.
- Page 14 a ) For P1—P36, Speed and inclination is divided into 16 segments. Each segment has the same time. The speed after selecting will be avail in current segment. When run to next segment. It will sound 3 times in advance. When finish 16 segments, the motor will stop with a long prompt sound. b ) Press “START”...
- Page 15 km / h. C: When the user's heart rate is lower than the target heart rate 6-29 beats / min, the speed is increased 1.0 km / h. D: When the user's heart rate is higher than the target heart rate 30 beats / min, the speed is decreased 2.0 km / h.
-
Page 16: Program Speed Table
Program Speed Table: LEVEL PROG. CLASSIF ICATION SPEED INCLINE SPEED INCLINE SPEED INCLINE SPEED INCLINE SPEED 10.0 10.0 10.0 INCLINE SPEED 10.0 10.0 11.0 INCLINE SPEED 11.0 10.0 11.0 INCLINE SPEED 10.0 11.0 INCLINE SPEED 10.0 11.0 12.0 12.0 INCLINE SPEED 10.0 10.0... - Page 17 INCLINE SPEED 11.0 11.0 11.0 11.0 INCLINE SPEED 11.0 11.0 11.0 11.0 11.0 INCLINE SPEED 11.0 11.0 11.0 11.0 INCLINE SPEED 11.0 11.0 11.0 11.0 11.0 INCLINE SPEED 13.0 13.0 13.0 13.0 13.0 13.0 13.0 13.0 INCLINE SPEED 10.0 12.0 10.0 12.0 10.0...
-
Page 18: Exploded Drawing
EXPLODED DRAWING... - Page 19 NAME QUANTITY Incline frame Platform frame Left upright post Right upright post Console frame Screen board frame Left clamp ring Right clamp ring Motor base frame Wheel φ78×φ12.2×t23 Permanent seat Feet pad Φ74×86×M12 Left side rail 25.4×108.4×1475 Right side rail 25.4×108.4×1475 Running belt 3360×580×t3.2 Tire pattern 3050CA Running deck 1410×680×25 Rear cover 830.5×90×180...
- Page 20 Allen C.K.S. full thread screw M10×40×20 Allen C.K.S. half thread screw M12×70×20 Hex self-locking nut M10 Allen socket full thread screw M8×15 Flat washer Φ8 Allen socket full thread screw M8×25 Allen socket full thread screw M8×80 Allen C.K.S. full thread screw M8×15 Hollow circular tube plug Φ35×t1.2 Communication wire L-900mm Communication wire L-1100mm...
-
Page 21: Treadmill Maintenance
TREADMILL MAINTENANCE 1. LUBRICATION After running the belt for a period of time, it must be lubricated with specially designed silicone oil. Suggestion: use less than 3h per week lubricate once per 5 months use 4-7h per week lubricate once per 2 months use more than 7h per week lubricate once per month Do not lubricate too much. - Page 22 4. ADJUSTMENT OF THE MOTOR BELT All running belts are properly set at the factory and after installation. It may stretch of be off center after use. Stretching is normal during the break-in period. It is mainly adjusted by the user. Steps of Adjustment:①...
- Page 23 GARLANDO SPA Via Regione Piemonte, 32 - Zona Industriale D1 15068 - Pozzolo Formigaro (AL) - Italy contact@toorxprofessional.it www.toorxprofessional.it...
Need help?
Do you have a question about the TRX8500 and is the answer not in the manual?
Questions and answers