Advertisement
Quick Links
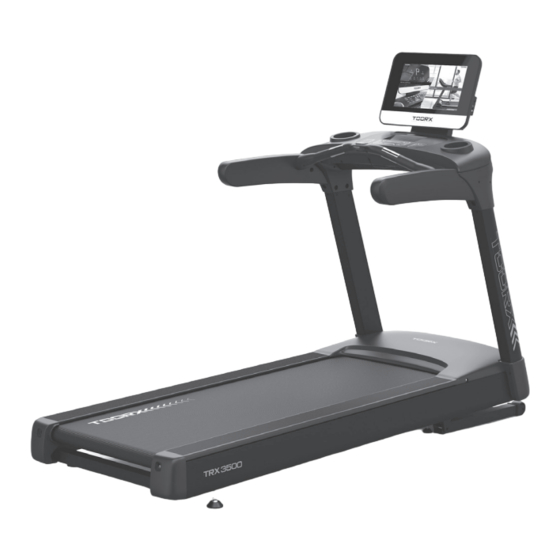
Advertisement

Related Manuals for TOORX TRX 3500 TFT


Summary of Contents for TOORX TRX 3500 TFT
- Page 1 INSTRUCTION...
-
Page 2: Parts List
Parts list... - Page 3 Description Description Description Base frame Right rear end cap Cross head sunk screw M3X8 Running board Motor Cross head sunk supporting tube screw M8X25 Incline frame Incline motor Cross head sunk screw M8X30 Left upright tube Controller Cross head sunk screw M8X35 Right upright Overload switch...
-
Page 4: Installation Instruction
Side rail Bolt M8X35 Spring washerΦ5 Baffle plate Bolt M8X50 Spring washerΦ8 Power panel Bolt M10X50 Spring washerΦ10 Side rail Bolt M10X75 C10 Nylon washer Φ10 positioning nut Square end cap Bolt M10X90 Cushion Bolt M10X160 Wrench Motor upper Cross screwdriver Half round bolt M8X20 cover Left upright tube... - Page 5 2.1 Install Left upright tube (4) to base frame (1) by two sets of half round bolt M8X20 (A8),half round bolt M8*40 (A9) and four pcs of flat washer φ8 (C2) by side. (Attention: to align screw hole with the upper surface).
-
Page 6: Adjustment Instruction
Installation of display screen 5.1 Connect the signal wire from display screen to corresponding wire from controlling panel. Crowding the extra wire into the panel. 5.2 Connect the display screen (7) to handlebar and controlling panel (6) by four sets of half-round bolt M10X25(A10), flat... - Page 7 the belt deviated, stop the treadmill and adjust the running belt according to the requirements of "maintenance". 4.Press emergency stop key or pull out safety key,the treadmill will stop immediately. Re- inset the emergency stop key to reset or insert safety key, can restart treadmill. (As below figure) 5.Press Stop key, the treadmill stop running, then turn off the power when the incline returns to zero.
-
Page 8: Console Instruction
Console instruction WARNING: To reduce the possibility of electric shock, keep the console dry. To prevent liquid from spilling onto the console, only sealed water bottles can be placed on the water bottle holder. 1. Quick start The treadmill adopts 15.6 inch high resolution touch screen to display the data and sports state during exercise, and installs multimedia APP application and running training mode to make sports entertainment more rich and interesting. - Page 9 Click "Quick Start" on the screen or the " " button on the console to start quickly. The treadmill will directly start the countdown and enter running mode as shown below: Main interface in running state is shown as below: After starting the treadmill, press the speed adjustment button (+ -/ ) on the controlling panel or color screen to adjust your running speed.
- Page 10 When the speed is > 1KM/H, click the " " , the speed will be reduced to a comfortable state and the incline to the initial state value. When you want to stop running, press the " " on the home page or the" "button on the controlling panel, and a window that is about to end running will pop up on the home page to provide"...
- Page 11 After inserting the safety key, it will switch to the main menu page, as shown below: standby mode, you can choose the Quick start mode, Real mode, Target mode, Training mode and other sports programs to train, and you can also choose Multimedia for other operations.
- Page 12 2. Controlling panel instruction Wireless charging Speed up Incline up Incline down Speed down Pause/Stop Start Mechanical button operation Start: after power on, press “START”,the treadmill starts running. Stop/pause press this button when running, the treadmill will puase, and press again to stop :...
- Page 13 2.2.4 Training mode: click this button to ente into the traning selection interface. 2.2.5 HRC mode: click this button to enter into setting interface of HRC 2.2.6 Multimedie: click this button to view different applications. 2.2.7 :click this button to return to the previous menu. 2.2.8 :click this button to switch to the full screen.
- Page 14 4. Instruction of running programs and setting operation 4.1 Treadmill operation instruction Switch on the power, the treadmill enters into the standby state, press “START”, the treadmill starts to run, you can choose the speed or incline button to adjust, press “STOP” to stop running. In the standby state, if there is no signal input for a long time, the treadmill enters the black screen of shutdown standby state.
- Page 15 Users can choose their favorite real scene, click to enter the scene running. For example: the user chooses "Beach" real scene, beach scene running will be started. As shown below: Press the speed adjustment button (+ -/ ) on the controlling panel or screen to adjust the speed of running.
- Page 16 4.4.1 Distance: Built-in 2/4/6/8/ Mini marathon/half marathon/full marathon/custom options. The distance will gradually decrease as you run, then come to end when it drop to 0. Users can select their target distance and click to enter the running interface. For example, users can select a "4km"...
- Page 17 4.4.2 Time:Built-in 15/30/45/60/90/120/150/custom options. The setting time will gradually decrease as you run, then come to end when it reaches 0. Users can select their target time and click to enter the running interface. For example, the user selects the "15 minute" to start. As shown below: Custom mode:...
- Page 18 4.4.3 Calorie: Built-in for 100/200/300/400/500/1000/1500 / custom options. The setting calories will gradually decrease as you run, then come to end when it reaches 0. Users can select their target calorie and click to enter the running interface. For example, the user selects the "100"...
- Page 19 4.5 Training mode Click “Training mode” to enter the selection interface, as shown below: 4.5.1 In the training mode, the system provides a variety of preset training plans of Relax, Cardio, Fat burning and Endurance for different running styles to help train stretching. Different running modes have different incline and paces, so users can concentrate on running without worrying about various Settings.
- Page 20 4.5.2 Cardio mode,as shown below 4.5.3 Fat burning mode, as shown below:...
- Page 21 4.5.4 Endurance mode, as shown below 4.5.5 Custom mode: If the preset training mode cannot meet users’ requirements, they can...
- Page 22 customize the training mode, including: running time, incline and speed of each running stage. You can press and drag any rectangular bar to set different incline changes and different pace parameters in different time periods. After setting, click “START” to run, as shown below: 4.6 Heart rate control mode: click “HRC Mode”to enter into heart rate control setting page, such as “Age”- “Gender”- “Percentage of difficulty”- “Time”...
- Page 23 5.Multimedia Click “Multimedia” to enter application selection interface , as shown below: *Remark: Because the software is constantly updated and iterated, if the actual interface is inconsistent with that in this instructiont, the actual interface prevails, this document is for reference only. Heat rate test ◆...
- Page 24 is only for the reference of sports and fitness. Tips: When using wireless heart rate, please do not use in MP3 mode, to prevent the interference of two signals, and a special wireless heart rate chest band is required. Warning: Heart rate monitoring system may be inaccurate. Excessive exercise can result in serious injury or death.
- Page 25 Warning: To ensure the safety and normal use, check the wear and damage of the treadmill regularly. Maintennance and malfunction treatment 1.Clean: The surface of the treadmill should be kept clean, pull out the power cord before cleaning. You can clean the running belt and the surface of the treadmill with a soft and wet cloth, be sure not to use strong solvents.
- Page 26 treadmill in the best condition, the treadmill is equipped with reminding function of belt lubricating and replacing. When the treadmill runs to 9000km, "Need lubrication" will be displayed on left upper corner of the screen, it means need to add oil to the treadmill; After the first time oiling, the next reminding will be displayed every 1000km.
- Page 27 GARLANDO SPA Via Regione Piemonte, 32 - Zona Industriale D1 15068 - Pozzolo Formigaro (AL) - Italy www.toorx.it - info@toorx.it...
Need help?
Do you have a question about the TRX 3500 TFT and is the answer not in the manual?
Questions and answers