Table of Contents
Advertisement
Quick Links
Advertisement
Table of Contents

Subscribe to Our Youtube Channel
Related Manuals for TOORX TRX 9000


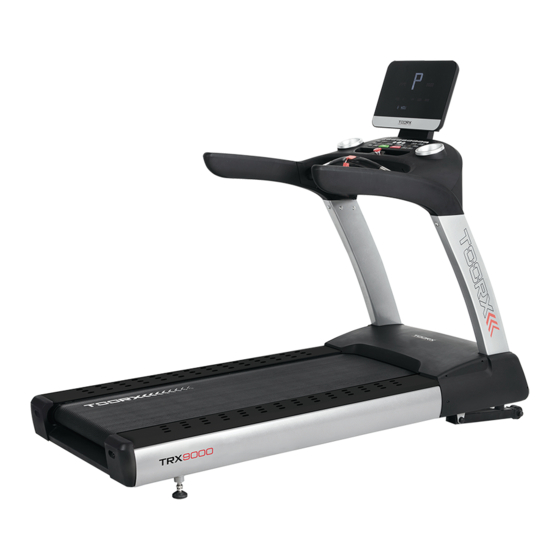
Summary of Contents for TOORX TRX 9000
- Page 1 INSTRUCTION...
- Page 2 Hardware and tool Explored drawing...
-
Page 3: Spare Parts List
Spare Parts List Description Description Base frame Signal wire A Switch base frame Signal wire B Incline frame Signal wire C Left upright tube Right upright tube Handlebar and controller Display screen Bolt M8X55 Oil pipe Bolt M10X95 Front roller Bolt M10X55 Rear roller Bolt M10X25... -
Page 4: Assembly Instruction
Assembly Instruction Please make sure there’s enough space to install the treadmill and recommend 2 persons to install it. WARNING: Don’t insert the power wire until the treadmill was fully assembled. Assembly tips: 1.In order to avoid instruction mistake, do not tighten bolt completely until the whole treadmill assembly is finished. - Page 5 tighten. In upper outer side, using Bolt M10X165 (A6) that was assembled on frame to tighten.(Attention: bolt head position is the front underside. See figure 3-1) 4. Assembling handlebar and controller A. Connect the Signal wire from Right upright tube to corresponding wires from Handlebar.
-
Page 6: Adjustment Instruction
Adjustment instruction Treadmill adjustment 1.Before connect power, service or professional inspect if voltage is suitable, and if three-core plug grounded wire is connected. Using hand to pull the belt, inspect if rotation is flexible and no noise. 2.Connect power, press Start key, treadmill will run slowly, inspect if belt and computer are normal. -
Page 7: Computer Instruction
Computer Instruction Function 2.Controller instruction 2.1 Physical rubber buttons control console ( see figure as below) 2.1.1 Buttons function table Button Icon Button Name Button Instruction ■Treadmill operation key instruction Connect the power, press START key, the treadmill start running. START Key When treadmill running, press STOP/PAUSE to pause status, press it again, the treadmill turn to stop status. - Page 8 Press this key to confirm after setting. ENTER Key Press this key to confirm to clear after setting. CLEAR Key It is an emergency stop device to prevent slip. Please clamp to your clothes when using the treadmill. Pull the string or pat the safety key button, treadmill will stop immediately, matrix Safety Key window shows ---...
- Page 9 target training program. Program Three kinds of different incline hill climbing program. It can be P5:Hill Climbing strengthen limbs and muscle training from gentle slope to Program steep slope. Three kinds of timing fat burn training program: p1 training time P6:Fat burn of 20 minutes;...
- Page 10 #H./2>?@-!?-1>/3=>?@- JBS!$/.2EK?44!@H./2>?@-!?-1>/3=>?@- G9"9"!T1&'4;)!.*43!*63-&1/*' =+1!1%3!2638/&5!6*F3-!F/-3!/'23-1!1*!1-3&4./55!2*8(31D!&'*1%3-!3'4!*,!6*F3-!F/-3!%&2!;3!8*''38134!1*!1%3 3'K/-*'.3'1!F*-(/'0!K*51&03!?3'K/-*'.3'1!F*-(/'0!K*51&03!.+21!;3!/'!8*',*-./1)!F/1%!-3W+/-3.3'12!*, 1%3!1-3&4./55#9!V*''381!1%3!6*F3-D!1-3&4./55!3'13-!1*!21&'4;)!.*43D!1/.3!F/'4*F!2%*F2!3'K/-*'.3'1 13.63-&1+-3D!=Z^hZM\!F/'4*F!2%*F2!2311/'0!6-*0-&.!D*1%3-!F/'4*F2!F/55!2%*F2!/'/1/&5!K&5+3!i>j9 G9"9<!T1&-1!1-3&4./55!*63-&1/*'! C'! 21&'4;)! .*43D! 6-322! T$MZ$ ! (3)D! 1-3&4./55! 21&-1! 1*! -+''/'0D! 3&8%! F/'4*F! F/55! 2%*F! 8+--3'1! 373-8/23!4&1&!&88*-4/'05)9!\&1-/7!F/'4*F!4/265&)!8+--3'1!6*2/1/*'!&'4!1-&8(2D!53'01%!*,!1-&8(!G>>!.313-29! M1!1%3!2&.3!1/.3D!)*+!8&'!235381!26334!*-!/'85/'3!(3)! ! 1*!&4R+21!26334!*-!/'85/'3!85&22!&2!)*+!5/(3D! 6-322!21*6!(3)! ! 1*!6&+23!*-!21*6!-+''/'09! G9"9B!Q73-8/23!6-*0-&.!*63-&1/*'!/'21-+81/*'! $-3&4./55!+234!P!(/'42!*,!/'1355/03'1!373-8/23!6-*0-&.9!M88*-4/'0!1*!+23-A2!&03D!03'43-D!F3/0%1!318D!&'4! +23-A2!373-8/23!6+-6*23!1*!8+21*./U39!Q73-8/23-!&88*-4/'0!1*!/'13'1/*'!1*!8%**23!&!&66-*6-/&13!373-8/23! 6-*0-&.!1-&/'/'09! ! b%3'!)*+!+23!/'1355/03'1!6-*0-&.D!)*+!'334!1*!+23!2311/'0!(3)! 1*!6-38343!-353K&'1!2311/'0D!6-322! Q'13-!(3)! 1*!8*',/-.O!6-322!V53&-!(3)! 1*!.*4/,)!2311/'0O!=-322!="`=P!4/-381!(3)! 1*!235381!/'1355/03'1!6-*0-&.!&2!)*+!5/(3D!6-322!T1*6e6&+23!(3)! 1*!37/1!F%3'!23538134D!1%3'!)*+!
- Page 11 P1: Heart Rate Control Program P2: Custom Program P3: Manual Program P4: Target Setting Program P5: Hill Climbing Program...
- Page 12 P6: Fat burn Program P7: Cardio Program P8: Strength Program P9: Fit test Program...
- Page 13 4.1.5 MP3 Playing and treadmill operation Warm tip: When you wearing special HRC wireless heart rate chest belt, do not play MP3 at the same time to avoid audio signal interfere with wireless heart rate 4.1.6 Program Matrix graphics and body mass index reference table Custom program graphics Hill climbing:...
- Page 14 Fat percentage reference table Adult body mass index(BMI) reference table 5. Hand pulse test 5.1 After and before exercise, can monitor exercise’s pulse of static and dynamic. The pulse will be restore after finished exercise. Exerciser hold the left and right hand touch pulse monitored metal, show pulse on screen.
-
Page 15: Maintenance And Malfunction Treatment
will show “REPLACE BELT” after 50KMS Oil adding reminding replaces belt reminding Maintenance and Malfunction Treatment 1) Clean: The surface of the treadmill should be kept clean, pull out the power line before cleaning. You can clean the running belt and the surface of the treadmill with a soft and wet cloth. - Page 16 GARLANDO SPA Via Regione Piemonte, 32 - Zona Industriale D1 15068 - Pozzolo Formigaro (AL) - Italy contact@toorxprofessional.it www.toorxprofessional.it...
Need help?
Do you have a question about the TRX 9000 and is the answer not in the manual?
Questions and answers