Advertisement
Quick Links
Advertisement

Subscribe to Our Youtube Channel
Related Manuals for TOORX TRX 40 S EVO


Summary of Contents for TOORX TRX 40 S EVO
- Page 1 INSTRUCTION...
-
Page 2: Table Of Contents
CONTENT CONTENT -------------------------------------------------------------------------------------------------------------------------------- IMPORTANT SAFETY PRECAUTIONS -------------------------------------------------------------------------------------2 TECHINICAL PARAMETERS-------------- -------------------------------------------------------------------------------------3 PRODUCT OVERVIEW -------------- ---------------------------------------------------------------------------------------------3 ASSEMBLY INSTRUCTIONS ----------------------------------------------------------------------------------------------------4 FOLDING & UNFOLDING INSTRUCTIONS -------------------------------------------------------------------------------7 GROUNDING METHODS -----------------------------------------------------------------------------------------------------------8 OPERATION GUIDE -------------------------------------------------------------------------------------------------------------------9 GETTING STARTED GUIDE -----------------------------------------------------------------------------------------------------14 WARM-UP EXERCISES ------------------------------------------------------------------------------------------------------------15 SAFETY EXERCISES ---------------------------------------------------------------------------------------------------------------16 MAINTENANCE INSTRUCTIONS ---------------------------------------------------------------------------------------------17 BELT ADJUSTMENT ----------------------------------------------------------------------------------------------------------------18... -
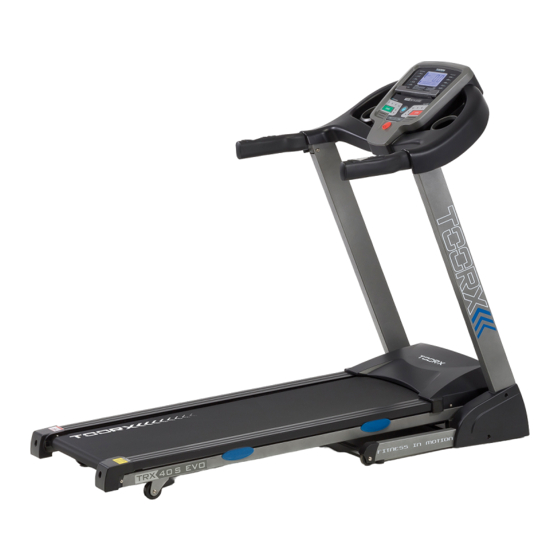
Page 3: Product Overview
removed. Note the power cord of motorized treadmill made by special equipment, and if it is broken, please contact distributor quickly. 15. The treadmill is for home use only. 16. The treadmill maximum user weight is 100kgs 17. Please do not over-use the treadmill so can avoid any injury and do not use incorrect way for your safety. -
Page 4: Assembly Instructions
Assembly instruction WHEN YOU OPEN THE CARTON, YOU WILL FIND THE BELOW SPARE PARTS: STEP 1: Take out and prepare the below parts 1 Main frame 1 set D17 Inner star washer M8 D13 Round hex bolt C13 Safety key 1 set 8 PCs M8*15 4 PCs D3 Allen wrench 5MM,... - Page 5 STEP 3: Secure bottom frame with bolt M8*45(D16), M8*15 (D13) and i (D17). nner star washer Then assemble the console bracket with bolt M8*15 (D13) and (D17). inner star washer D 1 3 D 1 3 D 1 6 D 1 3 D 1 6 D 1 7 Step 4: Tighten the rubber cover (B12) to the left/right side covers (B11L/R) with cross...
- Page 6 Step 5: Place on the safety key (C13). Step 6: To check if the running belt runs correctly, placing treadmill in folding position and tightening all the bolts. Then set speed under 3km/h and see if running belt runs without problem.
- Page 7 Folding Instruction Lift up the machine and force to pull up until you heard "click" that made by safety casing stuck the pneumatic cylinder. Unfolding instruction Kick the safety sleeve lightly and pull down the machine at the same time as the arrow direction.
-
Page 8: Grounding Methods
Grounding Methods This product must be grounded. If it should malfunction or breakdown, grounding provides path of least resistance for electric current to reduce the risk of electric shock. This product is equipped with a cord having an equipment-grounding conductor and a grounding plug. -
Page 9: Operation Guide
Operation Guide WINDOW DISPLAY 1.1. 1.1. Console 1.2. START Normal start after 5 seconds countdown 1.3 PROGRAM 3 countdown functions, 12 sets of programs , 1 body fat program 1.4. SAFETY LOCK FUNCTION The window shows"---" when take away the safety lock and the treadmill will stop quickly with "didi" alarm noise. - Page 10 When the treadmill is not running, press this button can choose from program circle mode to manual mode (P1-P12). The lowest speed for manual mode is “0.8km/h”, and the highest speed is “16km/h”; the lowest incline is “0”, and the highest is “12”. 1.5.3 “MODE”...
- Page 11 1.6.5 DISTANCE Display the running total distance or distance countdown. 1.6.6 CALORIES Display the calorie or calorie countdown 1.6.7 SPEED DIAGRAM Display the diagram of the running speed 1.6.8 ALL WINDOW DISPLAY DATA RAGNE TIME:0:00 – 99.59(MIN) DISTANCE: 0.00 – 99.9(KM) CALORIES: 0.0 –...
- Page 12 1.9 3 COUNTDOWN FUNCTION PARAMETER DATA Countdown time initial setting 10:00 minutes,setting range 5:00---99:00 minutes , each step 1:00. Countdown calorie initial setting 50therm, setting range 20---990 therm,each step 10. Countdown distance initial setting 1.0km,setting range 1.0---99.0 km,each step 0.1 Cycle switch order is: manual, time, distance, calories.
- Page 13 Height 100----200 Weight 20-----150 FAT ≤19 Under weight FAT = (20---25) Normal weight FAT = (25---29) Over weight FAT ≥30 Obesity 1.11 OTHERS When the countdown mode is finished and “END” appears on screen, warning sound occurs 1.11.1 . Then it will be back to manual mode. You can set statistics at circled mode.
-
Page 14: Maintenance Instructions
Maintenance Instruction WARNING : Please make sure pull out the treadmill's power plug before cleaning or maintaining the product. CLEANSING:General cleaning or the unit will greatly prolong the treadmill's life. Keep treadmill clean by dusting regularly. Be sure to clean the exposed part of the deck on either side of the walking belt and also the side rails. -
Page 15: Belt Adjustment
Belt Adjustment Place treadmill on a level surface. Make treadmill run at approximately 6-8 km/h, observe the running belt deviate condition. f the belt has drifted to the right, unplug the safety lock and power switch, and turn the right adjusting bolt 1/4 turn clockwise, then insert the power switch and safety lock, make the treadmill running, observe the running belt deviate condition. -
Page 16: Exploded Drawing
Exploded Drawing Parts list... -
Page 17: Parts List
Parts List A. Welding parts Description Description Main frame Console bracket Base frame Incline bracket Left upright Filter bracket Right upright Motor bracket 1 B.Plastic parts Description Description Console set Motor upper cover B1-1 Overlay Motor lower cover B1-2 Membrane keys Side rail B1-3... - Page 18 Round hex bolt M10*50 Hex round head bolt M8X80 Round hex bolt M8X15 Cross head bolt M6X25 Cross head bolt M4X20, Round hex bolt M8X30 washer Cross head bolt M5X15, Round hex bolt M8X40 washer Cross head bolt M5x20, Round hex bolt M8X45 washer Cross self-tapping bolt Inner star washer M8...
- Page 19 GARLANDO SPA Via Regione Piemonte, 32 - Zona Industriale D1 15068 - Pozzolo Formigaro (AL) - Italy www.toorx.it - info@toorx.it...
Need help?
Do you have a question about the TRX 40 S EVO and is the answer not in the manual?
Questions and answers