Table of Contents
Advertisement
Quick Links
Advertisement
Table of Contents

Related Manuals for TOORX TRX SMART COMPACT


Summary of Contents for TOORX TRX SMART COMPACT
- Page 1 INSTRUCTION...
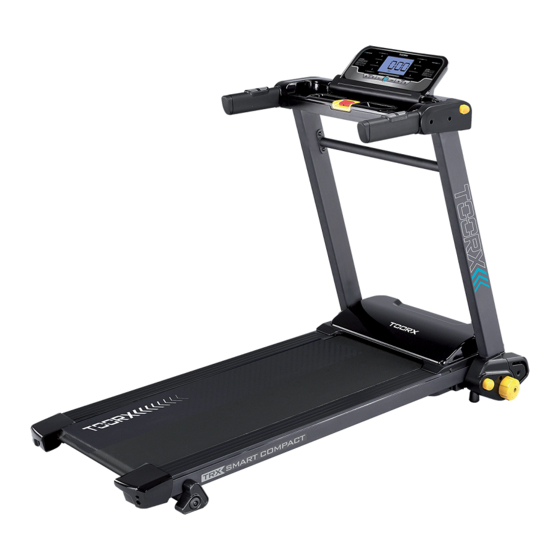
- Page 2 INTRODUCTION The treadmill has been designed and constructed to provide trouble free usage and enjoyable exercise. You can greatly improve your understanding and benefits of exercising by carefully reading the instructions given in this manual. Please familiarize yourself with the maintenance advice provided for you. SPECIFICATIONS •...
-
Page 3: Assembly Pack Check List
ASSEMBLY PACK ASSEMBLY PACK CHECK LIST CHECK LIST #99. M5 × P0.8 × 12L #111. Lubricant (1 pc) Phillips Head Screw (2 pcs) #112. L Allen Wrench (1pc) #115. Short Phillips Head Screw Driver (1pc) - Page 4 ASSEMBLY ASSEMBLY Step 1. Place the treadmill on level ground. Step2. Install Front Frame Base Cover (L)(R) (37) and (38) on the treadmill and use Short Phillips Head Screw Driver (115) to tighten 2 pcs of M5 × P0.8 × 12L_Phillips Head Screw. NOTE: Please Tighten All Screw After All Components Assembly Complete.
- Page 5 UNFOLDING FOLDING TRANSPORT Unfolding Procedure Step 1. Place the treadmill on level ground. Step 2. Press and hold the Release To Push A Button (Bottom)(48) and pull Uprights (L, R) (3,2) as the arrow indicates to the end position.
- Page 6 UNFOLDING FOLDING TRANSPORT Step 3. Press and hold Release To Push A Button (Top) (23) and turn Console Support (4) as indicated below and unfold console Assembly (26) into place.
- Page 7 UNFOLDING FOLDING TRANSPORT Folding Procedure Step 1. Fold Console Assembly (26). Step 2. Press and hold the Release To Push A Button (Top) (23) and pull Console Support (4) up to the end.
- Page 8 UNFOLDING FOLDING TRANSPORT Step 3. Press and turn Brake Tension Knob (20) clockwise and pull Uprights (L, R) (3,2) as the arrow indicates to the end position. Step 4. Pull up the Main Frame (1) to fold up the treadmill.
-
Page 9: Computer Operation Instructions
FUNCTIONS COMPUTER OPERATION INSTRUCTIONS Button Function A > “START/ STOP” Button Press this button to start the operation of the treadmill with the starting speed at 1.0 KPH. Press it again to stop the treadmill with the speed gradually slow down until full stop. B >... - Page 10 FUNCTIONS Get prepared before using the treadmill Be sure that the power complies with product specification prior to turning on the treadmill. The red light of the switch comes on and the console shows E0 when the treadmill turns on. Put the safety key in place and clip on the other end to the cloth and be ready for the workout.
-
Page 11: Belt Tracking Adjustmeant
BELT TRACKING ADJUSTMEANT If during use you notice that walking belt either shifts to the right or the left of center, first remove "Safety Key" and unplug equipment from AC power source. Using Allen wrench provided, turn left rear roller adjustment as indicated below clockwise no more the 1/4"... -
Page 12: Treadmill Lubrication
TREADMILL LUBRICATION Your treadmill should require little maintenance other then periodically applying lubricant. Lubricating under the treadbelt will ensure superior performance and extend its life expectancy. HOW TO CHECK TREADBELT FOR PROPER LUBRICATION? Lift one side of the treadbelt and feel the top surface of the treadboard. If the surface is slick to the touch, then no further lubrication is required. - Page 13 OVERVIEW CHART...
-
Page 14: Parts List
PARTS LIST DESCRIPTION Q'TY Main Frame Right Upright Left Upright Console Support Inclination Adjustor Bushing Assembly Upright Support Axle Sprung Latch Releasing Bracket Axle Handrail Support Brake Tension Knob Axle Rear Roller Cover Front Roller W/Pulley Rear Roller Motor Bracket Motor Drive Belt Running Deck... - Page 15 PARTS LIST DESCRIPTION Q'TY Deck stopper (L) Deck stopper (R) Handgrip End Cap Motor Top Cover Frame Cover Handgrip Foam Release To Push A Button (Bottom) Rear Adjustment Base (L) Rear Adjustment Base (R) Inclination Adjustor (L) Inclination Adjustor (R) Bolt Cap Inclination Adjustor Bushing Transportation Wheel...
- Page 16 PARTS LIST DESCRIPTION Q'TY M8 × P1.25 × 12L_Hex Head Bolt 1/4" × UNC20 × 60L_Socket Head Cap Bolt M5 × P0.8 × 10L_Flat Phillips Head Screw Ø3.5 × 12L_Sheet Metal Screw M10 × P1.5 × 50L_Button Head Socket Bolt 5/16"...
- Page 17 GARLANDO SPA Via Regione Piemonte, 32 - Zona Industriale D1 15068 - Pozzolo Formigaro (AL) - Italy www.toorx.it - info@toorx.it...
Need help?
Do you have a question about the TRX SMART COMPACT and is the answer not in the manual?
Questions and answers