EMS FireCell Programming Manual
Hide thumbs
Also See for FireCell:
- Programming manual (38 pages) ,
- Setup manual (16 pages) ,
- Maintenance manual (10 pages)

Subscribe to Our Youtube Channel
Related Manuals for EMS FireCell


Summary of Contents for EMS FireCell
- Page 1 Programming Manual (V3 Software) ©2019 EMS Ltd. All rights reserved. MK98 Iss17 05/04/2019 AJM...
-
Page 2: Table Of Contents
Add New Device Assign Device Remove Device Hub/RCC Options Set Hub Address Add RCC Remove RCC Hub/RCC Status Fault Status Signal Level Manual Update Background Level ©2019 EMS Ltd. All rights reserved. Page 2 of 40 MK98 Iss17 05/04/2019 AJM... -
Page 3: Introduction
This manual provides a comprehensive guide to the programming of the EMS FireCell Wireless System. Note: this revision is intended for use with Rev 3 Software FireCell Systems, as previous versions of Radio Hub menu structures will slightly vary. Refer to the Issue 13 of this document, when using FireCell Systems with Rev 2 software. -
Page 4: System Design
Handling Precautions General: Care should be taken when handling the EMS FireCell product range. Avoid dropping any of the parts onto hard surfaces, as damage may occur to the case and internal circuitry. ESD Precautions: EMS FireCell products include components that are susceptible to damage from Electrostatic discharge (ESD). -
Page 5: Equipment Identi Cation
Equipment Identi cation It is important to establish which devices have been supplied for the installation. Examples of each FireCell device are shown below: Wireless Detectors Note: Detector and Detector Wireless Bases shown below, can be mixed and matched as required. -
Page 6: Equipment Familiarisation
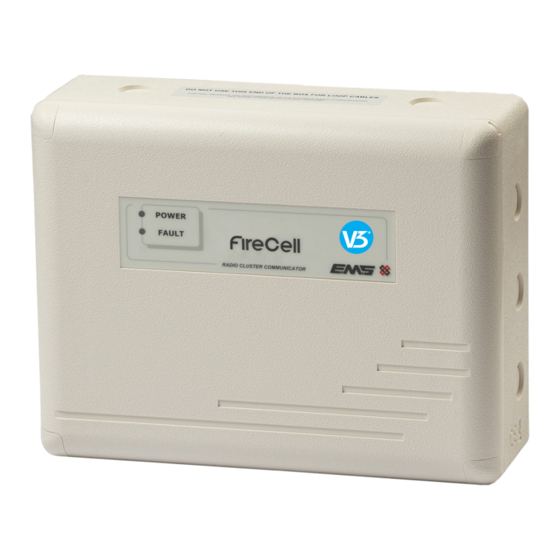
Log on button Wireless Sounder Base unpowered IDENT (pins unlinked) PRESS HERE TO LOG ON device Status LED powered Ident Number (both pins linked) 1d872 RevX DD/MM/YY ©2019 EMS Ltd. All rights reserved. Page 6 of 40 MK98 Iss17 05/04/2019 AJM... - Page 7 N/O COM N/C device powered (both pins linked) Radio Cluster Communicator Ident Number RESET IDENT HEALTHY FAULT 1d872 RevX DD/MM/YY SYS FAULT BACK LOGON Log On Button ©2019 EMS Ltd. All rights reserved. Page 7 of 40 MK98 Iss17 05/04/2019 AJM...
-
Page 8: Quick System Programming
Quick System Programming This quick system programming guide provides a recommended procedure into the installation and programming of the EMS FireCell Radio System. Before commencing with the installation, the survey report should be available detailing where the control panel and wireless infrastructure is to be tted. -
Page 9: Assign Rccs
The newly added devices must now be assigned. This can be achieved by selecting; Assign Device Assign All Dev 000 of 003 changing to From Unassigned Dev Done 003 of 003 (once complete) To Exit BACK ©2019 EMS Ltd. All rights reserved. Page 9 of 40 MK98 Iss17 05/04/2019 AJM... -
Page 10: Panel Programming
Press the ‘Enter’ Button to enter. Con rmation of the addition to the system should now be shown. Once complete, press the ‘Exit’ button to escape the menu. ©2019 EMS Ltd. All rights reserved. Page 10 of 40 MK98 Iss17 05/04/2019 AJM... -
Page 11: Equipment Features
Radio Hub. System Fault LED; a yellow LED will ash if a checksum error is detected, in either the software program or con guration data. ©2019 EMS Ltd. All rights reserved. Page 11 of 40 MK98 Iss17 05/04/2019 AJM... - Page 12 ENG 1 Port; the engineers port is used to establish connection to a computer based terminal program. This is used for programming purposes, using the FireCell Con guration Tool. Loop 1 -4 Connections; these are used for Loop IN and OUT connections to the re alarm control panel.
-
Page 13: Rcc
Log On Button; the log on button is used to log the Radio Cluster Communicator on to the Radio Hub. ENG 1 Port; the engineers port is used to establish connection to a computer based terminal program. This is used for programming purposes, using the FireCell Con guration Tool. Battery/Mains Connections ©2019 EMS Ltd. - Page 14 Battery Fail LED; this LED will illuminate when the battery is disconnected. Input L N E; mains connections. Note: Allow up to 30 seconds, for the LEDs to re ect a change in condition. ©2019 EMS Ltd. All rights reserved. Page 14 of 40 MK98 Iss17 05/04/2019 AJM...
-
Page 15: Wireless Devices
LED enable button is pressed and the input is closed the LED will be illuminated. The LEDs will be illuminated for 10 minutes and then automatically time out. ©2019 EMS Ltd. All rights reserved. Page 15 of 40 MK98 Iss17 05/04/2019 AJM... -
Page 16: Menu Structure
Analogue 35 mode Audio Detect Batt Smoothing Alarm Status shown as I/O Status for Input/Output device types. Programming features not yet released in this version of software. † ©2019 EMS Ltd. All rights reserved. Page 16 of 40 MK98 Iss17 05/04/2019 AJM... -
Page 17: Front Display
The menu structure section details each of the menu options, highlighting their e ect within the FireCell system. A quick step by step guide is shown at the end of each of the menu descriptions to aid navigation. -
Page 18: Menu Explanation
Available device type elds are: Optic; Optical Detector Sound; Sounder Device I/O; Input/Output Device Multi; Multisensor Detector Heat; Heat Detector Ht Heat; High Temperature Detector MCP; Manual Callpoint ©2019 EMS Ltd. All rights reserved. Page 18 of 40 MK98 Iss17 05/04/2019 AJM... -
Page 19: Fault Status
Unassigned; this description indicates that the device is unassigned to the system. Assigning the device is possible by pressing the rotary control to assign or visiting the Assign Devices option from the main menu. ©2019 EMS Ltd. All rights reserved. Page 19 of 40 MK98 Iss17 05/04/2019 AJM... -
Page 20: Alarm Status
OUT: 0-1; this indicates that output 2 is in the closed (activated) state. OUT: 1-1; this indicates that output 1 and 2 is in the closed (activated) state. ©2019 EMS Ltd. All rights reserved. Page 20 of 40 MK98 Iss17 05/04/2019 AJM... -
Page 21: Battery Level
Pack 2 Missing; this indicates a battery from Pack 2 is missing. The battery must be inserted on the device for continued reliable operation. This is represented by displaying an X symbol. ©2019 EMS Ltd. All rights reserved. Page 21 of 40... -
Page 22: Signal Level
The menu will change to show that it’s updating the signal level. Once completed check the new signal level by entering the Signal Level menu. Front Display Device Status Select Desired Device No Manual Update followed by Update Requested ©2019 EMS Ltd. All rights reserved. Page 22 of 40 MK98 Iss17 05/04/2019 AJM... -
Page 23: Rcc Number & Ident
This will show the devices unique identi cation number, if correct, selecting ‘Yes’ will remove the device from the system. Remove Device Front Display ©2019 EMS Ltd. All rights reserved. Page 23 of 40 MK98 Iss17 05/04/2019 AJM... -
Page 24: Hub/Rcc Options
RCC from the system. NOTE: RCCs can only be removed from the system when no devices are allocated to that particular RCC. Hub/RCC Options Remove RCC Front Display ©2019 EMS Ltd. All rights reserved. Page 24 of 40 MK98 Iss17 05/04/2019 AJM... -
Page 25: Hub/Rcc Status
U; RCC is unassigned to the Radio Hub. !; a fault is present. (See fault status descriptions). † Available options are: RCC01; Radio Cluster Communicator numbered from 01-31 Hub; Radio Hub ©2019 EMS Ltd. All rights reserved. Page 25 of 40 MK98 Iss17 05/04/2019 AJM... -
Page 26: Fault Status
Devices’ option from the main menu. Checksum Error; if an error is detected in either the software program or con guration data, the error message will be displayed. ©2019 EMS Ltd. All rights reserved. Page 26 of 40 MK98 Iss17 05/04/2019 AJM... -
Page 27: Signal Level
Indicates a good signal level 8 to 19dB Indicates a low signal level 1 to 7dB Indicates a caution signal level Indicates no signal level is being received ©2019 EMS Ltd. All rights reserved. Page 27 of 40 MK98 Iss17 05/04/2019 AJM... -
Page 28: Manual Update
Hub. By undertaking the command, the RCC is cleared and reprogrammed, clearing the fault condition. Hub/RCC Options Hub / RCC Status Refresh RCC Front Display Select Desired Device No ©2019 EMS Ltd. All rights reserved. Page 28 of 40 MK98 Iss17 05/04/2019 AJM... -
Page 29: Radio Channels
Ch24: 868.924 MHz Ch12: 868.323 MHz Ch12: 868.323 MHz Ch28: 869.024 MHz Ch28: 869.024 MHz Ch16: 868.423 MHz Ch16: 868.423 MHz Ch32: 869.125 MHz Ch32: 869.125 MHz ©2019 EMS Ltd. All rights reserved. Page 29 of 40 MK98 Iss17 05/04/2019 AJM... - Page 30 Ch28: 869.024 MHz Ch12: 868.323 MHz Ch28: 869.024 MHz Ch16: 868.423 MHz Ch32: 869.125 MHz Ch16: 868.423 MHz Ch32: 869.125 MHz Radio Hub to all RCCs ©2019 EMS Ltd. All rights reserved. Page 30 of 40 MK98 Iss17 05/04/2019 AJM...
-
Page 31: Currently Used
High band as described in the Radio Channels section: Front Display Radio Channels Manual Select Device RCC Ch For example: Device to RCC Communication path Low Band Ch 4, High Band Ch 29 ©2019 EMS Ltd. All rights reserved. Page 31 of 40 MK98 Iss17 05/04/2019 AJM... -
Page 32: Auto Select
RCC Listing; this menu allows you to view all of the devices assigned to each RCC. Once the desired RCC has been selected, devices can be viewed by scrolling through the list of devices. Advanced Device RCC Listing Front Display ©2019 EMS Ltd. All rights reserved. Page 32 of 40 MK98 Iss17 05/04/2019 AJM... -
Page 33: Global Batt Stat
LED’s to be turned on for detectors and call points, individual sounder operation and relay output operation on Input /Output units. Advanced Individual test Front Display ©2019 EMS Ltd. All rights reserved. Page 33 of 40 MK98 Iss17 05/04/2019 AJM... -
Page 34: Start Fast Test
30 min cut o which will turn all wireless sounders o after 30 minutes to conserve battery life. Any subsequent re alarm activations will re-activate the sounders again. Advanced Sounder Mode Front Display ©2019 EMS Ltd. All rights reserved. Page 34 of 40 MK98 Iss17 05/04/2019 AJM... -
Page 35: Call In Verify
30 day battery low warning is still achieved. The default is set to OFF so no smoothing is implemented and the fault type is displayed instantly. Advanced Batt Smooth Front Display ©2019 EMS Ltd. All rights reserved. Page 35 of 40 MK98 Iss17 05/04/2019 AJM... -
Page 36: Analogue Values / Fault Recti Cation
Call Point Alarm Check that the device’s element is reset. Detector Alarm Ensure that the environment of the devices location is free of smoke residue and dust. ©2019 EMS Ltd. All rights reserved. Page 36 of 40 MK98 Iss17 05/04/2019 AJM... -
Page 37: Signal Level Requirements
L1 A013 42dB Sounder Loop 1 Address 14 L1 A014 38dB Sounder Loop 1 Address 15 L1 A015 45dB Sounder Beacon Loop 1 Address 16 L1 A016 22dB ©2019 EMS Ltd. All rights reserved. Page 37 of 40 MK98 Iss17 05/04/2019 AJM... - Page 38 Meeting the acceptable signal levels shown ensures the immunity to site attenuation (path loss) is met as required in Clause 4.2.1 and Annexe B of EN54-25. ©2019 EMS Ltd. All rights reserved. Page 38 of 40 MK98 Iss17 05/04/2019 AJM...
-
Page 39: How To Improve Signal Levels
/ closest RCC and re-check signal levels. Carry survey to re-check signal levels. Contact the EMS Technical signal levels Support department now ok? further advice. Signal Levels successfully improved. ©2019 EMS Ltd. All rights reserved. Page 39 of 40 MK98 Iss17 05/04/2019 AJM... - Page 40 The information contained within this literature is correct at time of publishing. EMS reserves the right to change any information regarding products as part of its continual development enhancing new technology and reliability. EMS advises that any product literature issue numbers are checked with its head o ce prior to any formal speci cation being written.
Need help?
Do you have a question about the FireCell and is the answer not in the manual?
Questions and answers