EMS firecell Setup Manual
Hide thumbs
Also See for firecell:
- Programming manual (40 pages) ,
- Setup manual (16 pages) ,
- Maintenance manual (10 pages)

Related Manuals for EMS firecell


Summary of Contents for EMS firecell
- Page 1 Setup Guide ©2015 EMS Security Group Ltd. All rights reserved. MK99 Iss6b 17/07/15 AJM...
-
Page 2: Table Of Contents
Contents 1 Install Control Panel & Radio Hub 2 Install & Log On the RCCs 3 Assign the RCCs 4 Add and Install the Wireless Devices 5 Assign the Devices 6 Control Panel Programming 7 Check Device Signal Levels 8 Test the System Hub Menu Structure Fault Recti cation 12-14... -
Page 3: Install Control Panel & Radio Hub
1 Install Control Panel & Radio Hub POWER FAULT Radio Hub SYSTEM FAULT FIRE Control Panel Fire Alarm Control The Control Panel and the Radio Hub require installation into their proposed locations. (See the Radio Hub Installation Guide for more information). Once installed and with power applied, the Radio Hub will show the following default screen: TOT001 A000 F000... -
Page 4: Install & Log On The Rccs
2 Install & Log On the RCCs POWER POWER POWER FAULT FAULT FAULT SYSTEM FAULT 230V AC 230V AC FIRE POWER FAULT 230V AC Fire Alarm Control 230V AC The Radio Cluster Communicators (RCCs) require installing in their proposed locations. Refer to the Radio Cluster Communicator Installation Guide (TSD053) for more information. -
Page 5: Assign The Rccs
3 Assign the RCCs Assign Device HEALTHY FAULT SYS FAULT RESET BACK LOGON LOOP 1 LOOP 2 LOOP 3 LOOP 4 IN OUT IN OUT IN OUT IN OUT IN OUT IN OUT IN OUT IN OUT The newly added RCCs should now be assigned. Assign Device Dev 000 of 001 changing to Done From Unassigned Dev... -
Page 6: Add And Install The Wireless Devices
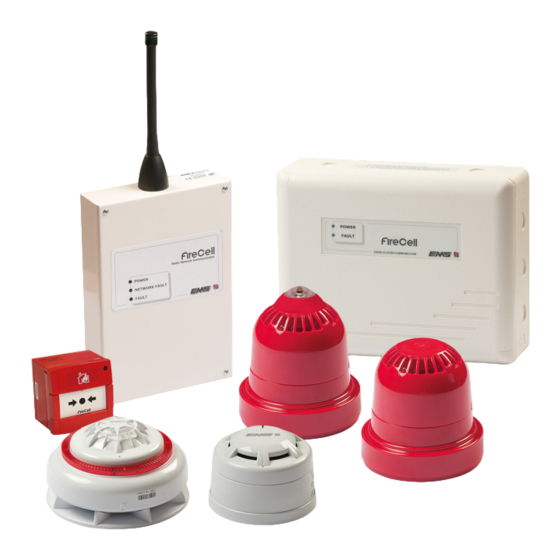
4 Add and Install the Wireless Devices www.emsgroup.co.uk Wireless Detector Base IDENT PRESS HERE TO LOG ON The Wireless Devices can be added to their relevant RCCs, either by pressing the device’s log on buttons or by entering the device’s unique ident number. If adding by ident, always make a note of the devices ident numbers and device type prior to installation and refer to the Programming Manual (MK98) for further details. -
Page 7: Assign The Devices
5 Assign the Devices Assign Device HEALTHY FAULT SYS FAULT RESET BACK LOGON LOOP 1 LOOP 2 LOOP 3 LOOP 4 IN OUT IN OUT IN OUT IN OUT IN OUT IN OUT IN OUT IN OUT The newly added devices must now be assigned. From Unassigned Dev Assign Device Dev 000 of 003 changing to Done... -
Page 8: Control Panel Programming
6 Control Panel Programming Program the Control Panel; ensuring Loop number and addresses programmed at the Radio Hub correspond to that programmed at the Control Panel. Ensure write switch is set to enable. Turn the key switch to the enabled position. Press the button to enter the menu. -
Page 9: Check Device Signal Levels
7 Check Device Signal Levels The signal levels for all wireless devices and RCCs must be checked. This menu will display the signal levels in dB for each wireless device and RCC over a 24 hour period, listed in Loop and Address Number order. After the system has been running for a 24 hour period, the device signal levels should display 24dB or above and the RCC signal levels should display 20dB or above. -
Page 10: Test The System
8 Test the System Note: loops can be entered into fast test for ease of testing. This allows the detectors on the selected loops to be triggered into an alarm condition quicker than normal. The led on the device will ash to indicate it is in this fast test mode. A time period of between 1 and 30 minutes is selectable which decrements and is then re-generated on a re alarm event. -
Page 11: Hub Menu Structure
Hub Menu Structure Device Loop / Fault Status Front Screen Text Device Status Address / Status / Alarm Status Add New Device Type Unassigned Dev Battery Level Assign Device Remove Device Signal Level Hub/RCC Options Manual Update Radio Channels RCC Number & Ident Advanced Software Version Set Hub Addr... -
Page 12: Fault Recti Cation
Fault Recti cation Device Type Symptom Recti cation Process Battery missing Check battery connections and voltages. Mains fail Check the RCCs mains supply. Detector Head fault Check that the device is correctly assembled. Failing this, it is recommended that the detector is replaced. Sounder No audio output Check the devices audio monitoring switches are set... - Page 13 Fault Recti cation Continued Batt/charger fail Check the RCCs battery connection voltage. Signal strength Check devices location to ensure no visible cause can be caution seen. Check device signal level in the Global Sig Stat menu. Refer to the ‘How to improve device signal levels’ section. Signal strength Has any electrical equipment recently been installed in close caution...
-
Page 14: Fault Recti Cation
Fault Recti cation Continued Detector Signal strength No action required. good Detector Head dirty It is recommended that the detector is replaced for new. Note: Where temporary work involving the generation of dust, smoke, paint spray, and other aerosols is to be carried out in an area protected by smoke detectors, the supplied dust covers must be temporarily tted to prevent... -
Page 15: How To Improve Signal Levels
How to Improve Signal Levels Has the device been installed in the correct location as per the survey? Reposition the device in the correct location and re-check the signal Is there levels. metalwork / electrical equipment near the unit, contrary to the device installation Are the instructions? - Page 16 The information contained within this literature is correct at time of publishing. The EMS Security Group Ltd reserves the right to change any information regarding products as part of its continual development enhancing new technology and reliability. The EMS Group advises that any product literature issue numbers are checked with its head o ce...
Need help?
Do you have a question about the firecell and is the answer not in the manual?
Questions and answers