
Related Manuals for Qualstar Q40


Summary of Contents for Qualstar Q40
- Page 1 Q40™ Tape Library Installation and Operations Manual Document No. 511026 Rev. 07-01-19...
- Page 2 © Copyright 2018, QUALSTAR. All rights reserved. This document and the information contained herein are the property of QUALSTAR. No part of this document may be reproduced, transmitted, transcribed, stored in a retrieval system, or translated into any language or computer language in any form or by any means, electronic, mechanical, magnetic, optical, manual, or otherwise, without the express written permission of QUALSTAR.
- Page 3 • Any of the tape library components is repaired or modified by anyone other than Qualstar’s personnel or approved agent. Note: Certain components of the Q40 Tape Library, are identified in this manual as ‘field replaceable’. These include the power supply, tape drives, library controller and magazines.
-
Page 4: Table Of Contents
Q40 Tape Library Installation and Operations Manual Table of Contents Introduction ........................8 General Warnings ......................... 8 General Product Warnings: ......................8 Product Overview ......................11 Supported Library Configurations – Rackmount Installation ............11 Supported Tape Drives ....................... 14 Front Panel ..........................15 Rear Panel .......................... - Page 5 3.20 Labeling Tape Cartridges ......................35 3.21 Write Protecting Tape Cartridges ....................36 3.22 Tape Cartridges .......................... 37 3.23 Read and Write Compatibility ...................... 38 3.24 Loading Tape Cartridges ......................39 3.25 Using the Mailslot ........................40 3.26 Bulk Loading Magazines ......................40 Initial Setup of the Library....................42 Using the OCP ..........................
- Page 6 Q40 Tape Library Installation and Operations Manual 6.16 Controlling the UID LEDs ......................103 6.17 Moving the Robotic Assembly to the Base Module..............103 6.18 Operating the Library with the RMI ................... 104 6.19 Viewing Status Information on the RMI ..................108 Upgrading and Servicing the Library ................
- Page 7 This page intentionally left blank 511026 Rev. 07-01-19...
-
Page 8: Introduction
Document Purpose This manual provides information about installing, operating, troubleshooting and servicing a Qualstar Q40 Tape Library. It is intended for system administrators and general users who need physical and functional knowledge of the Q40 Tape Library. The main components are... - Page 9 Danger MECHANICAL • Risk of hand pinching, can trap hands, fingers and cause HAZARD serious injury. Keep hands clear during operation. Product Weight WARNING Risk of personal injury Before lifting a library: • Observe local health and safety requirements and guidelines for manual material handling.
- Page 10 Q40 Tape Library Installation and Operations Manual Only trained personnel should operate this equipment. Read all WARNING documentation and procedures before installation or operation. This product is intended for installation and operation in a computer rack with the front and rear doors closed and secured. Only personnel with technical and product safety training should be provided access to the library.
-
Page 11: Product Overview
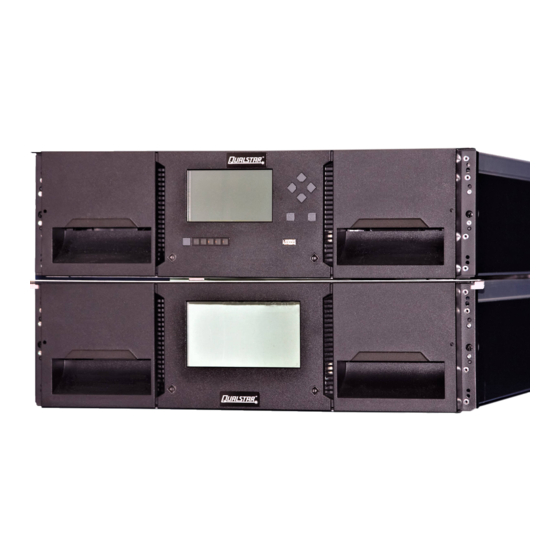
Product Overview The Qualstar Q40 is a 3U highly scalable library system. The Q40 is expandable, allowing a user to grow their tape storage capacity as their data requirements increase. All Q40 installations begin with the 3U Base Module, with capacity for 32 tape cartridges and 3 half-height LTO tape drives. - Page 12 Q40 Tape Library Installation and Operations Manual Module Quantity Supported Library Configurations 2 Module Library Base Module 1 Expansion Module 3 Module Library Base Module 2 Expansion Modules 4 Module Library Base Module 3 Expansion Modules 511026 Rev. 07-01-19...
- Page 13 Module Quantity Supported Library Configurations 5 Module Library Base Module 4 Expansion Modules 6 Module Library Base Module 5 Expansion Modules 7 Module Library Base Module 6 Expansion Modules 511026 Rev. 07-01-19...
-
Page 14: Supported Tape Drives
The Q40 was developed to integrate industry-standard LTO Ultrium tape drives. Mixed drive generations and mixed interfaces are supported within a single library and within a single module. Listed below in Table 2 are the tape drives that have been tested and implemented in the Q40. Table 2: Supported Tape Drives... -
Page 15: Front Panel
Front Panel Left Magazine Emergency Release Access Hole Left Magazine Access Handle Power Button Base Module Only Unit Identification LED, Blue Base Module Only Ready LED, Green Base Module Only Clean LED, Amber Base Module Only Attention LED, Amber Base Module Only Error LED, Amber Base Module Only USB Port... -
Page 16: Rear Panel
Q40 Tape Library Installation and Operations Manual Rear Panel Power Supply 1 Standard on Base Module Optional on Expansion Module Power Supply 2 Optional on Base Module Optional on Expansion Module Half-Height Tape Drive Bays Upper Expansion Module Connection Port... -
Page 17: Lto-6/7/8 Hh Sas Dual Port
LTO-6/7/8 HH SAS Dual Port SAS Port A SAS Port B Tape Drive Power LED, Green LTO-6/7/8 HH FC Single Port FC Port A Tape Drive Power LED, Green LTO-6/7/8 HH FC Dual Port FC Port A FC Port B Tape Drive Power LED, Green 511026 Rev. -
Page 18: Power Supply Rear Panel Leds
Q40 Tape Library Installation and Operations Manual Power Supply Rear Panel LEDs White AC power connected, but Module Powered Off Green Module Powered On Element Numbering The library will generally display logical element numbering of modules, storage slots and tape drives starting with number one from the bottom up. -
Page 19: Installing The Library
Installing the Library Planning Installation • Choose a location for the library. See “Location Requirements”. • Plan the SAS or Fibre Channel configuration and obtain the necessary cables. See “SAS Configuration Requirements” “Fibre Channel Configuration Requirements”. • Plan the rack layout. See “Planning the Module and Rack Layout”. -
Page 20: Sas Configuration Requirements
Q40 Tape Library Installation and Operations Manual SAS Configuration Requirements Serial Attached SCSI (SAS) is a computer bus technology mainly used to transfer data to and from storage devices, including disk drives and tape drives. SAS is designed to transfer data at up to 6 Gbps. -
Page 21: Fibre Channel Configuration Requirements
Fibre Channel Configuration Requirements The Fibre channel tape drive can be connected directly to the server with a host bus adapter (HBA) or through a storage area network (SAN). The installation requires one Fibre Channel cable for each tape drive. The tape drives all utilize an LC- style connector. -
Page 22: Planning Module And Rack Layout
Q40 Tape Library Installation and Operations Manual Planning Module and Rack Layout If possible, install the Base Module in the middle of the rack to provide space for the permitted 3 Expansion Modules above and 3 Expansion Modules below. See Table 1: Supported Library Configurations for additional details. -
Page 23: Host Preparation
Installation Precautions Product Weight WARNING Each Q40 module weighs more than 20 kg (44 lbs) without drives or tapes and more than 35 kg (77 lbs) with 3 tape drives and 40 tapes. Risk of personal injury Before moving or lifting a library: •... -
Page 24: Unpacking Base Module And Expansion Modules
15° C (30° F) from where the module was stored, allow it to acclimate for at least 12 hours prior to unpacking. Unpacking a Q40 Base Library or Expansion Module: 1. Before opening and removing a module from the box, inspect the container for shipping damage. - Page 25 5. Remove the rack rails and the accessory kit box. Remove accessory kit box Remove rack rails 6. Remove the foam pieces from the top of the module. Remove foam from top With assistance, lift the module out of the bottom foam nest, remove the wrapping from the module and then place the module on the work surface.
- Page 26 Q40 Tape Library Installation and Operations Manual 8. The robotics is protected during shipment by an insertion foam which has to be removed prior to installation 9. To remove the top cover plate from the Base Module, unlock the top cover using two small screwdrivers.
-
Page 27: Identifying Library Module Components
12. If you are installing a Base Module only without an Expansion Module install the top cover again on the Base Module 13. If you want to install a library system with multiple modules see chapter “Preparing Top and Bottom Modules”... - Page 28 Q40 Tape Library Installation and Operations Manual Unlock the top cover using two small screwdrivers. Lift the front end of the cover and pull gently forward to disengage from the pivot point at the unit center. 2. Install top cover on the Expansion Module that will be installed on the top of the library.
- Page 29 3.11.2 To move the library bottom cover plate from the Base Module to an Expansion Module: Remove the library bottom cover plate from the Base Module. Place the Base Module on a work table Lift the front end of the module (use module’s rear as a pivot edge) Support the bottom cover with one hand.
-
Page 30: Installing Modules In A Rack
Installation and Operations Manual 3.12 Installing Modules in a Rack Q40 modules are easy to install in racks compliant to the EIA 310A Standard, when at least 1 meter deep. You need a #2 Phillips screwdriver for this process. To locate the rail locations when installing multiple modules: 1. - Page 31 6. Place the library at the front of the rack on the support angles of the sliding rails and push it into the rack to the back stop. 7. If you are installing multiple modules, verify that this module has been installed directly above or below its adjacent module and is contained within the correct 3U volume.
-
Page 32: Aligning And Connecting Modules
Q40 Tape Library Installation and Operations Manual 3.13 Aligning and Connecting Modules Skip this step if the library does not have Expansion Modules. Aligning the modules ensures that the robot can move freely between the modules. The library will not operate unless the alignment mechanism is in the locked position. -
Page 33: Installing Tape Drives
3.14 Installing Tape Drives 1. Locate an appropriate vacant drive bay on the back of the library. 2. To assist in aligning the drive, only remove the drive bay covers for one drive at a time. Remove the face plate covering the drive bay by removing the screws holding it in place. Remove one drive bay cover to install one half-height tape drive. -
Page 34: Powering On The Library
Q40 Tape Library Installation and Operations Manual 3.17 Powering On the Library 1. Plug the power cord into the power connector on each module and into power outlets. If the library has dual redundant power supplies. Plug each power cord into a NOTE different AC power circuit. -
Page 35: Labeling Tape Cartridges
The Q40 contains a bar code reader that reads the tape labels and stores the inventory data in memory. The Q40 then provides the inventory information to the host application, OCP, and RMI. Having a bar code label on each tape cartridge enables the bar code reader to identify the cartridge quickly, thereby speeding up inventory time. -
Page 36: Write Protecting Tape Cartridges
Q40 Tape Library Installation and Operations Manual 3.21 Write Protecting Tape Cartridges All rewriteable data cartridges have a write-protect switch to prevent accidental erasure or overwriting of data. Before loading a cartridge into the device, make sure the write-protect switch on the front of the cartridge is in the desired position. -
Page 37: Tape Cartridges
Tape Cartridges 3.22 Use the Ultrium data and cleaning tape cartridges designed for your LTO tape drive. Table 6: LTO-6 Tape Drive Cartridge Type LTO-6 Ultrium 6.25TB* Data Cartridge LTO-6 Ultrium 6.25TB* WORM Data Cartridge Ultrium Universal Cleaning Cartridge Table 7: LTO-7 Tape Drive Cartridge Type LTO-7 Ultrium 15TB* Data Cartridge LTO-7 Ultrium 15TB* WORM Data Cartridge... -
Page 38: Read And Write Compatibility
Q40 Tape Library Installation and Operations Manual -40 to +60º C in a dust-free environment in which relative humidity is always between 20 percent and 80 percent (non-condensing). • If the data cartridge has been exposed to temperatures outside the specified ranges, stabilize the cartridge at room temperature for the same length of time it was exposed to extreme temperatures or 24 hours, whichever is less. -
Page 39: Loading Tape Cartridges
3.24 Loading Tape Cartridges The library will power on without cartridges, but needs cartridges before performing data read and write operations, or any tests or operations that transfer cartridges. The easiest way to open a mailslot or magazine is to use the emergency release access button located on the left and right side of each module. -
Page 40: Using The Mailslot
Q40 Tape Library Installation and Operations Manual 3.25 Using the Mailslot If the mailslot is enabled (indicated by the right button LED steady ON), you can use it to load cartridges into the library. 1. Press the right button for less than 3 seconds. This will start the unlock operation for the mailslot, indicated by the LED slowly flashing. - Page 41 4. Load the tape cartridges into the magazine 5. Insert the magazine to the unit 6. Push the magazine handle slowly until the magazine release latch snaps into place. The magazine locks into place. 7. Repeat steps 1 through 3 for each of the other magazines. IMPORTANT Push the magazine fully into place until the latch snaps into place.
-
Page 42: Initial Setup Of The Library
Q40 Tape Library Installation and Operations Manual Initial Setup of the Library The library provides two main interfaces: • Operator Control Panel (OCP) — With the OCP, you can monitor, configure, and control the library from the front panel. •... -
Page 43: Logging Into The Library
The service user has full access to all functionality. The service user should only be accessed by trained personnel or by direction from Qualstar Technical Support. 511026 Rev. 07-01-19... -
Page 44: Using The Initial Configuration Wizard On The Ocp
Q40 Tape Library Installation and Operations Manual Using the Initial Configuration Wizard on the OCP For initial configuration navigate to the Home > Configuration > Initial System Setup feature. The wizard guides you through setting the library network configuration, configuring date and time, and setting the administrator PIN. -
Page 45: Operating The Library Using The Operator Panel
Operating the Library using the Operator Panel The OCP contains a power button, an LCD display, six navigation buttons, and five LEDs. With the OCP you can monitor, configure, and operate most library functions from the library front panel. To navigate the OCP, use the six navigation buttons (up/down, left/right, Enter, Back). -
Page 46: Login
Q40 Tape Library Installation and Operations Manual Login 1. If the OCP screen saver is on, press Enter to get to the dashboard page. 2. On the Login screen navigate to the dropdown box and select the user. 3. Then navigate to the Enter PIN field and enter the 4-digit PIN 4. -
Page 47: Magazine Buttons
Magazine Buttons Each magazine has a button that provides an easy way to unlock a magazine. Each magazine can be configured to have a portion designated as a mailslot. To unlock the mailslot, press the magazine button for less than 3 seconds. To unlock the entire magazine, press the magazine button for more than 3 seconds. -
Page 48: Operation
Q40 Tape Library Installation and Operations Manual Operation Navigate with the Up/Down buttons to the Operation menu entry on the Home screen to access the operation features. The Operation Menu provides the following submenus: Move Cartridge from Drive to Home Slot... - Page 49 5.3.2 Move Media Navigate to Operation > Move Media page. The first page provides instructions how to proceed. 1. Pressing the Enter button opens the source screen. A list will be shown like below. Pressing the Back button will take the screen back to the Operation menu. Navigate with the Up or Down buttons to select the source element.
-
Page 50: Configuration
Q40 Tape Library Installation and Operations Manual 5.3.3 Inventory Scan Navigate to Operation > Inventory Scan page. Pressing the Enter button will start the inventory scan process. Configuration Navigate with the Up/Down buttons to the Configuration menu entry on the Home screen to access the configuration features. - Page 51 5.4.1 Initial System Setup For initial configuration go to the Configuration > Initial System Setup screen. The wizard guides you through setting the library network configuration, configuring date and time, and setting the administrator PIN. You can skip items and stop the wizard at any time. When you have configured the network settings, you can initiate the wizard from the RMI to complete the remaining configurations.
- Page 52 Q40 Tape Library Installation and Operations Manual 3. When finished with the network settings, select Next> and press Enter to switch to date and time. 4. When finished with the date and time settings, select Next> and press Enter to switch where the Administrator OCP PIN can be changed.
- Page 53 5.4.2 Date & Time To configure date and time navigate to the Configuration > Date & Time screen. 1. Press Enter and use Up or Down buttons to change the date. 2. Press the Right button to move to the month and select the correct month 3.
- Page 54 Q40 Tape Library Installation and Operations Manual 5.4.3 Network Settings To configure the network settings go to the Configuration > Network Settings screen. The following settings can be changed on the Network Settings screens: • Host Name • Domain Name •...
- Page 55 5.4.4 Drive Power On/Off From the Configuration > Drive Power On/Off page you can switch power on or off for an installed drive. 1. The page provides a list of all installed drives. Select the drive that you want to power on or off and press Enter 2.
- Page 56 Q40 Tape Library Installation and Operations Manual 5.4.5 User Accounts The Configuration > User Accounts page provides the following submenus: • Change PIN • Restricted RMI Login From the Configuration > User Accounts > Change PIN page you can change the PIN to access the OCP.
- Page 57 If pressing Yes or in case a different PIN was entered, the PIN update is confirmed with the following message. NOTE As long as you stay logged in, the new PIN will not become active. The new PIN becomes valid after you logout of the current session. From the OCP Configuration >...
- Page 58 Q40 Tape Library Installation and Operations Manual 5.4.6 Save/Restore The Configuration > Save/Restore page provides the following submenus: • Save Configuration File • Restore Configuration File • Reset Default Settings • Reset the List of Known Drives and Modules •...
- Page 59 5.4.6.2 Restore Configuration File From the Save/Restore > Restore Configuration File page you can restore the library configuration from a USB device. 1. Insert a USB device on the OCP. 2. Press Submit to start the restore process. 3. A dialog box will prompt the user to confirm the restore process. 4.
- Page 60 Q40 Tape Library Installation and Operations Manual 5.4.6.3 Reset Default Settings From the Save/Restore > Reset Default Settings page you can reset the library to default configuration settings. 1. Press Submit to reset the configuration settings to default. 2. A dialog will prompt the user to confirm to reset to defaults.
- Page 61 5.4.6.4 Reset List of Known Drives and Modules The Save/Restore > Reset List of Known Drives and Modules page enables you to remove Modules and Drives that have been physically removed from the library stack. 1. Press Submit to reset the list of drives and modules in the library stack 2.
-
Page 62: Maintenance
Q40 Tape Library Installation and Operations Manual Maintenance Use the Up/Down buttons to go to Maintenance on the Home screen to access the maintenance features. The Maintenance Menu provides the following submenus: • Library Tests • View Events • Drive Logs Download •... - Page 63 5.5.1.1 System Test To run the System Test, go to the Maintenance > Library Tests > System Test screen. The System Test exercises overall library functionality by moving cartridges within the library. • During each cycle the library moves a cartridge from a full slot to an empty drive and then returns it to its original slot.
- Page 64 Q40 Tape Library Installation and Operations Manual 5.5.1.3 Robotic Test To run the Robotic Test, go to the Maintenance > Library Tests > Robotic Test screen. The Robotic Test exercises overall robotic functionality by initializing motors and checking sensors and the barcode reader.
- Page 65 5.5.2 View Events From the Maintenance > View Events screen you can get a quick overview of recent Error Events and Warning Events. 1. Navigate with the Up/Down buttons to select Warning or Error Event Log from the list 2. Press Enter. 3.
- Page 66 Q40 Tape Library Installation and Operations Manual 5.5.3 Drive Logs From the Maintenance > Drive Logs page you can download logs from every drive that is installed in the library. 1. Use the Up/Down buttons to choose the drive and use Enter to confirm the selection.
- Page 67 5.5.5 Drive Firmware Upgrade From the Maintenance > Drive Firmware Upgrade page you can upgrade the firmware revision of every drive that is installed in the library. To update the drive firmware from the OCP, the drive firmware files needs to be available on a USB drive. 1.
- Page 68 Q40 Tape Library Installation and Operations Manual 5.5.6 Library Firmware Upgrade From the Maintenance > Library Firmware Upgrade page you can upgrade the firmware revision of the library. When the library firmware is updated, the library will also update the firmware of all connected expansion modules.
- Page 69 5.5.7 LCD Adjustment On the Maintenance > LCD Adjustment page, the LCD display can be adjusted according to your personal needs. You can adjust the contrast and the backlight brightness of the LCD display 1. On the Home > Maintenance screen select LCD Adjustment and press Enter. This action opens the Maintenance >...
-
Page 70: Status
Q40 Tape Library Installation and Operations Manual Status Use the Up/Down buttons to go to the Status page on the Home screen to access status information. The Status Menu provides the following submenus: • Network Settings • Library • Drive 5.6.1 Network Settings... - Page 71 5.6.2 Library From the Status > Library screen you can see the library status information. • Library Status • Module Status for each single module in the stack (up to 7 modules can be possible) The Status > Library > Library Status screen provides the following status information: Library Information: •...
- Page 72 Q40 Tape Library Installation and Operations Manual 5.6.3 Drive From the Status > Drive screen you can see the configuration and status of each drive that is installed in the library. Use Up and Down to select a drive from the drive list The drive list already provides the powered status of the drives (On, Off).
- Page 73 5.6.4 Logout Use the Up/Down buttons to go the Logout page on the Home screen. On the Logout screen you can exit the current session on the OCP and return to the login screen. Press Enter to logout and return to the login screen. 511026 Rev.
-
Page 74: Operating The Library Using The Rmi
Q40 Tape Library Installation and Operations Manual Operating the library using the RMI Using the Library Main Screen with the RMI The library main screen is organized into the following regions: • Top Banner - Contains the home button and displays the overall status and information about the library and user •... - Page 75 • Library Time & Date – helpful when analyzing event logs and support tickets, and might be needed when contacting support. • User – The user account for this session. • Logout – Logs out of this session. • ? -– Accesses online help. 6.1.2 Left Pane Elements •...
-
Page 76: Configuring The Library With The Rmi
Q40 Tape Library Installation and Operations Manual 6.1.3 Center Pane Elements • Open Mailslot – (Administrator user only) Click to unlock the mailslot on the selected module. Mailslots must be enabled before the slots can be used as mailslots. See “Enabling or Disabling Mailslots”. - Page 77 Restoring the library configuration from a file 1. Navigate to the Configuration > System > Save/Restore Configuration screen. 2. Click Browse to navigate to and select the configuration file. The file has to be a zip file. 3. Select the file and press Upload File & Restore. Starts the uploading process and restores the configuration file from the system running the RMI.
- Page 78 Q40 Tape Library Installation and Operations Manual To set the current Date/Time, select Set Date/Time. If the library has network access to an SNTP server. Click SNTP. Check the SNTP checkbox. Enter the SNTP server IP address and click the Submit button.
-
Page 79: Configuring The Library Network Settings
6.2.4 Configuring Allow Unlabeled Media Use the Configuration > System > Allow Unlabeled Media page to enable or disable the detection of media without barcode labels. This option should only be enabled if you must use media without labels. Please note that using media without labels will increase the duration of the inventory scan significantly. - Page 80 Q40 Tape Library Installation and Operations Manual 6.3.1 Network > Reset internal IP Range For internal communication between modules the tape library uses an Ethernet connection with an internal IP address range. To prevent any conflict between the internal IP address range and external IP addresses it is required to select the internal IP range before the tape library gets connected to the external Ethernet port.
- Page 81 6.3.2 Configuring SNMP Use the Configuration > Network Management > SNMP page to enable and configure SNMP (Simple Network Management Protocol), which allows applications to manage the device. The library supports both SNMP configuration and SNMP traps. • SNMP Enabled – When checked, the library can be managed by computers listed in the SNMP Target IP Addresses field.
- Page 82 Q40 Tape Library Installation and Operations Manual To add an SNMP target or edit information for an SNMP target: 1. Click Edit for the appropriate SNMP target. When adding an SNMP target, click Edit next to a target without an IP/Hostname.
- Page 83 6.3.3 Configuring Event Notification Parameters Use the Configuration > Network Management > SMTP page to enable SMTP (Simple Mail Transfer Protocol) functionality and configure e-mail notification of library events. The library must have network access to an SMTP server. • SMTP Enabled –...
- Page 84 Q40 Tape Library Installation and Operations Manual 6.3.4 Configuring Tape Drives Use the Configuration > Drives page to see and modify drive configuration settings. • Drive number – Drives are numbered from the bottom of the library up beginning with one. The drive currently hosting the SCSI communication for the library is designated with (LUN).
-
Page 85: Enabling Or Disabling Mailslots
• Port configuration (FC only) – Drive port configuration. • Speed –The currently selected ◦ speed. The default is Automatic. • Port Type • Automatic • Loop – Enables selection of the Addressing Mode. Addressing Mode – Addressing Mode can be set to Soft or Hard ALPA –... - Page 86 Q40 Tape Library Installation and Operations Manual • Basic Partition Wizard – Use this wizard if you want to simply specify the total number of desired partitions and allow the wizard to assign drives and storage slots as evenly as possible to the requested partitions.
- Page 87 6.5.2 Using the Expert Partition Wizard Click Configuration > Expert Wizard to start the wizard. The Create Partition Scheme screen lists the current partitions, if any, and the free resources. Use the wizard to configure one partition at a time. NOTE If you want to enable or disable mailslots, Cancel out of the wizard and update the mailslot configuration prior to initiating the Partition Wizard.
- Page 88 Q40 Tape Library Installation and Operations Manual 6.5.3 Configuring Passwords for User Accounts Use the Configuration > User Accounts page to configure the password settings for the library. There are two types of accounts you can configure. • User – The user account allows access to library status information and does not allow access to configuration, maintenance, or operation features.
- Page 89 • Click the down arrow in the Actions box and choose the desired operation • Enter the New Password. • Verify the New Password. • If the new password satisfies the Password Rules you can click the Modify button. • If the Modify button remains greyed out, the new password either does not satisfy the Password Rules or the password and verify password fields do not match.
- Page 90 Q40 Tape Library Installation and Operations Manual To use LDAP to validate user accounts navigate to Configuration > User Accounts > LDAP Add your LDAP server information. Make sure to click Test Connection to verify connectivity. Click OK once completed.
- Page 91 To use Kerberos to validate user accounts navigate to Configuration > User Accounts > Kerberos Add your Kerberos server information. Make sure to click Test Connection to verify connectivity. Click OK once done. After adding the Kerberos server information, you can add a User. Click OK once done.
-
Page 92: Configuring Web Management Options
Q40 Tape Library Installation and Operations Manual 6.5.4 Restricted RMI Login The administrator has the possibility to set login restrictions for administrator and security login. If restriction mode is enabled the administrator and the security user are not allowed to login via RMI. - Page 93 The Q40 offers different Certificate options: You can change the Certificate assigned to the library. The default setting of the library uses the library’s self-signed Certificate. Select the Start Certificate Wizard button to create your own certificate. Follow the prompts to create and deploy the new certificate.
- Page 94 Q40 Tape Library Installation and Operations Manual OCP/RMI Session Locking can be used to prevent users from logging into the library until the current user logs out of the OCP/RMI. NOTE When Session Locking is enabled, users must always logout of their RMI/OCP session.
-
Page 95: Maintaining The Library On The Rmi
Maintaining the Library on the RMI From the Home screen, click Maintenance to access the library’s maintenance features. 6.7.1 System Test The system test exercises overall library functionality by moving cartridges within the library. • During each cycle the library will move a cartridge from a full slot to an empty drive and then return it to its original slot. - Page 96 Q40 Tape Library Installation and Operations Manual 6.7.3 Element to Element Test The element to element test moves a selected cartridge to a selected slot or tape drive, and then returns it to the original slot. You can select the number of times to move the selected cartridge to the destination location and back.
- Page 97 6.7.4 Position Test The position test moves the robotic assembly vertically between two element locations. The test does not move cartridges. You can select the number of times to move the robotic assembly between two element positions. The position test is intended to show that the vertical movement of the robotic assembly is operating correctly.
- Page 98 Q40 Tape Library Installation and Operations Manual 6.7.5 Wellness Test The wellness test performs a general health check of the library by running the following tests: Basic Hardware Review Robotics Initialization Test Barcode Scanning Test Move Media Test •...
-
Page 99: Viewing Log Files
6.7.6 Robotic Test The robotic test exercises all robotic movements and sensors. To run the robotic test, navigate to Maintenance > Library Tests > Robotic Test and click Start Test 6.7.7 OCP Test From the RMI you can run an LED test on the OCP. The test illuminates each of the front panel LEDs. To start the test, navigate to Maintenance >... -
Page 100: Saving Log Files
Q40 Tape Library Installation and Operations Manual Saving Log Files To save the library log files, navigate to the Maintenance > Logs and Traces > Download Logs and Traces page and then select Save. 6.10 Managing System Firmware The firmware version currently installed on the library is displayed in the library status area on the Home page and the left panel. -
Page 101: Managing Drive Firmware
6.11 Managing Drive Firmware Drive firmware can be updated on multiple drives of the same type at the same time. Drive firmware can only be updated from the RMI. Each drive will only accept appropriate firmware. To update drive firmware from the RMI: 1. -
Page 102: Downloading Library Log And Trace Files
Q40 Tape Library Installation and Operations Manual 6.13 Downloading Library Log and Trace Files To download the library log and trace files from the RMI, navigate to the Maintenance > Logs and Traces > Download Logs and Traces screen and then click Save. -
Page 103: Controlling The Uid Leds
6.16 Controlling the UID LEDs The UID (Unit Identification) LED refers to blue LEDs on the tape library that assist users and service personnel in determining which component requires attention. UID LEDs can be found on the controller board of each base and expansion module. Additionally, there is one UID LED on the Operator Control Panel OCP. -
Page 104: Operating The Library With The Rmi
Q40 Tape Library Installation and Operations Manual 6.18 Operating the Library with the RMI Click the Operations button on the Home page of the library to access the library’s operations functions. 6.18.1 Moving Media From the Operation > Move Media page you can move a tape cartridge located in a source element to an available destination element within the same partition. - Page 105 6.18.1.2 Moving a Cartridge 1. Select the cartridge from Source Elements. 2. Select the destination location from Destination Elements. 3. Click Submit. 6.18.2 Opening a Mailslot To open a mailslot navigate to Operation > Open Mailslot. To open a mailslot, click Open for the appropriate mailslot. The library will release the lock. You can then pull the mailslot out of the library to access the mailslot.
- Page 106 Q40 Tape Library Installation and Operations Manual 6.18.3 Opening a Magazine From the Operation > Open Magazine screen you can unlock any magazine in the library. To unlock a magazine, click Open for the magazine. The library will release the lock. You can then pull the magazine out of the library to access the storage slots.
- Page 107 6.18.5 Rescanning the Cartridge Inventory To have the library rescan the cartridges, navigate to the Operation > Rescan page and click Rescan. The library’s status will change to Scanning and will be unavailable to perform other operations until the scan is complete. 6.18.6 Forcing a Drive to Eject a Cartridge The force drive media eject operation attempts to force a tape drive to eject a cartridge and place it into an open slot.
-
Page 108: Viewing Status Information On The Rmi
Q40 Tape Library Installation and Operations Manual 6.19 Viewing Status Information on the RMI Click the Status button on the Home page of the library to view library status information. 6.19.1 Viewing Library and Module Status Summary information is displayed in the top banner and the left side bar. For additional library status information navigate to Status >... - Page 109 The Library Status section provides the following information: • Idle – The library robotic is ready to perform an action. • Moving – The library robotic is moving a cartridge. • Scanning – The library robotic is performing an inventory of cartridges. •...
- Page 110 Q40 Tape Library Installation and Operations Manual 6.19.2.1.1 Filtering by Barcode Label To filter the list based on barcode label, enter characters in the filter box and then click Search. 1. CIick Filter On. The search box is displayed. 2. Enter characters into the search box and then click Search.
- Page 111 Moving the mouse over drives or cartridges will display additional information: • Drive – LTO generation of drive and format (Full Height or Half Height) • Drive # - The drive number • Serial # - Serial number of the drive •...
- Page 112 Q40 Tape Library Installation and Operations Manual 6.19.2.3.1 List View In the Inventory List (Partition View) you can see: • Module – The module number • Slot # - The slot number in the form <module> <slot>. • Label – Barcode label.
- Page 113 6.19.2.3.1.3 Viewing Elements by Group When the list is grouped, you can expand or contract the list for each group by clicking the triangle next to the number in the first column. Grouping is enabled by default. To disable grouping, click Group Off. To enable grouping, click Group On.
- Page 114 Q40 Tape Library Installation and Operations Manual Moving the mouse over a partition layer will display additional information: • Name – Partition name • Barcode – Barcode orientation • Media Removal – Indicates whether media removal is allowed or prevented by the host •...
- Page 115 Moving the mouse over a drive will display additional information such as: • Drive – LTO generation of drive and format (Full Height or Half Height) • Drive # - The drive number • Serial # - Serial number of the drive •...
- Page 116 Q40 Tape Library Installation and Operations Manual 6.19.2.3.3 Partition Map Configuration Status To see the configuration of a partition, navigate to the Status >Partition Map >Configuration Status page. • Partition Number – The partition number • Partition Name – The partition name •...
- Page 117 Drive state (loaded, empty) • Drive powered on or off • The version of firmware currently installed on the drive. • The tape drive serial number. Use this serial number when working with Qualstar Technical Support. • Port status 511026 Rev. 07-01-19...
- Page 118 Q40 Tape Library Installation and Operations Manual 6.19.2.5 Network Status To see the configuration and status of the library’s network settings navigate to the Status > Network Status page. On the network status page you can see: • Host Name – Library hostname •...
-
Page 119: Upgrading And Servicing The Library
Upgrading and Servicing the Library Possible Tools Needed • #2 Phillips Screwdriver – securing or removing the round-hole rack adapter bracket, securing retention inserts in square-hole racks • Small Flat Head or Torx Screwdriver – retracting the locking screen when moving a library cover, using the magazine manual release •... - Page 120 Q40 Tape Library Installation and Operations Manual 3. Loosen the blue captive thumbscrews on the tape drive and pull straight back on the tape drive handle while supporting the bottom of the drive to remove it from the unit. Support the bottom of the tape drive when removing it to avoid CAUTION damaging any of the internal connections.
-
Page 121: Adding An Expansion Module
Adding an Expansion Module Product Weight WARNING Each Q40 module weighs more than 44 lbs (20 kg) without drives or tapes and more than 77 lbs (35 kg) with 3 tape drives and 40 tapes. Risk of personal injury Before moving or lifting a module: •... - Page 122 Q40 Tape Library Installation and Operations Manual 7.4.1 Overview To install an Expansion Module, you will: 1. Clear space in the rack, if necessary, and then install the rack rails. 2. Transfer the library top or bottom cover to the Expansion Module.
-
Page 123: Removing The Library
Product Weight WARNING Each Q40 module weighs more than 44 lbs (20 kg) without drives or tapes and more than 77 lbs (35 kg) with 3 tape drives and 40 tapes. Risk of personal injury Before moving or lifting a module: •... -
Page 124: Replacing A Power Supply
Q40 Tape Library Installation and Operations Manual Replacing a Power Supply Static Sensitive CAUTION Risk of damage to devices • A discharge of static electricity damages static-sensitive devices or micro circuitry. • Proper packaging and grounding techniques are necessary precautions to prevent damage. -
Page 125: Replacing A Controller Board
7.6.4 Installing the New Power Supply 1. Position the new power supply onto the alignment rails. 2. Slide the power supply into the module until it is flush with the back panel of the module. 3. Tighten the blue captive thumbscrews with your fingers to secure it to the module. 4. - Page 126 Q40 Tape Library Installation and Operations Manual 7.7.3 Powering Off the Library Power off the library from the front panel. Press and hold the power button for 3 seconds. If the library does not perform a soft shutdown, press and hold the power button for 10 seconds.
-
Page 127: Installing Or Replacing A Drive Power Board
7.7.7 Verifying the Base or Expansion Module Controller Installation 1. Using the OCP or RMI, click or tap Status > Library Status > Module x to view the controller status. 2. Using the OCP or RMI, check for events; the event that indicated the controller was faulty should be cleared. - Page 128 Q40 Tape Library Installation and Operations Manual 2. Using the thumbscrews, slowly remove the library/expansion controller from the module. 3. Disconnect the Drive Power board by pushing down the blue latch on the board. 4. Slowly slide out the Drive Power board out of the module.
-
Page 129: Replacing A Module (Base Or Expansion)
Replacing a Module (Base or Expansion) Product Weight WARNING Each Q40 module weighs more than 44 lbs (20 kg) without drives or tapes and more than 77 lbs (35 kg) with 3 tape drives and 40 tapes. Risk of personal injury Before moving or lifting a module: •... - Page 130 Q40 Tape Library Installation and Operations Manual Before beginning this replacement procedure Ensure that the rack is level side to side and front to back. Verify that all applications using the library are idle. If the temperature in the room where the replacement module will...
- Page 131 7.9.7 Removing the Tape Drives Remove any tape drives from the module being replaced. The library tracks the drive locations and will issue events if the drives aren't in the expected locations. Note the drive locations so they can be replaced in the same order.
- Page 132 Q40 Tape Library Installation and Operations Manual 7.9.9 Moving Library Cover Plates Unpack the replacement module and place it on a sturdy work surface. Save the packaging materials to return the empty module. The library has removable top and bottom cover plates. The two covers are identical and the process for removing and installing them is the same for the top and bottom of the module.
-
Page 133: Replacing The Robotic Assembly And Spooling Mechanism
3. Under normal operation the library configuration is saved on the Base Module controller. 4. Replace the tape cartridges in the same locations. 7.10 Replacing the Robotic Assembly and Spooling Mechanism Parts can be damaged by electrostatic discharge. Keep parts in CAUTION electrostatic containers until needed. - Page 134 Q40 Tape Library Installation and Operations Manual 5. Disconnect and completely remove the expansion interconnect cables from the Base Module and from the adjacent modules. Removing the expansion interconnect cables completely prevents damaging the cables when moving the module in and out of the rack.
- Page 135 4. Lift the robotic assembly gently from the module and place it on top of the module on the right side (opposite the spooling mechanism) and slightly to the front. Take care not to damage the spooling cable. 5. On the top of the robotic assembly where the spooling cable is attached, use a small flat head or Torx screwdriver driver to press and push the small latch that unlocks the spooling cable.
- Page 136 Q40 Tape Library Installation and Operations Manual 6. Lift the spooling cable from the robotic assembly and place it in its cradle at the top of the spooling mechanism. 7. Place the spooling connector to the park position. 8. Set aside the robotic assembly.
- Page 137 5. Each corner of the robotic assembly has a gear with two protruding pins. Rotate one of the gears on the robotic assembly so that the two pins are aligned horizontally. 6. Place the gears of the robotic assembly into the grooves on the inside corners of the module. Confirm that all of the pins are touching the outside of the grooves.
-
Page 138: Replacing The Front Bezel Or Ocp
7. Reconnect the Ethernet, SAS, and Fibre Channel cables to the Base Module. 8. Reconnect the power cords. 9. Pack the failed robotic assembly and spooling mechanism to return to Qualstar Technical Support. 7.10.6 Powering On the Library Power on the library by pressing the power button on the Base Module just below the OCP; the green light will illuminate. - Page 139 7.11.3 Installing the Bezel Place the top tabs of the bezel into the slots in the top slots of the module. Rotate the bezel and snap in at the bottom 7.11.4 Powering On the Library Power on the library by pressing the power button on the Base Module just below the OCP; the green light will illuminate.
-
Page 140: Library Troubleshooting
Q40 Tape Library Installation and Operations Manual Library Troubleshooting This library is designed to operate when installed in a rack using the rack CAUTION rail kit. Operating the library without installing it in the rails, such as on a table or rack shelf, could result in library errors. Placing any weight on top of the library might also cause errors. - Page 141 make sure that the connectors are oriented in the correct alignment. The mini-SAS connector on the tape drive is keyed at location four, which is the standard location for end devices. If the connector on the cable is keyed in a different location, not only will the connector not plug in, but the cable probably will not work.
-
Page 142: Operation Problems
Q40 Tape Library Installation and Operations Manual Operation Problems Table 14: Power Problems Problem Solution Check all power cord connections. Device does not power on. Check the LEDs on the power supplies. Make sure the power button on the front panel has been pressed, and the green Ready LED is lit. - Page 143 Problem Solution Tape stuck in drive (continued). IMPORTANT: Inspect the tape cartridge that was stuck. Damage or misplaced labels on the cartridge could have caused the load/unload failure. Discard any tape cartridge found to have issues. If the OCP or RMI is still operational: Tape cannot be removed from storage slot Unlock the magazine from the Operation >...
- Page 144 Q40 Tape Library Installation and Operations Manual Table 18: Attention LED is Lit Problem Solution This is most likely caused by a dirty drive that cannot read a tape and Both the Attention and marks the tape invalid. Cleaning LEDs are lit.
-
Page 145: Performance Problems
Table 20: RMI Network Connection Issues Problem Solution • Cannot connect to the RMI. Verify that the Ethernet cable is connected to the Base Module’s controller board and to the LAN. • Verify that the link LED on the RJ45 (LAN) connector is lit when the device is powered up. - Page 146 Q40 Tape Library Installation and Operations Manual 8.4.1 Average File Size The hard drive must seek to the position of a file before it can start reading. The more seeks a drive must perform will lower the overall performance of the drive. Therefore, if the average file size is small, the read performance will be slower.
-
Page 147: Finding Event Information
restore operations work on an entire disk, partition, or LUN. You might not be able to back up a subset of files or restore a single file. If you can restore a single file, the restore process will be slow. Database backup performance will vary. - Page 148 Q40 Tape Library Installation and Operations Manual 8.6.2 Using the RMI Log in as an administrator. On the Home screen, click Open Magazine. Click Open in the left or right magazine column within the module containing the magazine to be opened.
-
Page 149: Unloading A Stuck Tape
Returning the Robotic Assembly to the Base Module When the Q40 is powered off the robotic assembly should return to its parked position in the Base Module behind the OCP. If the robotic assembly does not return to its parked position: •... - Page 150 Q40 Tape Library Installation and Operations Manual 8.8.1 The Robotic Assembly is stopped in an Expansion Module that is near the Base Module or is Stopped Directly between Two Modules • Remove the front bezel from the Base Module, the Expansion Module containing the robotic assembly, and any modules in between as needed;...
-
Page 151: Running Library Tests
• Extend the expansion module containing the robotic assembly while carefully guiding the free spooling cable; see “Preparing to Remove the Robotic Assembly and Spooling Mechanism from the Base Module”. While there may be minor differences, these instructions for a Base Module will also apply to an Expansion Module. -
Page 152: Acronyms And Abbreviations
Q40 Tape Library Installation and Operations Manual Acronyms and Abbreviations Fibre Channel Graphical User Interface Host Bus Adapter Half Height Logical Unit Number Operator Control Panel Remote Management Interface Storage Area Network Serial Attached SCSI SNMP Simple Network Management Protocol... -
Page 153: Event Codes
Event Codes Table 22: Error Events Event Code Message Text and Description Details and Solution Failed to move cartridge. Verify the source and destination elements and retry 2000 the move operation. 2002 The initial module discovery (detection of Verify that all expansion modules are powered on and that the expansion interconnect cables are expansion modules) failed. - Page 154 Q40 Tape Library Installation and Operations Manual Event Code Message Text and Description Details and Solution Library test failed due to spooling Ensure that the spooling mechanism is fully seated 2010 mechanism defect. in the base module and connected correctly to the robotic assembly.
- Page 155 Event Code Message Text and Description Details and Solution 2028 Move failed inserting cartridge to slot. Check for labels or cartridge misalignments. Verify there are no obstructions at the bottom of the library. Power cycle the library and verify no further critical events were generated.
- Page 156 Q40 Tape Library Installation and Operations Manual Event Code Message Text and Description Details and Solution Wellness test failed because of unit lock Ensure that the alignment mechanism is engaged in 2041 failed. every module that is above another module in the library.
- Page 157 Event Code Message Text and Description Details and Solution 2052 An open magazine was detected in one Ensure that all magazines are completely inserted or more modules and as a result the and properly locked. Do not open magazines using system was taken offline.
- Page 158 Q40 Tape Library Installation and Operations Manual Event Code Message Text and Description Details and Solution Library startup process failed during Check for obstructions in the vertical or horizontal 2066 inventory scan. pathway of the robotic assembly. Examples could include a cartridge that is not seated properly, a robotics assembly that is not level, or a problem with the robotic spooling cable that is impeding progress.
- Page 159 Event Code Message Text and Description Details and Solution 2074 The library startup failed due to a GPIO Reboot or power cycle system. error. The library startup failed due to an error Reboot or power cycle system. 2075 when trying to open the robotics serial port.
- Page 160 Q40 Tape Library Installation and Operations Manual Event Code Message Text and Description Details and Solution Communication failure to the Expansion Until this issue is resolved, the base module will not 2086 Module controller board I2C port be able to discover any attached expansion expander component.
- Page 161 Event Code Message Text and Description Details and Solution 4004 The drive status request failed. Remove and reseat the drive. If the drive installed is a different generation than the drive previously installed, you may need to reset defaults and reconfigure the drive as appropriate.
- Page 162 Q40 Tape Library Installation and Operations Manual Event Code Message Text and Description Details and Solution Backup configuration data to base module 4016 Attempt to save a library configuration failed, power cycle the library and retry the operation. failed 4017...
- Page 163 Event Code Message Text and Description Details and Solution 4044 One of the Library tests failed because of a Verify that a valid cartridge is located in the source source element or destination element is element and that the destination element is empty. currently not accessible.
- Page 164 Q40 Tape Library Installation and Operations Manual Event Code Message Text and Description Details and Solution Unlocking the right magazine failed. Reboot the library and retry the operation. If the error 4077 persists replace the chassis. If the magazine needs to...
- Page 165 Event Code Message Text and Description Details and Solution 4090 Auto calibration of one or more modules The library needs to be re-calibrated. Ensure the failed. Library not properly calibrated. This library firmware is up to date. This event indicates may cause media movement failures.
- Page 166 Q40 Tape Library Installation and Operations Manual Event Code Message Text and Description Details and Solution Drive disabled because no power supply Remove all affected Drives, insert and power up at 4117 available in this module. least one power supply to the failing module. Wait 10 seconds and put the drives back into the module.
- Page 167 Table 24: Configuration Change Events Event Code Message Text and Description 8000 The configuration of a drive changed. 8001 The drive was added or removed from the system. 8002 A partition was added/removed or changed. 8003 A mailslot bank was enabled / disabled. 8004 Drive firmware changed due to firmware upgrade.
- Page 168 Q40 Tape Library Installation and Operations Manual 8031 A SNMP target has been deleted. 8032 The SNMPv3 settings changed. 8033 The OCP module has been changed. A drive reboot has been requested by RMI command or REST interface. This process could cause 8034 side effects if done in parallel to running operations.
- Page 169 Event Code Message Text and Description 9005 The library was powered down from Front Panel. 9006 The network interface was switched on. 9007 The network interface switched off. 9008 The System Time was synchronized with an NTP server. 9009 A magazine was unlocked and opened. 9010 A magazine was closed and locked.
- Page 170 Q40 Tape Library Installation and Operations Manual Event Code Message Text and Description 9043 Drive cleaning. 9045 Library configuration data failed to duplicate on to the Base Module. 9058 Power supply fan failed. 9060 One or multiple configured DNS servers are not responding.
-
Page 171: Technical Specifications
Technical Specifications Table 26: Physical specifications Characteristic Product alone Packaged Height 268 mm 615 mm Width 475 mm 800 mm Depth 892 mm 1200 mm Weight Base module: 25 Kg Base module: 30 Kg Expansion module: 18 Kg Expansion module: 23 Kg Table 27: Environmental Specifications Characteristic Specification... - Page 172 Q40 Tape Library Installation and Operations Manual Table 29: Regulatory Specifications (CSA test conditions) Characteristic Tested condition or value Equipment mobility Stationary - rack mount Connection to the mains Pluggable - Type A Operating condition Continuous Access location Operator accessible...
- Page 173 Table 30: Default Settings Parameter Default Setting Reset to Default? User Accounts User = user “User” User NOT reset PW = null User= administrator Administrator login NOT reset PW = adm001 User = service Service Login (requires admin pwd in NOT reset addition to service pwd) PW = Update001...
- Page 174 Q40 Tape Library Installation and Operations Manual Secondary network Definable from range NOT reset Default controller IP 10.144.4.1 NOT reset Mailslots Disabled Magazines/Mailslots Allow user "User" Disbaled access Disabled (one underlying All deleted leaving a single partition Partitions partition) NTP/SNTP Setting...
- Page 175 Media Barcode Compatibility Check Enabled RMI Timeout 30 minutes RMI Restricted Login Disabled Drive speed and topology settings Automatic/Automatic Electrostatic Discharge To prevent damaging the system, be aware of the precautions you need to follow when setting up the system or handling parts. A discharge of static electricity from a finger or other conductor may damage system boards or other static-sensitive devices.
-
Page 176: Regulatory Information
Q40 Tape Library Installation and Operations Manual Regulatory Information NOTE • The MultiStor library must be installed in a restricted area. • Only personnel with technical and product safety training shall have access to the library. • Access is through the use of a tool or lock and key, or... - Page 177 CCL Mark FCC (United States) The computer equipment described in this manual generates and uses radio frequency (RF) energy. If the equipment is not installed and operated in strict accordance with the manufacturer’s instructions, interference to radio and television reception might result. This equipment complies with Part 15 of the FCC Rules.
Need help?
Do you have a question about the Q40 and is the answer not in the manual?
Questions and answers