Canon XC15 Instruction Manual
4k camcorder
Hide thumbs
Also See for XC15:
- Manual (13 pages) ,
- Quick start manual (3 pages) ,
- Quick manual (48 pages)
Table of Contents
Advertisement
Quick Links
Advertisement
Table of Contents

Related Manuals for Canon XC15


Summary of Contents for Canon XC15
- Page 1 PUB. DIE-0491-000C 4K Camcorder Instruction Manual Firmware ver. 1.0.1.0...
- Page 2 Important Usage Instructions WARNING TO REDUCE THE RISK OF ELECTRIC SHOCK AND TO REDUCE ANNOYING INTERFERENCE, USE THE RECOMMENDED ACCESSORIES ONLY. COPYRIGHT WARNING: Unauthorized recording of copyrighted materials may infringe on the rights of copyright owners and be contrary to copyright laws. Table of Contents Menus Index...
- Page 3 Trademark Acknowledgements • SD, SDHC and SDXC Logos are trademarks of SD-3C, LLC. • Canon is an authorized licensee of the CFast 2.0™ trademark, which may be registered in various jurisdictions. • Microsoft and Windows are trademarks or registered trademarks of Microsoft Corporation in the United States and/or other countries.
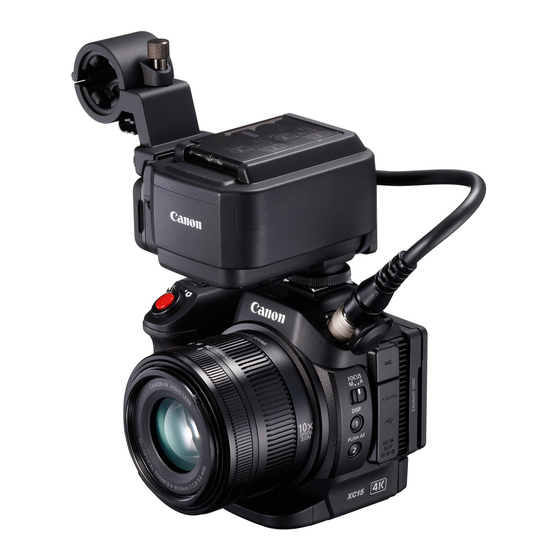
- Page 4 Highlights of the XC15 The Canon 4K Camcorder XC15 embodies many elements the discerning cinematographer looks for in a camera, with its ability to record video at either 4K (3840x2160) or HD (1920x1080) quality, extended audio recording options thanks to the supplied MA-400 Microphone Adapter and a multitude of camera functions to help put your artistic vision to screen.
-
Page 5: Push Af While The Camcorder Is In Manual Focus Mode
Advanced Professional Features and • ND filter When activated, the built-in ND filter reduces the Flexibility amount of light by 3 stops, allowing you to better Wi-Fi network functions capture your subject in the desired depth of field When you use the Wi-Fi functions (A 123), you can (A 140). -
Page 6: Table Of Contents
Table of Contents 1. Introduction 9 3. Recording 41 About this Manual 9 Recording Video and Taking Photos 41 Conventions Used in this Manual 9 Preparing to Record 41 Basic Recording 42 Supplied Accessories 11 Names of Parts 12 Selecting the Photo Size and Aspect Ratio 44 MA-400 Microphone Adapter 17 Shooting Continuous Photos (Drive Mode) 44 Viewfinder unit 18... - Page 7 Adjusting the Focus 74 Saving and Loading Menu Settings 107 Autofocus (AF) Mode 74 Saving Menu Settings to an SD Card 107 Manual Focus (MF) 76 Loading Menu Settings from an SD Card 107 Push AF 79 5. Playback 108 Detecting and Focusing On Faces (Face Detection &...
- Page 8 8. Additional Information 137 Menu Options 137 FUNC. Menu 137 Setup Menus 139 Troubleshooting 146 List of Messages 151 Handling Precautions 155 Maintenance/Others 158 Optional Accessories 159 Specifications 161 Reference Tables 165 Index 167 Table of Contents Menus Index...
-
Page 9: Introduction
Introduction About this Manual Thank you for purchasing the Canon XC15. Please read this manual carefully before you use the camcorder and Troubleshooting retain it for future reference. Should the camcorder fail to operate correctly, refer to (A 146). Conventions Used in this Manual •... - Page 10 About this Manual The arrow > is used to abbreviate menu Operating modes selections. For a detailed explanation on how A dark icon (like ) indicates the function can be Using the MENU to use the menus, refer to used in the operating mode shown; a light icon Button and Joystick (A 30).
-
Page 11: Supplied Accessories
Supplied Accessories Supplied Accessories The following accessories are supplied with the camcorder. CA-946 AC Adapter LP-E6N Battery Pack Lens Hood Viewfinder Unit (incl. power cord) (incl. protective cover) (incl. viewfinder unit cover) Lens Cap MA-400 Microphone Adapter UN-5 Unit Cable Cable Clamp Shoulder Strap IFC-300PCU/S USB Cable... -
Page 12: Names Of Parts
Names of Parts Names of Parts 1 Focus ring (A 74) 8 USB terminal (A 100) 2 Zoom ring (A 73) 9 DC IN terminal (A 19) 3 FOCUS (focus mode) switch (A 74) 10 DISP. (display) button (A 51)/ 4 AUDIO terminal (A 24) Assignable button 1 (A 105) 5 Shoulder strap mount (A 27) - Page 13 Names of Parts 3 × (headphone) terminal (A 93) 1 Air intake vent (A 52) 2 Shoulder strap mount (A 27) 4 Tally lamp (A 42) 5 Remote sensor (A 40): For operating the camcorder with the optional RC-6 Remote Controller.
- Page 14 Names of Parts 1 LCD touch screen (A 26) 6 CARD OPEN (open recording media slot cover) 2 MAGN. (magnification) button (A 77)/ lever (A 35) Assignable button 3 (A 105) 7 Recording media slot cover 3 MENU button (A 30) 8 CFast card slot (A 35) 4 Joystick (A 30) 9 SD card slot (A 35)
- Page 15 Names of Parts 1 Built-in microphone (A 87) 5 Movie/photo switch (A 28) 2 Accessory shoe (A 24, 87): For attaching the 6 Control dial (A 55) 7 ^ (playback) button (A 108) supplied MA-400 Microphone Adapter. 3 ON/OFF button (A 33) 8 POWER/CHG (power/battery charging) indicator 4 START/STOP button (A 41)/PHOTO button (A 19)
- Page 16 Names of Parts 1 Battery compartment 4 Battery compartment cover (A 19) 2 Battery release latch (A 19) 5 Tripod socket (A 27) 3 BATT. OPEN (open battery compartment) switch (A 19) Table of Contents Menus Index...
-
Page 17: Ma-400 Microphone Adapter
Names of Parts MA-400 Microphone Adapter 1 Audio recording level switches for CH1 (top) and 6 Microphone lock screw (A 24) CH2 (bottom) (A 90) 7 Microphone holder: For microphones with a diameter of ∅19 mm to 20 mm. 2 INPUT 1 (top)/ INPUT 2 (bottom) switches (audio source selection) (A 88) 8 Microphone cable clamp 3 Attachment base... -
Page 18: Viewfinder Unit
Names of Parts Viewfinder unit 1 Viewfinder unit latch (A 22) 3 Dioptric adjustment lever (A 23) 2 Eye cup Table of Contents Menus Index... -
Page 19: Preparations
Preparations Charging the Battery Pack The camcorder can be powered with a battery pack or directly using the CA-946 AC adapter. The first time you use the camcorder, charge the battery pack. For approximate charging times and recording/playback times with a fully charged battery pack, refer to Recording and Playback Times (A 166). - Page 20 Charging the Battery Pack 7 Charging will start when the camcorder is turned off. POWER/CHG • If the camcorder was on, the green POWER/CHG indicator will (battery pack charging) indicator go out when you turn off the camcorder. After a moment, the POWER/CHG indicator will illuminate in red (battery pack charging).
- Page 21 Charging the Battery Pack IMPORTANT • Turn off the camcorder before connecting or disconnecting the AC adapter. After you turn off the camcorder, important data is updated on the recording media. Be sure to wait until the green POWER/CHG indicator goes out.
-
Page 22: Preparing The Camcorder
Preparing the Camcorder Preparing the Camcorder This section outlines the basic preparations of the camcorder, such as attaching the viewfinder unit and supplied MA-400 Microphone Adapter, and adjusting the screen and grip. Attaching the Lens Hood Attach the lens hood to protect the lens and reduce the amount of stray light that may hit the lens. Place the lens hood on the front of the lens so that the hood’s lens mount index covers the index on the lens and turn it 90 degrees clockwise until it clicks... - Page 23 Preparing the Camcorder 4 Hook the viewfinder unit latch under the left side of the LCD panel and then fasten the latch. Then, return the LCD panel to its original position. Adjusting the Viewfinder Unit 1 Press the ON/OFF button to turn on the camcorder. •...
-
Page 24: Attaching The Ma-400 Microphone Adapter
Preparing the Camcorder 3 Attach the viewfinder unit cover, hook the viewfinder unit latch to the left side of the cover and then fasten the latch. NOTES • When you are not using the viewfinder unit, make sure to attach the viewfinder unit cover to the unit. Attaching the MA-400 Microphone Adapter By attaching the microphone adapter to the camcorder, you can use the INPUT terminals to record audio from commercially available microphones or analog line in sources with an XLR connector. - Page 25 Preparing the Camcorder 3 Using the supplied unit cable, connect the microphone adapter’s AUDIO terminal to the camcorder’s AUDIO terminal ( ). • Align the Í marks on the unit cable’s plugs and terminals. • The unit cable’s connectors are interchangeable and either end can be plugged into either terminal.
-
Page 26: Using The Lcd Panel
Preparing the Camcorder 4 Unscrew the lock screw at the back of the microphone adapter ( ) and then remove the cable clamp ( ). Using the LCD Panel Pull out the LCD panel and adjust it to a comfortable viewing angle. -
Page 27: Adjusting The Grip
Preparing the Camcorder NOTES • About the LCD screen: The screen is produced using extremely high-precision manufacturing techniques, with more than 99.99% of the pixels operating to specification. Less than 0.01% of the pixels may occasionally misfire or appear as black, red, blue or green dots. This has no effect on the recorded image and does not constitute a malfunction. -
Page 28: Basic Operation Of The Camcorder
Basic Operation of the Camcorder Basic Operation of the Camcorder Depending on how you plan to shoot, you may need to switch between shooting video clips and shooting photos. Before you shoot, you can also select a shooting mode, which can give you the freedom of adjusting the camcorder’s camera-related settings or allow you to entrust the settings to the camcorder to varying degrees, depending on the mode. -
Page 29: Using The Touch Screen
Basic Operation of the Camcorder Operating Mode Icons Used in This Manual This instruction manual uses icons to indicate the recording and playback modes for video clips and photos. Icon Description Video clip shooting mode. Photo shooting mode. Video clip playback mode Photo playback mode. -
Page 30: Using The Menu Button And Joystick
Basic Operation of the Camcorder IMPORTANT • The camcorder features a capacitive touch screen. In the following cases, you may not be able to perform touch operations correctly. - Using your fingernails or hard-tipped objects, such as ballpoint pens. - Operating the touch screen with wet or gloved hands. - Applying excessive force or forcefully scratching the touch screen. - Page 31 Basic Operation of the Camcorder FUNC. Menu The FUNC. menu contains camera-related functions, such as shutter speed and aperture, used while shooting. The icons of each function’s current setting appear on both sides of the menu. The left side contains functions used prior to shooting while the right side contains functions that can be used while shooting.
- Page 32 Basic Operation of the Camcorder 3 Touch the tab of the desired menu. • Depending on the operating mode, some tabs may be divided into multiple “pages”. Touch the numbers under the tab icons or drag your finger left/right to switch to other pages in the currently selected tab. 4 Touch the desired setting.
-
Page 33: Date, Time And Language Settings
Date, Time and Language Settings Date, Time and Language Settings Setting the Date and Time You will need to set the date and time of the camcorder before you can start using it. When the camcorder’s clock is not set, the [Date/Time] screen will appear automatically with the day selected. -
Page 34: Changing The Language
Date, Time and Language Settings Changing the Language [ System Setup] The default language of the camcorder is English. You can set it to one of 27 languages. Operating modes: [Language 1 Press the MENU button. [English] 2 Open the [Language ] screen. -
Page 35: Preparing Recording Media
SDXC memory cards. Initialize recording media (A 38) when you use them with this camcorder for the first time. In the case of SD cards, initialize using the [Complete Initialization] option. Compatible Recording Media For the latest information about recording media tested for use with this camcorder, visit your local Canon Web site. CFast cards CFast 2.0-compliant cards. -
Page 36: Inserting A Cfast Card
Preparing Recording Media Inserting a CFast Card 1 Turn off the camcorder. • Wait until the ACCESS indicator is off. 2 Slide the CARD OPEN switch in the direction of the arrow and open the recording media slot cover. 3 Insert the CFast card straight, with the label facing up, all the way into the slot •... -
Page 37: Removing A Cfast Card
Preparing Recording Media Removing a CFast card 1 Turn off the camcorder. • Wait until the ACCESS indicator is off. 2 Slide the CARD OPEN switch in the direction of the arrow and open the recording media slot cover 3 Push in the CFast card release button to release the CFast card. -
Page 38: Initializing The Recording Media
Preparing Recording Media Initializing the Recording Media The first time you use any recording media with this camcorder, initialize it first. You can also initialize a recording media to permanently delete all the data it contains. When initializing an SD card, you can select quick initialization, which clears the file allocation table but does not physically erase the stored data, or complete initialization, which deletes all data completely. - Page 39 Preparing Recording Media NOTES • This procedure may delete clips shorter than 0.5 seconds in length. Additionally, up to 0.5 seconds may be deleted from the end of the clips. • In some cases, it may not be possible to recover the data. This is more likely when the file system is corrupted or the recording media is physically damaged.
-
Page 40: Remote Controller (A
Using the Optional RC-6 Remote Controller Using the Optional RC-6 Remote Controller The camcorder can be operated remotely. You can use the optional RC-6 Remote Controller as described in this section. You can also use the camcorder’s network functions and wirelessly connect a compatible device to Browser Remote: control the camcorder. -
Page 41: Recording
Recording Recording Video and Taking Photos This section explains the recording basics. Before you begin recording clips*, make a test recording first to check if the camcorder operates correctly. Record a 4K clip (on the CFast card) at 305 Mbps (frame rate of 25.00P) for approximately 5 minutes and an HD clip (on the SD card) at 50 Mbps (frame rate of 50.00P) for approximately 15 minutes. -
Page 42: Basic Recording
Recording Video and Taking Photos Basic Recording This camcorder uses the same button to record video clips and take photos. In this manual, when you are recording video clips, this button is referred to as the START/STOP button; when you are shooting photos, it is referred to as the PHOTO button. - Page 43 - Do not open the recording media slot cover and do not remove the recording media. - Do not disconnect the power source or turn off the camcorder. • Be sure to save your recordings regularly (A 122), especially after making important recordings. Canon shall not be liable for any loss or corruption of data.
-
Page 44: Selecting The Photo Size And Aspect Ratio
Recording Video and Taking Photos Selecting the Photo Size and Aspect Ratio Recording Setup] You can select the size and aspect ratio of recorded photos. Operating modes: [Photo Aspect Ratio] 1 Press the MENU button. 2 Open the [Photo Aspect Ratio] submenu. [ 4:3 4000x3000] [3 Recording Setup] >... -
Page 45: Setting The Clip File Name
Recording Video and Taking Photos To shoot clips 2 Touch [START/STOP]. • The recording operation indicator changes to [ÜREC] and the center of the START/STOP button lights up in red. • The time code displayed on the Browser Remote screen is the same as on the camcorder. •... - Page 46 [Reel Number] ….. [001] [Clip Number] ….. [001] To set the reel number or initial clip number [User Defined] ….. [CANON] 1 Press the MENU button. 2 Open the [Reel Number] or [Clip Number] screen. [3 Recording Setup] > [2] or [3] (depending on the system frequency) > [Reel Number] or [Clip Number] 3 Touch [Í] or [Î] to select the first digit of the reel/clip number and then touch the next field to select the next...
-
Page 47: Onscreen Icons And Displays
Recording Video and Taking Photos To set the user-defined field 1 Press the MENU button. 2 Open the [User Defined] screen. [3 Recording Setup] > [3] > [User Defined] 3 Touch [Í] or [Î] to select the first character and then touch the next character. •... - Page 48 Recording Video and Taking Photos Icons on the left side of the screen Icon/Display Description F0.0 Aperture value 55, 58 1/0000, 000.00° Shutter speed, shutter angle 55, 58 y ±0 0/0, y ±0 0/0: AE shift, : exposure locked ISO00000, 00.0dB ISO00000: ISO speed, 00.0dB: gain : auto ISO limit, : AGC limit...
- Page 49 Recording Video and Taking Photos Icons in the center of the screen Icon/Display Description Remote sensor disabled Onscreen markers Face detection. When a face is detected, a white frame will appear around the main subject’s face. £ User-selected tracking frame Icons on the right side of the screen Icon/Display Description...
- Page 50 Recording Video and Taking Photos Icons that appear during mode Icons on the top of the screen Icon/Display Description , 0, { Self timer Icons on the left side of the screen Icon/Display Description Looks ª, ¬, « Light metering mode , p, Drive mode Orientation detection...
- Page 51 Recording Video and Taking Photos Icons on the bottom of the screen Icon/Display Description {L, {S Button to open the [Photo Aspect Ratio] submenu and currently selected photo size ( or ). Indicates whether the focus and/or exposure is locked while the PHOTO button is pressed –...
-
Page 52: Using The Fan
Recording Video and Taking Photos Using the Fan The camcorder uses an internal cooling fan to reduce the camcorder’s internal heat. Operating modes: 1 Press the MENU button. [ System Setup] 2 Open the [Fan] submenu. [ System Setup] > [3] > [Fan] 3 Select the desired option and then touch [X]. -
Page 53: System Frequency, Frame Rate And Bit Rate
Video Configuration: Resolution (4K/HD), System Frequency, Frame Rate and Bit Rate Video Configuration: Resolution (4K/HD), System Frequency, Frame Rate and Bit Rate Before you record, select the resolution (4K or HD), system frequency, frame rate and bit rate that best match your project’s needs. - Page 54 Video Configuration: Resolution (4K/HD), System Frequency, Frame Rate and Bit Rate Available resolution, system frequency, frame rate and bit rate settings Resolution System frequency Frame rate / Bit rate 25.00P / 305 Mbps 50.00 Hz 25.00P / 205 Mbps (3840x2160) 24.00P / 305 Mbps 24.00 Hz 24.00P / 205 Mbps...
-
Page 55: Shooting Modes
Shooting Modes Shooting Modes This camcorder offers various shooting modes to help bring your creative intent to life. After you select a mode, you can adjust related settings, such as the shutter speed, using the control dial. You can also use the FUNC. menu or Browser Remote application (A 61). - Page 56 Shooting Modes To select the shutter speed mode The following procedure allows you to set the shutter speed in terms of fractions of a second or the shutter angle. You can select the shutter speed mode also using the Browser Remote application (A 61). This function is available when the shooting mode is set to ‚...
- Page 57 Shooting Modes Available shutter speed settings Shutter speed mode Frame rate Shutter speed 1/2, 1/3, 1/4, 1/5, 1/6, 1/7, 1/8, 1/10, 1/12, 1/14, 1/17, 1/20, 1/25, Speed* All available 1/29, 1/30, 1/33, 1/40, 1/50, 1/60, 1/75, 1/90, 1/100, 1/120, (1/4-stop increments) frame rates 1/150, 1/180, 1/210, 1/250, 1/300, 1/350, 1/400, 1/500, 1/600, 1/700, 1/800, 1/1000, 1/1200, 1/1400, 1/1600, 1/2000...
-
Page 58: Aperture Priority Ae (")
• The lowest available ISO speed and gain settings are 500 and 9.0 dB, respectively, when [Slow & Fast Motion] (A 96) is set to [x1/4] or [Looks] (A 71) is set to [ Production Camera], [ Canon Log] or [ Wide DR] (A 71). -
Page 59: Program Ae (')
Shooting Modes 1 Set the shooting mode dial to ‚ • The shutter speed will highlighted in orange. 2 Turn the control dial to adjust the shutter speed. • You can also adjust the shutter speed using the FUNC. menu or Browser Remote application (A 61). - Page 60 Shooting Modes Options [H Portrait]: The camcorder uses a large aperture, to achieve a sharp focus on the subject while blurring the background. [û Sports]: To record scenes with lots of movement, such as sports events. Night Scene]: To record nightscapes with lower noise. [ý...
-
Page 61: Using The Func. Menu Or Browser Remote To Adjust Settings
Shooting Modes • [ Low Light]: - Moving subjects may leave a trailing afterimage. - Picture quality may not be as good as in other modes. - White points may appear on the screen. - Autofocus may not work as well as in other modes. In such case, adjust the focus manually. •... - Page 62 Shooting Modes To change the aperture value when the shooting mode is n or “ 1 Touch the current aperture value on the Browser Remote screen. 2 Select the desired aperture value from the list. • The selected value will be displayed on the Browser Remote screen and applied on the camcorder.
-
Page 63: Automatic Gain And Iso Limits
Automatic Gain and ISO Limits Automatic Gain and ISO Limits Depending on the brightness of the surroundings, the camcorder will automatically raise the gain or ISO speed to try to get a brighter picture. Because doing so can lead to video noise, you can select a maximum limit for how high levels are raised. - Page 64 Wide DR] (A 71). • However, the lowest available settings will be 1250 and 18.0 dB when [Slow & Fast Motion] is set to [x1/4] [Looks] is set to [ Production Camera], [ Canon Log] or [ Wide DR]. Table of Contents Menus...
-
Page 65: Exposure
Exposure Exposure In some shooting modes, the camcorder features the following exposure-related functions to help you achieve the desired brightness for the image. Exposure lock: You can lock the exposure when the camcorder is set to automatically adjust the exposure. This ’... -
Page 66: Touch Exposure
Exposure Using the Browser Remote Application After completing the necessary preparations (A 131), you can manually change the exposure from a connected device using the Browser Remote application. In this procedure, depending on the network device, you may need to click the Browser Remote onscreen button instead of touching it. 1 Press [ ]. -
Page 67: Ae Shift
Exposure AE Shift 1 Touch [FUNC.] and then touch y [AE Shift]. • An adjustment dial will appear on the bottom of the screen. 2 Drag your finger left/right to move the adjustment dial to the desired setting. • You can also press the joystick itself so that the position of the current setting is highlighted in orange and then push left/right to adjust the setting. -
Page 68: Light Metering Mode
Light Metering Mode Light Metering Mode The camcorder measures light in the scene in order to set the optimal exposure settings. Depending on the scene, you may want to change the measurement method. This function is available when the shooting mode is set to “, ‚, or ’. -
Page 69: White Balance
White Balance White Balance The white balance function helps you to accurately reproduce colors under different lighting conditions. This function is available when the shooting mode is set to n, “, ‚, or ’. Operating modes: 1 Touch [FUNC.] and then touch [White Balance]. - Page 70 White Balance • Using a custom white balance may provide better results in the following cases: - Changing lighting conditions - Close-ups - Subjects in a single color (sky, sea or forest) - Under mercury lamps, certain types of fluorescent lights and LED lights •...
-
Page 71: Using Looks
• The selected icon will appear on the left side of the screen. • For settings other than [ Canon Log], you can adjust the settings with the procedure below before touching [X]. • Touching [WFM] will display the waveform monitor (A 83). -
Page 72: Creating A User-Defined Look
4 Select the look that will be the basis of the user-defined look. 5 Touch [Yes] and then touch [OK]. 6 Adjust the settings as described in the previous section. • The settings for [ Canon Log] cannot be adjusted. 7 Touch [X]. Table of Contents Menus... -
Page 73: Zooming
Zooming Zooming You can operate the zoom (10x optical zoom) using the zoom ring on the lens. Operating modes: Turn the zoom ring to zoom in and out. NOTES • If you turn the zoom ring too quickly, the camcorder may not be able to focus immediately. In such case, the camcorder will focus after you finish turning the ring. -
Page 74: Adjusting The Focus
Adjusting the Focus Adjusting the Focus The camcorder offers 3 ways to focus. When you use manual focus, you can use the focus assistance functions, peaking and magnification, to help you focus more accurately. Autofocus (AF): The camcorder continuously adjusts the focus automatically. You can also use the focus ring (with no physical stops). - Page 75 Adjusting the Focus Remote Operation Using Browser Remote After completing the necessary preparations (A 131), you can change the focus mode remotely from a connected device using the Browser Remote application. You can use the application to change the focus mode regardless of the position of the camcorder’s FOCUS switch.
-
Page 76: Manual Focus (Mf)
Adjusting the Focus Manual Focus (MF) You can adjust the focus using the focus ring on the lens, through the FUNC. menu, or remotely with the Browser Remote application. Operating modes: Using the Focus Ring 1 Set the FOCUS switch to M. •... - Page 77 Adjusting the Focus Remote Operation Using Browser Remote After completing the necessary preparations (A 131), you can adjust the focus remotely from a connected device using the Browser Remote application. In this procedure, depending on the network device, you may need to click the Browser Remote onscreen button instead of touching it.
- Page 78 Adjusting the Focus 2 Touch [O On]. • Peaking is activated and edges are highlighted. • Touch [ Off] to turn off the peaking effect. 3 To change the peaking settings, touch [ For the black & white setting: Touch [Off] or [On] For the peaking color: Touch [Red], [Blue] or [Yellow] 4 Touch [X].
-
Page 79: Detecting And Focusing On Faces (Face Detection Tracking)
Adjusting the Focus Push AF Operating modes: While using manual focus (A 76), press the PUSH AF button and hold it pressed down. • Autofocus is temporarily activated as long as you hold the PUSH AF button pressed down. NOTES •... - Page 80 Adjusting the Focus NOTES • The camcorder may mistakenly detect the faces of non-human subjects. In such case, turn face detection off. • When the shooting mode is set to N, face detection & tracking will automatically be set to [i On }] and cannot be changed.
-
Page 81: Image Stabilizer
Image Stabilizer Image Stabilizer Use the image stabilizer to compensate for camcorder shake in order to achieve steadier shots. When taking photos, you can turn image stabilization on and off. When recording clips, there are 3 methods of image stabilization; select the method that best suits your needs. Standard IS : Standard IS compensates for a lower degree of camcorder shake, such as when shooting while remaining stationary, and is suitable for shooting natural-looking scenes. -
Page 82: Onscreen Markers And Zebra Patterns
Onscreen Markers and Zebra Patterns Onscreen Markers and Zebra Patterns Using onscreen markers allows you to make sure your subject is correctly framed. The zebra patterns help you identify areas that are overexposed. The onscreen markers and zebra pattern will not affect your recordings. Operating modes: Displaying Onscreen Markers [v Camera Setup]... -
Page 83: Using The Waveform Monitor
Using the Waveform Monitor Using the Waveform Monitor The camcorder can display a simplified waveform monitor. You must first add [P Waveform Monitor] to the right side of the FUNC. menu before displaying the waveform monitor. If you have already done so, start from the To activate the waveform monitor second procedure, Operating modes:... -
Page 84: Setting The Time Code
Setting the Time Code Setting the Time Code mode, the camcorder can generate a time code signal and embed it in clips. Additionally, you can superimpose the time code on video output from the HDMI OUT terminal. Operating modes: Selecting the Time Code Mode [3 Recording Setup] You can select the camcorder’s time code mode. - Page 85 Setting the Time Code Setting the Time Code’s Initial Value [3 Recording Setup] If you set the time code mode to [ Preset], you can set the initial value of the time code. 1 Press the MENU button. 2 Open the [Initial Time Code] screen. [Initial Time Code] [3 Recording Setup] >...
-
Page 86: Setting The User Bit
Setting the User Bit Setting the User Bit The user bit display can be selected from the date or the time of recording, or an identification code consisting of 8 characters in the hexadecimal system. There are sixteen possible characters: the numbers 0 to 9 and the letters A to F. -
Page 87: Recording Audio
Recording Audio Recording Audio This camcorder features 2-channel linear PCM audio recording and playback with a sampling frequency of 48 kHz. You can record audio using a commercially available external microphone (INPUT terminals, MIC terminal), analog line input (INPUT terminals) or the built-in stereo microphone. Audio is not recorded during slow &... -
Page 88: Using The Mic Terminal/Built-In Microphone While The Microphone Adapter Is Attached
Recording Audio Using the MIC Terminal/Built-in Microphone while the [¡ Audio Setup] Microphone Adapter is Attached To use an external microphone connected to the MIC terminal or use the built-in microphone while the supplied microphone adapter is attached to the camcorder, follow the procedure below to deactivate the INPUT [INPUT 1/2] terminals. -
Page 89: Recording A Single Audio Input To Two Audio Channels (Input Terminals)
Recording Audio Recording a Single Audio Input to Two Audio Channels [¡ Audio Setup] (INPUT Terminals) By default, each audio input is recorded to a separate audio channel (INPUT 1 to CH1 and INPUT 2 to CH2). If necessary (for example, as an audio backup recording), you can record the audio input into the INPUT 1 [CH2 Input] terminal to both audio channels, CH1 and CH2. -
Page 90: Adjusting The Microphone's Sensitivity (Input Terminals)
Recording Audio Manual Audio Level Adjustment CH1/CH2 ∞ You can set the audio level for each channel manually from - to +18 dB. audio level switches 1 Set the audio level switch of the desired channel to M (manual). 2 Turn the corresponding – dial to adjust the audio level. ∞... -
Page 91: Activating The Microphone's Attenuator (Input Terminals)
Recording Audio Activating the Microphone’s Attenuator (INPUT [¡ Audio Setup] Terminals) When the INPUT 1 or INPUT 2 switch is set to MIC or MIC+48V, you can activate the external microphone’s attenuator (20 dB). 1 Press the MENU button. [INPUT 1 Mic Att.] 2 Open the desired INPUT terminal’s microphone attenuator submenu. -
Page 92: Microphone Attenuator (Mic Terminal)
Recording Audio Microphone Attenuator (MIC Terminal) [¡ Audio Setup] You can activate the microphone attenuator (20 dB) for a microphone connected to the MIC terminal to prevent audio from being distorted if the audio level is too high. 1 Press the MENU button. [MIC Att.] 2 Open the [MIC Att.] submenu. -
Page 93: Low-Cut Filter (Built-In Microphone)
Recording Audio Low-Cut Filter (Built-in Microphone) [¡ Audio Setup] Perform the procedure below to activate the low-cut filter for the built-in microphone. 1 Press the MENU button. 2 Open the [Built-in Mic Low Cut] submenu. [Built-in Mic Low Cut] [¡ Audio Setup] > [2] > [Built-in Mic Low Cut] [j Off] 3 Select the desired option and then touch [X]. - Page 94 Recording Audio 1 Press the MENU button. [¡ Audio Setup] 2 Open the [Headphone Volume] screen. [¡ Audio Setup] > [3] > [Headphone Volume] 3 Touch [Ô]/[Õ] to adjust the volume and then touch [X]. • Alternatively, you can drag your finger left/right to move the [Headphone Volume] adjustment bar to the desired setting.
-
Page 95: Colors Bars/Audio Reference Signal
Colors Bars/Audio Reference Signal Colors Bars/Audio Reference Signal You can have the camcorder generate and record color bars and a 1 kHz audio reference signal. The color bars can be output from the HDMI OUT terminal while the audio reference signal can be output from the HDMI OUT and ×... -
Page 96: Slow & Fast Motion Mode
Slow & Fast Motion Mode Slow & Fast Motion Mode This mode allows you to change the shooting frame rate to achieve a slow motion or fast motion effect during playback. Sound is not recorded in this special recording mode. Operating modes: 1 Touch the slow &... -
Page 97: Pre-Recording Mode
Pre-recording Mode Pre-recording Mode When pre-recording mode is activated, the camcorder starts recording continuously into a temporary memory of approximately 5 seconds so when you press the START/STOP button, the clip will contain also approximately 5 seconds of video and audio recorded before you pressed the button. Pre-recording is available only for HD clips. -
Page 98: Interval Recording Mode
Interval Recording Mode Interval Recording Mode The camcorder will automatically record photos at a selected interval. This mode is suitable for recording subjects with little movement, such as natural surroundings or plants. Set the interval in advance. Operating modes: 1 Touch the interval recording button at the bottom right of the screen. •... -
Page 99: Self Timer
Self Timer Self Timer You can have the camcorder record after a 2-second or 10-second countdown. Operating modes: 1 Touch [FUNC.] and then touch [Self Timer]. 2 Select the desired countdown duration and then touch [X]. • The countdown icon ( ) appears at the top of the screen. -
Page 100: Recording Gps Information (Geotagging)
The GPS information is recorded as part of the clip’s metadata and can be used to organize and search recordings using Canon XF Utility (A 122). * The time in the UTC standard is recorded for photos only. - Page 101 Recording GPS Information (Geotagging) Displaying GPS Information [ System Setup] You can display GPS information for clips and photos. [4] (in mode) or Operating modes: [3] (in mode) 1 Press the MENU button. [GPS Information Display] 2 Open the [GPS Information Display] screen. [ System Setup] >...
-
Page 102: Orientation Detection
Orientation Detection Orientation Detection When orientation detection is turned on, the camcorder will detect if it is turned sideways or upside-down while recording and add that information to the photo’s Exif data. Furthermore, when you play back those photos, the camcorder can automatically rotate them so that they are displayed in the correct orientation. - Page 103 Orientation Detection Correcting Orientation during Playback You can have the camcorder display in the correct orientation photos that were recorded using orientation detection. Operating modes: 1 Press the MENU button. [^ Playback Setup] 2 Open the [Auto Rotate] submenu. [^ Playback Setup] > [1] > [Auto Rotate] 3 Touch [i On] and then touch [X].
-
Page 104: Customization
Customization Customizing the FUNC. Menu You can change what functions appear on the right side of the FUNC. menu, making frequently used functions easier to access. To replace an icon, follow the procedure below. Operating modes: 1 Press the MENU button. [ System Setup] 2 Open the [Customize Menu] screen for the current... -
Page 105: Assignable Buttons
Assignable Buttons Assignable Buttons The camcorder conveniently features assignable buttons to which you can assign various functions. By assigning often-used functions, you can quickly access them with a single press of a button. Operating modes: 1 Open the submenu of the desired assignable button. [ System Setup] [ System Setup] >... -
Page 106: Using An Assignable Button
Assignable Buttons Using an Assignable Button After you assign a function to one of the assignable buttons, press the button to activate the function. Assignable Functions Functions can be set separately depending on the operating mode. Refer to the following table for assignable functions and available modes. -
Page 107: Saving And Loading Menu Settings
After you adjust settings in the FUNC. menu and setup menus, you can save those settings on an SD card. You can load those settings at a later date or on another XC15 camcorder so that you can use that camcorder in the same exact way. -
Page 108: Playback
Playback Playback This section explains how to play back recordings with the camcorder. For details on playing back recordings Connecting to an External Monitor using an external monitor, refer to (A 121). Playing Back Recordings In playback mode, the thumbnails of clips and photos you have recorded are shown in index screens sorted by the type of recording. -
Page 109: Changing The Index Screen
Playback Changing the Index Screen Clips and photos are sorted into different index screens depending on the type of recording. You can easily switch between the index screens to play back a desired recording. Operating modes: 1 Touch the index screen button. 2 Select the desired index screen. -
Page 110: Onscreen Icons And Displays During Playback
Playback NOTES • You may notice brief stops in video or audio playback between clips. • The following photos may not be displayed correctly. - Photos not recorded with this camcorder. - Photos created or edited on a computer. - Photos whose file names have been changed. Onscreen Icons and Displays during Playback Icons that appear during mode... - Page 111 Playback Icons on the bottom of the screen Icon/Display Description Ú/Ù, Ý, Ñ, Ø/×, Playback controls during clip playback. Ð, Ö/Õ, Ô/Ó Button to capture a photo from a 4K clip (4K frame grab) or HD clip. Button to open the volume controls. Button to play back an HD-sized clip from a 4K clip.
-
Page 112: Playback Controls During Clip Playback
Playback Icons on the right side of the screen Icon/Display Description 8 00/00 Current photo / Total number of photos – 000-0000 File number Icons on the bottom of the screen Icon/Display Description Button to magnify the photo. Ð, Ý, f, h Playback controls during photo playback. -
Page 113: Playback Controls During Photo Playback
Playback Playback Controls during Photo Playback When you play back a photo, touch the screen to display the playback controls to access playback functions. Operating modes: Button Function [Ð]/[Ý] Start/stop slideshow playback. Return to the index screen. Photo jump. Touch [Ï] or [Ð], or drag your finger along the scroll bar to find the desired photo. -
Page 114: Playback (A
Playback Playing an HD-sized Clip from a 4K Clip When playing back a 4K clip, you can select an HD-sized portion of the frame to play back. Output from the HDMI OUT terminal will be a maximum of 1920x1080, depending on the capability of the external monitor. -
Page 115: Magnifying Photos During Playback
Playback Magnifying Photos during Playback You can magnify photos when you play them back. Operating modes: 1 Play back the photo you want to magnify (A 108). 2 Touch the screen to display the playback controls. 3 Touch [ • The center of the photo is magnified approximately 2 times. Touch [ ] to magnify the image further. -
Page 116: Deleting Recordings
Deleting Recordings Deleting Recordings You can delete those clips and photos that you are not interested in keeping. Deleting recordings allows you also to free up space on the recording media. Deleting Clips and Photos from the Index Screen Operating modes: 1 Open the index screen with the clip or photo you want to delete (A 109). -
Page 117: Deleting A Photo During Playback
Deleting Recordings Deleting a Photo during Playback Operating modes: 1 Play back the photo you want to delete (A 108). 2 Touch the screen to display the playback controls. 3 Delete the photo. [¸] > [¸ Proceed] > [Yes] • The photo is deleted and the next photo is displayed. You can drag your finger left/right select another photo to delete and then touch [¸... -
Page 118: External Connections
External Connections Video Output Configuration The video signal output from the HDMI OUT terminal depends on the clip’s video configuration and the capability of the external monitor. Recording Video Signal Configuration and Video Output Configuration Refer to the following table for the video output configuration, depending on the recording video configuration used. -
Page 119: Playback Video Configuration And Video Output Configuration
Video Output Configuration Playback Video Configuration and Video Output Configuration Refer to the following tables for the video output configuration, depending on the video configuration of the clip being played back. For playback of an HD-sized clip from a 4K clip, refer to the entry for HD. Operating modes: Playback configuration HDMI OUT terminal output... -
Page 120: Selecting The Audio Output Channel
Selecting the Audio Output Channel Selecting the Audio Output Channel The camcorder can output audio from the × (headphone) terminal and you can select the output channel. When performing the following procedure in mode, the MA-400 Microphone Adapter must be connected to the camcorder and make sure to set [¡... -
Page 121: Connecting To An External Monitor
Connecting to an External Monitor Connecting to an External Monitor When you connect the camcorder to an external monitor for recording or playback, connect the camcorder’s HDMI OUT terminal to the monitor’s HDMI input terminal using the supplied HTC-100/S High Speed HDMI Cable. -
Page 122: Saving Clips To A Computer
Saving Clips to a Computer Use Canon XF Utility to save clips or one of the Canon XF plugins* to import clips into non-linear editing (NLE) software. When using the software to transfer clips to a computer, make sure to use a compatible card reader. -
Page 123: Wi-Fi Functions
Canon cannot provide support regarding network configurations. IMPORTANT • Canon shall not be liable for any loss of data or damage resulting from incorrect network configuration or settings. Additionally, Canon shall not be liable for any loss or damage caused by the use of Wi-Fi functions. - Page 124 About the Wi-Fi Functions NOTES • About the Wi-Fi antenna: When using the camcorder's Wi-Fi functions, do not cover the Wi-Fi antenna with your hand or other object. Covering it may interfere with wireless signals. • Do not open the recording media slot cover while using Wi-Fi functions.
-
Page 125: Wireless Connections Using Wi-Fi
Wireless Connections Using Wi-Fi Wireless Connections Using Wi-Fi The camcorder is Wi-Fi certified and can connect to a Wi-Fi network using an external access point (wireless router) or can itself serve as a Wi-Fi access point. The camcorder can connect to wireless routers (access points) compliant with the 802.11a*/b/g/n protocol and are Wi-Fi certified (bear the logo shown on the right). -
Page 126: Searching For Access Points
Wireless Connections Using Wi-Fi 5 Within 2 minutes, touch [OK] on the camcorder’s screen. • While the camcorder is attempting to connect to the access point, you can touch [Stop] and then [OK] to interrupt the operation. 6 When the confirmation screen appears, touch [OK] and then touch [X]. NOTES •... - Page 127 Wireless Connections Using Wi-Fi 4 Select the desired access point. Encrypted access point • If the desired access point is not displayed, you can touch [Í] or [Î] to go through the list of detected access points. You can also touch [Search Again] to have the camcorder search for access points again.
-
Page 128: Manual Setup
Wireless Connections Using Wi-Fi Manual Setup If you prefer, you can enter manually the details of the Wi-Fi network you want to connect to. Follow the instructions on the screen to complete the procedure. To enter text for the various settings, use the virtual keyboard (A 127). 1 Press the MENU button. -
Page 129: Viewing And Changing Wi-Fi Settings
Viewing and Changing Wi-Fi Settings Viewing and Changing Wi-Fi Settings You can view and change Wi-Fi connection settings saved in the camcorder. Because the settings must be changed manually, adequate knowledge about configuring and using Wi-Fi networks is required. If Browser Remote has been activated, deactivate it before performing the following settings (A 131). - Page 130 Viewing and Changing Wi-Fi Settings Viewing the camcorder’s MAC address [— Wi-Fi Setup] 1 Press the MENU button. 2 Open the [— Display MAC Address] screen. [— Wi-Fi Setup] > [1] > [Display MAC Address] • The camcorder’s MAC address will appear. [Display MAC Address] 3 Touch [K] and then touch [X].
-
Page 131: Browser Remote: Controlling The Camcorder From A Network Device
You can also check the recording media, remaining recording time, time code, etc. * For details about compatible devices, operating systems, Web browsers, etc., please visit your local Canon Web site. Operating modes:... - Page 132 Browser Remote: Controlling the Camcorder from a Network Device Connecting the Network Device 1 Network device: Activate Wi-Fi in the settings screen. • Detected networks appear on the screen. 2 Network device: Touch the SSID (network name) that matches the one displayed on the camcorder’s screen. 3 Network device: Enter the password displayed on the camcorder’s screen to establish a connection.
- Page 133 Browser Remote: Controlling the Camcorder from a Network Device NOTES • Depending on the network used and the strength of the Wi-Fi signal, you may notice delays in the refreshing of the live view image and other settings. • While color bars are displayed on the camcorder, the live view image will not be displayed. The [Advanced Control] Screen When using a computer, tablet and other devices with larger screens, the [Advanced Control] screen offers all the controls available for operating the camcorder remotely via Browser Remote.
- Page 134 Browser Remote: Controlling the Camcorder from a Network Device The [Basic Control] Screen When using a smartphone or other device with a smaller screen, you can use the [Basic Control] screen that offers only the most important shooting controls (START/STOP, PHOTO, live view and focus) but will fit in the screen without scrolling.
-
Page 135: Playback Via Browser
You can then play back your photos using the Web browser and even save local copies of them on the device. * For details about compatible devices, operating systems, Web browsers, etc., please visit your local Canon Web site. Operating modes: 1 Camcorder: Open the [}] index screen (A 108). -
Page 136: Media Server
• From the information screen above, touch [Change Connection Point] to connect to a different access point. 4 Computer: Start the media playback software and select [Canon XC15] from the list of servers. 5 Computer: Select the desired recording to play back from the displayed folder. -
Page 137: Additional Information
Additional Information Menu Options Using the FUNC. Menu and Setup Menus For details about how to select an item, refer to (A 30). For details about each function, see the reference page. Menu items without a reference page are explained after the tables. Setting options in boldface indicate default values. - Page 138 Standard], [ Cinema EOS Std.], [ Neutral], [ Production Camera], [ Color Matrix Off], – Highlight Priority] Canon Log], [ EOS Std.], [ Wide DR], [ v User Setting 1], [ v User Setting 2], [WFM] (waveform monitor) on or off...
-
Page 139: Setup Menus
Menu Options FUNC. menu ( modes; right side of FUNC. menu) Menu item Setting options [Aperture] [F2.8] to [F11], [WFM] (waveform monitor) on or off 55, 58 [Shutter] For clips: Shutter speed: [1/2] to [1/2000] ([1/50]), shutter angle: [360.00°] to [11.25°] (180.00°), [WFM] (waveform monitor) on or off 55, 58... - Page 140 Menu Options Menu item Setting options Ü Ü [Focus Ring Response] [Z Fast], [[ Normal], [] Slow] – Ü [AF Speed] [Z Fast], [[ Normal], [] Slow] – – Ü [ISO/Gain] ISO], [ Gain] – – Ü [Gain Increment] [h Normal], [) Fine] –...
- Page 141 – – Ü [Clip Number] [001] to [999], [Reset] – – – Ü [User Defined] Five characters, each: [A] to [Z], [0] to [9] ([CANON]) – – – Ü [Color Bars] [j Off], [ SMPTE], [ EBU], [ ARIB] –...
- Page 142 Menu Options [Photo Review Time]: Selects the time to display a photo after it is recorded. [Available Space in Memory]/[Used Space in Memory]: Displays a screen where you can verify how much of the recording media is currently available for recording or how much is in use (the recording media icon shows the total recording time and ª...
- Page 143 Menu Options Menu item Setting options [Monitor Channels] [ƒ CH1/CH2], [š CH1/CH1], [Ÿ CH2/CH2], Ü Ü Ü – CH1+2/CH1+2] Ô Õ [Headphone Volume] Ü Ü Ü – 0-15 (8) Ø Ù [Speaker Volume] Ü Ü – – 0-15 (8) Ü Ü...
- Page 144 Menu Options Menu item Setting options [Assign Button 1], DISP.], [ Push AF], [^ Magnification], [ Zebra], [Assign Button 2], [O Peaking], [ Digital Tele-conv.], [ Powered IS], Ü Ü Ü Ü [Assign Button 3]* ND Filter], [¯ Start / Stop], [ Photo], [P Waveform Monitor] Ü...
- Page 145 Menu Options [Auto Power Off]: In order to save power when the camcorder is powered by a battery pack, it will automatically shut off if left without any operation for 5 minutes. • Approximately 30 seconds before the camcorder shuts off, [Auto Power Off] will appear. Operating any of the camcorder’s controls while the message is displayed will prevent the camcorder from shutting off.
-
Page 146: Troubleshooting
- The camcorder cannot communicate with the battery pack attached. Non-genuine Canon battery packs cannot be charged using this camcorder. - If you are using a genuine Canon battery pack, there may be a problem with the camcorder or battery pack. Consult a Canon Service Center. - Page 147 - The camcorder may become hot after using it continuously for long periods of time; this is not a malfunction. If the camcorder becomes unusually hot or it becomes hot after using it only for a short while, it may indicate a problem with the camcorder. Consult a Canon Service Center. Playback Deleting clips takes longer than usual.
- Page 148 - Charge the battery pack in temperatures between approximately 0 °C and 40 °C. - The battery pack is damaged. Use a different battery pack. - Canon’s LP-E6 Battery Pack cannot be charged. Check the bottom label of the battery pack and make sure it is an LP-E6N Battery Pack.
- Page 149 Troubleshooting Recording Media and Accessories Cannot insert the recording media. - The CFast card or SD card you are trying to insert is not facing the correct direction. Make sure it is facing the correct direction when you insert it (A 35). Cannot record 4K clips on the CFast card.
- Page 150 - Check that there are no IP address conflicts among the devices connected to the same network. - If multiple XC15 camcorders are connected to a single access point, connection speeds may be reduced. - To reduce radio wave interference when there are multiple access points using IEEE 802.11b/g or IEEE 802.11n (in the 2.4 GHz band), leave a gap of four channels between each wireless access point.
-
Page 151: List Of Messages
Battery communication error. Does this battery display the Canon logo? - This may be due to using a non-genuine Canon battery pack. - If you are using a genuine Canon battery pack, there may be a problem with the battery pack or camcorder. Consult a Canon Service Center. - Page 152 Then, remove the recording media being used and reinsert it. Alternatively, replace the recording media. If this does not solve the problem, consult a Canon Service Center. • Corrupted file control information cannot be recovered. Recording media or clips with corrupt file control information cannot be read by Canon XF Utility.
- Page 153 Unable to access configuration files - Turn off the camcorder. After a short while, turn it on again. If the problem persists contact a Canon Service Center. Unable to complete WPS. - Turn off the camcorder and access point (wireless router). After a short while, turn them on again and try again. If the problem persists, perform setup using the [Search for Access Points] option (A 126).
- Page 154 - Turn off the camcorder and access point (wireless router). After a short while, turn them on again and perform the Wi-Fi network setup again. If the problem persists contact a Canon Service Center. Table of Contents...
-
Page 155: Handling Precautions
If any of the above should get into the camcorder it may damage the camcorder and/or the lens. Consult a Canon Service Center as soon as possible. • Be careful to avoid dust and dirt particles accumulating on the lens or entering the camcorder. When you finish using the camcorder, make sure to remove the lens hood and attach the lens cap to the camcorder. - Page 156 Recording Media • We recommend backing up the recordings on the recording media onto your computer. Data may be corrupted or lost due to defects or exposure to static electricity. Canon shall not be liable for lost or corrupted data.
- Page 157 Handling Precautions Disposal When you delete data on the recording media, only the file allocation table is altered and stored data is not physically erased. Take the necessary precautions when you dispose of the recording media, for example by physically damaging it to prevent the leakage of private data. If giving the recording media to another person, initialize it (using the [Complete Initialization] initialization option for SD cards) (A 38).
-
Page 158: Maintenance/Others
You can use the AC adapter to operate the camcorder and to charge battery packs in any country with power supply between 100 and 240 V AC, 50/60 Hz. Consult a Canon Service Center for information on plug adapters for overseas use. -
Page 159: Optional Accessories
The message [Battery communication error] is displayed if you use a non-genuine Canon battery pack, and user response is required. Note that Canon shall not be liable for any damages resulting from accidents, such as malfunction or fire, that occur due to use of non-genuine Canon battery packs. - Page 160 Battery Packs When you need extra battery packs, make sure to select the LP-E6N. LP-E6N This mark identifies genuine Canon video accessories. When you use Canon video equipment, we recommend Canon-brand accessories or products bearing the same mark. Table of Contents...
-
Page 161: Specifications
Specifications Specifications XC15 System • Recording System Movies: Video compression: MPEG-4 AVC/H.264 Audio compression: Linear PCM, 16 bits, 48 kHz, 2 channels Movie format: MXF Photos: DCF (Design rule for Camera File system), compatible with Exif Ver. 2.3, JPEG compression •... - Page 162 Specifications • Image Stabilization Optical-Shift Image Stabilizer + digital compensation (Standard IS, Dynamic IS, Powered IS) • Subject Illumination* (manual exposure, gain at 42.0 dB, shutter speed at 1/2) Minimum Illumination: 0.05 lux Illumination Range: 0.05 lux to 100,000 lux * All figures are approximate.
- Page 163 Specifications Terminals • HDMI OUT Terminal: HDMI Mini connector, output only; 1080/50.00P, 2160/25.00P output available • MIC Terminal ∅ 3.5 mm stereo mini-jack, -65 dBV (manual volume center, full scale -12 dB) / 5k Ω or more Microphone attenuator: 20 dB •...
- Page 164 Specifications CA-946 AC Adapter • Power supply: 100 – 240 V AC, 50/60 Hz • Rated output / consumption: 8.4 V DC, 3.7 A / 65 VA (100 V) – 85 VA (240 V) • Operating temperature: 0 – 40 °C •...
-
Page 165: Reference Tables
Reference Tables Reference Tables Number of Photos Available on an SD Card The numbers given in the following table are approximate and vary according to shooting conditions and the subject. mode Number of photos Photo aspect ratio/size 16 GB 32 GB 4:3, 4000x3000 2,150 4,300... - Page 166 Reference Tables Recording and Playback Times Recording and playback times given in the following tables are approximate and vary according to operating mode, bit rate, and charging, recording or playback conditions. The effective usage time of the battery pack may decrease when recording in cold surroundings, when using the brighter screen settings, etc.
-
Page 167: Index
HDMI OUT terminal .....121 Canon XF Utility (download) ....122 Headphone terminal . - Page 168 Language ......34 Rec run (time code) ..... .84 Lens hood .
- Page 169 Video configuration ..... .53 Video output configuration ....118 Viewfinder unit .
- Page 170 UNITED KINGDOM CANON LATIN AMERICA, INC. Canon UK Ltd Unit 160, Centennial Park, Centennial Avenue, Elstree, Hertfordshire, WD6 3SG 020-7660-0186 Visit your local Canon Web site to download the latest version of this Instruction Manual. © CANON INC. 2017 PUB. DIE-0491-000C...
Need help?
Do you have a question about the XC15 and is the answer not in the manual?
Questions and answers