
Related Manuals for Canon XC10


Summary of Contents for Canon XC10
-
Page 1: Quick Guide
PUB. DIE-0468-000 4K Camcorder Quick Guide This guide introduces only basic functions. To download the Instruction Manual, which contains more advanced information, refer to page... -
Page 2: Important Usage Instructions
REGIONS OF USE XC10 is in compliance (as of March 2015) with the radio signal regulations of the regions listed below. For details on other regions where they can be used, make inquiries with the contacts listed on the back cover of this guide. - Page 3 • SD, SDHC and SDXC Logos are trademarks of SD-3C, LLC. • Canon is an authorized licensee of the CFast 2.0™ trademark, which may be registered in various jurisdictions. • Microsoft and Windows are trademarks or registered trademarks of Microsoft Corporation in the United States and/or other countries.
-
Page 4: Supplied Accessories
Supplied Accessories Supplied Accessories The following accessories are supplied with the camcorder. CA-570 Compact Power Adapter LP-E6N Battery Pack Lens Hood (incl. power cord) (incl. protective cover) Viewfinder Unit Lens Cap RC-6 Wireless Remote Controller (incl. viewfinder unit cover) (incl. CR2032 lithium button battery) Shoulder Strap IFC-300PCU/S USB Cable HTC-100/S High Speed HDMI Cable... -
Page 5: Table Of Contents
To learn how to use the more advanced functions, to read important handling precautions and to consult the troubleshooting section if an error message is displayed, download the full-version Instruction Manual (PDF file). Access the following Web site. Click on your country/region and follow the onscreen instructions to download the PDF file. http://www.canon.com/icpd/... -
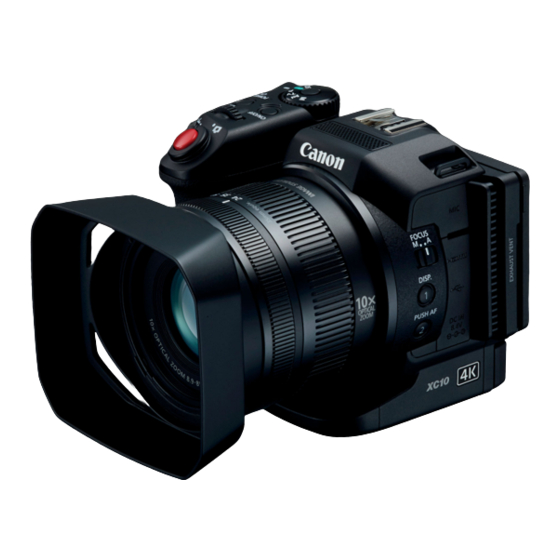
Page 6: Names Of Parts
Names of Parts Names of Parts 9 10 1 Focus ring (; 67) 8 DC IN terminal (A 17) 2 Zoom ring (; 66) 9 DISP. (display) button (; 47)/ 3 FOCUS (focus mode) switch Assignable button 1 (; 98) (;... - Page 7 Names of Parts 3 × (headphone) terminal (; 85) 1 Air intake vent (; 48) 2 Shoulder strap mount (; 25) 4 Tally lamp (; 39) 6 Lens hood (; 22) 5 Remote sensor (; 36)
- Page 8 Names of Parts 1 LCD touch screen (A 20) 6 CARD OPEN (open recording media 2 MAGN. (magnification) button slot cover) lever (A 26) (; 70)/ 7 Recording media slot cover Assignable button 3 (; 98) 8 CFast card slot (A 26) 3 MENU button (;...
- Page 9 Names of Parts 1 Built-in microphone (; 79) 5 Movie/photo switch (A 24) 2 Accessory shoe (; 87, 95): 6 Control dial (; 50) 7 ^ (playback) button (; 101) For attaching the optional GP-E2 GPS Receiver or optional EX-series 8 POWER/CHG (power/battery charging) Speedlite for EOS cameras.
- Page 10 Names of Parts 1 Battery compartment 4 Battery compartment cover (A 17) 2 Battery release latch (A 17) 5 Lens hood mount index (; 22) 3 BATT. OPEN (open battery 6 Tripod socket (; 25) compartment) switch (A 17)
- Page 11 Names of Parts Viewfinder unit 1 Viewfinder unit latch (; 22) 3 Dioptric adjustment lever (; 23) 2 Eye cup RC-6 Remote Controller 4 Delay switch (; 36) 6 Transmit button 5 Battery compartment cover...
-
Page 12: Onscreen Icons And Displays
Onscreen Icons and Displays Onscreen Icons and Displays Refer to this section for an explanation of the various icons and screen displays that appear in modes. They may differ depending on the shooting mode and settings in the FUNC. menu and setup menus. Some icons that appear in mode also appear in mode. - Page 13 Onscreen Icons and Displays Icons on the left side of the screen Icon/Display Description F0.0 Aperture value 50, 52 1/0000 Shutter speed 50, 53 y +0/0, y +0/0: exposure adjustment value, : exposure locked ISO00000, 00dB ISO00000: ISO speed, 00dB: gain : auto ISO limit, : AGC limit @, D 0.0m...
- Page 14 Onscreen Icons and Displays Icons on the right side of the screen Icon/Display Description è, é, ê, ë, Remaining battery charge – 000 min The icon shows an estimate of the remaining charge. The remaining recording time is displayed, in minutes, next to the icon.
- Page 15 Onscreen Icons and Displays Icons that appear during mode Icons on the top of the screen Icon/Display Description , 0, { Self timer Icons on the left side of the screen Icon/Display Description ¼, ½, ¾, ¿, , É, White balance Looks ª, ¬, «...
- Page 16 Onscreen Icons and Displays Icons on the bottom of the screen Icon/Display Description {L, {S Button to open the [Photo Aspect Ratio] submenu and currently selected photo size ( or ). Indicates whether the focus and/or exposure is locked while –...
-
Page 17: Step 1: Charging The Battery Pack
Step 1: Charging the Battery Pack Step 1: Charging the Battery Pack The camcorder can be powered with a battery pack or directly using the compact power adapter. The first time you use the camcorder, charge the battery pack. For approximate charging times and recording/playback times with a fully charged battery pack, refer Recording and Playback Times (;... - Page 18 Step 1: Charging the Battery Pack 8 Disconnect the compact power adapter in the order shown in the illustration. To remove the battery pack Open the battery compartment cover and slide the battery release latch in the direction of the arrow so Battery the battery pack springs out.
- Page 19 Step 1: Charging the Battery Pack IMPORTANT • Turn off the camcorder before connecting or disconnecting the compact power adapter. After you turn off the camcorder, important data is updated on the recording media. Be sure to wait until the green POWER/CHG indicator goes out. •...
-
Page 20: Step 2: Preparing The Camcorder
Step 2: Preparing the Camcorder Step 2: Preparing the Camcorder Attaching the Lens Hood Attach the lens hood to protect the lens and reduce the amount of stray light that may hit the lens. Place the lens hood on the front of the lens so that the hood’s lens mount index covers the index on the lens and turn it 90 degrees... -
Page 21: Step 3: Date, Time And Language Settings
Step 3: Date, Time and Language Settings Step 3: Date, Time and Language Settings Setting the Date and Time You will need to set the date and time of the camcorder before you can start using it. When the camcorder’s clock is not set, the [Date/Time] screen will appear automatically with the day selected. -
Page 22: Changing The Language
Step 3: Date, Time and Language Settings NOTES > > • You can adjust the date and time later on with the [ System Setup] [Date/ Time] setting. • When you do not use the camcorder for about 3 months, the built-in rechargeable lithium battery may discharge completely and the date and time setting may be lost. -
Page 23: Changing The Time Zone
Step 3: Date, Time and Language Settings Changing the Time Zone Change the time zone to match your location. The default setting is Paris. In addition, the camcorder is able to retain the date and time of an additional location. This is convenient when you travel so that you can set the camcorder to match the time of your home location or that of your travel destination. -
Page 24: Step 4: Basic Operation Of The Camcorder
Step 4: Basic Operation of the Camcorder Step 4: Basic Operation of the Camcorder Depending on how you plan to shoot, you may need to switch between shooting movies and shooting photos. Before you shoot, you can also select a shooting mode, which can give you the freedom of adjusting the camcorder’s camera-related settings or allow you to entrust the settings to the camcorder to varying degrees, depending on the mode. - Page 25 Step 4: Basic Operation of the Camcorder Touch Press on an element displayed on the touch screen. Used to start playing back a scene in an index screen, to select a setting from the menus, etc. Drag Swipe your finger up and down or left and right across the screen.
-
Page 26: Step 5: Preparing Recording Media
Step 5: Preparing Recording Media Step 5: Preparing Recording Media The camcorder records 4K clips to CFast cards, and HD clips and photos to SDHC and 0 SDXC memory cards. Initialize recording media (; 34) when Compatible Recording Media you use them with this camcorder for the first time. See (;... -
Page 27: Inserting And Removing An Sd Card
Step 5: Preparing Recording Media Removing a CFast card 1 Wait until the ACCESS indicator is off. 2 Slide the CARD OPEN switch in the direction of the arrow and open the recording media slot cover. ACCESS indicator 3 Push in the CFast card release button to release the CFast card. - Page 28 Step 5: Preparing Recording Media IMPORTANT • Observe the following precautions while the ACCESS indicator is on or flashing in red. Failure to do so may result in permanent data loss. - Do not disconnect the power source or turn off the camcorder. - Do not open the recording media slot cover.
-
Page 29: Recording Video And Taking Photos
Recording Video and Taking Photos Recording Video and Taking Photos Preparing to Record 1 Remove the lens cap. 2 Attach the lens hood and, if necessary, attach the viewfinder unit ( 22). 3 Attach a charged battery pack to the camcorder ( 17). - Page 30 Recording Video and Taking Photos To shoot clips 4 Press the START/STOP button. • Recording starts. The tally lamp illuminates and the Ñ icon at the top of the screen changes to Ü. • The ACCESS indicator flashes in red intermittently as the camcorder records to the recording media.
- Page 31 Recording Video and Taking Photos Selecting the Frame Rate and Bit Rate Follow the procedure below to select the frame rate and bit rate. Choose the combination of frame rate and bit rate that best suits your needs. 1 Press the MENU button. 2 Open the [4K Recording] or [HD Recording] submenu.
-
Page 32: Playback
Playback Playback Playing Back Recordings 1 While the camcorder is turned off, hold the ^ button pressed down. • The camcorder will turn on and an index screen will appear. • If you hold the button pressed down again, the camcorder will switch to mode, depending on the position of the movie/photo switch. -
Page 33: Deleting Recordings
Playback Using the Playback Index Screens Clips and photos are sorted into different index screens depending on the type of recording. The [y4K] index screen contains 4K clips, the [yHD] index screen contains HD clips and the [}] index screen contains photos. You can easily switch between index screens. - Page 34 Playback Deleting a Photo during Playback 1 Play back the photo you want to delete. 2 Touch the screen to display the playback controls. 3 Delete the photo. ] > [¸ Proceed] > [Yes] Ý • The photo is deleted and the next photo is displayed. You can drag your finger left/ right select another photo to delete and then touch [¸...
-
Page 35: Connecting To An External Monitor
Connecting to an External Monitor Connecting to an External Monitor When you connect the camcorder to an external monitor for recording or playback, connect the camcorder’s HDMI OUT terminal to the monitor’s HDMI input terminal using the supplied HTC-100/S High Speed HDMI Cable. Connection Diagram We recommend that you power the camcorder from a power outlet using the compact power adapter. -
Page 36: Saving Clips To A Computer
Saving Clips to a Computer Saving Clips to a Computer Use the Canon XF Utility for XF-AVC software to save your clips on a computer. Canon XF Utility for XF-AVC is a browser for transferring clips to a computer, playing back and checking video, and managing clips. -
Page 37: Overview Of Wi-Fi Functions
Overview of Wi-Fi Functions Overview of Wi-Fi Functions This camcorder’s Wi-Fi functions use either an infrastructure or camera access point connection, depending on the function. Refer to the following table for a brief summary of the Wi-Fi functions. Wi-Fi functions and connection types Wi-Fi connection Function Description... -
Page 38: Abridged Specifications
The message [Battery communication error] is displayed if you use a non-genuine Canon battery pack, and user response is required. Note that Canon shall not be liable for any damages resulting from accidents, such as malfunction or fire, that occur due to use of non-genuine Canon battery packs. - Page 39 Canon UK Ltd CCI Service Centre, Unit 130, Centennial Park, Borehamwood, Hertfordshire, WD6 3SE 0844-369-0100 Visit your local Canon Web site to download the latest version of the full-version Instruction Manual (PDF file). 0190W899 © CANON INC. 2015 PUB. DIE-0468-000...
Need help?
Do you have a question about the XC10 and is the answer not in the manual?
Questions and answers