Neopost IJ-80 User Manual
Hide thumbs
Also See for IJ-80:
- User manual (143 pages) ,
- User manual (143 pages) ,
- Instruction manual (178 pages)
Table of Contents
Advertisement
Quick Links
Download this manual
See also:
Instruction Manual
Advertisement
Table of Contents

Related Manuals for Neopost IJ-80


Summary of Contents for Neopost IJ-80
- Page 1 User Guide Franking machine IJ-80/90/110...
- Page 2 The IJ 80/90/110 is connectable. It can exchange data with Neopost scales and printers in order to provide optimal mail processing and reporting. Finally, the IJ 80/90/110 is a unique communication tool for your company.
- Page 3 Any removal of covers or dis- assembly of the product will result in the license being revoked and may result in the Post Office requesting Neopost to remove the product from use. The inking system used within the IJ 80/90/110 contains Post Office approved ink.
- Page 4 STANDARD In order to comply with standard NFEN60950, this equipment should be connected to installations in accordance with the applicable building trade standards. As regards overcurrent pro- tection of the internal wiring, a two-pole 5 amp protection is required. This equipment is in accordance with standard 55022, Class A.
-
Page 6: Table Of Contents
TABLE OF CONTENTS GETTING STARTED ........... 11 SECTION A: BASIC FUNCTIONS ......13 1. OVERALL PRESENTATION ..........15 1.1 Overview ..............15 1.1.1 Overall view (franking machine and optional standard automatic feeder) ......15 1.1.2 Overall inside view with optional standard automatic feeder .......... - Page 7 1.6 Envelope moistening ..........45 1.6.1 Standard automatic feeder ......... 45 1.6.2 Mixed-mail feeder .......... 46 1.7 Operation with an inserter ........48 2. PROTECTION BY AN ACCESS PIN CODE ....... 50 3. USING A SCALE ..............51 3.1 Using dynamic scale ..........53 3.1.1 Dynamic weighing OFF mode ......
- Page 8 9. OPERATION WITH AN EXTERNAL PC REMOTE CONTROL ................69 10. CREDIFON RECREDITING ..........70 10.1 Remote credit setting ..........70 10.2 Application for a new Credifon PIN ......72 10.3 Credifon Credit Controls ......... 72 11. ONLINE SERVICES ............. 73 12.
- Page 9 4. SUPERVISOR MODE ............94 4.1 Enabling the supervisor mode ........ 94 4.2 User setup .............. 98 4.3 Supervisor setup ............ 98 4.3.1 Security............99 4.3.2 Time ............100 4.3.3 Timeout ............101 4.3.4 Load rate table ..........102 4.3.5 DS tests ............
- Page 10 1.3 Dynamic scale problems ........131 2. GENERAL MAINTENANCE ..........132 2.1 Replacement of the brush and moistening sponges132 2.2 Mixed-mail feeder ..........133 2.3 Cleaning of the rollers ........... 135 2.4 Cleaning the printhead .......... 136 2.5 Replacing the envelope pressure units (dynamic scale) ............
-
Page 12: Getting Started
GETTING STARTED 1 Switch on the machine; 2 Enter your PIN number using the numeric keys and validate by pressing 3 Enter the postage print value using the numeric keys; 4 Place an envelope on the feed platform; START 5 Press STOP Congratulations! You have succeeded in franking an envelope. - Page 13 Special icons Signals an essential piece of information that cannot be missed. Signals an important issue. Indicates an interesting idea or special function. Illustration through an example According to the machine configuration, the menu lists may change.
-
Page 14: Section A: Basic Functions
SECTION A: BASIC FUNCTIONS OVERALL PRESENTATION ..........15 Overview 1.1.1 Overall view (franking machine and optional standard automatic feeder) 1.1.2 Overall inside view with optional standard automatic feeder 1.1.3 Mixed-mail feeder (optional) 1.1.4 Tactile screen and keyboard Installation 1.2.1 Preparation of the franking machine 1.2.2 Installation with the feed platform 1.2.3... - Page 15 Operation with an external weighing platform 3.2.1 Standard Mode 3.2.2 Differential Weighing Mode Operation with an external scale ENTERING POSTAGE VALUE AND MAIL PROCESSING 61 Entering postage value 4.1.1 Manually 4.1.2 With an external scale 4.1.3 With a dynamic scale Mail processing 4.2.1 Envelopes with Autofeed Sealer...
-
Page 16: Overall Presentation
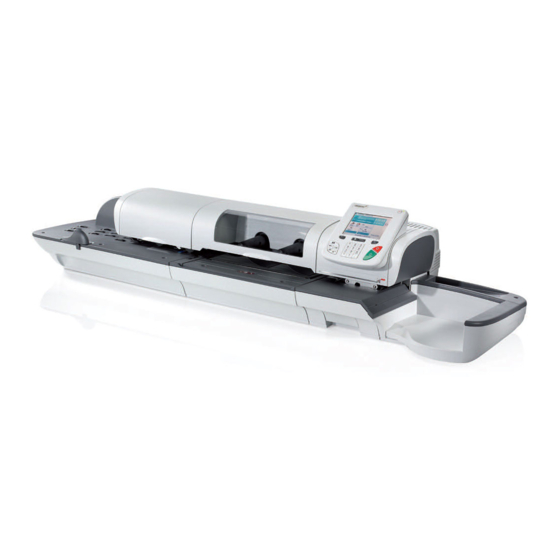
OVERALL PRESENTATION 1.1 Overview 1.1.1 Overall view (franking machine and optional standard automatic feeder) accessories pre-cut ON/OFF modem memory documentation label switch connector card storage dispenser (rear) (rear) reader cover cover removable adjustable front conveyor tactile table keyboard rear side guide graphic guide... -
Page 17: Overall Inside View With Optional Standard Automatic Feeder
1.1.2 Overall inside view with optional standard automatic feeder printhead blue button for ink tank removable conveyor release (IJ 90/IJ 110 postage water bottle device only) meter thickness adjustment label dispenser flap 2 positions blue button: (left) : up to 8 mm (right) : from 8 to 16 mm without the dynamic scale and from 8 to 12 mm with the dynamic scale Overall presentation... -
Page 18: Mixed-Mail Feeder (Optional)
1.1.3 Mixed-mail feeder (optional) tightening knob end/rear view water anti-skew bottle levers sensor cover large front small and conveyor cover envelope guide medium release side guide envelope handle side guide Overall presentation... -
Page 19: Tactile Screen And Keyboard
1.1.4 Tactile screen and keyboard external to select postage to select scale, sealing value precut label dynamic scale or weigh platform user definable text slogan Mini-die date parameter TEXTE SLOGAN MENTION LOW CREDIT LABEL SCALE SEALER XX-XX-XX INFO RATE 753.190 RATE NAME USER RATE WGH MAN... - Page 20 : locking and standby mode : return to main menu with default settings RESET : label mode selection : reset postage value START : START/STOP envelope or label feed STOP : numeric entry keys : validating a selection : return to previous menu with no validation ESCAPE : return to main menu with no validation HOME...
-
Page 21: Installation
1.2 Installation 1.2.1 Preparation of the franking machine The franking machine should be installed on a flat horizontal surface. Allow sufficient free space as follows: - above the machine to enable the opening of the covers - at the rear for the machine cooling. With the O/I switch in the “... -
Page 22: Installation Of The Standard Automatic Feeder (Optional)
1.2.3 Installation of the standard automatic feeder (optional) - Align the feeder with the franking machine; - Push the feeder towards the machine, taking care to keep the centering pin aligned as indicated; - Thread the feeder screw into the franking machine. Then, using the tightening knob, push and screw to lock (if the two devices are not closing properly, slightly rotate the gear protruding from the feeder and repeat the operation). -
Page 23: Installation Of The Mixed-Mail Feeder (Optional)
1.2.4 Installation of the mixed-mail feeder (optional) The mixed-mail feeder operates with an optical sensor next to the feed platform. Thus, it should not be installed in an area exposed to any excessive light source. - Align as much as possible the feeder with the franking machine; - Push the feeder towards the franking machine (or the dynamic scale), taking care to keep the alignment using the centering pin;... - Page 24 If the whole assembly needs to be moved, the units should be separated: - separate the units; - disconnect the cables at the rear; - remove the feeder water bottle; - move the feeder to the edge of the table; Cont'd Overall presentation...
- Page 25 - unclip the pipe under the unit and remove the plug (hold the pipe upwards to avoid getting wet; pipe - empty the water remaining in the feeder; - insert the plug and put the pipe back in its place. Overall presentation...
-
Page 26: Installation Of The Dynamic Scale (Optional)
1.2.5 Installation of the dynamic scale (optional) The equipment including a dynamic scale (the whole system representing approximately 55 kg) requires the use of a steady and rigid table, in order to prevent any weighing problem. Be sure not to install the machine in an area exposed to the sunlight or to air drafts. - Page 27 tightening knob centering pin (on the side) (gear) - Assemble the feed platform with the feeder as indicated: Whole configuration If the whole system needs to be moved manually, the franking machine, the dynamic scale, the feeder and the platform should be separated from one another. When the machine is to be moved, please, contact the customer helpdesk.
-
Page 28: Connections At The Rear Of The Units
Do not apply pressure on the dynamic scale tray. 1.2.6 Connections at the rear of the units Connections at the rear of the franking machine Modem Printer Port 2: Port 4: - PC - PC - Scanner - Scanner - Scale - Scale - Weighing - Weighing Platform... - Page 29 Connections with a standard automatic feeder The feeder will automatically be switched on at the same time as the franking machine. Feeder connection cable AC power outlet Connections with a standard automatic feeder and a dynamic scale The feeder and the dynamic scale will automatically be switched on at the same time as the franking machine.
- Page 30 Connections with a mixed-mail feeder power outlet The mixed-mail feeder remains energized (when connected to the mains) even if the franking machine is turned off. Connections with a mixed-mail feeder and a dynamic scale The dynamic scale will automatically be switched on at the same time as the franking machine.
-
Page 31: Ink Tank And Printhead
1.2.7 Ink tank and printhead - When the message "ink low" is displayed, it is possible to continue to print; - When the message "ink very low" is displayed, it is possible to continue to print, but it is strongly recommended to replace the ink tank;... - Page 32 - Insert the new ink tank. - Press on the front of the ink cartridge (1), then on the left hand side (2) in order to lock it into position. - Lower the blue lever and close the cover. PRINTHEAD REPLACEMENT (IJ 80/90/110) The machine must be switched on.
- Page 33 - Lift the Print Head cover & press on the front of the printhead in order to disengage it. - Lift out the printhead. - Remove the manufacturers tape from the print head. Insert the new printhead. - Lock it in position by pinching the rear of the printhead.
-
Page 34: Installation Of The Weighing Platform
1.2.8 Installation of the Weighing Platform INSTALLATION ON SERIAL PORTS The abbreviation WP stands for Weighing Platform. WP supported are WP3, WP5, WP10 & WP30 weighing platforms. For serial port configuration, a WP can be connected to any unused serial port GEO CODE ACTIVATION CODES FOR WP USE "WP's Setup"... - Page 35 MENU REPORTS WP SETUP INK INFORMATION HOME LOGOUT CLEAN - Select "WP SETUP" menu: WP SETUP POSTAL SERVICES 4330411003411 430411003411 SERIAL NUMBER : 433483586 LICENCE NUMBER : 123456789 00345 11002 GEO CODE : RETAIL POSTAL ROUNDING MODE : CHANGE MODE : MANUAL ON EVENT CAPACITY :...
- Page 36 Geodesic Map for the UK 58 ° 60 ° 56 ° 58 ° 54 ° 56 ° 52 ° 54 ° 50 ° 52 ° Overall presentation...
- Page 37 Geodesic Codes for UK Altitude 50 ° 10368 10368 10375 10382 10399 10405 10412 51 ° 10344 10351 10368 10375 10382 10399 10405 52 ° 10337 10344 10344 10351 10368 10375 10382 53 ° 10313 10320 10337 10344 10351 10368 10375 54 °...
-
Page 38: Envelope Feeding
1.3 Envelope feeding 1.3.1 With the standard automatic feeder - Fan the envelopes to separate them - Bevel the edge of the stack - Place the envelopes on the feed platform, with their upper edge resting against the back of the feed platform. - Ensure that the envelopes are stacked along the side and front guides. - Page 39 - It is possible to set to portrait feed a few large size envelopes (240x330 approx.). - The guides may be retracted when required. - Do not mix sealed and non-sealed. - Arrange the mail according to the size (the largest letters beneath).
-
Page 40: With A Mixed-Mail Feeder
1.3.2 With a mixed-mail feeder - Fan the envelopes to separate them. - Place the envelopes on the feed platform, with their upper edge resting against the side guide; - Stack the envelopes properly along the front guide. Cover the sensor: Right: the sensor is covered Wrong: the sensor is not covered... - Page 41 Adjustment of the small and medium envelope side guide Most envelopes can be processed without side guides. The side guides need to be used if the stack of envelopes is not stable. - Pull the guide forward; - turn the guide and let it drop; - to adjust the guide, allow a small gap between the guide and the envelopes.
- Page 42 Adjustment of the large envelope guide - Pull the guide forward; - Place the stack of envelopes; - To adjust the guide, allow it to rest against the envelopes without pressing. Positioning of nested envelopes (nested flaps) - Insert the nested flaps in the slot: Envelopes should be placed with their flap open, in order to allow a correct sealing.
-
Page 43: With Feed Platform Alone
- With a dynamic scale, the maximum envelope length is 330 mm. - It is possible to set the envelopes to portrait feed (maxi- mum length: 330 mm). - Envelopes of different thickness and size may be mixed together with the largest are the bottom. - Maximum weight: of stack up to 3 kg. -
Page 44: Label Feeding
1.4 Label feeding - Open the flap (1) of the label dispenser. - Press the blue button (2) and insert the labels by stacking them at the bottom of their recess, with the peel off tab facing upwards and the side to be printed facing to the right, in the dispenser. - Maximum capacity is 80 labels. -
Page 45: Filling Of The Removable Water Bottle
1.5 Filling of the removable water bottle It is recommended to use Neopost sealing solution for optimal operation of your machine. In case of an intensive use of the moistener and for optimal operation of your machine, use Neopost sealing solution. -
Page 46: Mixed-Mail Feeder
1.5.2 Mixed-mail feeder - Remove the bottle and turn it over. - Unscrew the cap. - Fill the bottle up to the limit marks. - Screw the cap back on again. - Put the bottle back in its place - Shake the bottle gently once or twice in order to drive out the air and start the water flow. -
Page 47: Mixed-Mail Feeder
1.6.2 Mixed-mail feeder From the main menu, press the SEALER MODE key. The menu below will be displayed: SEALER MODE OPEN & CLOSED FLAPS SEALING OPEN & CLOSED FLAPS SEALING OPEN FLAPS SEALING SEAL ONLY, NO POSTAGE SEALING OFF POSTAL CARDS ONLY HOME LOGIN SETUP... - Page 48 not printed. The symbol is displayed on the screen. - SEALING OFF: this mode is used to feed envelopes with sealed flaps or envelopes that are not to be sealed. The symbol is displayed on the screen. - POSTAGE CARDS ONLY: for postcard usage. The symbol is displayed on the screen.
-
Page 49: Operation With An Inserter
Adjustment of the sealer From the previous screen, press the key, the below menu SETUP is displayed: SEALER SETUP MOISTENING LEVEL SPEED REDUCED NORMAL LOGIN ESCAPE - enter the new moistening value by pressing on the number; this value should range from 1 (minimum water level) to 5 (maximum water level);... - Page 50 - Select "ON" in the INSERTER MODE if the franking machine is behind an inserter; - Press to confirm. In this case, the high performance automatic feeder and the START franking machine operate continuously when key is pressed STOP START once and until is pressed again.
-
Page 51: Protection By An Access Pin Code
PROTECTION BY AN ACCESS PIN CODE At power-up or when pressing a key if the machine is in the sleep mode, the screen prompts you to enter a 4-digit user pin code (only when access to the machine has been protected by the supervisor). -
Page 52: Using A Scale
USING A SCALE DEFAULT SCALE At the power on, you can select, in supervisor mode, the default Scale (Dynamic scale or WP in the case where both are connected), by pressing on the touch screen the touch area to SCALE access on "Scale setup"... - Page 53 MANAGEMENT OF SCALES In the main screen, press ; the screen below is SCALE displayed: WEIGHTING MODE DYNAMIC SCALE OFF DYNAMIC SCALE ON DYNAMIC SCALE BATCH WP STANDARD WP DIFFERENTIAL WEIGHTING HOME LOGIN Select the scale (WP or Dynamic Scale). SCALE ICONS Dynamic Scale Weighing mode Dynamic Scale Batch mode...
-
Page 54: Using Dynamic Scale
3.1 Using dynamic scale In the main screen, press ; the screen below is SCALE displayed: Select one of the 3 modes using keys validate by pressing 3.1.1 Dynamic weighing OFF mode The displayed icon is In this mode, the envelopes are only transported by the dynamic scale;... -
Page 55: Dynamic Batch Mode
- Transported (one by one) from the feeder to the dynamic scale, which send the weight, the length, the over-size and the thickness to the rate calculator; - Printed by the mailing machine at the corresponding value, calculated by the rate calculator. 3.1.3 Dynamic batch mode The displayed icon is This mode allows to print a whole envelope series at the same... - Page 56 TEXTE SLOGAN MENTION LOW CREDIT LABEL SCALE SEALER XX-XX-XX INFO RATE 753.190 RATE NAME USER RATE WGH MAN 30 g MENU JOBS LOGIN WP SETUP When you put a new weight on the WP platform, the weight value and the amount are recalculated with the current Rate, and are displayed on the screen.
-
Page 57: Differential Weighing Mode
3.2.2 Differential Weighing Mode By pressing the touch screen area, select the SCALE appropriate mode to activate the differential Weighing. normal label automatic label automatic envelope - Push touch screen area to change mode - Select the target Label Mode for the printing process - Select the rate before starting the Differential Weighing process. - Page 58 ZEROING IN PROGRESS PLEASE WAIT... LOW CREDIT XX-XX-XX INFO RATE DEPT MARKETING RATE NAME USER RATE BTO XXXXX WGH MAN 30 g TOI XXXXXX The zeroing process will start, you have to wait the end of the zero process. PLACE ITEMS ON WP AND PRESS OK LOW CREDIT XX-XX-XX...
- Page 59 NO WEIGHT ON WP LOW CREDIT SEALER WEIGHING PLATFORM XX/XX/XXXX REMOVE ALL ITEMS ON WP AND PRESS OK RATE Refresh weight RATE NAME RATE 1 DEPT value TOI XXXXXX BTO XXXXX When you remove one item (Envelope or parcel) the weight of the removed item and associated rate is displayed on the screen.
-
Page 60: Operation With An External Scale
Check if it is the last item to print. 3.3 Operation with an external scale The IJ 80/90/110 can be connected to an external Neopost scale to select the desired mail service. Place the letter to be weighed on the scale and select the mail service. - Page 61 - Print one label (press key on the scale) or SE N D LAB EL several labels (press key on the scale, and indicate FUNCTION the number of labels if connected to an SE37/57/107). When the scale and the machine are in the "department" mode, the open departments may be selected from the scale, provided that they are not protected by an access code in the machine.
-
Page 62: Entering Postage Value And Mail Processing 61
ENTERING POSTAGE VALUE MAIL PROCESSING 4.1 Entering postage value 4.1.1 Manually Press key if a value different from zero is displayed and enter the postage value required, using the numeric keys. In case of error, press . When a dynamic scale is present, mode Dynamic Scale Off should be selected to print on envelope. - Page 63 USER... DISPL... RATE USER RATE USER RATE 1st CLASS 2nd CLASS 1st CLASS REC. Spec. Del. ND L1 (£500) Spec. Del. ND L2 (£1000) Air Letter Europe MORE HOME LOGIN - Select a rate configuration from both the user’s configuration and the configurations predefined by the supervisor, using arrows provides details on the...
- Page 64 MODIF RATE NAME USER RATE MAIL CLASS 1ST CLASS LETTER 1ST CLASS LETTER NONE FORMAT 1ST CLASS LETTER inland DESTINATION 1ST CLASS LETTER NO SERVICE 1ST CLASS LETTER SERVICES ESCAPE Select the parameter (MAIL CLASS, DESTINATION or SERVI- CES) to be modified, by touching the area concerned: - If MAIL CLASS is selected: the list of available mail types appears.
-
Page 65: Mail Processing
4.2 Mail processing 4.2.1 Envelopes with Autofeed Sealer (except batch mode) Place a stack of envelopes on the feed platform and press key START STOP START To stop the envelope feeding, press key again (or wait for STOP a few seconds until the machine stops automatically when there are no more envelopes to be processed). -
Page 66: Labels
against the back guide and push the envelope towards the franking machine, until it is fed into the machine. START To stop the envelope feeding, press key again. STOP 4.2.4 Labels - Press key - If required, enter the number of labels to be processed (from 1 to 999) at the same value (default number of labels is 1). -
Page 67: Modification Of The Imprint
MODIFICATION OF THE IMPRINT The imprint may be modified by selecting: - the date; - the slogan; - the mini die; - the text; - the print offset (for thick items). To allow a quicker access, the supervisor may store configurations in memories M1 to M9 (see section B, paragraph "Programming memories 1 to 9"). -
Page 68: Using Departments
USING DEPARTMENTS - In order to use departments, the supervisor must have selected first the department mode (see section B, paragraph "Defining security"). - The machine is supplied with DEPT OFF. In order to use departments, select DEPT ON in supervisor mode. Total postage used and a number of pieces may be assigned to a department selected from a list, as described below. - Page 69 - Departments sharing the same access pin code make up a group. When you have entered the access pin code once, you will not be prompted to enter the pin code again within the same group. - The last department selected will be proposed by default when operation is resumed after a standby period or after the machine power-up.
-
Page 70: Operation With An External Scale
OPERATION WITH AN EXTERNAL SCALE The IJ 80/90/110 can be connected to an external Neopost scale to select the desired mail service. Place the letter to be weighed on the scale and select the mail service. The scale display will indicate the corresponding price. -
Page 71: Credifon Recrediting
10. CREDIFON RECREDITING 10.1 Remote credit setting Credit may be purchased from Royal Mail, using the Credifon re- setting system, in units of £1, minimum £50.00, maximum £10,000 up to a maximum of £10,000 on the machine. The default maxi- mum credit limit will be set at £1000 unless you request a higher or lower limit. - Page 72 - Enter the Credifon Pin code and press RECREDIT AMOUNT OLD VALUE: 1000 NEW VALUE: ESCAPE - Enter the amount in units of £ to be added and press You will be asked confirmation by Press for £1000. The machine will connect to the Credifon Server. At the end of the transaction, you should see displayed: INFO TRANSACTION SUCCESSFUL...
-
Page 73: Application For A New Credifon Pin
10.2 Application for a new Credifon PIN If you lose or forget your Credifon PIN you must apply for a new PIN in writing on your company headed paper to the following address: Neopost Ltd - Credifon Accounts Neopost House South Street... -
Page 74: Online Services
1. Account Credit Limit ......This credit limit affects the overall account; 2. Machine Credit limit ......This specifies the maximum credit that any single machine can hold at one time. This will automatically be set at £10,000.00 . 3. Low Credit Warning Level (RCB only) . An early warning to ensure that enough credit is held in your RCB account. -
Page 75: Pc Connection For Mailmanager
12. PC CONNECTION FOR MAILMANAGER (PC MAIL ACCOUNTING) The Franking machine is connected to a PC incorporating Mail Accounting software, MailManager, which compiles the franking data sent by the franking machine. When switching on the franking machine, MailManager is automatically activated on the PC and the following screen is displayed on the franking machine: PC DEPT NUM PC DEPT CODE... - Page 76 the franking machine is switched on. The postal service, department number and franking type (label or envelope) can be selected from the scale. In case of a connection problem between the franking machine and the PC, the franking machine will display the following mes- sage: ERROR M259 PC link error...
-
Page 78: Section B: Advanced Functions
SECTION B: ADVANCED FUNCTIONS FURTHER FUNCTIONS ............ 79 Mode 1.1.1 Pass through mode 1.1.2 Message mode 1.1.3 Dating mode 1.1.4 Postage Paid Imprint mode (optional) Franking machine general configuration Configuration of the main screen display JOB MEMORY SAVING ........... 84 Storing in user memory "0"... - Page 79 4.11 Downloading an advertisement slogan or a mini die 112 4.12 Rate configuration 4.13 Scale high accuracy configuration mode 4.14 Programming memories 1 to 9 4.15 Text modification 4.16 PC connection Recovery Mode 4.17 Exiting the supervisor mode...
-
Page 80: Further Functions
FURTHER FUNCTIONS 1.1 Mode - To select the MODE menu, touch the postage value area; the screen below will appear: DATE PRINT ... NORMAL PASS THROUGH MESSAGE MESSAGE DATER PPI 1 PPI 2 HOME LOGIN - Select an option using keys or by pressing directly the numeric key corresponding to the selection. -
Page 81: Message Mode
1.1.2 Message mode MESSAGE will appear on the screen. This function is designed to print a text instead of a franking mark. It is possible to use the batch registers to count items processed in this mode. 1.1.3 Dating mode This function is designed to print the date instead of a postage imprint. -
Page 82: Franking Machine General Configuration
TEXTE SLOGAN MENTION LOW CREDIT LABEL SCALE SEALER XX-XX-XX INFO RATE 753.190 RATE NAME USER RATE WGH MAN 30 g MENU JOBS LOGIN DIFF It is possible to use the batch registers to count items processed in this mode (see the following paragraph "Batch registers"). 1.2 Franking machine general configuration The following parameters may be set up: - the language,... -
Page 83: Configuration Of The Main Screen Display
- Select the options required by touching them; - Validate the whole configuration by pressing 1.3 Configuration of the main screen display This mode is also accessible in User and Supervisor mode. In the main screen, the "INFO" area may display from 3 to 5 items and has a dynamic build up. - Page 84 - To suppress an item, select the line concerned and touch - To confirm, press on It is useful to select DESCENDING so the amount of postage in your meter is always displayed on the main menu. Abbreviations table ASCENDING ......TOT TOTAL ITEMS .......
-
Page 85: Job Memory Saving
JOB MEMORY SAVING 2.1 Storing in user memory "0" After selections have been made (postage value, advertisement slogan, mail class die, moistening, shift, etc.) it is possible to take a “software snapshot” of the machine status. To do so, press key , then ;... - Page 86 - Select a job using keys or by pressing directly the numeric key (from ) corresponding to the selection. - To confirm, press on Memories 1 to 9 are preprogrammed by the supervisor - see paragraph "Programming memories 1 to 9" in this section.
-
Page 87: Report Printing
REPORT PRINTING Various reports (or statements) may be printed on a printer, on labels, or sent to a PC. 3.1 Operating mode: - From the main screen press on key , and select MENU REPORTS using keys or by pressing directly the numeric key corresponding to the selection. -
Page 88: Batch Registers
- Press to select the label, printer or PC: PRINTER PRINTER LABELS PRINTER is displayed. Then, simply press LABELS, PRINTER or PC. - Press : the report will be automatically printed out PRINT (press if there is more than one page). NEXT In the label mode, make sure that there are labels in the label dispenser. - Page 89 The batch register is referred to in the meter STATUS report (subtotal and subtotal of items; see paragrah "Meter report"). The batch register is useful for counting the total number of pieces and postage printed when doing presort mail. Each of these registers may be reset (zeroed) separately by pressing the key;...
-
Page 90: Automatic Call List
3.3 Automatic Call List - Select the AUTOMATIC CALL LIST tab to view the report data: AUTOMATIC CALL LIST REASON CALL CALL DATE AND TIME REASON CALL CALL DATE AND TIME STATIC UPLOAD MM/DD/YYYY HH:MM E.CONFIRMATION MM/DD/YYYY HH:MM FILE DOWNLOAD MM/DD/YYYY HH:MM ESCAPE The report includes all scheduled automatic calls. -
Page 91: Modules Details
3.5 Modules Details - Select the MODULES DETAILS tab to view information the report data : MODULES DETAILS MODULE SWVER SERIALS # CYCLE METER 30.11 123456789012 BASE 1.00.f 123456789012 12346 12347 RATE 04.07B PRINT PREV NEXT ESCAPE - Select to view the reference data: REFERENCE DATA MODULE SW PART NB... -
Page 92: Activity Error List
3.6 Activity Error List - Select the ACTIVITY ERROR LIST tab to view the report data: ACTIVITY ERROR LIST Last reset date : 12/01/1990 00 : 00 ERROR OCCURRENCE LAST OCC. DATE 01 P23 MM/DD/YYYY HH:MM:SS 02 P65 MM/DD/YYYY HH:MM:SS 03 S03 MM/DD/YYYY HH:MM:SS 04 P43... - Page 93 INFO DO YOU REALLY WANT TO RESET ACTIVITY REPORT ? ESCAPE - Touch to reset activity report and get the confirmation. CONFIRMATION CONNECTION TO SERVER IS REQUIRED PRIOR TO ACTIVITY REPORT RESET TO AVOID INCOHERENCE. DO YOU WANT TO CONNECT NOW ? ESCAPE When user has requested to reset the activity report, a confirma- tion message is display to be sure the user wants to reset the...
-
Page 94: Activity History Report
3.7 Activity History Report - Select the ACTIVITY HISTORY REPORT tab to view the report data: ACTIVITY HISTORY # # T REASON CALL CALL DATE AND TIME M STATISTICS UPLOAD MM/DD/YYYY HH:MM CX M STATISTICS UPLOAD MM/DD/YYYY HH:MM OK A GENERIC MM/DD/YYYY HH:MM CM A GENERIC MM/DD/YYYY HH:MM OK... -
Page 95: Supervisor Mode
SUPERVISOR MODE Under this mode, the Supervisor can access all the machine functions, except postage printing. The scrolling procedure from screen to screen is the same as in the user mode, except that the supervisor mode includes a number of extra configuration function keys. - Page 96 The main menu in the supervisor mode will appear: MENU USER SET UP SUPERV. SETUP DISPLAY SETUP RECREDIT SERVICES DEPARTMENTS RATE PRINTING INKER SERVICING HOME LOGOUT CLEAN then (by pressing MENU REPORTS WP SETUP INK INFORMATION HOME LOGOUT CLEAN The mini-message "SUP" indication or the menu headings at the top, on the right, indicates that the user is in the supervisor mode.
- Page 97 GENERALITIES A number of menus or selection keys can be accessed only in supervisor mode: - the function used to modify for instance names MODIFY (departments, memory, advertisement, etc.) or status (slogan, or mini die), - the function designed to select a default value, DEFLT - the key designed to do a backspace in the alphanumeric...
- Page 98 When pressing key , the following screen is DEFLT displayed: FRAC... SLOGAN MINI DIE NO SLOGAN FLAG RECYCLE FIRST CLASS FIRST CLASS AIR MAIL SEASONS GREETINGS HOME LOGOUT MODIFY DEFLT To set an advertisement slogan active, select it in the previous screen and press .
-
Page 99: User Setup
4.2 User setup When pressing "USER SETUP" the screen below appears: USER SETUP DISPL... RATE LANGUAGE ENGLISH FRANCAIS BUZZER ON ERR ON KEY CONTRAST INSERTER HOME HOME LOGIN DEFLT LOGIN Select the language, the buzzer function and the contrast simply by touching keys and press to validate all the selections. -
Page 100: Security
4.3.1 Security After selecting “SECURITY” in the main supervisor menu, the menu below will be displayed: SECURITY 1234 USER PIN NO NORMAL LOCKED MACHINE STATUS HIGH VAL THRESLD 123456 PC ABSENT MODE ACTIVE LOCKED ESCAPE where: - USER PIN NO : is used to define the user access code (4 digits). -
Page 101: Time
DEFINING THE HIGH VALUE THRESHOLD In the "SECURITY" screen, after selecting the "HIGH VAL THRESLD" menu, the below screen will be displayed: HIGH VALUE THRESHOLD OLD VALUE : 1455 NEW VALUE : ESCAPE Simply enter the new value, using the numeric keypad (with no point or comma, e.g.:99000 corresponds to 99.000). -
Page 102: Timeout
4.3.3 Timeout After selecting "TIME OUT" in the main supervisor menu, the screen below is displayed: TIMEOUT (SEC) 0015 0015 START(10 - 9999) 0005 STOP (1 - 9999) 0005 STANDBY (1 - 9999) 0120 0120 SLEEP (30 - 9999) 0240 0240 ESCAPE The next delays are determined by the supervisor (between 0 and... -
Page 103: Load Rate Table
4.3.4 Load rate table - Select the menu "LOAD RATE" in the main supervisor menu. - Insert the memory card into the reader, on the right side of the machine; - Press to initiate the downloading operation. INFO LOADING IN PROGRESS then: INFO LOADING SUCCESSFUL... -
Page 104: Ds Tests
4.3.5 DS tests This function can only be used at the technical department’s request. 4.3.6 Touchscreen calibration Do not touch the screen with a pen, pencil or any sharp instrument’ By selecting "TOUCHSCREEN CALIBRATION" in supervisor setup screen, the calibration input box is displayed: INFO Touchscreen Calibration Aim the targets with a fine pen... -
Page 105: Serial Port Setup
4.3.7 Serial port setup This menu allows the User to define which external unit is connected to a port. When selecting "SERIAL PORT SETUP", the following is displayed: SERIAL PORT SETUP SCANNER PORT1 PORT2 SCALE PORT3 NOT ACTIVE PORT4 ESCAPE - When touching a selection (SCANNER FOR EXAMPLE), a list of the possible external units is displayed. -
Page 106: Departments
4.5 Departments After selecting "DEPARTMENT" in the main supervisor menu, the following menu is displayed: DEPARTMENTS PRINT... REPOR... DEPT MODE ON MARKETING OPEN DIRECTION CLOSED DESIGN OPEN DESIGN OPEN RESEARCH OPEN CLOSED FACTORY OPEN LOGOUT HOME MODIFY SETUP After selecting a department using keys by pressing directly the numeric key corresponding to the selection), when pressing key from the above screen,... - Page 107 - close a department (CLOSED), - unlock an automatically locked department: lock out occurs if more than 8 attempts have been made to access this department with a wrong pin code. The department name will disappear in user mode from the menu selection when locked out. - choose a name (12 characters), - choose a department number (8 digits only when an external scale is not interfaced, 4 digits with a scale),...
-
Page 108: Printing Inker Servicing
The machine is supplied with DEPARTMENT ; in order to use the departments, select DEPARTMENT (by touching it). Validate with . You should then select DEPARTMENT in the main supervisor menu to open and define the departments you want to use (see on previous page). -
Page 109: Reports
In order to adjust the alignment, select the letter corresponding to the straightest vertical line (letter F in the above example), then press to confirm. Irrespective of the selection, the test impression remains unchanged. 4.7 Reports After selecting "REPORTS" in the main supervisor menu, the following menu is displayed: USER ... -
Page 110: Ink Information
Select "DEPT SETUP REPORT" and press DEPT SETUP REPORT DATE 10-24-00 DIE N XXX YYYYYY NAME STATUS PIN CODE Accounting OPEN 0621 Marketing OPEN 6969 OPEN 1445 CLOSED 0221 Bookshop OPEN 0018 CLOSED 0277 Car park CLOSED 2012 4.8 Ink information Select "INK INFORMATION"... -
Page 111: Recredit Services
4.9 Recredit services The telephone number of Royal Mail credit re-setting centre is stored in the franking machine. This is used when you want to purchase credit. Modification of the telephone number is possible by selecting "RECREDIT SERVICES" in the supervisor main menu: DEPAR... - Page 112 POSTAL CONNECTION SETUP PREFIX 123456 123456 TELEPHONE # LOW FUNDS THRESLD DIALTONE ON OFF ESCAPE To add or to modify a number, touch the area concerned and enter a number using the numeric keys. Confirm with It may be necessary to enter a pause between the outside line digit and the new telephone number: add a "...
-
Page 113: Online Services
Simply enter the new value, using the numeric keypad (with no point or comma, e.g.:99000 corresponds to 99.000). When the postage is below the low postage threshold value, a message will be prompted in the main menu. 4.10 Online services See the "Online services"... - Page 114 SLOGAN MODIF NOT ACTIVE ACTIVE STATUS MARKETING NAME NUMBER ESCAPE LOAD - Modify NAME, or insert the memory card into the reader, on the right side of the machine and press to initiate the LOAD downloading operation. INFO LOADING IN PROGRESS then: INFO LOADING SUCCESSFUL...
-
Page 115: Rate Configuration
4.12 Rate configuration To set a predefined rate configuration as a default parameter, see paragraph 4.1 "Enabling the supervisor mode" in this section. To modify the name (except for "user rate") or the characteristics of a predefined rate configuration, the procedure is the same as in the user mode, followed by pressing . -
Page 116: Programming Memories 1 To 9
- Enable (or disable) the function, touching and confirm with 4.14 Programming memories 1 to 9 Up to 9 configurations may be stored into memories 1 to 9. - From the main menu, make all the required selections on the machine (amount, department, text, slogan, moistening, etc., verifying that they are active);... - Page 117 MEMORY SETUP DIRECTION DIRECTION NAME NUMBER ESCAPE To modify the NAME of the memory, touch the NAME area to have access to the alphanumerical entry screen (see next paragraph). Validate change by pressing Press OK again to confirm the changes to the Memory Setup screen.
- Page 118 INFO CONFIRM OVERWRITING OF JOB MEMORY X ESCAPE - To validate, press ; the screen displays: INFO DEPARTMENT IN JOB MEMORY: YES OR NO - press to validate the department previously selected. You will keep a software snapshot of the machine status before returning to the initial screen.
-
Page 119: Text Modification
4.15 Text modification - From the menu select the text to be modified, select the text area: FREE TEXT 32 CHARS MAX SPACE ESCAPE allows access to the following screen: ENTER NAME AND PRESS OK 12 CHARS MAX MARKETI_10_ SPACE ESCAPE allows access to the previous screen. -
Page 120: Pc Connection Recovery Mode
4.16 PC connection Recovery Mode In case of a connection problem between the franking machine and the PC, the PC connection recovery mode enables the franking machine to store in memory the partial franking data and to transmit them to the PC as soon as the connection is re- established. - Page 121 USER ... SUPERV. SETUP DISPL... SECURITY SECURITY TIME TIMEOUT LOAD RATE TABLE DYNAMIC SCALE TESTS TOUCHSCREEN CALIBRATION SERIAL PORT SETUP HOME LOGOUT - Scroll down to “PC ABSENT MODE” and select “ACTIVE”: SECURITY 1234 USER PIN # NORMAL LOCKED MACHINE STATUS HIGH VAL THRESLD 123456 PC ABSENT MODE...
-
Page 122: Exiting The Supervisor Mode
4.17 Exiting the supervisor mode To deactivate the supervisor mode, select the key from LOGOUT the supervisor menu (return to the main menu) or press key which will set the machine to the sleep mode. Supervisor Mode 121... -
Page 124: Section C: Maintenance Advice
SECTION C: MAINTENANCE ADVICE TROUBLE SHOOTING ........... 125 Misfeed 1.1.1 In the standard automatic feeder 1.1.2 In the mixed-mail feeder 1.1.3 In the franking machine 1.1.4 In the dynamic scale Machine and feeder problems Dynamic scale problems GENERAL MAINTENANCE ..........132 Replacement of the brush and moistening sponges 132 Mixed-mail feeder Cleaning of the rollers... -
Page 126: Trouble Shooting
TROUBLE SHOOTING 1.1 Misfeed 1.1.1 In the standard automatic feeder - Open the feeder cover. - Unlock the conveyor. Press back on the central blue button then lift the conveyor. - Carefully remove the misfed envelopes. - Press the conveyor to put it in place again. - Shut the cover. - Page 127 When more free space is required to facilitate the access to the machine, you may shift the whole machine table sideways by lifting the tab under the handle in direction (2). - With handle open, push lever underneath in an upwards direction and pull the drawer open.
-
Page 128: In The Dynamic Scale
1.1.4 In the dynamic scale In the event of a jam under the conveyor - Open the cover of the dynamic scale; - Press the handle on the left side in order to raise the conveyor; jammed envelope - Remove the envelope jam; - Release the handle to restore the conveyor to its correct position;... -
Page 129: Machine And Feeder Problems
1.2 Machine and feeder problems PROBLEM SOLUTION The machine cannot get Check the power cord and the started. connection. The printer does not operate - Is it switched on? Is it connected? (optional with I/O board). - Is the printer mode selected in the SETUP menu? The feeder does not - Make sure that it is properly... - Page 130 PROBLEM SOLUTION Poor printing quality - See paragraph "Cleaning the printhead". - Make sure that the side drawer is properly closed. Envelopes are being - Make sure that the side drawer is stained by machine properly closed. - Clean rollers (see “General maintenance”...
- Page 131 SOLUTION PROBLEM - Fan the envelopes (see Envelopes are not properly "Envelope feeding" ). fed or are double fed. - Bevel the edge of envelope stack (“Envelope feeding” page 37). - With the standard feeder, make sure that the feeder A position is selected for thin items.
-
Page 132: Dynamic Scale Problems
1.3 Dynamic scale problems MESSAGE SOLUTION S105 Oversize sensor error. Clear and clean See below window under dynamic scale unjam handle. window oversize sensor Trouble shooting 131... -
Page 133: General Maintenance
GENERAL MAINTENANCE 2.1 Replacement of the brush and moistening sponges - Switch off the franking machine. - Separate the feeder from the franking machine. - Unlock the conveyor (central blue button) and lift it. - To remove the brush, raise it and lightly pull it. - Install new brush by snapping the clips onto the brush holder. -
Page 134: Mixed-Mail Feeder
2.2 Mixed-mail feeder Replacing (or cleaning) the moistening ramp and the filter - Switch the machine off. - Pull the handle in the forward direction, in order to release the cover. handle filter moistening ramp - In order to remove the moistening ramp, straighten it and pull it slightly upwards. - Page 135 - In order to put the moistening pathway back in its place, insert the left end under the table (1), then lower the moistening ramp (2) and snap it on. - To remove the filter, slightly pull it upwards: To clean the filter, rinse it with warm water. The filter needs to be cleaned once a week if sealing is used.
-
Page 136: Cleaning Of The Rollers
2.3 Cleaning of the rollers Shift the machine table sideways by releasing handle (see paragraph1.1.2 "In the franking machine" in this section). rollers Clean the rollers with a damp cloth. General Maintenance 135... -
Page 137: Cleaning The Printhead
2.4 Cleaning the printhead In case of poor printing quality: - Press key , in order to run a cleaning cycle for the CLEAN printhead, when the printing quality is getting poor. - If running a cleaning cycle for the print head is not enough, remove the printhead (see paragraph "Ink tank and printhead"... -
Page 138: Replacing The Envelope Pressure Units (Dynamic Scale)
2.5 Replacing the envelope pressure units (dynamic scale) - Squeeze the pressure unit (1) at the position indicated and pull (2). - Insert the new pressure unit and press firmly to lock in place. envelope pressure units Squeeze here on the envelope pressure unit to remove it. -
Page 139: Removal Of The Postage Meter
2.6 Removal of the postage meter - Switch off the franking machine. - Open the cover. - Hold the handle on the meter and pull it upwards. General Maintenance... -
Page 140: Touchscreen Precautions
2.7 Touchscreen precautions - Do not pile any products or any heavy items on it. - Do not give any shock or vibration to the product and not drop - Do not apply water, organic solvent or chemicals such as acid and alkali to the product. -
Page 141: Specifications
SPECIFICATIONS • Speed: - IJ 80 in weighing mode* ..: up to 6000 items/hour - IJ 80 not in weighing mode* ..: up to 11000 items/hour - IJ 90 in weighing mode* ..: up to 7200 items/hour - IJ 90 not in weighing mode* .. - Page 142 • Envelopes dimensions and weights Standard High perf. feeder feeder Min. length 140 mm 127 mm Max. length (without dynamic scale) 330 mm 381 mm Max. length (with dynamic scale) 330 mm 330 mm Min. width 90 mm 90 mm Max.
- Page 143 • Operating conditions - Ambient temperature ..: 5 to 40 °C - Relative humidity ....: 15 to 80 % with no condensation • Storage of labels: It is recommended at room temperature of 25°C and up to 50% relative humidity.
- Page 144 FURTHER ASSISTANCE Contact Neopost for further assistance if you have problems in operating the machine: Tel: 0845 880 0000 Contacting Neopost 143...
-
Page 145: Index
INDEX Display setup 104 Downloading an advertisement slogan or a Abbreviations table 83 mini die 112 Access code 50 Dynamic scale 53, 61 Advertisement slogan change 66 Entering postage value 61 Batch mode 54 Envelopes Batch Registers 87, 89, 90, 91 feeding Brush replacement 132 mixed-mail feeder 39... - Page 146 Mode 79 Moistening 45 High accuracy configuration mode 114 High value threshold 100 ON/OFF switch 15 Online services 73 Imprint 66 Ink information 109 Ink tank 16 Pass through (Seal only) 79 Ink tank replacement 30 Pass through mode 79 Inker PIN code 50 Replacement 30...
- Page 147 POSTAGE CARDS ONLY 47 SEAL ONLY, NO POSTAGE 46 SEALING OFF 47 Security 99 Serial port setup 104 Specifications 140 Sponges replacement 132 Supervisor mode 94 Exiting 121 Supervisor setup 98 Tactile screen 18 Text modification 118 Thickness adjustment 16, 38 Time 100 Timeout 101 Timeout setting 101...
- Page 149 Products presented in this guide are conform to requirements of directives nbr 73/23/CEE and 89/336/CEE. Neopost has implemented a program for the recycling of worn franking machines and ma- chines at the end of their lifetime. Contribute in a responsible way to the environmental pro- tection by consulting your retailer internet site, or by contacting him.
- Page 150 4126903G/F - 01/02/2015...
Need help?
Do you have a question about the IJ-80 and is the answer not in the manual?
Questions and answers