Table of Contents
Advertisement
Quick Links
Advertisement
Chapters
Table of Contents

Related Manuals for ETAS ES910.3-A


Summary of Contents for ETAS ES910.3-A
- Page 1 ES910.3-A Prototyping and Interface Module User’s Guide...
- Page 2 The data in this document may not be altered or amended without special noti- fication from ETAS GmbH. ETAS GmbH undertakes no further obligation in rela- tion to this document. The software described in it can only be used if the customer is in possession of a general license agreement or single license.
-
Page 3: Table Of Contents
3.1.2 ES910.3-A Features ........16 Housing . - Page 4 4.17 Firmware ..........41 4.17.1 Firmware of the ES910.3-A ......41 4.17.2 Firmware of the Modules mountable in the Extension Slot .
- Page 5 Configuring the ES910.3-A ........
- Page 6 ES910.3-A ........
- Page 7 10 ETAS Contact Addresses ........
-
Page 8: About This Manual
The presentation looks as follows: Goal definition: any advance information... • Step 1 Any explanation for step 1... • Step 2 Any explanation for step 2... • Step 3 Any explanation for step 3... ES910.3-A - User’s Guide... -
Page 9: Scope Of Supply
Additional cables and adapters can be obtained separately from ETAS. A list of available accessories and their order designation is located in chapter "Cables and Accessories" on page 106 of this manual or in the ETAS product catalog. Additional Information The configuration instructions for the module under INCA can be found in the corresponding software documentation. -
Page 10: Basic Safety Notices
Intended Use The ES910.3-A has a simulation controller and the ECU interfaces CAN, LIN, ETK and XETK and also one interface for Daisy Chain modules (ES4xx/ES63x/ES93x modules). If additional interfaces are required, the extension slot of the ES910.3- A can be used with the ES920.1 FlexRay module, the ES921.1 CAN module or... - Page 11 • The power cable must not be connected directly to the vehicle battery or lab power supply, but via a fuse of up to 20 A. • Ensure that the connections of the lab power supply, the power supply at the module and the vehicle battery are easily accessible! ES910.3-A - User’s Guide...
- Page 12 Approved power supply cables Power supply cables suitable for the ES910.3-A module can be delivered in two designs: • power supply cable CBP120 with standard banana plugs (current design) •...
- Page 13 Basic Safety Notices • Adhere to the maximum permissible cable lengths! • Do not use any damaged cables! Cables may be repaired only by ETAS! • Never apply force to insert a plug into a socket. Ensure that there is no contamination in and on the connection, that the plug fits the socket, and that you correctly aligned the plugs with the connection.
- Page 14 Maintenance The product is maintenance-free. Repair If an ETAS hardware product should require a repair, return the product to ETAS. Cleaning the module housing • Use a dry or lightly moistened, soft, lint-free cloth for cleaning the module housing.
- Page 15 Damage to the module and loss of properties based on IP30! Do not open or change the module housing! Work on the module housing may only be performed by ETAS. Potential equalization CAUTION! Potential equalization in the vehicle is possible via the shield of ...
-
Page 16: Hardware Description
ES920.1 FlexRay module, the ES921.1 CAN module or with the ES922.1 CAN FD module. The Service Port provides the functions “Wake Up” and “Trigger”. The ES910.3-A is supported by INCA as an interface for mea- sure, calibration and diagnostic applications. - Page 17 – Rapid prototyping of control functions with MATLAB®/Simulink®, ASCET-MD, and C by integration in INTECRIO – Supported by INCA, INCA ES9xx Add-On, INCA-EIP, RTA-TRACE, HSP For the complete technical data of the ES910.3-A, refer to the chapter "Techni- cal Data" on page 74. ES910.3-A - User’s Guide...
-
Page 18: Housing
Housing Standard housing with interfaces on the front and rear of the device is used for the ES910.3-A. The sturdy metal housing of the ES910.3-A has nonskid plastic feet. It can be easily screwed onto a carrier system for installation in a vehicle or in the lab. -
Page 19: Interfaces
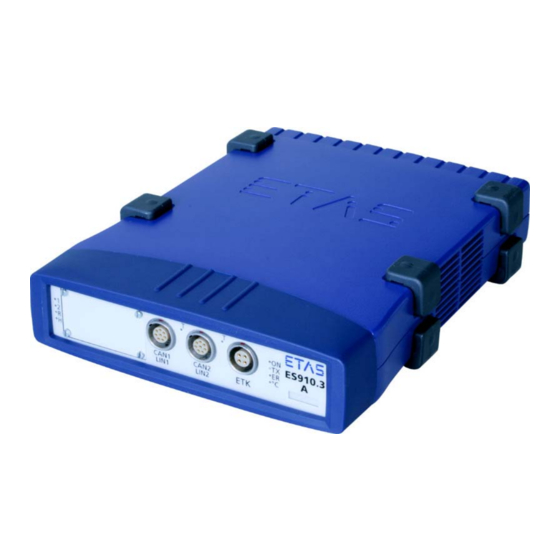
Hardware Description Interfaces 3.3.1 Front Panel The following interfaces are on the front panel of the ES910.3-A: • Extension slot (e.g. for ES920.1 FlexRay Module) • CAN1/LIN1 (1 x CAN, 1 x LIN) • CAN2/LIN2 (1 x CAN, 1 x LIN) •... -
Page 20: Back Panel
ETAS Hardware Description 3.3.2 Back Panel The following interfaces are on the back panel of the ES910.3-A: • 6 ... 32V DC (power supply) • ON/AUTO switch • SP (Service Port) • IO (interface for ES4xx/ES63x/ES93x modules or EtherCAT automation bus) •... -
Page 21: Indicators
(s) Fig. 3-4 Flash Codes of the Indicators 3.4.2 ES910.3-A Operational State Four LEDs can be found on the front panel of the ES910.3-A. They indicate the following operational states: Display Operational State Green The unit is powered on. -
Page 22: Es910.3-A Functional State
LEDs on the Back Panel One LED SYNC can be found on the right-hand side of the back panel of the ES910.3-A. The LED indicates the synchronization function of the module (mas- ter or slave) and the synchronization state. Display... -
Page 23: Functional State Of Individual Interfaces
Hardware Description 3.4.4 Functional State of Individual Interfaces If the ES910.3-A is powered on (operational state "On") they indicate the follow- ing functional states at the assigned interfaces: Interface CAN1/LIN1 and CAN2/LIN2 A common LED T is assigned to the interfaces CAN1/LIN1 and CAN2/LIN2 (see Fig. -
Page 24: Acoustic Signal
Yellow 100 Mbit/s communication Communication interrupted Acoustic Signal The ES910.3-A has an acoustic signal generator. Emitting an Acoustic Signal • Short signal when booting the ES910.3-A. • Linked to the °C indicator, temperature states of the module are indi- cated: –... -
Page 25: Functional Description
Block Diagram of the ES910.3-A Power Supply (7-29V DC) The power supply interface (7-29V DC) of the ES910.3-A is routed to a 2-pin connector (Lemo socket) on the back panel of the device. Power is supplied to the ES910.3-A via an external power supply or vehicle battery. -
Page 26: On/Auto Switch In Position „Auto
“Off”, “Standby” and “On”. 4.4.1 Operational State: “Off” The ES910.3-A is not connected to the external power supply and is completely powered off. All interfaces are disabled. The “Wake Up” function (see chapter 4.5 on page 26) is disabled. -
Page 27: Fig. 4-3 Operational States Of The Power Supply (Simplified)
Power Connect Power Disconnect Wake Up STANDBY Sleep Fig. 4-3 Operational States of the Power Supply (Simplified) The following table is a list of possible ways of activating the ES910.3-A. Source of Active Wake Up Event Sleep Condition activating ON/AUTO switch Always „ON“... -
Page 28: Service Interface (Sp)
Functional Description Service Interface (SP) The Service interface of the ES910.3-A is routed to a 4-pin SP connector (Lemo socket) on the back panel of the device. Two connector pins are used for the “Manual Trigger” function and one for the “Wake Up Power” function. -
Page 29: Wake Up Control" Pin
The voltage range at the “Wake Up Control” pin of the Service Port corresponds to the operating voltage range of the ES910.3-A (7 V to 29 V direct voltage). Interfering signals pending at the “Wake Up Control” pin of the Service Port are filtered out. -
Page 30: Pc Interface (Pc)
4.7.1 Mixed Network If the ES910.3-A is to be used in a network with other ETAS modules (ES59x, ES6xx) on an ES600 module, the ES910.3-A can communicate with the PC with 10/100 Mbit/s, the same as the other modules. -
Page 31: Feature
ETAS supplies cables and termination resistors of 120 Ohm for setting up CAN networks. LIN Interface (CAN1/LIN1, CAN2/LIN2) The ES910.3-A has two LIN interfaces. One each of the LIN interfaces is routed to the two 8-pin CAN1/LIN1 and CAN2/LIN2 connectors (Lemo socket) on the front panel. -
Page 32: Operating Modes
4.9.3 Power Supply on the Bus The LIN nodes of the ES910.3-A can either be powered externally by the LIN bus or internally by the module. The type of power supply must be configured in the web interface of the ES910.3-A (see chapter 5.6 on page 60). -
Page 33: Initialization
4.10.1 Initialization If an ETK type supported by the ES910.3-A is connected to the ETK interface it is recognized automatically. The ETK interface is automatically initialized. If an ETK type which is not supported by the ES910.3-A is connected to the ETK interface the overall system behaves, as if no ETK is connected. -
Page 34: Io Interface (Io)
4.11 IO Interface (IO) The ES910.3-A has one IO interface for modules of the ES4xx line. This IO inter- face is routed to an 8-pin IO connector (Lemo socket) on the back panel of the device and is galvanically isolated from the other interfaces of the ES910.3-A. -
Page 35: Ethercat" Operating Mode
(SYNC IN) of ES910.3-A is deactivated in the EtherCAT operating mode. Connecting the EtherCAT Bus A cable for connecting the EtherCAT bus to the IO interface of ES910.3-A will be provided by ETAS Engineering upon request. Cable lengths of up to 30 m can be supplied. -
Page 36: Overload For Rapid Prototyping Applications
ES910.3-A can no longer process the data of the ES930.1. The ES910.3-A discards data of the ES930.1 or data of other ETAS daisy chain mod- ules that are present at its IO interface. The IO interface of the ES910.3-A to which the ES930.1 is connected is overloaded. -
Page 37: Ecu Interface (Ecu)
Functional Description 4.12 ECU Interface (ECU) The ES910.3-A has one ECU interface which is routed to a 4-pin ECU connector (Lemo socket) on the back panel. The ECU interface is galvanically isolated from the other interfaces of the ES910.3-A. 4.12.1... -
Page 38: Hardware Detection And Protocols
"L2 Bridge off" (see chapter 5.6.6 on page 63). Without this setting, data losses or other errors of ES910.3-A may occur even after minutes of a functional operation. Note In the delivery state, the ECU interface of ES910.3-A is configured for opera- tion with an external switch ("L2 Bridge off"... -
Page 39: Ethernet Interface With Ilinkrt Tm Protocol" Operating Mode
XCP on UDP Rapid Prototyping The ECU interface supports the XCP on UDP bypass functionality for Rapid Pro- totyping. The ES910.3-A acts as an XCP master; the connected XCP on UDP bypass device acts as an XCP slave. XCP on TCP/IP Measuring and Calibrating The ECU interface supports the XCP on TCP/IP functionality for measuring and calibrating. -
Page 40: External Switch With Etas Modules" Operating Mode
For additional information about the use of INCA-MCE, see chapter 5.4.4 on page 55. 4.12.6 Feature You can find a list of applications supported by the ES910.3-A at the ECU inter- face in chapter 7.6.2 on page 78. 4.13 Extension Slot The ES910.3-A has a slot for add-ons (Extension slot). -
Page 41: Real Time Clock
4.16 Real Time Clock The ES910.3-A has a Real Time Clock (RTC). The clock has to be set in the web interface of the ES910.3-A. This involves the PC time being transferred to the module. The module can also temporarily store the time for a specific duration without a supply voltage. -
Page 42: Getting Started
Transferring Dissipated Heat 5.1.1 Ventilation of the Module The housing of the ES910.3-A absorbs the heat generated inside the module due to dissipation power and disperses it via its surface. The module requires additional ventilation with an internal fan and ventilation slits on the side to prevent the ES910.3-A from overheating during operation,... -
Page 43: Requirements When Setting Up With Other Modules
5.2.2 Requirements when Setting up with Other Modules You must adhere to important requirements when setting up and operating the ES910.3-A with other modules to ensure sufficient ventilation and avoid heat concentration: • ETAS recommends not to stack or assemble ES910.3-A modules on top ofeach other particularly if these modules are to be operated simultane- ously. -
Page 44: Assembly And Locking
Assembly and Locking 5.3.1 Fixing a Module onto a Carrier System The ES910.3-A has a rugged metal housing with nonskid plastic feet. The unit can easily be screwed onto a carrier system for installation in a vehicle or in the lab. -
Page 45: Connecting Several Modules Mechanically
ES910.3-A modules can only be connected vertically to other modules. If the ES910.3-A is to be connected with modules of the ETAS compact line, the latter must not be positioned to the side of the ES910.3-A as this would mean insufficient exchange of heat. -
Page 46: Fig. 5-4 Connecting The Es910.3-A To Another Module
Getting Started To connect modules mechanically: • Remove the four plastic feet from the bottom of the ES910.3-A so a further module can be attached. This makes the assembly slits for the T Brackets accessible. You can attach a further module under the ES910.3-A. -
Page 47: Applications
ETAS Getting Started Applications Note You can find a list of applications supported by the ES910.3-A in chapter 7.6.2 on page 78. 5.4.1 ETK Bypass Systems ETK Bypass System via ETK Interface and CAN Interface In this application, the rapid prototyping tasks and the calculating of the func- tions are realized by the ES910.3-A. -
Page 48: Fig. 5-6 Etk Bypass System With Es910.3-A
ETK Bypass System via ETK Interface and CAN/LIN Interfaces Here, the ES910.3-A runs rapid prototyping tasks and calculates the functions. The ES910.3-A has access for bypass applications via the CAN interfaces (High- Speed or Low-Speed), the LIN interfaces and the ETK interface. -
Page 49: Fig. 5-7 Etk Bypass System With Es910.3-A
XETK Bypass System via ECU Interface and CAN/LIN Interfaces Here, the ES910.3-A runs rapid prototyping tasks and calculates the functions. The ES910.3-A has access for bypass applications via the CAN interfaces (High- Speed or Low-Speed), the LIN interfaces and the ECU interface. Measuring and calibration applications are also possible via the ECU interface. -
Page 50: Etk Bypass System With Simultaneous Measuring And Calibration
CBE230 (connected to cable 2) (1 Gbit/s) In INCA/INCA-EIP, the ES910.3-A Rapid Prototyping Module acts as an ECU with a calibration port. INCA synchronizes the measure signals from the Rapid Proto- typing Target with those of the vehicle ECU and sensors (see Fig. 5-8 on page 50). -
Page 51: Fig. 5-9 Etk Bypass System With Daisy Chain Modules
INCA or for Rapid Pro- totyping with INTECRIO and the ES910.3-A module. The IO interface of the ES910.3-A enables an module chain to be connected directly. All you need to do is connect the data transfer cable CBEP430 or the data transfer cable CBEP4305 to the ES910.3-A module. - Page 52 The ES400 product family concept of positioning the small and sturdy ES400 modules as close as possible to the sensors, concatenating the modules with each other and connecting just the first module of this chain to the ES910.3-A results in a simple network architecture.
-
Page 53: Es910.3-A With Es720.1 Drive Recorder
Daisy Chain modules For measurement tasks in the development, application and validation of elec- tronic vehicle systems, the ES910.3-A module can be connected directly to the ES720.1 Drive Recorder. Additional ECU and bus interface modules as well as measurement modules are networked with each other via Ethernet and connected with the drive recorder or ES910.3-A. - Page 54 The data are stored in the ASAM standard format MDF (Measure Data Format). They can be conveniently analyzed Measure Data Analyzer MDA from ETAS and easily compared with INCA reference measurements. The ES720.1 module can automatically transfer the recorded measurement files encrypted and compressed via LAN, WLAN or wireless radio to customer-specific data servers.
-
Page 55: Es910.3-A For Fast Application Access With Inca-Mce
With the fast test bench connection for automated measurement and calibration tasks INCA-MCE (Measurement and Calibration Embedded) developed by ETAS, an automation system can access the ECU in real-time via the ES910.3-A proto- typing and interface module. Partial functions of the INCA application tool were relocated to the real time- capable ES910.3-A hardware. - Page 56 Getting Started Cable for EtherCAT operating mode A cable for connecting the EtherCAT bus to the IO interface of ES910.3-A mod- ule will be provided by ETAS Engineering upon request. Cable lengths of up to 30 m can be supplied.
-
Page 57: Cabling
• Launch your application. Operating the ES910.3-A at an ES720.1 Drive Recorder If you want to operate the ES910.3-A with an ES720.1 drive recorder, you find detailed relevant information in the user documentation of ES720.1. The cables CBE230 and CBAE330 are required for connecting the modules. For information about additional available connecting cables, see chapter "Cables... -
Page 58: Io Interface (Io)
IO Interface (IO) "Daisy Chain" Operating Mode The IO interface of ES910.3-A does not supply the daisy chain modules of the ES4xx/ES63x/ES93x with operating voltage. Connecting these modules to ES910.3-A is, therefore, done with the CBEP430 or the CBEP4305 Y-cable for providing the supply voltage of the daisy chain modules (see Fig. -
Page 59: Ecu Interface (Ecu)
Daisy Chain modules in the relevant User’s Guide. "EtherCAT" Operating Mode The cable for connecting the EtherCAT bus to the IO interface of the ES910.3-A module will be provided by ETAS Engineering upon request. Cable lengths of up to 30 m can be supplied. -
Page 60: Configuring The Es910.3-A
ETAS Getting Started Configuring the ES910.3-A The ES910.3-A is configured by the ON/AUTO switch and at the PC via a graphic user interface. A web browser application is used as an interface. 5.6.1 Web Interface The web interface of the ES910.3-A consists of a home page, a page for custom- ized configuration of the interfaces for the "Wake Up"... -
Page 61: Configuring The Can/Lin Interfaces
The CAN2 interface is operated in the operating mode “Low-Speed”. • Click Save Config. The configuration of the CAN2 interface is saved. Note After changing a configuration on the web interface of ES910.3-A, the module has to be restarted! ES910.3-A - User’s Guide... -
Page 62: Configuring The Io Interface
For notes about the configurable parameters of the IO interface, see chapter 4.11 on page 34. Note At the "IO" interface, it is possible to use either ETAS daisy chain modules or the EtherCAT automation bus. The simultaneous use at an ES910.3-A module is not possible. -
Page 63: Configuring The Ecu Interface
EtherCAT mode. • Click on Save Config. The configuration of the IO interface is being saved. Note After changing a configuration on the web interface of ES910.3-A, the module has to be restarted! 5.6.6 Configuring the ECU Interface Calling up the Configuration Page on the Web Interface Calling up the configuration page: •... - Page 64 Configuring the ECU Interface If hardware is connected directly to the ECU interface, the internal switch of ES910.3-A must be configured with the "L2 Bridge on" setting. If an external switch is connected to the ECU interface, the internal switch of ES910.3-A must be configured with the "L2 Bridge off"...
-
Page 65: Troubleshooting Problems
Please observe the LEDs which provide information on the functions of the inter- face and the ES910.3-A (see the chapter "Indicators" on page 21) to be able to judge the operational state of the ES910.3-A as well as troubleshooting mea- sures. - Page 66 Are you using an ES930.1 Check whether the error in event mode in your bit for the overload case measuring setup? of ES910.3-A is set at the IO interface. For notes about exiting the over- load case, see chapter 4.11.5 on page 36.
-
Page 67: Problems And Solutions
Windows XP and Vista systems. Network security policies, however, may request the APIPA mechanism to be disabled. In this case, you cannot use a network adapter which is configured for DHCP to access ETAS hardware. The ETAS Net- work Manager displays a warning message. -
Page 68: Search For Ethernet Hardware Fails
If you use more than one PC or notebook for accessing the same ETAS hardware, the network adapters used must be configured to use the same logical network. If this is not possible, it is necessary to switch the ETAS hardware off and on again between different sessions (repowering). -
Page 69: Personal Firewall Blocks Communication
Ethernet hardware at all, although the configuration parameters are correct. Certain actions in ETAS products may lead to some trouble if the firewall is not properly parameterized, e.g. upon opening an experiment in ASCET or searching for hardware from within INCA or HSP. - Page 70 • Directed IP broadcasts via UDP to the network configured for the ETAS application, destination ports 17099 or 18001 • Outgoing IP unicasts via UDP to any IP in network configured for the ETAS application, destination ports 17099 through 18020 •...
- Page 71 To unblock a product: • In the "Windows Security Alert" dialog window, click on Unblock. The firewall no longer blocks the ETAS product in question (in the example: ASCET). This decision sur- vives a restart of the program, or even the PC.
- Page 72 This tab lists the exceptions not blocked by the fire- wall. Use Add Program or Edit to add new pro- grams, or edit existing ones. • Make sure that the ETAS products and services you want to use are properly configured exceptions. –...
- Page 73 ETAS, ETASData, and ETAS temporary directories. Otherwise, an error message opens if the product is started, and a database is opened. In that case, no correct operation of the ETAS product is possible because the data- base file and some *.ini files are modified during operation.
-
Page 74: Technical Data
Operating voltage range (DC voltage) Current consumption, max. Marking for CE conformity, see chapter 7.3 on page 76 Marking for WEEE, see chapter 7.4 on page 76 Marking for China RoHS, see chapter 7.2.2 on page 76 ES910.3-A - User’s Guide... -
Page 75: Fulfilled Standards And Norms
Do not open or change the module housing! Work on the module housing may be performed only by qualified technical personnel. Return defective modules to ETAS for repair. 7.1.5 Cleaning the Product We recommend cleaning the product with a dry cloth. ES910.3-A - User’s Guide... -
Page 76: Mechanical Data
The user is obligated to separate the waste equipment and to provide it to the WEEE return system for reuse. The WEEE Directive applies to all ETAS devices, but not to external cables or bat- teries. Additional information about the recycling program of ETAS GmbH is available from the ETAS sales and service locations (see chapter 10 on page 110). -
Page 77: Use Of Open Source Software
System Requirements 7.6.1 Hardware Operation of the ES910.3-A requires a power supply voltage of 7 V to 29 V DC. Ethernet Interface of the PC A PC with a free Ethernet interface (1 Gbit/s or 100 Mbit/s, Full Duplex) with an RJ-45 connection is required. -
Page 78: Supported Applications And Software Requirements
Supported Applications and Software Requirements The ES910.3-A is supported by HSP V8.0.0 and higher. RTA-Trace V2.1 controls the interaction of the tasks of the ES910.3-A realtime operating system at runtime. Software in the following versions is required to configure and control the ES910.3-A and for data acquisition purposes. - Page 79 Interface Application Classification Support in Application Software ES910.3-A INCA INCA-MCE INTECRIO ASCET-RP ETK Measurement and Calibration V8.0 V6.2.1 ETK MCE V9.4 V7.0.0 V1.0 ETK Bypass V8.0 V3.1.1 V6.1 XCP on UDP V8.0 V3.1.1 V6.1 XETK Measurement and Calibration V8.0 V6.2.1 XETK MCE V10.0...
-
Page 80: Compatibility Between Rapid Prototyping Models And Es910.3-A Firm
Compatibility between Rapid Prototyping Models and ES910.3-A Firmware Rapid prototyping models that were generated with INTECRIO V3.2.0 / ASCET- RP V6.1.2 or with earlier versions, cannot be executed on ES910.3-A systems containing the firmware from HSP V9.4.0 or from newer HSP versions. -
Page 81: Electrical Data
Full Duplex Protocol TCP/IP IP address Dynamic via INTECRIO or INCA Support of the ETAS synchronization SYNC IN functionality mechanism Note To ensure successful initialization of the network card of your PC, refer to chap- ter 7.6.1 on page 77. -
Page 82: Can Interfaces (Can1/Lin1 And Can2/Lin2)
2 independent interfaces, galvanically isolated from each other and from the other interfaces, every channel separately configurable Specification LIN V2.1 Controller LIN-Core (FPGA) Transceiver (Physical Layer) MCZ33661EF Operating mode Master or Slave (configurable in the ES910.3-A web interface) ES910.3-A - User’s Guide... -
Page 83: Etk Interface (Etk)
Note ES910.3-A supports all current ETK types. Exception: The ETK types not supported by ES910.3-A are listed in the following table. Detailed information can be found on the Internet pages of ETAS GmbH (ETK System Feature PDF document). -
Page 84: Service Interface (Sp)
(except for serial ETKs [ETKSx]). The update is carried out either with HSP or with the (X)ETK configuration tool. Note The minimum requirements for the HDC/FW version of the ETK used for Ser- vice-Based Bypass V3.0 can be found on the Internet pages of ETAS GmbH (ETK System Feature PDF document). -
Page 85: Io Interface
EtherCAT slave 7.7.9 Interface (ECU) Operational Mode "ECU Interface" Connection 1000Base-T Ethernet; Full Duplex Protocol XCP on UDP/IP, TCP/IP Support of the ETAS synchronization SYNC OUT functionality mechanism Operational Mode "iLinkRT" Connection 1000Base-T Ethernet; Full Duplex Protocol XCP on iLinkRT... -
Page 86: Miscellaneous
ES920.1, ES921.1, ES922.1 is not used if the ES910.3-A is on standby In the standalone Mode: time to boot the operating system and to start the flashed model until the "Init Task" ES910.3-A - User’s Guide... -
Page 87: Pin Assignment
ETAS Technical Data Pin Assignment Note All connectors are shown with a view of the interfaces of the ES910.3-A. All shields are at case potential. 7.8.1 Power Supply Interface (7-29V DC) Fig. 7-2 Power Supply Interface (7-29V DC) Socket at the ES910.3-A module: Lemo EPJ.1B.302... -
Page 88: Pc Interface (Pc)
ETAS Technical Data 7.8.2 PC Interface (PC) Fig. 7-3 PC Interface (PC) Socket at the ES910.3-A module: Lemo EPE.1B.310 Signal Meaning TXD1+ BID3- BID3+ RXD2- RXD2+ BID4- BID4+ TXD1- Reserved Reserved ES910.3-A - User’s Guide... -
Page 89: Can/Lin Interface (Can1/Lin1 And Can2/Lin2)
ETAS Technical Data 7.8.3 CAN/LIN Interface (CAN1/LIN1 and CAN2/LIN2) Fig. 7-4 CAN/LIN Interface (CAN1/LIN1 and CAN2/LIN2) Socket at the ES910.3-A module: Lemo EPC.1B.308 Signal Meaning UBATT (LIN) CAN_LOW CAN_GND LIN_GND CAN_GND CAN_HIGH Reserved ES910.3-A - User’s Guide... -
Page 90: Etk Interface (Etk)
ETAS Technical Data 7.8.4 ETK Interface (ETK) Fig. 7-5 ETK Interface (ETK) Socket at the ES910.3-A module: Lemo EPG.1B.304 Signal Meaning Send data, plus Send data, minus Received data, plus Received data, minus ES910.3-A - User’s Guide... -
Page 91: Sp Interface (Sp)
ETAS Technical Data 7.8.5 SP Interface (SP) Fig. 7-6 SP Interface (SP) Socket at the ES910.3-A module: Lemo EPG.1B.304 The suitable Lemo connector for the socket: FGG.0B.304 Signal Meaning TRIG IN+ Man. trigger input, plus TRIG IN- Man. trigger input, minus... -
Page 92: Io Interface (Io)
The IO interface (IO) can be used either as connection for daisy chain modules or as connection for EtherCAT. The function of the interface is selected or con- figured on the web interface of ES910.3-A (see chapter 5.6 on page 60). Operational Mode "Daisy Chain": Pin Assignment... -
Page 93: Ecu Interface (Ecu)
ETAS Technical Data 7.8.7 ECU Interface (ECU) Fig. 7-8 ECU Interface (ECU) Socket at the ES910.3-A module: Lemo EPE.1B.310 Signal Meaning TXD1+ BID3- BID3+ RXD2- RXD2+ BID4- BID4+ TXD1- Reserved Reserved ES910.3-A - User’s Guide... -
Page 94: Cables And Accessories
ETAS Cables and Accessories Cables and Accessories Note Only use the ETAS cables named in this User’s Guide at the interfaces of the ES910.3-A. The maximum admissible cable lengths must be adhered to. Power Supply Cable DANGER! Dangerous electrical voltage! -
Page 95: Cbp120 Cable
CBP120-2 (power supply cable with standard banana plugs) Side A Side B Signal Plug Signal UBATT- UBATT- Ground Black Ground Order Name Short Name Order Number Power Supply Cable, Lemo 1B FGJ Banana CBP120-2 F 00K 102 584 (2mc-2mc), 2 m ES910.3-A - User’s Guide... -
Page 96: Cbp1205 Cable
Power Supply Cable, Lemo 1B FGJ – Safety CBP1205-2 F 00K 110 023 Banana (2mc-2mc), 2 m Note Power supply cables with safety banana plug are suitable only for connection to voltage sources with safety socket. ES910.3-A - User’s Guide... -
Page 97: Pc Interface Cable
Ethernet Adapter Cable (1 Gbit/s / 100 Mbit/s) Fig. 8-4 CBAE330.2 Cable Order Name Short Name Order Number Ethernet Connection Adapter Cable 1 Gbit/ CBAE330-0m5 F 00K 105 759 s to 100 Mbit/s, Lemo 1B PHE - Lemo 1B FGF (10fc-8mc), 0m5 ES910.3-A - User’s Guide... -
Page 98: Combined Can And Lin Cable
Mapping of DSUB Socket Plug Combinations to ES910.3-A If one CBCFI100 cable each is used at the interfaces CAN1/LIN1 and CAN2/LIN2 of ES910.3-A, these interfaces are mapped to the DSUB socket plug combina- tions of both cables as follows: ES910.3-A Cable Cables in CBCFI100 Fig. - Page 99 Cables and Accessories Connector Pin assignment of Cable at the CAN1/LIN1 or CAN2/LIN2 Interface The DSUB socket plug combinations of the CBCFI100 cable are assigned the sig- nals of the CAN1/LIN1 or CAN2/LIN2 interface of ES910.3-A as follows: Lemo DSUB, ...
-
Page 100: Can Interface Cable
SUB (8mc-9fc+9mc), 2 m 8.5.2 K107 Cable Fig. 8-7 K107 Cable Order Name Short Name Order Number CAN Interface Y-Cable, Lemo 1B FGC K107 F 00K 001 272 Lemo 0S PCA Lemo 0S FFA (8mc,- 2fc+2mc) , 2 m ES910.3-A - User’s Guide... -
Page 101: Cbcx130-2 Cable
F 00K 103 780 (9fc-2mc), 3 m 8.5.5 CBAC140-3 Cable Fig. 8-10 CBAC140-3 Cable Order Name Short Name Order Number CAN ECU Adapter Cable, DSUB Lemo 2B CBAC140-3 F 00K 103 783 FGG (9fc-10mc), 3 m ES910.3-A - User’s Guide... -
Page 102: Cbac150-2M5 Cable
F 00K 104 159 1B FGC (16mc-8mc), 2m5 CAN Terminating Resistor 120 Ohm Fig. 8-12 CBCX131-0 Terminating Resistor Order Name Short Name Order Number CAN 120 & Termination Resistor, 2xDSUB CBCX131-0 F 00K 103 786 (9fc+9mc) ES910.3-A - User’s Guide... -
Page 103: Etk Interface Cable Cbm150-X
CBE230.1-3 F 00K 105 757 1B FGE - Lemo 1B FGE (10mc- 10mc), 3 m Ethernet Connection Cable 1 Gbit/s, Lemo CBE230.1-8 F 00K 105 758 1B FGE - Lemo 1B FGE (10mc- 10mc), 8 m ES910.3-A - User’s Guide... -
Page 104: Ethernet Chain Connection And Power Supply Cable (Daisy Chain Modules)
Supply Cable, Lemo 1B FGL - Lemo 1B FGA - Safety Banana (8fc-8mc-2mc), 0m5 Note The wiring of the modules of the Daisy Chain product family with each other and the cables required by the modules are described in the documentation of the modules. ES910.3-A - User’s Guide... -
Page 105: Ordering Information
ETAS Ordering Information Ordering Information ES910.3-A 9.1.1 ES910.3-A with CBP120 Power Supply Cable Order Name Short Name Order Number ES910.3-A Prototyping and Interface Mod- ES910.3-A F 00K 106 565 Package Contents ES910.3-A Prototyping and Interface Mod- ule, cable CBE200-3, cable CBP120-2, ... -
Page 106: Cables And Accessories
Ordering Information Cables and Accessories Note Only use the ETAS cables named in this User’s Guide at the interfaces of the ES910.3-A. The maximum admissible cable lengths must be adhered to. Note Custom cables can be produced according to your specifications. For more information on custom cables, please contact your local ETAS sales representa- tive. -
Page 107: Etk Interface Cable
CBE230-3 F 00K 105 757 1B FGE - Lemo 1B FGE (10mc- 10mc), 3 m Ethernet Connection Cable 1 Gbit/s, Lemo CBE230-8 F 00K 105 758 1B FGE - Lemo 1B FGE (10mc- 10mc), 8 m ES910.3-A - User’s Guide... -
Page 108: Sp Interface Cable
SP Interface Cable Note The cable for using the ES910.3-A “Manual Trigger” and “Wake Up” functions has to be customized by the customer (see chapter 7.7.7 on page 84). The necessary connector is not part of the delivery scope or accessories of the ES910.3-A. -
Page 109: Housing Accessories
ETAS Ordering Information 9.2.9 Housing Accessories Order Name Short Name Order Number T-Bracket for ES600 Housing ES600_H_TB F 00K 001 925 ES900 Spare Screws for Extension Slot ES900_Screws F 00K 105 362 ES910.3-A - User’s Guide... -
Page 110: Etas Contact Addresses
Germany WWW: www.etas.com ETAS Subsidiaries and Technical Support For details of your local sales office as well as your local technical support team and product hotlines, take a look at the ETAS website: ETAS subsidiaries WWW: www.etas.com/en/contact.php ETAS technical support WWW: www.etas.com/en/hotlines.php... -
Page 111: Figures
ETAS Figures Figures Fig. 3-1 ES910.3-A View of the Device ..............18 Fig. 3-2 ES910.3-A Front Panel ................19 Fig. 3-3 ES910.3-A Back Panel................. 20 Fig. 3-4 Flash Codes of the Indicators ..............21 Fig. 4-1 Block Diagram of the ES910.3-A..............25 Fig. - Page 112 Fig. 8-11 CBAC150-2m5 Cable ................102 Fig. 8-12 CBCX131-0 Terminating Resistor .............. 102 Fig. 8-13 CBM150-x Cable ..................103 Fig. 8-14 CBE230.1 Cable ..................103 Fig. 8-15 Cable CBEP430.1 ..................104 Fig. 8-16 Cable CBEP4305.1 .................. 104 ES910.3-A - User’s Guide...
-
Page 113: Index
Bus Terminating Resistor, CAN- Carrier system Bypass application CBCX131-0 Terminating Resistor Cable CE Declaration of Conformity CBAC130-x Compatibility CBAC140-3 Compatibility operating mode CBAC150-2m5 Connecting CBAE330.2 housing CBCFI100 Control and diagnostic functions CBCX130-x CBE200-x Data CBE230.1 electrical CBEP430.1 mechanical ES910.3-A - User’s Guide... - Page 114 Hardware description Use Case Housing Operational State connecting “Off” fastening “On” Housing accessories “Standby” Ordering Identifying the product Ordering information iLinkRTTM Overload, permanent Indicators Overload, RP applications ES910.3 functional state Overload, short-term ES910.3 operational state Overview ES910.3-A - User’s Guide...
- Page 115 Service Interface (SP) Setting up with other modules Simulation controller software function, modeled Standards Standards and norms Supply voltage SYNC IN functionality SYNC OUT functionality Synchronization master Synchronization slave System requirements Technical data Test bench system ES910.3-A - User’s Guide...
- Page 116 ETAS Index ES910.3-A - User’s Guide...
Need help?
Do you have a question about the ES910.3-A and is the answer not in the manual?
Questions and answers