Table of Contents
Advertisement
Advertisement
Table of Contents

Related Manuals for Crestron CGEIB-IP


Summary of Contents for Crestron CGEIB-IP
- Page 1 Crestron CGEIB-IP KNX Control Interface Operations & Installation Guide...
- Page 2 This document was prepared and written by the Technical Documentation department at: Crestron International Oude Keerbergsebaan 2 B-2820 Rijmenam - Belgium Tel.: +32.15.50.99.50...
- Page 3 Crestron CGEIB-IP KNX Control Interface Operations & Installation Guide All brand names, product names and trademarks are the property of their respective owners. ©2009 Crestron Electronics, Inc.
- Page 5 Crestron CGEIB-IP KNX Control Interface Operations & Installation Guide...
- Page 6 Prevent foreign objects from entering the device. The Crestron CGEIB-IP can be used with Class 2 output wiring. All brand names, product names and trademarks are the property of their respective owners. ©2009 Crestron Electronics, Inc.
-
Page 7: Table Of Contents
Uploading and Upgrading ......................14 Programs and Firmware .................... 14 Operation ..........................17 Main Module: Crestron KNX IO v3.1 ............... 17 Group Modules ......................17 The different types of Data Type modules ..............17 Data type 1 bit ......................18 Data type 4 bit ...................... -
Page 9: Knx Control Interface: Crestron Cgeib-Ip
CGEIB-IP Introduction The Crestron CGEIB-IP is a control interface by which a Crestron control system can be coupled to a KNX installation using either RS232 or Ethernet (TCP/IP). Also, the Crestron CGEIB-IP filters the desired information out of received KNX... -
Page 10: Physical Description
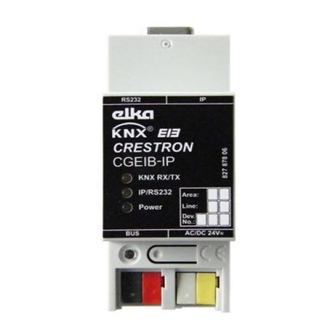
2.76 in (7 cm) Weight 0.231 lbs (0.105 kg) 1. The latest software versions can be obtained from the Crestron website. Refer to the NOTE following these footnotes. 2. Crestron 2-Series control systems include the AV2 and PRO2. Consult the latest Crestron Product Catalog for a complete list of 2-Series control systems. - Page 11 KNX BUS Connector Wago connector that connects the CGEIB-IP with the KNX bus. Power Connector Wago connector used to power the CGEIB- IP. The CGEIB-IP should be powered with 24V AC/DC KNX Programming-LED Color: red Red when CGEIB-IP is in ETS programming mode.
-
Page 12: Setup
The KNX v3.1 modules only support TCP/IP communication. The RS232 interface is described here for legacy purposes. The CGEIB-IP can be serially controlled over RS-232 via the SUBD 9 on top of the unit. The following pins are required: Com pin outs between Crestron COM port and CGEIB-IP RS232 SUBD 9pol. - Page 13 NOTE: As described above, the Ethernet configuration only takes place when no RS-232 cable I connected. Therefore, when using Ethernet to control the CGEIB-IP, upon reboot of the unit make sure the Ethernet cable is plugged in and no RS-232 cable is present.
- Page 14 Open browser (e.g. Windows Internet Explorer) Browse to the IP-address of the LAN port Select menu item “Network” to setup basic IP configuration (static or DHCP) 6 KNX/EIB Control Interface: Crestron CGEIB-IP Operations & Installation Guide – DOC. 0009...
- Page 15 This is not the RS-232 baud rate the unit would use to communicaie serially. It is in face the baudrate used internally to translate TCP/IP communication to RS_232 KNX/EIB Control Interface: Crestron CGEIB-IP 7 Operations & Installation Guide – DOC. 0009...
- Page 16 Select menu item “Connection”, make sure “Accept Incoming” is set to “Yes” and verify the port used. Select menu item “Configurable pins” and make sure the settings are as below. 8 KNX/EIB Control Interface: Crestron CGEIB-IP Operations & Installation Guide – DOC. 0009...
-
Page 17: Cgeib-Ip Setup
Crestron CGEIB-IP KNX Control Interface CGEIB-IP Setup As described above (1. Functional Description), a Crestron CGEIB-IP can be setup to communicate with other KNX units based on Group Addresses. When using Group Addresses the Crestron programmer needs to know how the KNX installation has been programmed exactly. - Page 18 If you need more information to import ETS files, please type "F1 → Functions → Import and export file" in the KNX-Gate software for further information. The list will be sent from the PC to the CGEIB-IP over a direct serial connection. The RS-232 cable must be a “full” cable – all pins connected! Please be careful with the option “Value request on restart”.
- Page 19 Export tables in ETS-CSV format to allow import in the ETS. This simplifies the creation of filter tables. Download the last loaded filter table from the CGEIB-IP with the option “Start reconstruction” Set CGEIB-IP communication parameters like: “Transmit for received data” and “Acknowledge for transmit”...
-
Page 20: Installation
Crestron CGEIB-IP Example: When the Crestron controller changes the value of the KNX group address 0/0/1 from 0 to 1, the CGEIB-IP will return this command resulting in immediate feedback on the button. It is advised to have this “always activated”. -
Page 21: Programming Software
The symbol can be viewed by double clicking on the icon or dragging it into Detail View. Each signal in the symbol is described in the SIMPL Windows help file (F1). The Crestron KNX IO module should be placed in the user database specified in the SIMPL Windows software. -
Page 22: Uploading And Upgrading
SIMPL Windows or Crestron Toolbox Firmware Check the Crestron website to find the latest firmware. (New users may be required to register to obtain access to certain areas of the site, including the FTP site.) Follow the following procedure to upload a new firmware. - Page 23 Crestron CGEIB-IP KNX Control Interface 3) Scan for the correct baudrate 4) Wait until a baudrate is found KNX/EIB Control Interface: Crestron CGEIB-IP 15 Operations & Installation Guide – DOC. 0009...
- Page 24 5) Select Programming, then firmware download and then Firmware version 7 and higher 6) Select firmware and click open The CGEIB-IP will now be updated with the new firmware 16 KNX/EIB Control Interface: Crestron CGEIB-IP Operations & Installation Guide – DOC. 0009...
-
Page 25: Operation
The different types of Data Type modules For every different data type in the KNX system (also called EIS type) there is a specific Crestron module, this will allow you to send or read out any specific KNX command or signal. -
Page 26: Data Type 1 Bit
(e.g. level 70%). Therefore the KNX 1Byte module requires an analog value on its input, it also gives out an analog value as feedback: 18 KNX/EIB Control Interface: Crestron CGEIB-IP Operations & Installation Guide – DOC. 0009... -
Page 27: Data Type 2 Byte
Values to set the correct temperature (1800d, 2200d) depend on the KNX device. Data type 4 Byte The 4 byte module is almost identical to the “Crestron CI-KNX 2 Byte v1.6” module. In this case however the value to be controlled and read out is 32 bit (0d to 4294967295d). -
Page 28: Data-Type 14 Byte
“Transmit for received data” checkbox (page 9- 10). Therefore, KNX Data Type module contains a digital input called “Poll_Value” for polling the value for the KNX data type. 20 KNX/EIB Control Interface: Crestron CGEIB-IP Operations & Installation Guide – DOC. 0009... - Page 29 Use the “Poll_Value” inputs on the KNX Data Type modules to poll for individual values once the program is started. Polling is only possible if you enable the “Read” flag in the ETS software. KNX/EIB Control Interface: Crestron CGEIB-IP 21 Operations & Installation Guide – DOC. 0009...
-
Page 30: Problem Solving
This web interface can be used to set up the TCP-IP communication with the CGEIB-IP, but does not allow you to set up the device with group addresses. You’d still need to use KNX-Gate to set the group addresses via RS- 232. - Page 31 KNX Control Interface 1) Please use the Deviceinstaller™software to examine the Ethernet address of the CGEIB-IP. By default it is set up as DHCP, so it should be assigned an address by the DHCP server automatically. In Deviceinstaller™, select „Device“ → „Search“ to autodiscover the CGEIB-IP.
- Page 32 Crestron CGEIB-IP 2) Use your web browser to browse to this IP address. In case your browser displays a web interface as the one below (with a Crestron banner) the web firmware of the CGEIB-IP needs to be updated. 24 KNX/EIB Control Interface: Crestron CGEIB-IP...
- Page 33 KNX Control Interface 3) Use the Lantronix Device Installer software (Vesion 4.2) and select „Device“ → „Search“. Select the CGEIB-IP in the list on the left hand side, highlight it and select „Device“ → „Upgrade“. When asked for, select the „XPort03-ROM6507COB1602.lxi“ file and start the upgrade.
- Page 34 4) After a succesfull upgrade, the web interface should be changed to the version below. (If you are prompted for username and password, you can just leave these blank and press „Enter“.) 26 KNX/EIB Control Interface: Crestron CGEIB-IP Operations & Installation Guide – DOC. 0009...
- Page 35 Crestron CGEIB-IP KNX Control Interface 5) Refer to Changing the IP-address configuration on page 6 of this manual to correctly set up you CGEIB-IP KNX/EIB Control Interface: Crestron CGEIB-IP 27 Operations & Installation Guide – DOC. 0009...
-
Page 36: Reference Documents
Crestron's award winning customer service team by calling Crestron at +32-15-509920. You can also log onto the online help section of the Crestron website (www.crestron.com/onlinehelp) to ask questions about Crestron products. First-time users will need to establish a user account to fully benefit from all available features. -
Page 37: Software License Agreement
This Agreement may only be modified by a writing signed by an authorized officer of Crestron. Updates may be licensed to You by Crestron with additional or different terms. This is the entire agreement between Crestron and You relating to the Software and it supersedes any prior representations, discussions, undertakings, communications or advertising relating to the Software. - Page 38 “applets” incorporated into the Software), the accompanying media and printed materials and any copies of the Software are owned by Crestron or its suppliers. The Software is protected by copyright laws and international treaty provisions. Therefore, you must treat the Software like any other copyrighted material, subject to the provisions of this Agreement.
-
Page 39: Return And Warranty Policies
Purchasers should inquire of the dealer regarding the nature and extent of the dealer's warranty, if any. CRESTRON shall not be liable to honor the terms of this warranty if the product has been used in any application other than that for which it was intended or if it has been subjected to misuse, accidental damage, modification or improper installation procedures. - Page 40 KNX Control Interface Crestron CGEIB-IP 32 KNX/EIB Control Interface: Crestron CGEIB-IP Operations & Installation Guide – DOC. 0009...
- Page 41 Crestron CGEIB-IP KNX Control Interface KNX/EIB Control Interface: Crestron CGEIB-IP 33 Operations & Installation Guide – DOC. 0009...
Need help?
Do you have a question about the CGEIB-IP and is the answer not in the manual?
Questions and answers