
Related Manuals for Zeiss Humphrey Field Analyzer 3


Summary of Contents for Zeiss Humphrey Field Analyzer 3
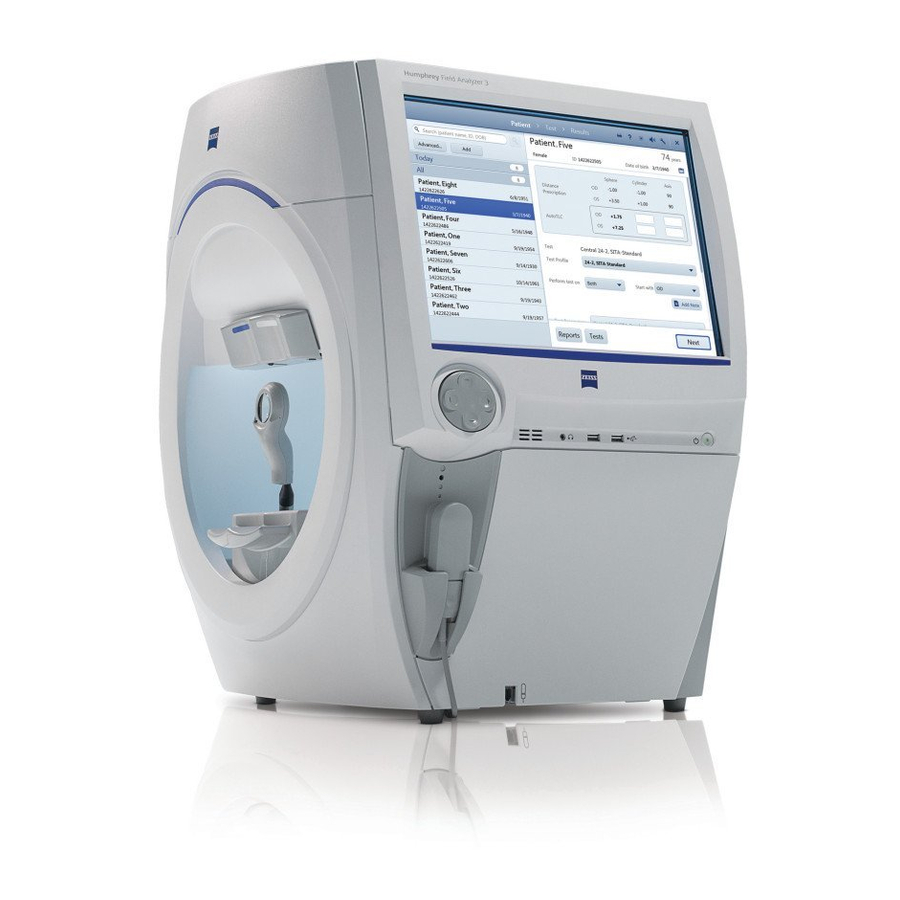
- Page 1 2660021166131 Rev. A 2018-112660021166131 Rev. A 2018-11 ® Humphrey Field Analyzer 3 (HFA3) Instructions for Use – Models 830, 840, 850, 860...
- Page 2 Faster, SITA Standard, SITA-SWAP, STATPAC, RelEYE, Visual Field Index, and VFI are either registered trademarks or trademarks of Carl Zeiss Meditec, Inc in the United States and/or other countries. Windows, Windows Vista, and Windows Server are registered trademarks of Microsoft Corporation in the United States and/or other countries.
-
Page 3: Table Of Contents
Table of Contents (1) Introduction ......... . 1-1 Operating Principles . -
Page 4: Table Of Contents
(6) Data, Tests & Reports........6-1 Save Test Reports and Test Data . -
Page 5: Table Of Contents
Guidelines for Trial Lens Selection ....... . B-1 How to Calculate the Spherical Equivalent ......B-1 (C) Troubleshooting. -
Page 6: Hfa3 Instructions For Use 2660021166131 Rev. A
HFA3 Instructions for Use 2660021166131 Rev. A 2018-11... -
Page 7: Introduction
Introduction Go to Contents (1) Introduction ® This introductory section covers general information about the Humphrey Field Analyzer 3 ™ (HFA Operating Principles A patient's visual field can be assessed by briefly projecting a spot of light (“stimulus”) of known size, brightness, and location on the inside surface of a roughly hemispherical bowl. -
Page 8: Specifications
Introduction Go to Contents Application The HFA3 is designed for continuous use, although it is expected that most sites operate the instrument for 10 hours or less per day, indoors, within a medical office or hospital setting. This setting should have clean air free of soot, vapors from adhesives, grease, or volatile organic chemicals. -
Page 9: Purpose Of This User Manual
Introduction Go to Contents Occupational Skills The user should have the following skills: • See Instrument Operation on page 1-2. • Ability to work with elderly patients and those with disabilities Job Requirements The user should have training and certification in the analysis and treatment of ophthalmic diseases or other eye-related medical issues as required by governing bodies. -
Page 10: Symbols And Labels
Introduction Go to Contents Symbols and Labels WARNING CAUTION Must Follow Instructions For Use. ® DisplayPort USB Port Network Port Power Switch Type B applied parts Patient Response Button Headphones Direct Current Alternating Current CAUTION: Hot Surface Manufacturer HFA3 Instructions for Use 2660021166131 Rev. -
Page 11: Safety Information
Introduction Go to Contents Date of Manufacture Authorized European Community Representative Serial number Catalog number / part number Model number Patent European Conformity Disposal of the Product within the EU. Do not dispose via domestic waste disposal system or communal waste disposal facility. Safety Information Warning: Indicates a hazardous situation which may result in death or serious injury if the appropriate safety precautions are not heeded. -
Page 12: Instrument Disposition
Approved Software Only use of software supplied or approved by ZEISS for the HFA3 is authorized. For the current list of approved software call ZEISS Customer Care: In the U.S., call 800-341-6968. Outside the U.S., contact your local ZEISS distributor. -
Page 13: Instrument Installation
An authorized ZEISS service representative or the owner/operator can install the HFA3. In consultation with the buyer, ZEISS schedules one free on-site installation appointment after instrument delivery. The owner/operator receives training by Zeiss prior to using the HFA3 instrument for the first time. System installation and operator training require approximately one-half business day. - Page 14 , patient response button, external keyboard, and fan filter are all user-replaceable parts. For the replacement of any other instrument component, accessory, or peripheral, call ZEISS Customer Care: In the U.S., call 800-341-6968. Outside the U.S., contact your local ZEISS distributor.
-
Page 15: Electromagnetic Compatibility (Emc)
WARNING: Do not reconfigure system components on the table, nor add non-system devices or components to the table, nor replace original system components with substitutes not approved by ZEISS. Such actions could result in failure of the table height adjustment mechanism, instability of the table, tipping and damage to the instrument, and injury to operator and patient. - Page 16 Introduction 1-10 Go to Contents Guidance and manufacturer’s declaration - electromagnetic emissions The HFA3 is intended for use in the electromagnetic environment specified below. The customer or user of the HFA3 should ensure that it is used in such an environment. Emissions Test Compliance Electromagnetic environment - guidance...
- Page 17 Introduction 1-11 Go to Contents Guidance and manufacturer’s declaration - electromagnetic immunity The HFA3 is intended for use in the electromagnetic environment specified below. The customer or user of the HFA3 should ensure that it is used in such an environment Immunity Test IEC 60601 test level Compliance level...
- Page 18 Introduction 1-12 Go to Contents Recommended separation distances between portable and mobile RF communications equipment and the HFA3 The HFA3 is intended for use in an electromagnetic environment in which radiated RF disturbances are controlled. The customer or the user of the HFA3 can help prevent electromagnetic interference by maintaining a minimum distance between portable and mobile RF communications equipment (transmitters) and the HFA3 as recommended below, according to the maximum output power of the communications equipment.
-
Page 19: Software Installation
Software Installation (2) Software Installation ® ™ This section covers the installation instructions for the Humphrey Field Analyzer 3 (HFA Contents Software Kit The software kit contains two USB drives: • The white USB drive with the “SW” label contains the software update and is used for loading the software onto the HFA3. - Page 20 Screen and save in a graphics application, such as Microsoft Paint) of the information, then call your local ZEISS customer service number, shown on the back of this manual. 5. Navigate to the Maintenance screen and select Perform update... A confirmation screen will appear.
- Page 21 Software Installation CAUTION: From this point forward, please do not click on, or touch, the screen anywhere other than as instructed. Otherwise, you risk aborting installation progress. 8. Follow the on-screen instructions through the rest of the software upgrade process. Note: •...
- Page 22 Software Installation • If you are upgrading from version 1.4.1.x - Installer signals the controller to restart itself. 13.The instrument boots up and the screen may be black for several minutes. Wait until the InstallShield Wizard screen appears again. Allow the installer to complete the software update.
-
Page 23: Getting Started
Getting Started Go to Contents (3) Getting Started This chapter describes instrument features, general operation, and settings of the HFA3. Instrument Overview cáÖìêÉ=PJN=qÜÉ=ec^PÓ=léÉê~íçê=sáÉï 1 – Patient response button connection 4 – Touch screen 7 – Audio output 2 – Patient response button 5 –... - Page 24 Getting Started Go to Contents cáÖìêÉ=PJO=qÜÉ=ec^PÓ=páÇÉ=m~åÉä=`äçëÉÇ 1 – Location Side Panel HFA3 Instructions for Use 2660021166131 Rev. A 2018-11...
- Page 25 Getting Started Go to Contents cáÖìêÉ=PJP=qÜÉ=ec^PÓ=páÇÉ=m~åÉä=léÉåÉÇ 1 – 12V Power Outlet 2 – Display Port 3 – USB Port 4 – Ethernet Port cáÖìêÉ=PJQ=_~Åâ=m~åÉä=póãÄçäë HFA3 Instructions for Use 2660021166131 Rev. A 2018-11...
- Page 26 Getting Started Go to Contents cáÖìêÉ=PJR=qÜÉ=ec^P=Ó=cêçåí=sáÉï 1 – Chin rest 3 – Visor handle 2 – Testing bowl 4 – Forehead rest HFA3 Instructions for Use 2660021166131 Rev. A 2018-11...
- Page 27 Getting Started Go to Contents Model Features For a full list of available test patterns and strategies see Appendix (A), "Test Patterns & Parameters". Model Feature Manual Kinetic License Standard Standard Custom Kinetic Patterns License Standard Standard Custom Static Patterns Standard Standard Standard...
- Page 28 Go to Contents Surge Protectors ZEISS recommends the use of surge protectors or UPS (Uninterruptible Power Supply) systems to help isolate the HFA3 from power surges or fluctuations. Hospitals, surgery centers, and offices with instruments which consume large amounts of power, such as surgical lasers, especially should be careful to plug the HFA3 directly into a UPS or adequate surge protector.
- Page 29 Getting Started Go to Contents • Some menus are fields tagged with a down arrow (drop-down lists). To access menu options, touch or click on the bar. Select the bar again to close the menu. • Grayed-out menu options or buttons are not available. Using the External Keyboard and Mouse You may also use the external keyboard to move from one selection to the next on the HFA3 screen and enter data.
- Page 30 Getting Started Go to Contents Title Bar Title bar icons: This icon appears if the Liquid Trial Lens is installed (Model 860 only) and flashes red during lens adjustment. Do not touch the Liquid Trial Lens when the icon is blinking. Select the Private button to hide the screen from anyone who does not need to view patient data.
-
Page 31: Startup
If there is a question as to whether the HFA3 is running properly or if there is any question about electrical or fire safety: TURN OFF AND UNPLUG THE INSTRUMENT and call ZEISS customer care as soon as possible: 1-800-341-6968. Outside the U.S., contact your local ZEISS distributor. -
Page 32: Instrument Settings
Getting Started 3-10 Go to Contents Instrument Settings Select the Settings icon to display the setting types. Select and enter data or choose parameters as needed in each type of setting. When changes are made that require a reboot, a restart symbol appears on the Back button. - Page 33 Getting Started 3-11 Go to Contents General Settings Use the General Settings screen to configure general settings, such as date and time format, patient identification format, and printing options. HFA3 Instructions for Use 2660021166131 Rev. A 2018-11...
- Page 34 Sets the user interface language, format and the date and time formats. System Date and Time Sets the time zone, current date and current time. Carl ZEISS Toggle offline and online Teleservice. Meditec Teleservice Create a package with service relevant data for the service....
-
Page 35: Data Transfer
Getting Started 3-13 Go to Contents Specific Settings Use the Specific Settings screen to manage test profiles and custom test patterns, import and transfer data, configure reports and instrument settings, and manage EMR settings. Button Function Specific Settings Select the default test and create new test profiles. Test Profiles Edit test profiles and customize test parameters. -
Page 36: Data Synchronization
Getting Started 3-14 Go to Contents Button Function DICOM Configure additional DICOM communication options. See “Networking,” on page 7-1 for further details. HFA II-i Configuration Configure an HFA II-i for data sharing. See “Data Synchronization,” on page 10-1 for further details. Duplicate Patients Check the database for potential duplicate patients. - Page 37 Getting Started 3-15 Go to Contents Instrument Settings Settings Option Description Instrument Settings Manipulate the default settings for the instrument. Eye Image Brightness Move the slider to the right to increase eye image brightness or to the left to decrease brightness. Note that changing the default settings may affect Gaze Tracking.
- Page 38 Getting Started 3-16 Go to Contents Settings Option Description Head Tracking Enables the Head Tracking function, which aids in keeping (Not in Model 830) the patient’s eye centered behind the trial lens. The trial lens holder must be up and Gaze Initialization must be successful for this feature to work.
- Page 39 Getting Started 3-17 Go to Contents Default Reports Settings Option Description Default Reports Under Default Reports for Printing or Saving set the desired GPA-Qualified, SFA-Qualified and the Kinetic Tests. Back Go back to the previous screen. HFA3 Instructions for Use 2660021166131 Rev.
- Page 40 Getting Started 3-18 Go to Contents Report Output Settings Option Description End of Test Settings Configure settings for export to DICOM and report output settings. DICOM Output Toggle On/Off for FORUM Test Database and for Export EPDF. See Chapter (7), "Networking" for further details.
- Page 41 Getting Started 3-19 Go to Contents Networking Use the Networking Settings screen to configure network connections. See Chapter (7), "Networking", for more details on network configuration. Settings Option Description Networking Settings Shows the network settings. Adapter settings DHCP Enabled: If the DHCP (Dynamic Host Configuration Protocol) is enabled, the Host name, IP address, Subnet, Gateway, and DNS are filled in automatically and cannot be edited.
- Page 42 Getting Started 3-20 Go to Contents Settings Option Description Networking Settings Shows the network settings. Archives Archives is not used in HFA3. The Archive setting should remain Disabled. Network Drive Configured Network Drives: Lists available network drives and their Configuration connection statuses.
-
Page 43: Data Backup
Getting Started 3-21 Go to Contents Maintenance Use the Maintenance Settings screen to perform system maintenance actions such as database backup, restore, and perform software updates. Settings Option Description Maintenance Settings Shows the system maintenance actions. Configuration Wizard Start the Configuration Wizard: The Run Wizard button launches the configuration wizard, which guides you through the device configuration. - Page 44 Getting Started 3-22 Go to Contents Settings Option Description Audit trail and log Export audit trails: Click on Export..to open the dialogue, requesting files you to select a folder. Export all log files: Click on Export..to open the dialogue, requesting you to select a folder.
- Page 45 To manage licenses online, enter the Activation ID for the license in the Activation IDs field for the desired action, then click the appropriate button (Activate, Return, or Repair). Contact ZEISS service to obtain an activation ID for a new license.
- Page 46 Getting Started 3-24 Go to Contents Settings Option Description Licenses Lists current licenses, their product name, Version, Status, Expiration Date and Activation ID. License Activation Offline License Activation: Enter the Activation ID and click on Create request file... or Import response file... to open the dialogue. Online License Activation: Enter the Activation ID and click on Activate.
-
Page 47: Setup And Testing
Setup and Testing Go to Contents (4) Setup and Testing Perform Threshold or Suprathreshold Test Overview of patient setup and Threshold or Suprathreshold testing on the HFA3: 1. Select Patient. 2. Test Setup. 3. Set up Patient for Testing. 4. Preliminary Tests (Optional). 5. - Page 48 Setup and Testing Go to Contents 2. If the HFA3 is connected to FORUM or an EMR system, you may choose between All Patients and Scheduled Patients. Select Scheduled Patients and choose between Today, Tomorrow, Week, or Time Span from the drop-down menu. 3.
- Page 49 Setup and Testing Go to Contents Some EMR systems allow records that are missing key identifying information. The HFA3 will automatically add a default (Unknown) for missing names, but will reject patient records that do not contain a Patient ID or DOB. When the same patient has multiple records, reports that include multiple exams, such as a GPA Summary report, will not include all of the patient’s data.
- Page 50 Setup and Testing Go to Contents To change the test, select the Test Profile menu to display the list of available tests and select a test from the list. You may also Select Test Parameters to change the test. The modified test profile will be displayed.
- Page 51 Setup and Testing Go to Contents • Foveal Threshold • Fluctuation (Threshold only - (Threshold only) Models 840, 850, and 860) CAUTION: If the Blue-Yellow Test parameter has been chosen, allow the lamp used for Blue-Yellow testing to warm-up for seven (7) minutes before proceeding with a test. Reports This drop-down menu allows you to select available report types for automatic printing and/or exporting at the end of the test.
- Page 52 Setup and Testing Go to Contents 3. Lever the detachable lens holder off the base of the shaft. Note: Be careful not to touch the inside of the bowl with your hand or the lens holder. 4. Tilt the lens holder and move it out of the bowl. To attach the manual trial lens holder: 1.
- Page 53 Setup and Testing Go to Contents Note: Use only the narrow rimmed type of trial lenses. The wide rimmed variety will interfere with the patient’s peripheral vision and adversely affect test results. Move the lens handle towards the patient’s temporal side so it does not interfere with the patient’s eyebrow or nose. To remove the manual trial lens holder first remove the lenses, then follow the instructions for removing the Liquid Trial Lens holder on page 4-5.
- Page 54 Setup and Testing Go to Contents 1. Touch the center of the pupil in the Live Eye monitor, or use the manual chin rest switch, to move the chin rest and align the eye to the center of the lens target, indicated by a green plus sign “+”....
- Page 55 Setup and Testing Go to Contents Preliminary Tests (Optional) Test Foveal Threshold (Models 840, 850, and 860) This option is only available for Threshold testing. Go to Test Parameters and make sure the Foveal Threshold setting is set to On. The Foveal Threshold Test measures the sensitivity of the central part of the macula, the fovea.
- Page 56 Setup and Testing 4-10 Go to Contents Perform Gaze Initialization (Models 840, 850, and 860) To track whether the patient is fixating properly while stimuli are presented, go to Test Parameters, from the drop-down menu choose Fixation Monitoring, and select Gaze Tracking or Gaze/Blind Spot.
- Page 57 Setup and Testing 4-11 Go to Contents Administer the Test Final Patient Training The Final Patient Training dialog box should be automatically expanded on the screen. If it is closed, touch the box to expand it and read the instructions to the patient. ...
- Page 58 Setup and Testing 4-12 Go to Contents Suprathreshold Responses Suprathreshold-specific test responses and values are recorded on the right side of the screen beneath the error responses. The types of responses recorded depend on the test selected and includes: • Points Seen •...
- Page 59 Setup and Testing 4-13 Go to Contents Note: The patient can pause the test by holding down the response button, which will result in an on-screen message and an audible alert. The Start of Test sound will occur when the patient releases the button and the test is resumed.
- Page 60 Setup and Testing 4-14 Go to Contents End the First Eye Test When the test for the eye is complete, an alert sounds and a message displays. Select OK. If both eyes were selected for testing, the instrument returns to the Test screen: •...
-
Page 61: Perform Kinetic Test
Setup and Testing 4-15 Go to Contents Perform Kinetic Test The HFA3 Kinetic feature emulates manual standard Goldmann perimetry on Models 840, 850, and 860. Overview of patient setup and testing on the HFA3: 1. Select Patient. 2. Test Setup. 3. - Page 62 Setup and Testing 4-16 Go to Contents Set up Patient for Testing Follow the steps for setting up the patient outlined in section “Perform Threshold or Suprathreshold Test,” on page 4-1. Note: You will need to extend the visor for any binocular test. Do not use an eye patch. Administer the Test (Manual Kinetic) Use the Manual Kinetic Test screen to present stimuli to the patient, and to monitor the patient.
- Page 63 Setup and Testing 4-17 Go to Contents Stimulus Speed The Speed drop-down menu sets the speed in degrees per second (°/sec), at which the stimulus moves in the test bowl. Touch or click to open the menu and select the setting from the following options: The default value (5°/sec) is bold.) •...
- Page 64 Setup and Testing 4-18 Go to Contents Meridian Mode While the Meridian test mode is selected, perform the following steps to present a stimulus to the patient: 1. Select a stimulus type from the stimulus legend or choose a New stimulus.
- Page 65 Setup and Testing 4-19 Go to Contents Static Point Mode While the Static Point test mode is selected, perform the following steps to present a stimulus to the patient: 1. Select a stimulus type from the stimulus legend or choose a New stimulus.
- Page 66 Setup and Testing 4-20 Go to Contents End the First Test Select Review Results to end the first test (if both eyes are being tested). In the next screen: • Show or hide the connecting isopter lines for each stimulus by selecting or deselecting the stimulus in the Show Isopters menu.
- Page 67 Setup and Testing 4-21 Go to Contents Stimulus Value, Speed, and Visual Field settings cannot be altered during the test. SSA test parameters are III 4 e (size and intensity), 4 degrees (4°)/sec (speed), White (color). Note: Select Cancel at any time to cancel test results. To run a preset Kinetic Test: 1.
-
Page 68: Create Custom Test Patterns
Setup and Testing 4-22 Go to Contents Create Custom Test Patterns To create a custom pattern: 1. Go to Settings > Specific Settings > Custom Test Patterns. You should see a list of patterns if any exist. 2. To view a pattern, highlight it and select View. To create a new pattern, select Create Static Test Pattern Create Kinetic Test Pattern. - Page 69 Setup and Testing 4-23 Go to Contents Create a Single Point Pattern Set the Test Pattern to Single. Create single points by touching the test pattern on the screen directly, or by using a mouse. 1. Move your finger or the mouse, while holding the mouse button down, to position the point at the desired X, Y value.
-
Page 70: Set Up Test Profiles
Setup and Testing 4-24 Go to Contents Set up Test Profiles Test Profiles comes with a standard set of tests. Test profiles can be modified or deleted except for the 24-2 SITA Standard test and the default test. To create a new test profile: 1. -
Page 71: Quick Reference Guide
Quick Reference Guide (5) Quick Reference Guide ® ™ This section is a quick reference guide for the Humphrey Field Analyzer 3 (HFA CAUTION: Refer to the Instructions for Use for warnings, cautions, safety information, labeling, and detailed operating instructions. The quick guide is only a complement to the Instructions for Use. - Page 72 Quick Reference Guide Test Setup 1. For an existing patient the previous test that was used will automatically display. Otherwise, the 24-2 SITA FASTER is the default test. 2. If needed, select a different test from the Test Profile menu. The new test profile, pattern, and strategy now displays.
- Page 73 Move chair close to the instrument. Heijl, A., Patella, V.M., and Bengtsson, B. (2012) Effective Perimetry, Fourth Edition. Carl Zeiss Meditec, Inc. 4. Touch the center of the pupil, indicated by a red X when not centered to the lens, in the Live Eye monitor, or use the manual chin rest switch, to move the chin rest and align the eye to the center of the lens target, indicated by a green plus sign.
-
Page 74: Preliminary Tests (Optional)
Quick Reference Guide Preliminary Tests (Optional) Perform Foveal Threshold (if selected) 1. Read the on-screen instructions to the patient. 2. Select Start Foveal Threshold. 3. To proceed without this test select Skip Foveal Threshold. Perform Gaze Initialization (if selected) 1. Make sure to adjust the eye position before you initialize. 2. -
Page 75: Perform The Test
Quick Reference Guide Perform the Test 1. Read the Final Patient Training Instructions to the patient. 2. Select Start Test to initiate the visual field test. 3. To cancel the test select Cancel. Monitor the Test Screen features: • The Live Eye monitor allows you to center the eye by touching the eye image, or you can use the chin rest direction controls on the instrument to manually move the chin rest. -
Page 76: Review And Save Results
Quick Reference Guide Review and Save Results Review Results displays the test results for each eye tested. You can: • Use Add Note to add comments to the exam. • Change the output of Reports. • Select Save and Exit. A confirmation message will display when exam data is saved. 1. -
Page 77: Data, Tests & Reports
Data, Tests & Reports Go to Contents (6) Data, Tests & Reports See the Instrument Settings section starting on page 3-10 to set up your instrument to backup, archive, retrieve, and restore data. CAUTION: Routinely back up your data in case it becomes lost or damaged. To manage data, tests, and print reports in FORUM for a FORUM connected instrument see the user guides for FORUM and FORUM Glaucoma Workplace. - Page 78 Data, Tests & Reports Go to Contents Export Tests Manually To manually export test data to a shared network folder or USB storage device, use the following procedure. Note: You cannot use this procedure if data export to FORUM has been enabled (FORUM Test Database setting On under the Report Output settings).
- Page 79 Data, Tests & Reports Go to Contents Settings Option Description Reports The list shows tests sorted on Date, Time, Eye, and Parameters GPA Reliability. Click in the row to highlight a test. You can select one or more tests to generate reports. Select Reports Once the desired tests are highlighted, click on Select Reports.
-
Page 80: Print Test Reports
Data, Tests & Reports Go to Contents Print Test Reports Reports selected on the Patient Test selection screen are automatically printed at the end of testing. When a report is chosen at the Patient Test selection screen, report(s) will be automatically generated at the end of the test and automatically sent to the configured output location. -
Page 81: Import Tests
Data, Tests & Reports Go to Contents Import Tests Test data cannot be directly imported from a DICOM/EMR system to the instrument. Manually Import Tests 1. Connect a USB storage device containing the data you want transferred to a USB port on the HFA3 (see Figure 3-5). -
Page 82: Merging And Deleting Patient Records
Data, Tests & Reports Go to Contents Merging and Deleting Patient Records If the HFA3 is connected to an EMR system, patients merged or deleted on the HFA3 are only merged locally; the records on the EMR remain unchanged. If the HFA3 is connected to FORUM, patients cannot be merged or deleted from the local system because the patient database is stored in the FORUM archive. - Page 83 Data, Tests & Reports Go to Contents Report (Code) Description Full GPA (GPA) GPA assists with detection of glaucoma progression. Full GPA is a multi-page overview of the patient’s entire history. GPA Summary (GPASUM) Short GPA report (one page). GPA Last Three Follow Up Follows the same format as the Full GPA, but includes only the three (GPAL3F) most recent Follow Up tests.
- Page 84 Data, Tests & Reports Go to Contents cáÖìêÉ=SKN=páåÖäÉ=cáÉäÇ=^å~äóëáë=ïáíÜ=dm^=Epc^=dm^F 1 – Patient Data 4 – Glaucoma Hemifield Test 7 – Grayscale Results 10 – Probability Symbols 2 – Test and Report Type 5 – Global Indices 8 – GPA Information 11 – Notes Field 3 –...
- Page 85 Data, Tests & Reports Go to Contents The SFA Overview Report The Overview report shows the results of multiple tests in chronological order. Results from 30-2 and 24-2 tests may be presented in the same report. The results of each test display Grayscale, Numeric, Total Deviation, and Pattern Deviation Plots, along with test date, GHT, and indices.
- Page 86 6-10 Data, Tests & Reports Go to Contents GPA Summary Report The GPA Summary report is a one-page report that provides an overview of the patient’s qualified visual field history. At the top of the report, Grayscale and Pattern Deviation Plots are shown for both GPA Baseline tests, along with key indices.
- Page 87 6-11 Data, Tests & Reports Go to Contents Full GPA and Last Three Follow Up Reports The Full GPA report is a multi-page overview of the patient’s entire history. The Baseline page provides Grayscale, Numeric, Total Deviation, and Pattern Deviation Plots, as well as key indices for both GPA Baseline tests.
-
Page 88: Report Features
6-12 Data, Tests & Reports Go to Contents cáÖìêÉ=SKQ=qÜêÉÉ=få=låÉ 1 – Reliability Indices 3 – Defect Depth 2 – Grayscale Results 4 – Numeric (dB) Results Report Features Reliability Indices Blind Spot Errors (Fixation Losses/FL) Blind Spot Errors are recorded when Blind Spot monitoring is active and occur when a patient responds to a stimulus presented in the blind spot. - Page 89 6-13 Data, Tests & Reports Go to Contents compared to the reference limits. These are explained in the legend labeled “Probability Symbols.” For instance, a totally black square indicates that the value observed at that point location occurred in less than 0.5% of the subjects in the reference database. Pattern Deviation Plots The Pattern Deviation plots are similar to the total deviation plots, except that STATPAC has adjusted the analysis of the test results for any changes in the height of the measured hill of vision caused, for...
- Page 90 6-14 Data, Tests & Reports Go to Contents Progression Analysis Probability Plots The Progression Analysis Probability Plot compares the changes between the Baseline and Follow-up tests and highlights points that have worsened by an amount that exceeds the variability in all but the most variable 5% of glaucoma patients in a reference population. •...
-
Page 91: Suprathreshold Reports
6-15 Data, Tests & Reports Go to Contents Note: Manual Baseline selections may override automatic selection of the two oldest compatible tests. Always review the Baseline and Follow-up test selections before performing a GPA analysis. If the Baseline tests are Full Threshold, then the Follow-up tests may be any combination of SITA Faster, SITA Fast, SITA-Standard, or Full Threshold. -
Page 92: Kinetic Reports
6-16 Data, Tests & Reports Go to Contents When a Suprathreshold test uses the Threshold Related testing mode, the central (and peripheral) reference level values are determined from patient responses and appear on the report. The central reference level is the calculated threshold at the fovea. When the Age Corrected mode is used, the central (and peripheral) reference levels display values based on the patient’s age. - Page 93 6-17 Data, Tests & Reports Go to Contents Isopter points are connected to form the isopter lines. However, points that define the borders of a blind spot are not connected to each other. Occasionally an isopter point will appear on the report that is not connected to other isopter points.
- Page 94 6-18 Data, Tests & Reports Go to Contents HFA3 Instructions for Use 2660021166131 Rev. A 2018-11...
-
Page 95: Networking
You must log in as a user with Administrator privileges to access network settings. Note: Users are responsible for network setup and maintenance, including installation and configuration of all necessary hardware and software. ZEISS Customer Support is limited to testing network connectivity of the instrument. Customer Support cannot troubleshoot or repair problems with network connectivity. -
Page 96: Configuration To Pre-Existing Office Network
Networking Go to Contents Configuration to Pre-existing Office Network This section explains how to configure the HFA3 to communicate via a pre-existing office network (LAN). To do this, the instrument must be connected to the office network by a standard network patch cable. -
Page 97: Connect To A Dicom/Emr Server
Networking Go to Contents Export to a Network Shared Folder 1. Select Settings > Specific Settings to display the Specific Settings screen (see page 13). 2. Select Report Output. 3. In the End of Test Settings screen, under Report Output Default, select Print, Export, or Export and Print. - Page 98 Networking Go to Contents Storage Commitment: Enable this service to perform a storage commitment request. This service is used to confirm that exam data have been permanently stored by the DICOM system. Advanced DICOM Settings We recommend that you use the default values shown in the Specific settings dialog. Experienced network administrators may adjust these settings to optimize performance or allow for slow network connections.
- Page 99 Networking Go to Contents 2. Highlight the desired server and touch or click on Select. The DICOM system’s AE title, Host-Name, and Port will automatically populate their fields. Configure DICOM Services manually: 1. Check the DICOM services radio button to configure MWL and Storage services only. The Retrieve, Query, and Storage Commitment settings will be configured from Storage.
- Page 100 Networking Go to Contents Configuring Export to an EMR 1. Select Settings > Specific settings> Report Output. 2. In the End of Test Settings screen, go to DICOM Output, and turn off Forum Test Database. If Forum Test Database is enabled, the Reports and Tests buttons will not be visible in the Patient screen.
- Page 101 Networking Go to Contents 6. Enable MWL and enter these values in the next screen: A. Enter EmrSCP under AE title. B. Enter localhost under Host name. C. Enter 2112 under Port. D. Select OK. 7. Ensure that the EMR is integrated into the shared/FTP export and worklist folders before selecting Test connection on the instrument.
-
Page 102: Connect To A Printer
Networking Go to Contents Connect to a Printer This chapter contains instructions for: • “Wireless Printers,” on page 7-8 • “Wired Printers,” on page 7-10 • “Shared Network Printers,” on page 7-10 Wireless Printers Connect the HFA3 to a wireless printer using a wireless adapter: 1. - Page 103 Networking Go to Contents 9. You are prompted for the network security key. Enter the printer passcode recorded in step 4F as the Security key and select OK. A progress dialog box will appear. 10. Once the progress dialog box has closed and the connection has been established, restart the HFA3 by selecting the On/Off button.
- Page 104 Networking 7-10 Go to Contents Wired Printers To connect directly to a PostScript printer when an HFA3 is in local database mode: 1. Ensure that the HFA3 has not been connected to a local network. 2. Connect the appropriate cable to the Ethernet port on the instrument (see “The HFA3–...
-
Page 105: Maintenance
(8) Maintenance This chapter discusses instrument cleaning and customer-replaceable parts. ZEISS recommends routine yearly service and maintenance of the HFA3 by a qualified ZEISS Field Service Engineer. Only an authorized ZEISS service representative should calibrate the HFA3. Contact a ZEISS service technician if you think your instrument requires calibration. -
Page 106: Replacing The Stimulus Projection Lamp
• The filter may be rinsed with water, but make sure the filter is completely dry before installing. • To replace the air filter, call the Carl Zeiss Meditec Parts Department and order a “Fan Filter” (PN 2660021149222). 3. Return the new air filter or the clean and dry air filter to its proper location. - Page 107 If the bowl illumination error continues, do NOT attempt to replace the lamp. These highly specialized lamps are to be replaced only by a ZEISS Field Service Engineer. Contact ZEISS Customer Service to arrange for a service call.
-
Page 108: Liquid Trial Lens Care
Should the response button malfunction, disconnect it and replace it with a new response button. The part number (PN) for the Patient Response Button is 2660100029575 and can be ordered from the Carl Zeiss Meditec Parts Department. Liquid Trial Lens Care Check Liquid Trial Lens Using a Lens Analyzer The Liquid Trial Lens calibration can be verified on a lensometer used to check spectacle lenses. -
Page 109: Accessories And Supplies List
Manual Trial Lens Table 8.2 Note: Item part numbers and descriptions are subject to change. To order parts, call ZEISS Customer Care at 1-800-341-6968. Outside the U.S., contact your local ZEISS distributor. HFA3 Instructions for Use 2660021166131 Rev. A 2018-11... - Page 110 Maintenance Go to Contents HFA3 Instructions for Use 2660021166131 Rev. A 2018-11...
- Page 111 Data Transfer Go to Contents (9) Data Transfer This chapter describes how to move tests from an older Humphrey Field Analyzer model (either the HFA II or an HFA II- i ) to an HFA3 in local database mode. Transfer data by using the instrument’s network connection, a USB device, or by connecting a serial cable to the Data Transfer ports of two HFA instruments.
- Page 112 Data Transfer Go to Contents 7. Follow the detailed instructions on the screen. 8. Select Transfer Instructions for specific instructions on initiating manual data transfer from an HFA II or HFA II- i. 9. Select Transfer Log to view a summary of the data transfer. 10.
- Page 113 Data Synchronization 10-1 Go to Contents (10) Data Synchronization HFA3 Data Synchronization is a function that allows network connected HFA3 instruments to share all the tests in their database so that all HFA3 instruments have a synchronized complete set of HFA tests.
-
Page 114: Installation & Configuration Of Data Synchronization Function
Data Synchronization 10-2 Go to Contents Installation & Configuration of Data Synchronization Function Summary of Data Synchronization Set-up Steps Step Time Required Status of Instrument Upgrade all HFA II-i to version 5.0 or 0.5 - 1 hour HFA II-i cannot be used during 5.1 and connect to the same network. - Page 115 Data Synchronization 10-3 Go to Contents Step Description 2. Log in to Service From main Patient screen, select the Change user from the Close button menu. Use drop down menu to select login option Service. Password is 0000 (four zero’s) Note: The Synchronization function is only available through the Service login.
- Page 116 Data Synchronization 10-4 Go to Contents Step Description 4. Confirm all HFA3 instruments are Go to Settings > Networking > Synchronization Configuration. The Available Instruments now shows the HFA3 instruments detected. connected. Green check = connected. Red circle with white line = not connected. Add = manually add an instrument not found by entering the host name or IP address.
- Page 117 Data Synchronization 10-5 Go to Contents Step Description 6. Complete synchronization. The main screen header shows the database icon with check mark, indicating: Synchronization Complete. The HFA3 has completed synchronization and is ready for final restart to complete the process to screen for duplicate patient records.
- Page 118 Data Synchronization 10-6 Go to Contents Scenario 2: HFA II-i (one or more) and HFA3 (one or more) Data Synchronization Step Description Scenario 2: Turn ON Data Synchronization for One or More Data Synchronization HFA II-i and HFA3 1. Meet precondition requirements. •...
- Page 119 Data Synchronization 10-7 Go to Contents Configuration for Data Synchronization There are two choices depending on the model: • HFA II-i (USB drive) - Configuration for Data Synchronization, OR; • HFA II-i (Floppy drive) Configuration for Data Synchronization - Manual Configuration Step Description...
- Page 120 Data Synchronization 10-8 Go to Contents Test Connection and Patients Next step is to test the connection from HFA II-i to the HFA3 and test the patients with the HFAII-i in Data Synchronization Mode. Step Description Test Connection HFA II-i to HFA3 1.
- Page 121 Data Backup 11-1 Go to Contents (11) Data Backup This chapter describes how to protect the patient database. Data Backup on Shutdown and Data Restore Button Function Data backup on Shutdown Use the slider to Enable or Disable the data backup. It is strongly encouraged to set up the backup by enabling and setting a path to a back up location.
- Page 122 Data Backup 11-2 Go to Contents Button Function Data Restore Used to restore the database from a saved backup. The restore function replaces any existing data with the backup data. Restore set target path Use Browse... to select the drive where backup files are located. Backup list: The most current backup is listed by date and time.
- Page 123 Specifications 12-1 Go to Contents (12) Specifications HFA3 Instrument Stimulus • Maximum Intensity: 10,000 ASB • Duration: 200 msec, 500 msec for Esterman tests, continuous for kinetic tests • Wave Length: Broadband visible light Visual Field Testing Distance • 30 cm Bowl Illumination •...
- Page 124 Specifications 12-2 Go to Contents Storage (Unpacked) • Temperature: –10 to +55°C • Humidity: 10% to 95% • Atmospheric Pressure: 700 to 1060 hPa Operation • Temperature: +10 to +40°C • Relative Humidity: 30% to 90%, excluding condensation • Atmospheric Pressure: 700 to 1060 hPa •...
-
Page 125: A) Test Patterns & Parameters
Test Patterns & Parameters Go to Contents (A) Test Patterns & Parameters This appendix describes the Threshold and Suprathreshold test parameters and test patterns. Threshold Test Patterns Default pattern is shown in bold. Test Pattern Extent of Visual Field Tested / Application Number of Points Tested Central 30-2... - Page 126 Test Patterns & Parameters Go to Contents cáÖìêÉ=^JP=`Éåíê~ä=NMJO=qÉëí=m~ííÉêå cáÖìêÉ=^JQ=`Éåíê~ä=OQJO`=qÉëí=m~ííÉêåI=oáÖÜí=bóÉ cáÖìêÉ=^JR=mÉêáéÜÉê~ä=SMJQ=qÉëí=m~ííÉêåI=oáÖÜí=bóÉ cáÖìêÉ=^JS=j~Åìä~=qÉëí=m~ííÉêå cáÖìêÉ=^JT=k~ë~ä=píÉé=qÉëí=m~ííÉêåI=oáÖÜí=bóÉ HFA3 Instructions for Use 2660021166131 Rev. A 2018-11...
-
Page 127: Suprathreshold Test Patterns
Test Patterns & Parameters Go to Contents Suprathreshold Test Patterns Default pattern is shown in bold. Test Pattern Extent of Visual Field Tested / Application Number of Points Tested Central 40 Point 30 degrees/40 points General screening Central 64 Point 30 degrees/64 points General, glaucoma, neurological Central 76 Point... - Page 128 Test Patterns & Parameters Go to Contents Suprathreshold Test Pattern Diagrams cáÖìêÉ=^JU=`Éåíê~ä=QMJmçáåí=qÉëí=m~ííÉêåI=oáÖÜí=bóÉ cáÖìêÉ=^JV=`Éåíê~ä=SQJmçáåí=qÉëí=m~ííÉêåI=oáÖÜí=bóÉ cáÖìêÉ=^JNM=`Éåíê~ä=TSJmçáåí=qÉëí=m~ííÉêåI=oáÖÜí=bóÉ cáÖìêÉ=^JNN=`Éåíê~ä=UMJmçáåí=qÉëí=m~ííÉêåI=oáÖÜí=bóÉ (This is the same pattern as the 30-2 Threshold test) HFA3 Instructions for Use 2660021166131 Rev. A 2018-11...
- Page 129 Test Patterns & Parameters Go to Contents cáÖìêÉ=^JNO=`Éåíê~ä=^êã~äó=qÉëí=m~ííÉêåI=oáÖÜí=bóÉ cáÖìêÉ=^JNP=cìää=cáÉäÇ=^êã~äó=qÉëí=m~ííÉêåI=oáÖÜí=bóÉ cáÖìêÉ=^JNQ=k~ë~ä=píÉé=qÉëí=m~ííÉêåI=oáÖÜí=bóÉ cáÖìêÉ=^JNR=mÉêáéÜÉê~ä=SM=qÉëí=m~ííÉêåI=oáÖÜí=bóÉ HFA3 Instructions for Use 2660021166131 Rev. A 2018-11...
- Page 130 Test Patterns & Parameters Go to Contents cáÖìêÉ=^JNS=cìää=cáÉäÇ=UN=qÉëí=m~ííÉêåI=oáÖÜí=bóÉ cáÖìêÉ=^JNT=cìää=cáÉäÇ=NOM=qÉëí=m~ííÉêåI=oáÖÜí=bóÉ cáÖìêÉ=^JNU=cìää=cáÉäÇ=NPR=qÉëí=m~ííÉêåI=oáÖÜí=bóÉ cáÖìêÉ=^JNV=cìää=cáÉäÇ=OQS=qÉëí=m~ííÉêåI=oáÖÜí=bóÉ HFA3 Instructions for Use 2660021166131 Rev. A 2018-11...
- Page 131 Test Patterns & Parameters Go to Contents cáÖìêÉ=^JOM=pìéÉêáçê=PS=qÉëí=m~ííÉêåI=oáÖÜí=bóÉ cáÖìêÉ=^JON=pìéÉêáçê=SQ=qÉëí=m~ííÉêåI=oáÖÜí=bóÉ cáÖìêÉ=^JOO=bëíÉêã~å=jçåçÅìä~ê=qÉëí=m~ííÉêåI=oáÖÜí=bóÉ cáÖìêÉ=^JOP=bëíÉêã~å=_áåçÅìä~ê=qÉëí=m~ííÉêå HFA3 Instructions for Use 2660021166131 Rev. A 2018-11...
-
Page 132: Test Parameters
Test Patterns & Parameters Go to Contents Test Parameters Threshold Test Settings The following table displays parameter settings available only when Static Threshold Testing is chosen. Default values are shown in bold. Parameter Parameter Settings Description Test Strategy SITA-Faster SITA Faster reduces test time approximately 30% faster than SITA Fast and 50% faster than SITA Standard for the same patient tests. - Page 133 Test Patterns & Parameters Go to Contents Suprathreshold Test Settings The following table displays parameter settings available only when Suprathreshold Testing is chosen. Default values are shown in bold. Parameter Parameter Settings Description Test Strategy Two Zone For each point in the test pattern, a stimulus is presented 6 dB brighter than the expected threshold.
- Page 134 Test Patterns & Parameters A-10 Go to Contents Parameter Parameter Settings Description Gaze Tracking The Gaze Tracking system automatically measures gaze direction at the time of stimulus (Models 840, 850, presentation. and 860) Note: Gaze Tracking is the default for SITA Faster. Blind Spot The test program periodically presents a stimulus in the patient’s blind spot.
-
Page 135: B) Determine Trial Lens
Determine Trial Lens Go to Contents Determine Trial Lens If you are not using the automatic trial lens calculation refer to the following guidelines for selecting manual trial lenses. Guidelines for Trial Lens Selection 1. Ignore cylinders of 0.25 D or less. 2. - Page 136 Determine Trial Lens Go to Contents Distance R – Distance R Distance R Distance R Distance R Distance R Distance R 0.50 –1.00 –1.50 –2.00 –2.50 –3.00 over –3.00 Under 30 No trial lens No trial lens No trial lens No trial lens No trial lens No trial lens...
-
Page 137: C) Troubleshooting
Go to Contents (C) Troubleshooting In the case of malfunction, error messages or operational problems, call ZEISS Customer Care: In the U.S., call 800-341-6968. Outside the U.S., contact your local ZEISS distributor. Know the HFA3 model, serial number, and current software revision before calling Customer Service. - Page 138 Troubleshooting Go to Contents Alert Title Alert Text Test Failed System Encountered a Serious Error. Reboot device, if problem persists service may be required. Failed to Run Kinetic Test. You may retry the test and/or reboot device. If problem persists service may be required. Failed to Initialize Kinetic Test.
-
Page 139: Troubleshooting Table
Troubleshooting Go to Contents Troubleshooting Table Not all potential situations are listed in Table C-2, nor are all of the possible solutions. Table C-2 Problem Possible Cause or Solution Startup Difficulties HFA3 will not turn on. • Check power cord connections to HFA3 and wall outlet. •... - Page 140 Troubleshooting Go to Contents Table C-2 Problem Possible Cause or Solution Inconsistent labeling on the SFA GPA report. • Only occurs on 30-2 tests generated on the HFA3. If GPA analysis is based on prior 24-2 tests, pattern label for the Progression Analysis Probability Plot should be 24-2 but is displayed as 30-2.
- Page 141 Troubleshooting Go to Contents Table C-2 Problem Possible Cause or Solution Vertex Monitoring Vertex Monitoring does not work. • HFA3 not Models 850 or 860. • Vertex Monitoring not turned on. • Trial lens holder not in up position. • Gaze Tracking was not initialized at the start of the test. Vertex Monitoring alarm beep goes off too often.
- Page 142 Troubleshooting Go to Contents Table C-2 Problem Possible Cause or Solution USB Media Problems USB device does not show up on the HFA3, or a • The USB device may be incompatible with the HFA. USB media error is indicated. Data Transfer Problems Transfer of files from HFA II/HFA II - to HFA3 via...
-
Page 143: D) Legal Notices
Third Party Licensor’s standard shipment of the Software in source code form, including any operating systems and integrated software, and the media, Documentation and any updates and upgrades provided by ZEISS or the Third Party Licensors to which You are granted a license from ZEISS pursuant to this Agreement. - Page 144 ZEISS’ trademarks on output produced by the Software does not give rise to any rights in ZEISS’ trademarks in You. You do not acquire any rights, express or implied, in the Software other than those rights expressly granted under this Agreement. You will retain all right, title and interest in and to data created by Your operation of the Software (“Data”) except as...
- Page 145 You and ZEISS. You (a) will provide ZEISS with access to such Data and (b) hereby grant and will grant to ZEISS the right to use such Data, in each case (a) and (b) solely for the purpose of providing maintenance and support services in connection with the Software.
- Page 146 You or any third party, whether in an action in contract or tort, even if ZEISS has been advised of the possibility of such damages or if such damages are foreseeable. Without limiting the foregoing, if for any reason the foregoing limitation is not fully enforced, in no event will ZEISS’...
- Page 147 Agreement. No Assignment. You will not assign or transfer any rights, duties or obligations under this Agreement, in full or in part, by operation of law or otherwise, without ZEISS’ prior written consent. ZEISS may freely assign this Agreement. Third Party Beneficiaries. You hereby acknowledge that the Third Party Licensors are intended third party beneficiaries of this Agreement and have the right to bring legal action in their own name against You with respect to the Software.
- Page 148 Legal Notices Go to Contents regarding this Agreement or if You wish to request any information from ZEISS, please use the address information enclosed with HFA3 to contact the local ZEISS office serving Your country, or write to Customer Service, Carl Zeiss Meditec, Inc., 5160 Hacienda Drive, Dublin, CA 94568.
- Page 149 Legal Notices Go to Contents Text of the BSD License: Copyright (c) <year>, <copyright holder> All rights reserved. Redistribution and use in source and binary forms, with or without modification, are permitted provided that the following conditions are met: 1. Redistributions of source code must retain the above copyright notice, this list of conditions and the following disclaimer.
- Page 150 Legal Notices Go to Contents · Redistributions of source code must retain the above copyright notice, this list of conditions and the following disclaimer. · Redistributions in binary form must reproduce the above copyright notice, this list of conditions and the following disclaimer in the documentation and/or other materials provided with the distribution.
- Page 151 Legal Notices Go to Contents An "Application" is any work that makes use of an interface provided by the Library, but which is not otherwise based on the Library. Defining a subclass of a class defined by the Library is deemed a mode of using an interface provided by the Library.
- Page 152 Legal Notices D-10 Go to Contents b) Accompany the object code with a copy of the GNU GPL and this license document. 4. Combined Works. You may convey a Combined Work under terms of your choice that, taken together, effectively do not restrict modification of the portions of the Library contained in the Combined Work and reverse engineering for debugging such modifications, if you also do each of the following: a) Give prominent notice with each copy of the Combined Work that the Library is...
- Page 153 Legal Notices D-11 Go to Contents a) Accompany the combined library with a copy of the same work based on the Library, uncombined with any other library facilities, conveyed under the terms of this License. b) Give prominent notice with the combined library that part of it is a work based on the Library, and explaining where to find the accompanying uncombined form of the same work.
- Page 154 ZEISS or a third party on the content and/or functionality of the programs. You will have thirty (30) days from the delivery date of the additional programs to evaluate such programs, subject to the terms of the Agreement.
- Page 156 Germany Phone: +49 36 41 22 03 33 Fax: +49 36 41 22 01 12 info.meditec@zeiss.com www.zeiss.com/med Humphrey Field Analyzer 3 (HFA3) Carl Zeiss Meditec, Inc. Carl Zeiss Meditec AG 5160 Hacienda Drive Goeschwitzer Strasse 51-52 Dublin, CA 94568 07745 Jena...
Need help?
Do you have a question about the Humphrey Field Analyzer 3 and is the answer not in the manual?
Questions and answers
How to turn the Blue Yellow Parameter from off to on
To enable the Blue Yellow Parameter on the Zeiss Humphrey Field Analyzer 3, set the Blue Yellow parameter to "On." When enabled, this setting provides a yellow bowl and a Blue Size V stimulus, with illumination from a yellow lamp at the top of the bowl.
This answer is automatically generated
why is the refresh button gone to refresh tests on todays page ?
The refresh button is missing on the Zeiss Humphrey Field Analyzer 3 test page if the data are not being managed locally or if DICOM/EMR network settings are enabled, as the refresh option is related to updating the local worklist of patients.
This answer is automatically generated
what test do you use to perform a ptosis evaluation. we normally would use a superior 64 but that is not an option.
How to replace fixation bulb
Patient name was entered backwards. How do I change it
When doing the ssa manual kinetic can you change it from 8 pints to 16 points?
How to manually backup VF Humphrey field analyzer 3
slow and lagging