
Related Manuals for NTI ST-C5KVMA-600


Summary of Contents for NTI ST-C5KVMA-600
- Page 1 ® XTENDEX Series 600 FOOT EXTENDERS Installation and Operation Manual ST-C5KVM-600 PS/2 KVM Extender Man014 Rev. 9/11/18...
- Page 2 Note: CATx connection cable used between NTI XTENDEX Series Local and Remote or any XTENDEX Series products should not be run underground, outdoors or between buildings. WARNING: Outdoor or underground runs of CATX cable could be dangerous and will void the warranty.
-
Page 3: Table Of Contents
TABLE OF CONTENTS Introduction..................................1 Materials ..................................2 Features and Functions..............................4 Limitations ..................................6 Preparation for Installation............................7 Installation..................................8 Installing The Local Unit (models with VGA video connectors).................. 8 Installing the Local Unit (models with only KM connectors) ..................10 Connect The CATx Cable............................ -
Page 4: Introduction
Provides crisp and clear resolution up to 1024 x 768 @ 600 feet (see page 21 for more details) Compatible with all NTI switches and splitters, enabling the joining of products to create a system that satisfies all networking needs ... -
Page 5: Materials
(i.e. VMCTINT-xx) will be needed. Contact your nearest NTI distributor or NTI directly for all of your KVM needs at 800-RGB-TECH (800-742-8324) in US & Canada or 330-562-7070 (Worldwide) or at our website at http://www.networktechinc.com and we will be happy to be of assistance. - Page 6 NTI XTENDEX 600 Foot Extenders...
-
Page 7: Features And Functions
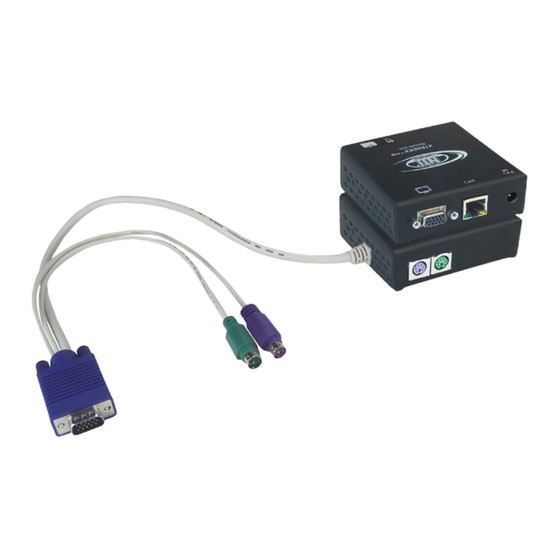
NTI XTENDEX 600 Foot Extenders FEATURES AND FUNCTIONS Green LED- power indicator- illuminates when power has been supplied to the unit Yellow LED- traffic indicator- illuminates when there is communication between the local and remote units. Cat 5- RJ45 female- for connecting the CAT 5 cable 4. - Page 8 NTI XTENDEX 600 Foot Extenders...
-
Page 9: Limitations
2 simple devices (i.e. mice) connected to each unit, or 1 complex device (i.e. serial modem, RS232 command port on an NTI switch) connected to either the Remote or Local Unit. In order for two users to share a PS/2 CPU, the user in control must pause for at least 3 seconds before another user can take control. -
Page 10: Preparation For Installation
Local and Remote Units should be grounded through either a display or source that uses a 3-prong power cord. If only one unit is grounded, shielded CAT5 cable should be used. Note: CATX connection cable used between NTI XTENDEX Series Local and Remote or any XTENDEX Series products should not be run underground, outdoors or between buildings. -
Page 11: Installation
NTI XTENDEX 600 Foot Extenders INSTALLATION Installing The Local Unit (models with VGA video connectors) 1. Plug the cables of the Local Unit into the back of the CPU. (See Figure 1.) Connect the blue 15HD cable end to the VGA port on the back of the CPU. -
Page 12: Figure 2- Connect The Local Unit With Audio Support To The Cpu
NTI XTENDEX 600 Foot Extenders (PURPLE-KEYBOARD) (GREEN-MOUSE) Network Technologies Inc AUDIO CONNECTOR XTENDEX line (BLUE- VIDEO) ONE WILL BE MARKED "line out" ,"spkr", "headphones" OR WITH THIS SYMBOL (BLACK- AUDIO) PS/2 CPU ST-C5KVMA-600 Local Unit (Front View) 3.5mm Stereo Plug... -
Page 13: Installing The Local Unit (Models With Only Km Connectors)
NTI XTENDEX 600 Foot Extenders If the Local Unit has RS232 support, connect the local user's RS232 cable from a touch screen monitor to the 9D male port on the Local Unit. If the Local Unit has audio support, connect the cable from the local speakers to the 3.5mm stereo audio jack on the Local Unit. -
Page 14: Connect The Catx Cable
Figure 6- Connect CATx cable to Local Unit WARNING: The CATx connection cable used between NTI XTENDEX Series Local and Remote or any XTENDEX Series products must be wired straight through (pin 1 to pin 1, pin 2 to pin 2, etc.) The use of a CROSSOVER CABLE will damage the extender and void your warranty. -
Page 15: Figure 7- Connect The Extended Components To The Remote Unit
NTI XTENDEX 600 Foot Extenders ST-C5KVMRS-600 Remote Unit (Front and Rear View) 9D Male RS232 Connector Front View of Remote Unit Rear View of Remote Unit 15HD Female Network Technologies Inc Video Connector XTENDEX 6 pin miniDIN Female Connector Multi-Scan... -
Page 16: Installing The Remote Unit (Models With Only Km Connectors)
Ethernet RJ45 connector of an Ethernet device. Damage to devices connected to the Ethernet may result. WARNING: The CATx connection cable used between NTI XTENDEX Series Local and Remote or any XTENDEX Series products must be wired straight through (pin 1 to pin 1, pin 2 to pin 2, etc.) The use of a CROSSOVER CABLE will damage the... -
Page 17: Models With Two Remotes
Damage to devices connected to the Ethernet may result. WARNING: The CATx connection cable used between NTI XTENDEX Series Local and Remote or any XTENDEX Series products must be wired straight through (pin 1 to pin 1, pin 2 to pin 2, etc.) The use of a CROSSOVER CABLE will damage the extender and void your warranty. -
Page 18: Plug-In And Boot Up
NTI XTENDEX 600 Foot Extenders Plug-in and Boot Up Plug the power cord from the monitor into the power outlet. Connect each AC adapter power connector to the 9VDC ports on the Remote and Local Units Plug each AC adapter into a power outlet. -
Page 19: Video Quality
NTI XTENDEX 600 Foot Extenders VIDEO QUALITY Automatic Video Quality Adjustment (see chart on page 1) Video quality adjustment is done automatically to assure the image is as clear as possible. Note: When the cable is longer than 300 feet some colored lines can be seen at the black-to-white transitions. This is a normal behavior and is caused by the different twisting rates of each pair of wires in the CATx cable. -
Page 20: Command Mode
NTI XTENDEX 600 Foot Extenders Command Mode Depending upon your unit’s date of manufacture, models ST-C5KVM-600, ST-C5KVMA-600 and ST-C5KVMRS-600 may be enabled with a Command Mode feature to perform the following: fine adjustment of the general video quality ... -
Page 21: Mix Ddc
NTI XTENDEX 600 Foot Extenders Mix DDC To update DDC information based on resolution characteristics common to the monitors connected to the Local and Remote units, press <N> to enter DDC information from both. The CapsLock LED will illuminate solid, the NumLock and ScrollLock LEDs will be OFF . -
Page 22: Manual Edid Capture
NTI XTENDEX 600 Foot Extenders Manual EDID Capture Applicable to ST-2C5xxxx-L-600 models only. The 15HD connector on the ST-2C5V(A)-L-600 provides only support for DDC, no video. The ST-2C5V(A)-L-600 Local Unit includes a button labeled “DDC Update” to be pressed in order to record and save EDID data. -
Page 23: More About Ddc
NTI XTENDEX 600 Foot Extenders More About DDC The recording and DDC transfer of EDID data from the monitor(s) enables the CPU to know what resolution settings are compatible with the monitor(s) connected. Once this data is provided to the CPU, your graphics card will either automatically update to the best resolution available (some models of graphic cards, not all), or you will need to choose from the available settings. -
Page 24: Technical Specifications
NTI XTENDEX 600 Foot Extenders TECHNICAL SPECIFICATIONS Models with VGA Video Video Compatibility XGA, VGA Video Coupling Video Connectors HD15 male to CPU HD15 female to monitor Input / Output Impedance 75 Ohms Input Horizontal Frequency Range 15kHz to 130 Hz... -
Page 25: Interconnection Cable Wiring Method
NTI XTENDEX 600 Foot Extenders INTERCONNECTION CABLE WIRING METHOD The connection cable between the remote and local is terminated with RJ45 connectors and must be wired according to the EIA/TIA 568 B industry standard. Wiring is as per the table and drawing below. -
Page 26: Troubleshooting
NTI XTENDEX 600 Foot Extenders TROUBLESHOOTING Each and every piece of every product produced by Network Technologies Inc is 100% tested to exacting specifications. We make every effort to insure trouble-free installation and operation of our products. If problems are experienced while installing this product, please look over the troubleshooting chart below to see if perhaps we can answer any questions that arise. -
Page 27: Index
A return authorization number is required for all repairs/returns. Note: CATx connection cable used between NTI XTENDEX Series Local and Remote or any XTENDEX Series products should not be run underground, outdoors or between buildings.
Need help?
Do you have a question about the ST-C5KVMA-600 and is the answer not in the manual?
Questions and answers