
Related Manuals for NuWave Nutri-Pot 13Q


Summary of Contents for NuWave Nutri-Pot 13Q
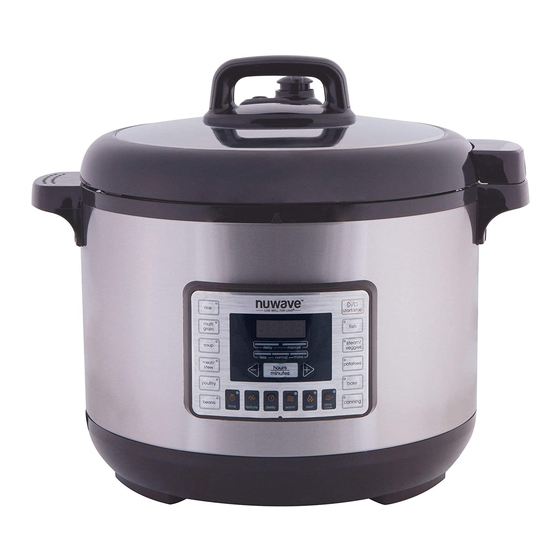
- Page 1 NuWave Nutri-Pot ® Digital Pressure Cooker Owner’s Manual & Complete Recipe Book...
- Page 2 NuWave Brio NuWave NuWave PIC ® (Precision Induction Digital Air Fryer Oven Pro Plus ® Cooktop) Super-heated air cooks Cook healthier Cook faster, safer, your food to crispy, meals faster and and more efficiently tender perfection. more efficiently than you ever could...
- Page 3 NuWave Nutri-Pot NuWave Medley ® ® Digital Pressure Cooker 12”x12” Digital Skillet Easily cook rice, poultry, vegetables Coated with Duralon Healthy ® and more all with the press of a Ceramic Non-Stick coating button! The Nutri-Pot’s safety release for easy cleanup. Includes a...
- Page 4 NuWave Flavor-Lockers NuWave Duralon Healthy ® ® Ceramic Non-Stick with Vacuum-Seal Technology Cookware Keep food fresh for up to 21 days! Slow the growth of mold by removing Coated with Duralon Healthy trapped oxygen with a few easy pumps. Ceramic Non-Stick coating for...
- Page 5 NuWave Nutri-Master Slow Juicer ® The Nutri-Master, with a low 48 RPM, is both incredibly quiet and powerful enough to extract juice from nuts and hard vegetables. www.nuwavenow.com 1-877-689-2838...
-
Page 6: Table Of Contents
TABLE OF CONTENTS OWNER’S MANUAL Veggies, Pastas & Sauces Parts Descriptions ......7 Blistered Cherry Tomato Stuffed Peppers .......48 Important Safeguards ....8 Stuffed Squash ......49 Additional Safeguards ....9 Classic Chili ......50 Product Features ......10 Risotto with Italian Sausage Care & Maintenance ....11 and Parmesan......51 Silicone Gasket Installation .. -
Page 7: Owner's Manual
PARTS DESCRIPTION Pressure Cooker Lid Part #: 34514 Pressure Indicator Floater Valve Part #: 34511 Pressure Release Valve Part #: 34507 Pressure Release Switch Vented, Tempered Glass Part #: 34506 Rack Part #: 34505 Inner Pot Part #: 34509 Control Panel Housing Part #: 34501 Pressure Cooker Lid... -
Page 8: Important Safeguards
IMPORTANT SAFEGUARDS READ ALL INSTRUCTIONS When using electrical appliances, basic safety precautions should always be followed, including the following: 1. DO NOT TOUCH HOT SURFACES. 2. To protect against electrical shock, do not immerse cord, plugs, or the unit in water or other liquid. 3. -
Page 9: Additional Safeguards
ADDITIONAL SAFEGUARDS 1. If you cook meat with skin, such as sausage, swelling can occur when cooked under pressure. Piercing skin after cooking can lead to bursts of hot liquid. 2. Do not lean over the pressure cooker at any time while cooking. 3. -
Page 10: Product Features
Healthier Results More vitamins and minerals are retained in food prepared with the NuWave Nutri-Pot Digital Pressure Cooker compared to conventional stovetop cooking. In addition, pressure cooking utilizes water instead of unhealthy oils or fat. -
Page 11: Care & Maintenance
CARE & MAINTENANCE CARE & MAINTENANCE • Unplug the NuWave Nutri-Pot Digital Pressure Cooker and let it cool ® before cleaning. • Wipe the Base and inside of the Base, if necessary, with a clean cloth. Do not immerse the Base in water or spray any water in it. -
Page 12: Operating Instructions
OPERATING INSTRUCTIONS Open Lid: Hold the left handle. Turn the Lid clockwise to “Open” position and lift. Hold Clean the outside of the Inner Pot and the inside of the Base. Place the Inner Pot in the Base. Place ingredients and water in the Inner Pot. (See below). For rice, beans, and grains, do not fill more than half full. - Page 13 OPERATING INSTRUCTIONS (Continued) Closing Lid: • Check that the Silicone Gasket is secure before closing. • Holding the Lid by the handle, lower the Lid and turn counterclockwise to close. When the Lid has been closed properly you will hear a “click” sound. Close Ensure that the arrows are properly aligned.
-
Page 14: Control Panel
OPERATING INSTRUCTIONS (Continued) Once the Lid is locked, turn the Pressure Release Switch to “Seal”. Plug the NuWave Nutri-Pot Digital Pressure Cooker into an electric power supply. The LCD display will show “--:--” and the unit will go into standby mode. -
Page 15: Presets Guide & Functions
PRESETS Texture Time Default Time (minutes) (minutes & hours) Presets & Hrs:Min Less Normal More Min.* Functions Rice 00:10 00:07 00:10 00:13 00:01 02:00 Multi Grain 00:30 00:27 00:30 00:32 00:01 02:00 Soup 00:20 00:15 00:20 00:25 00:01 02:00 Meat/Stew 02:00 01:30 02:00... - Page 16 PRESETS (Continued) hours/minutes rice Press the “hours/minutes” button to set the time when using the “time” start/stop function or to increase or decrease the cooking duration when cooking in multi grain “manual” mode. The blinking digits reflect whether hours or minutes are selected.
- Page 17 veggies less normal more potatoes hours FUNCTIONS minutes bake Texture: This is a function to help change the consistency of your foods. “less”, “normal”, and “more” are selected guides that increase or decrease the cooking time while under pressure. slow canning time texture...
-
Page 18: Troubleshooting
manual veggies more potatoes FUNCTIONS (continued) utes bake Sear: This function lets you sear food before slow-cooking or cooking under pressure. start/stop slow canning Directions: warm sear cook Press “sear”. Display will show “00:05”. Press “start/stop” to begin. steam/ nual See the “hours/minutes”... -
Page 19: Pressure Canning
Before pressure canning in the NuWave Nutri-Pot Digital Pressure Cooker, consult an instructional book written specifically for pressure canning. The NuWave Nutri-Pot Digital Pressure Cooker can be used for basic pressure canning, along with the water bath method. Both low- and high-acid fruits and vegetables are recommended. - Page 20 6. Do add acid (lemon juice, vinegar, or citric acid), especially to tomato products when directed in the recipe. If necessary, you can balance the tart taste by adding sugar. Liquid Level The NuWave Nutri-Pot Digital Pressure Canning Process ® Though your exact experience may vary depending on the specific recipe you are following, most recipes can be prepared by following this guide.
- Page 21 Properly processed food will last for months and seasons. Jars, lids, and screw bands are reusable. Check all carefully for damage before reuse. IMPORTANT: It is not recommended to use the NuWave Nutri-Pot Digital Pressure Cooker as a canning device at altitudes of 2,000 feet above sea level or higher.
-
Page 22: Pressure Canning
Digital Pressure Cooker ® THE MANUFACTURER WARRANTS The NuWave Nutri-Pot Digital Pressure Cooker, including the Base, the Lid, the Pressure Release Valve/Switch, the Rack, the Inner Pot, the Silicone Gasket, the Food Blocking Cap, and the Water-Collection Box are to be free from manufacturer defects. -
Page 23: Warranty
MANUAL. IF YOU STILL HAVE ANY QUESTIONS ABOUT OPERATION OR WARRANTY OF THE PRODUCT, PLEASE CONTACT NUWAVE, LLC. READ YOUR OWNER’S MANUAL: If you still have any questions about operation or warranty of the product, please contact NuWave, LLC at: 1-877- 689-2838 or email help@nuwavenow.com. Warranty... -
Page 24: Natural & Quick Release
NATURAL & QUICK RELEASE Quick Release Pressure Indicator When the pressure has built up the Pressure Indicator will pop up. What is quick release? To quickly release the pressure, simply turn the “Pressure Release Switch” to "Release". The switch will stay and steam will be rapidly released. -
Page 25: Natural & Quick Release
NATURAL & QUICK RELEASE ALWAYS PERFORM A QUICK RELEASE AFTER THE COMPLETION OF A NATURAL RELEASE AND DO SO UNTIL ALL STEAM/PRESSURE IS OUT. DO NOT ATTEMPT TO OPEN the pressure cooker if there is any resistance or if the Floater Valve is still up, indicating that there is still steam/ pressure remaining inside the unit. -
Page 26: Andouille Sausage And Cabbage Soup
Andouille Sausage and Cabbage Soup Serves: 8-12 Ingredients: 6 tablespoons olive oil 1 teaspoon caraway seeds 2 pounds andouille sausage, diced 2 teaspoons fennel seeds 2 small onions, diced 1 teaspoon mustard powder 4 carrots, chopped 2 tablespoons tomato paste 4 ribs celery, chopped 12 cups low-sodium chicken stock 1 head green cabbage, chopped... -
Page 27: Barley Beef Soup
Barley Beef Soup Serves: 8-12 Ingredients: 6 tablespoons olive oil, divided 4 cloves garlic, chopped 3 pounds beef, cubed 2 teaspoons dried rosemary Salt and black pepper 4 tablespoons tomato paste 2 onions, medium dice 2 cups red wine 4 carrots, medium dice 2 cups uncooked pearl barley 8 ribs celery, medium dice 12 cups low-sodium beef broth... -
Page 28: Chicken And Rice Soup
Chicken and Rice Soup Serves: 12-16 Ingredients: 2 tablespoons olive oil 2 cups long-grain rice 6 boneless skinless chicken breasts, 8 cups chicken stock diced small 2 (28-ounce) cans diced tomatoes 2 onions, finely chopped 3 teaspoons salt 6 carrots, peeled, sliced Freshly ground black pepper to taste 4 ribs celery, sliced ½... -
Page 29: Lentil Soup
Lentil Soup Serves: 6 Ingredients: 1 cup red lentils, sorted, rinsed ½ cup carrots, finely diced 1 cup green or brown lentils, 2 celery stalks, diced (optional) sorted, rinsed 1 pound Yukon Gold or red bliss 1 medium onion, chopped potatoes 3 cloves garlic, minced 1 bunch rainbow chard or similar... -
Page 30: Poultry
POULTRY Recipes... -
Page 31: Cassoulet Chicken
Cassoulet Chicken Serves: 8-12 Ingredients: 12-16 chicken legs or thighs 2 cup carrots Salt and black pepper to taste 2 tablespoons Dijon mustard 6 tablespoons olive oil 2 clove garlic, chopped 1 pound pancetta, diced 4 cups low-sodium chicken stock 2 cups white wine 4 (15-ounce) cans navy beans, 1 onion, chopped... -
Page 32: Chicken À La King
Chicken à la King Serves: 12 Ingredients: 2 tablespoons olive oil 3 cups rice 6 shallots, chopped 4 tablespoons parsley 6 carrots, diced 4 teaspoons salt 6 ribs celery, diced 2 teaspoons white pepper 2 tablespoons chopped garlic 2 tablespoons butter 2 cups mushrooms 6 tablespoons flour 3 teaspoons fresh thyme... -
Page 33: Salsa Chicken And Rice
Salsa Chicken and Rice Serves: 8 Ingredients: 4 teaspoons olive oil 2 (10-ounce) cans diced tomatoes 2 (4-pound) chickens, cut into 8 pieces 2 (10-ounce) cans green chilies 2 cups basmati rice 2 tablespoons chili powder 4 cups chicken stock 4 cloves garlic, chopped 1 cup dry white wine Salt and pepper to taste... -
Page 34: Beef
BEEF Recipes... -
Page 35: Beef Mac & Cheese
Beef Mac and Cheese Serves: 12-16 Ingredients: 2 tablespoons olive oil Freshly ground black pepper to taste 2 pounds lean ground beef 2 (28-ounce) cans diced tomatoes, 2 onions, finely chopped in juice 2 green peppers, diced small 2 cups beef stock 2 red pepper, diced small ½... -
Page 36: Beef Short Ribs
Beef Short Ribs Serves: 8-12 Ingredients: 4 tablespoons olive oil 6 sprigs fresh thyme 8 pounds beef short ribs 2 bay leaves Salt and freshly ground black pepper 1 cup white wine to taste 3 cups orange juice 2 onions, chopped 4 tablespoons soy sauce 2 ribs celery, chopped 4 tablespoons chopped fresh chives... -
Page 37: Spicy Beef And Cabbage
Spicy Beef and Cabbage Serves: 8-12 Ingredients: 2 tablespoons olive oil 2 tablespoons brown sugar 2 pounds lean ground beef 4 cups beef stock 2 onions, diced small 2 (28-ounce) cans whole, peeled 2 cloves garlic, sliced tomatoes, 2 teaspoons salt 2 (14-ounce) cans crushed tomatoes 2 teaspoons dried oregano 2 cups basmati rice... -
Page 38: Bbq & Meats
BBQ & MEATS Recipes... -
Page 39: Baby Back Ribs
Baby Back Ribs Serves: 8-12 Ingredients: 4 tablespoons olive oil, divided 2 teaspoons light brown sugar 2 yellow onions, medium dice 4 teaspoons kosher salt 8 cloves garlic, minced 2 teaspoons pepper 2 racks baby back ribs (about 3-4 2 teaspoons apple cider vinegar pounds) 4 cups ketchup 2 teaspoons smoked paprika... -
Page 40: Bbq Pulled Pork
BBQ Pulled Pork Serves: 16-20 Ingredients: 12 slices bacon, chopped ½ teaspoon cayenne pepper 2 (4- to 5-pound) pork shoulder roasts 2 cups ketchup 2 red onions, finely chopped 2 tablespoons tomato paste 8 garlic cloves, minced 4 tablespoons brown sugar 1 teaspoon dry mustard powder ½... -
Page 41: Honey Bbq Meatloaf
Honey BBQ Meatloaf Serves: 8-12 Meatloaf Ingredients: Sauce Ingredients: 1½ pounds of ground beef 1 cup chicken stock 1 pound pork 2 (14½-ounce) cans crushed tomatoes 1½ pounds veal 1 cup BBQ sauce 2 onions, diced 2 tablespoons honey 2 cloves garlic, minced 1 teaspoon dried thyme ½... -
Page 42: Pork Shoulder With Sauerkraut
Pork Shoulder with Sauerkraut Serves: 12 Ingredients: 6 pounds boneless pork butt, cut into 8 2 cups chardonnay wine even chunks 32 ounces sauerkraut Salt and pepper to taste 4 cups low-sodium beef stock 8 tablespoons olive oil 6 garlic cloves, smashed ½... -
Page 43: Pot Roast
Pot Roast Serves: 12-16 Ingredients: 2 (3½- to 4-pound) boneless chuck roasts 2 teaspoons dried oregano Salt and freshly ground black pepper 2 teaspoons dried sage to taste 2 cups red wine 4 tablespoons olive oil, divided 2 (28-ounce) cans crushed tomatoes 2 onions, chopped 2 bay leaves 6 carrots, chopped... -
Page 44: Swiss Steak
Swiss Steak Serves: 8-12 Ingredients: 2 pounds beef top round, cut into 2 medium onions, julienned ½-inch chunks 2 cloves garlic, minced 6 tablespoons olive oil, divided 2 teaspoons prepared horseradish Salt and freshly ground black pepper 2 (8-ounce) cans tomato sauce to taste. -
Page 45: Braised Lamb Shanks
Braised Lamb Shanks Serves: 8-12 Ingredients: 12 lamb shanks 6 tablespoons tomato paste Salt and freshly ground black pepper 4 cups red wine to taste 3 cups beef stock 1 cup flour 4 bay leaves 8 tablespoons olive oil 2 teaspoons dried thyme 2 yellow onions, chopped 1 teaspoon dried oregano 2 ribs celery, diced small... -
Page 46: Sailor's Mussels
Sailor’s Mussels Serves: 12-16 Ingredients: 8 pounds mussels 2 bay leaves 6 tablespoons butter, divided 3 cups white wine 2 large shallots, finely chopped ½ cup parsley, minced 4 cloves garlic, minced 1 cup heavy whipping cream 4 sprigs fresh thyme Pinch ground black pepper Directions: 1. -
Page 47: Veggies, Pastas & Sauces
VEGGIES, PASTAS & SAUCES Recipes... -
Page 48: Blistered Cherry Tomato
Blistered Cherry Tomato Stuffed Peppers Serves: 10 Ingredients: 2 tablespoons olive oil 4 teaspoons parsley 1 onion, diced 2 teaspoons marjoram 2 cups cherry tomatoes, halved 2 teaspoons fresh basil 2 (14-ounce) cans diced tomatoes 2 teaspoons salt 2 (14-ounce) cans tomato puree 2 teaspoons black pepper 2 cloves garlic 10 large green peppers, tops removed,... -
Page 49: Stuffed Squash
Stuffed Squash Serves: 8 Ingredients: 4 cups water ½ teaspoon ground cloves 4 small acorn squashes, cut in half, 4 tablespoons brown sugar seeded 4 green apples, peeled, chopped Kosher salt and freshly ground black 1 cup dried cranberries pepper to taste ½... -
Page 50: Classic Chili
Classic Chili Serves: 12-16 Ingredients: 2 tablespoons chili powder 2 medium white onions, diced small 2 teaspoons dried oregano 6 cloves garlic, minced 1 teaspoon ground, dried cumin 5-6 chipotle peppers in adobo sauce, 1 teaspoon smoked paprika chopped 6 tablespoons olive oil 2 (28-ounce) cans chopped tomatoes 8 pounds boneless chuck or round 2 cups low-sodium beef stock... -
Page 51: Risotto With Italian Sausage And Parmesan
Risotto with Italian Sausage & Parmesan Serves: 8-12 Ingredients: 2 tablespoons olive oil 1 cup white wine 2 pounds sweet Italian sausage, sliced 7 cups low-sodium chicken stock 1 cup shallots, chopped 2 teaspoons salt 4 cloves garlic, minced Freshly ground black pepper to taste 1 cup sliced sundried tomatoes 1 cup grated Parmesan cheese 3 cups Arborio rice... -
Page 52: Jambalaya
Jambalaya Serves: 8-12 Ingredients: 4 tablespoons olive oil 2 bay leaves 4 boneless, skinless chicken breasts, 3 cups long-grain rice cut into ½-inch pieces 4 cups low-sodium chicken stock 2 pounds andouille sausage, cut into 2 (14-ounce) cans chopped tomatoes medium chunks 2 tablespoons tomato paste 2 white onions, finely chopped... -
Page 53: Garlic Cheddar Mashed Potatoes
Garlic Cheddar Mashed Potatoes Serves: 12-16 Ingredients: 12 russet potatoes, washed, peeled, 6 tablespoons butter, melted and diced into 1-inch cubes 2 cups cheddar cheese, shredded 8 whole cloves garlic, peeled water Kosher salt and fresh black pepper to taste 1 cup half and half 10 scallions, sliced (optional) Directions:... -
Page 54: Marinana Sauce
Marinara Sauce Serves: 12 Ingredients: 6 tablespoons olive oil 2 teaspoons salt 8 cloves garlic, finely chopped Freshly ground black pepper to taste ½ teaspoon crushed red pepper flakes 1 teaspoon sugar 4 (28-ounce) cans crushed herb ½ cup chopped fresh basil, chopped tomatoes Directions: 1. -
Page 55: Rice & Beans
Rice and Beans Serves: 16-20 Ingredients: 2 cups dried pinto beans 2 teaspoons ground cumin Water 2 teaspoons chili power 2 tablespoons vegetable oil 2 (14-ounce) cans diced tomatoes 2 red onions, finely chopped 4 cups chicken stock 2 green peppers, finely chopped 2 teaspoons salt 2 jalapeños, finely chopped Black pepper to taste... -
Page 56: Tortellini
Tortellini Serves: 8-12 Ingredients: 2 tablespoons olive oil 2 (28-ounce) cans diced tomatoes 2 onions, diced small with juice 2 cloves garlic, minced 2 tablespoons tomato paste 2 red peppers, diced small 2 bay leaves 2 (8-ounce) packages cremini 4 medium carrots, thinly sliced mushrooms 4 medium zucchini, thinly sliced 2 teaspoons dried oregano... -
Page 57: Baking
BAKING Recipes... -
Page 58: Box Cake Mix
Box Cake Mix Serves: 8 Ingredients: 4 cups water 2 boxes cake mix Directions: 1. Prepare cake batter according to package directions. 2. Butter bottom and sides of 9-inch baking pan that will fit inside pressure cooker. 3. Pour half of prepared batter into baking pan and wrap with foil, ensuring the foil is airtight. -
Page 59: Orange Cheesecake
Orange Cheesecake Yields 1 (9-inch) cheesecake Ingredients: Filling Ingredients: 1½ cups graham cracker crumbs 4 (8-ounce) packages cream cheese 2½ tablespoons melted butter 1⅓ cups granulated sugar 1½ tablespoons orange zest 4 tablespoons all-purpose flour 2 tablespoons confectioners’ sugar Juice from 1 orange 4 eggs 2 teaspoons vanilla extract Directions:... -
Page 60: Brownies
Brownies Serves 8-10 Ingredients: ¾ cup all-purpose flour 2½ eggs ⅔ cup unsweetened cocoa powder 8½ tablespoons butter, melted ¾ cup granulated sugar 1 teaspoon vanilla extract 1½ teaspoon confectioners’ sugar 1 cup chopped walnuts 1 teaspoon baking powder 2½ cups water ⅓... -
Page 61: Spanish Manual
NuWave Nutri-Pot ® Olla de Presión Digital Manual del Usuario... -
Page 62: Part
DESCRIPCIÓN DE LAS PARTES Cubierta Parte #: 34514 Aparecerá el Indicador Válvula de Flotación Parte #: 34511 Válvula de Liberación de Presión Parte #: 34507 Interruptor de Liberación de la Presión Tapa de Vidrio Templado Parte #: 34506 Rejilla Parte #: 34505 Olla Interior Parte #: 34509 Panel de Control... - Page 63 IMPORTANTES MEDIDAS DE SEGURIDAD LEA TODAS LAS INSTRUCCIONES Cuando utilice aparatos eléctricos, siempre se deben seguir las precauciones básicas de seguridad, incluyendo las siguientes: 1. NO TOQUE SUPERFICIES CALIENTES. 2. Para protegerse contra descargas eléctricas, no sumerja el cable, los enchufes o la unidad en agua u otro líquido.
- Page 64 1. Si cocina carne con piel, como salchichas, se podría hinchar al cocinarse a presión. Pinchar la piel después de cocinar podría despedir líquidos calientes. 2. No incline la Olla Eléctrica a Presión NuWave Nutri-Pot en ningún momento mientras esté cocinando.
- Page 65 CARACTERÍSTICAS DEL PRODUCTO Beneficios La Olla de Presión Digital NuWave Nutri-Pot sella el vapor durante el uso, creando presión y elevando la temperatura interna por encima del punto de ebullición del agua. El resultado es un proceso de cocción acelerado y comidas saludables.
- Page 66 CUIDADO Y MANTENIMIENTO • Desconecte la Olla a Presión antes de limpiarla. • Limpie la base y su parte interior, si fuera necesario, con un trapo limpio. No sumerja la base en agua ni la rocíe con agua tampoco. • Retire y limpie el recolector de agua con una toalla húmeda einsértelo de nuevo en el cuerpo de la Olla a Presión.
- Page 67 INSTRUCCIONES DE OPERACIÓN Abra la tapa: Sujete el mango del lado izquierdo. Gire la tapa hacia la izquierda para abrir la posición y levantar. sostener Limpie el exterior de la Olla Interior y el interior de la Base. Coloque La Olla Interior en la base.
- Page 68 INSTRUCCIONES DE OPERACIÓN ( Continuación Cierrando la tapa: • Compruebe que la junta de silicona esté segura antes de cerrar. • Sujete la tapa por el mango, baje la tapa y gírela en sentido horario para cerrar. Cuando la tapa ha sido cerrada correctamente, escuchará un sonido de “clic”.
- Page 69 Una vez que la tapa está bloqueada en su lugar, vgire el interruptor de liberació`n de presión a la posición cerrada. Enchufe la Olla de Presión NuWave Nutri-Pot Digital a una fuente eléctrica. La pantalla LCD mostrará “-: -” y la unidad pasará al modo de espera.
- Page 70 PRESETS Texture Time Tiempo Predeterminado (Horas: Minutos) (Horas: Minutos) Funciones & Nor- Hrs:Min Less More Min.* Preajustes Arroz 00:10 00:07 00:10 00:13 00:01 02:00 00:30 00:27 00:30 00:32 00:01 02:00 Sopa 00:20 00:15 00:20 00:25 00:01 02:00 Carne/Estofado 02:00 01:30 02:00 02:30 00:01...
- Page 71 PRESETS ( Continuación houras/minutes Presione el botón “hours/minutes” para ajustar la hora cuando se utiliza la rice start/stop función “time” o para aumentar o disminuir la duración de cocción cuando se cocina en modo “manual”. Los dígitos parpadeantes reflejan si se multi grain seleccionan horas o minutos.
- Page 72 FUNCIONES Función Automática de Mantener Caliente Apagado Tiempo Preajustes Indefinida- Automático (Horas: Minutos) mente* Arroz ilimitado Multigrano ilimitado Sopa 04:00 Carne/Estofado 02:00 Aves 01:00 Frijoles 04:00 Pescado 00:30 Al Vapor/Verduras 00:30 start/stop Papas 01:00 Hornear Conservas Tiempo (Función) 04:00 steam/ delay manual veggies...
- Page 73 steam/ delay manual veggies less normal more potatoes hours FUNCIONES ( Continuación minutes bake Delay: Esta función le permite retrasar la hora de inicio de la cocción. Direcciones: slow canning texture delay warm sear cook Presione el botón “delay”. La barra de retardo se encenderá y el primer juego de “00”s parpadeará.
- Page 74 manual veggies more potatoes FUNCIONES ( utes Continuación bake Sear: Esta función le permite cocer los alimentos antes de cocinar o cocinar lentamente bajo presión. slow canning warm sear cook Direcciones: Pulse el botón “sear”. La pantalla mostrará 00:05. Presione el botón “start/stop” para comenzar. Consulte la sección “hours/minutes”...
- Page 75 240°F. Estas altas temperaturas sólo pueden alcanzarse en las conservas a presión. Antes de conservar en la Olla Eléctrica a Presión NuWave Nutri-Pot , consulte ™...
- Page 76 ácido agregando azúcar. Liquid Level El Proceso de Conserva a Presión Eléctrica de NuWave Nutri-Pot Aunque la experiencia exacta puede variar dependiendo de la receta específica que esté siguiendo, la mayoría de las recetas pueden prepararse siguiendo esta guía.
- Page 77 Los frascos, las tapas y las roscas son reusables. Revise todos ellos antes de usarlos. IMPORTANTE: No se recomienda utilizar la Olla Eléctrica a Presión NuWave Nutri-Pot como un aparato de conservas en altitiudes de 2,000 pies, o más, sobre el nivel del mar.
- Page 78 CONSERVAS A PRESIÓN (Continúa) • Puede revisar el sellado en las tapas planas presionándolas con el pulgar después de haberlas enfriado por una hora o más. Si la tapa permanece rígida, sin movimiento, entonces ha sido sellada adecuadamente. • Si las tapas no han sellado adecuadamente después de 2 horas de enfriamiento, el proceso de conserva a presión no funcionó.
- Page 79 El fabricante proporcionará las piezas y mano de obra necesarias para reparar cualquier parte de la Freidora de Aire Digital en el Departamento de Servicio de NuWave, LLC. Después de la expiración de la garantía, el costo de la mano de obra y las piezas serán responsabilidad del propietario.
- Page 80 LIBERACIÓN NATURAL Y LANZAMIENTO RÁPIDO Lanzamiento Rápido Aparecerá el Indicador Cuando la presión se haya acumulado, aparecerá el indicador de presión. ¿Qué es un lanzamiento rápido? Para liberar rápidamente la presión, simplemente presione hacia abajo el "Botón de liberación de presión". El botón permanecerá abajo y el vapor se liberará rápidamente.
- Page 81 LIBERACIÓN NATURAL Y LANZAMIENTO RÁPIDO SIEMPRE REALICE UNA LIBERACIÓN RÁPIDA DESPUÉS DE COMPLETAR UNA LIBERACIÓN NATURAL Y HÁGALO HASTA QUE TODA LA PRESIÓN/VAPOR ESTÉ HACIA FUERA. NO INTENTE ABRIR la olla a presión si hay resistencia o si la Válvula Flotante aún está alta, lo que indica que aún queda vapor/presión dentro de la unidad.
- Page 82 For patent information please visit: www.nuwavenow.com/legal/patent Designed & Developed in USA by: NuWave, LLC 1795 N. Butterfield Road Libertyville, IL 60048, U.S.A. Customer Service: 1-877-689-2838 • help@nuwavenow.com Item No. BM33500 Made in China Rev. 05 TH ©2018 NuWave, LLC • All Rights Reserved 03-05-18...
Need help?
Do you have a question about the Nutri-Pot 13Q and is the answer not in the manual?
Questions and answers