Truma Mover S User Manual
Caravan mover
Hide thumbs
Also See for Mover S:
- Installation & operation instructions (69 pages) ,
- Installation & operation instructions (17 pages)
Table of Contents
Advertisement
Mover SE R / TE R
Safety instructions
– The SE R / TE R control systems may only be used for the
Mover SE R / TE R.
– Practice operating the Mover in an open area before using
for the first time. This to fully familiarise yourself with
the handset / mover operation.
– Always check tyres and drive rollers before using the equip-
ment; remove sharp-edged stones and the like if necessary.
– No person must be present in the caravan during operation.
– All persons (particularly children) must remain outside
the Mover operating area.
– When operating the mover, ensure that no hairs, fingers or
other body parts, clothing or any other objects carried on
the body can become trapped by moving or rotating parts
(e.g. drive rollers).
– The distance between the radio remote hand set and the
centre of the caravan when manoeuvring must not
exceed 10 m!
– In the event of malfunctions pull on the handbrake.
– To prevent the caravan from tipping, direct the tow hitch
downhill when manoeuvering down a slope.
– After manoeuvring, always apply the handbrake first, dis-
engage the drive rollers from the tyres and block the
wheels (particularly on downwards-sloping surfaces). The
Mover is not suitable for use as a parking brake for a
parked caravan.
– Ensure that remote radio control is protected from unau-
thorised access (particularly by children!).
– Never tow the caravan with the drive rollers applied. This
can cause damage to the tyres, the towing vehicle and the
drive units.
– All wheels and tyres on the caravan must be of the same
size and design.
– In order to ensure that the Mover operates correctly, the
distance between the tyres and the disengaged drive rollers
must be 20 mm. All tyres must have the same inflation pres-
sure as per the manufacturer's instructions (check at regu-
lar intervals!). If tyres are worn or new tyres are fitted, the
distance between the drive rollers and the tyres may need
readjusting (see "Installation of the drive units").
– Do not use the Mover as a support when jacking up the
caravan, since this can damage the drive unit.
– Sensitive objects such as cameras, DVD-Players etc. must
not be kept in the stowage box near the control unit or the
motor cable. They can be damaged by the electromagnetic
fields.
– The empty weight of the vehicle increases by the weight of
the Movers, which reduces the payload of the vehicle.
– Remove plug from safety socket after manoeuvring, other-
wise the battery will be discharged. Standby current with
plug inserted approx. 200 mA. Standby current with plug
removed < 1 mA.
General instructions
The Mover SE R was developed for overcoming inclines of
up to approx. 25 % with a gross weight of 1200 kg and 15 %
with a gross weight of 2000 kg,
and the Mover TE R for overcoming inclines of up to approx.
25 % with a gross weight of 1200 kg and 10 % with a gross
weight of 2250 kg on a suitable surface.
Depending on the weight of the caravan, the Mover cannot
overcome obstructions that are more than about 3 cm in
height without assistance (please use wedges as a ramp).
Due to the nature of a radio signal, it can get corrupted by ex-
ternal terrain or objects. So there may be small areas around
the caravan where the quality of reception reduces, hence the
Mover may stop momentarily.
When the Mover is switched off using the remote control
the control unit remains in standby. In order to switch off
completely the battery must be disconnected or an isolating
switch installed.
Batteries
We recommend the use of so-called drive and lighting batteries.
Gel batteries and round cell batteries are also suitable.
These batteries are designed for high power demands and
have an extremely long service life. The maximum power
consumption of the Mover on the steepest incline and carry-
ing the maximum weight is 150 A. The correct choice of bat-
tery depends on the usage period and the scope of use (other
consumers in caravan). For mover operation we recommend
batteries with a capacity of approx. 80 Ah or more.
Example:
A fully charged lead-acid battery with a capacity of 80 Ah al-
lows the Mover to be operated for approximately 30 minutes
with a full load (depending on weight of caravan, battery type
and terrain). On level terrain the Mover has average power
consumption of approximately 35 A and therefore an operat-
ing time of approx. 2 hours.
The use of gel batteries or round cell batteries means that
smaller batteries can be used.
Batteries with more capacity allow the equipment to be used
for longer.
For optimum operation, we recommend the Truma Mover
PowerSet.
Function description
Always observe the operating instructions and "Safety
instructions" prior to starting! The vehicle owner is respon-
sible for correct operation of the appliance.
Please note that the Mover SE R is only suitable for
single-axle towed vehicles, and the Mover TE R is only
suitable for dual-axle towed vehicles.
The Mover is a manoeuvring system with which a caravan can
be moved without the assistance of a towing vehicle.
It consists of two separate drive units, each of which has a
12 Volt DC motor. These units are attached to the frame of the
vehicle near the wheels and are connected by lateral bars.
Once the drive rollers have been engaged to the tyres using
the remote hand set, the Mover is ready for operation. All op-
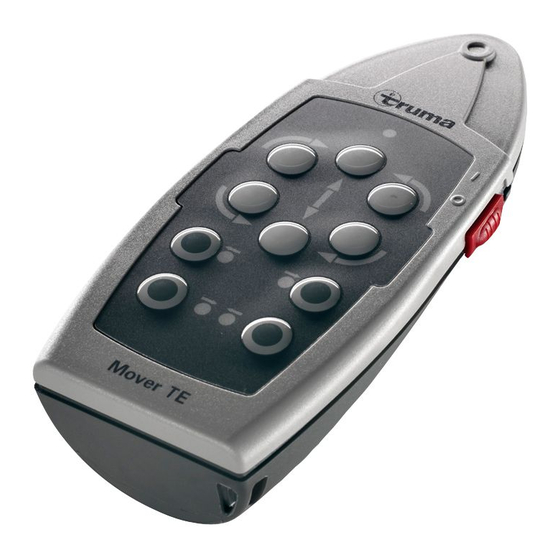
eration takes place using the remote hand set. This transmits
radio signals to the control unit. A separate 12 V lead-acid
battery or suitable lead-gel battery (not included in scope of
delivery) supplies the control unit with current.
13
Advertisement
Table of Contents


Need help?
Do you have a question about the Mover S and is the answer not in the manual?
Questions and answers